Bullet journaling is one of the most satisfying hobbies to start, and one of the easiest to overcomplicate. You don't need Instagram-worthy spreads or hand-lettered headers on day one. You need a good notebook, a reliable pen, and the basic system. Here's what that actually looks like.
By Colin B. · Published May 23, 2026 · Last reviewed June 3, 2026
You can start for $30 with a budget notebook and a Pilot G2. The setup most people land on (Leuchtturm, Mildliners, and a set of fineliners) runs around $70-80.
We earn commission on qualifying Amazon purchases — see our
affiliate disclosure.
Price tiers and budget totals shown above are editorial estimates;
actual Amazon prices vary.
At a glance
Our top pick in each category
The fastest path through this guide — each best-starter pick by category.
Scroll for the budget and upgrade alternatives.
Don't try to copy what you see on Instagram or Pinterest. Those spreads are the result of two years of practice. Start with the three collections Ryder Carroll actually invented: an index, a future log, and a daily log. Master those before you add habit trackers, mood wheels, or weekly spreads.
The notebook matters more than anything else here. A cheap pen on good paper beats the best pen on bad paper. Leuchtturm1917's 80 gsm paper handles almost any pen without bleed-through; bad paper will frustrate you before the system has a chance to click.
Don't buy brush pens in week one. Tombow dual-tip pens are beautiful and genuinely useful, but brush lettering takes real practice to look right. Start with a fineliner for headers, get the system working, then add brush pens when you know you're staying.
Your notebook is the whole system: get this right and everything else is secondary. The bullet journaling community has converged on A5 (slightly smaller than letter) as the ideal size: portable enough to carry daily, big enough for real spreads. For paper, you want at least 80 gsm to avoid ghosting and bleed-through. And for a true BuJo setup, dot grid beats ruled or blank; the subtle dots give you structure without cluttering the page.
Notebooks — what's the difference?
A few common shapes, each making a different trade.
Dotted
Subtle dot grid. Structure without visual noise. The BuJo default.
Grid visible
Faintly
Best for
Spreads, diagrams, mixed use
Standard?
Yes, and most BuJo layouts assume dots
Best for Most beginners and anyone doing spreads with headers and doodles
Tradeoff Slightly harder to write straight long-form text vs. ruled
Standard lines. Familiar, great for text-heavy pages.
Grid visible
Yes, prominent
Best for
Long-form writing, lists
Standard?
No (spreads lose the dot reference)
Best for Journalers who write more than they plan: daily entries over spreads
Tradeoff Harder to make grids, trackers, and diagrams look clean
Blank / Grid
Full graph paper grid. Precise, but visually busy.
Grid visible
Fully
Best for
Technical drawings, precise tracking
Standard?
No (most prefer dotted)
Best for Engineers or anyone who wants ruler-straight precision on every line
Tradeoff Grid lines compete with your handwriting, making it harder to read at a glance
Best starter
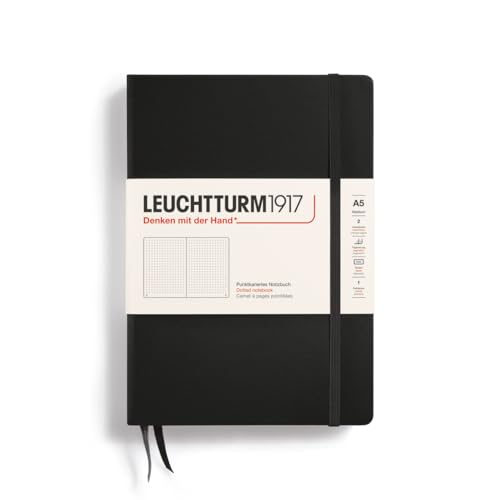
Leuchtturm1917
A5 Dotted Hardcover
$25.75 as of Jun 22, 2026
★★★★★Our rating· Only 1 left in stock - order soon.
This is the bullet journaling notebook. Pre-numbered pages and a built-in table of contents make the BuJo indexing system trivial to maintain. Two ribbon bookmarks let you keep your future log and daily log open simultaneously. The hardcover holds its shape in a bag; the 80 gsm paper handles almost any pen. It's not cheap, but it's exactly right.
What we like
Pre-numbered pages + built-in table of contents for easy indexing
Two ribbon bookmarks: keep future log and daily log open at once
80 gsm paper handles most pens without ghosting or bleed-through
What to know
Heavy fountain-pen inks can ghost slightly; lighter inks work fine
Slightly pricier than budget notebooks at the same size
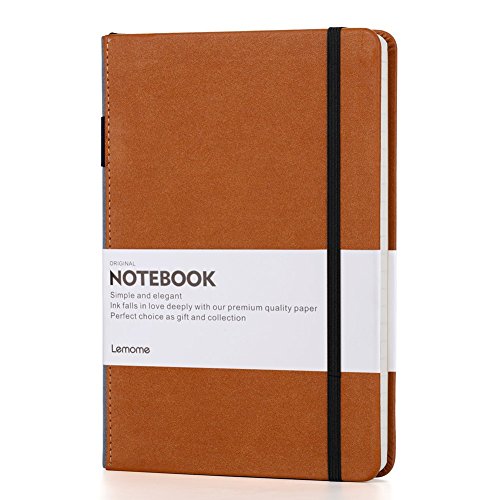
Under $20 and a genuinely solid entry point. The 120 gsm paper actually outperforms the Leuchtturm for wet pens (thicker stock means less ghosting). You'll need to number pages by hand and build your own index, but that's ten minutes of work and a good way to internalize the system before upgrading.
What we like
Under $20, a low-stakes way to test the BuJo system before committing
120 gsm paper outperforms Leuchtturm for wet pens and markers
What to know
No pre-numbered pages or built-in TOC; you add them yourself
Elastic pen loop can loosen after several months of daily use
The BuJo-specific Leuchtturm, designed with the system's creator. Paper upgrades to 120 gsm (handles brush pens the standard version can't), and pre-printed pages cover the bullet key, index, and future log so first-day setup takes five minutes, not an hour. Same familiar format, just built for the job.
What we like
120 gsm paper handles brush pens that ghost through the standard Leuchtturm
Pre-printed bullet key, index, and future log for faster first-day setup
Designed with the bullet journal's creator; the official BuJo notebook
What to know
Pre-printed pages are opinionated; custom systems may not fit the layout
About $10 more than the standard Leuchtturm A5 Dotted
Most bullet journal pages are written in a single black pen. That pen matters. You want consistent ink flow, no skipping, and a line width that fits your handwriting: 0.5mm for small writers, 0.7mm for standard. Gel ink dries fast and stays on the page without smearing; ballpoint skips on dotted paper; fountain pens are great if you already have one but a terrible first purchase.
Best starter
Pilot
G2 Gel Pens 0.7mm (12-pack)
$13.95 as of Jun 22, 2026
★★★★★Our rating· In Stock
America's best-selling pen, and for good reason. The G2's gel ink writes smoothly on Leuchtturm paper without skipping, the refillable design means the grip lasts forever, and a 12-pack means you won't spend a week hunting for the one that hasn't run dry. Boring answer, correct answer.
What we like
Smooth gel ink with no skipping on dotted paper at normal writing speed
Available everywhere; refillable grip lasts for years
12-pack means you always have a spare when one runs dry
What to know
0.7mm feels wide if you write small; try the 0.5mm version instead
Ink can blob slightly on very glossy or coated paper surfaces
The bullet journaling community's quiet favorite. The 0.5mm nib produces sharper, cleaner lines than the G2, and the minimal body doesn't add visual noise to your layouts. Very little ghosting on Leuchtturm pages. The one catch: refills require a Muji store or Muji's website; stock up when you buy.
What we like
0.5mm nib makes razor-clean lines in small headers and tight spreads
Minimal ghosting on 80 gsm Leuchtturm paper, nearly invisible on the reverse
What to know
Refills unavailable on Amazon; stock up at Muji stores directly
Can skip after sitting unused a few days; test on scrap paper first
For headers, section dividers, and simple diagrams, a fineliner beats a ballpoint every time. The 0.3mm tip stays precise even after months of use, the triangular grip fights hand fatigue during long planning sessions, and 20 colors means you have enough variety to color-code sections without going overboard.
What we like
0.3mm tip gives precise header lines and borders without bleeding
Triangular grip reduces hand fatigue on long planning sessions
20-color set provides enough variety to color-code sections at a glance
What to know
Cap must go back on: tip dries noticeably if left uncapped 10+ minutes
Water-based ink bleeds on cheap paper under 80 gsm
The right highlighters transform a wall of bullet text into a scannable spread. The wrong ones bleed through and ruin the page. What you want: water-based ink, muted tones (saturated neon colors look like a child's planner), and a fine tip for small accent strokes alongside a broad tip for full-width highlight bars. Zebra Mildliners hit all three; they've been the BuJo community's standard since 2016 for good reason.
Best starter
Zebra
Mildliner Double-Sided Highlighters (10-pack)
$$
★★★★★Our rating
The bullet journaling highlighter. Muted, desaturated tones that look tasteful instead of aggressive; two ends (a broad chisel for full lines, a fine bullet tip for small accents); water-based ink that won't bleed through Leuchtturm's 80 gsm paper. Buy the 10-pack first (warm set is most popular) and expand from there.
What we like
Muted tones look tasteful, not neon: the BuJo community standard since 2016
Two-ended: fine tip for accents, broad chisel for full highlight bars
Water-based ink won't bleed through Leuchtturm 80 gsm paper
What to know
Fine tip can fray if dragged across sticky washi tape edges
Colors appear slightly less saturated on cream-toned paper than white
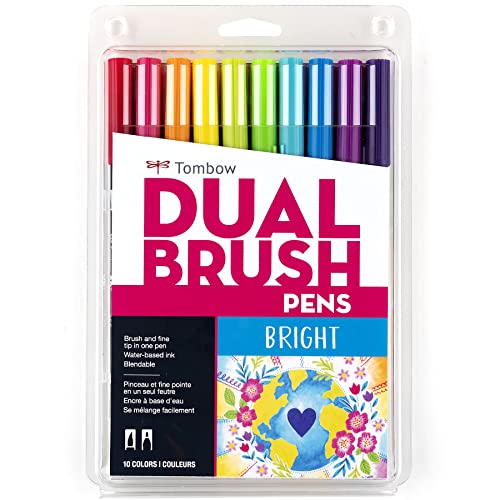
Once your spreads are running and you want to level up the look, Tombows open the door to brush lettering. The brush tip handles headers and title calligraphy; the fine tip does detail work; and two wet Tombows can be blended directly on the page for gradient effects. Real skill ceiling here, but a high ceiling worth climbing.
What we like
Brush tip unlocks real brush lettering for section headers and titles
Blendable on the page; two wet colors create gradients directly
What to know
Brush tip bleeds through Leuchtturm 80 gsm if strokes are heavy or slow
Brush lettering has a real learning curve; takes dedicated practice
Three things genuinely improve a bullet journal experience beyond pens and paper: washi tape (repositionable, writable, adds structure to borders and section headers), page flag tabs (sticky tabs that stick out beyond the page edge for instant navigation), and a good eraser for pencil planning before inking. That's the whole list; everything else is clutter.
Best starter
MT
Masking Tape Washi Set (10 Light Colors)
$32.70 as of Jun 22, 2026
★★★★★Our rating· Only 8 left in stock - order soon.
MT is the original washi tape brand: cleaner adhesive, crisper edges, and better color consistency than generic sets. A 10-roll set of thin washi strips gives you section dividers, borders, and decorative accents that are fully repositionable and writeable over. Start with the light color set for versatility.
What we like
Repositionable and writable: mark borders and sections without committing
MT's original adhesive peels cleanly without tearing the dotted page
What to know
Individual rolls narrower than spreads on social media typically show
MT brand costs more than generic washi of similar quality
Even with Leuchtturm's numbered pages, jumping straight to your Future Log or a specific monthly spread takes a moment. These index tabs stick to the page fore-edge and extend just past the paper, so you can thumb to any section in one motion. Use 3-4 tabs max; more than that defeats the purpose.
What we like
Sticks to the fore-edge and extends past the page for one-second navigation
Available in multiple colors, making it easy to color-code major sections
Repositionable several times before adhesive weakens
What to know
Adhesive weakens after 3-4 repositionings; commit to placement early
Bulk pack is more than you'll use in one notebook; share with a friend
Pencil-first planning is the best way to try out a spread layout before committing in ink. The Mars Plastic erases completely without streaking, smearing, or leaving a ghosted outline behind. Under $3. Everyone needs one; almost nobody buys one until they've already ruined a page.
What we like
Erases completely without streaking, making pencil planning easy
Under $3 and lasts for years; the cheapest upgrade to your whole setup
What to know
Only useful if you pencil-sketch spreads first; not everyone does
Crumbles slightly with heavy pressure; use light strokes
Most beginners either quit in week two (too many blank pages, too much pressure to make it look good) or never start because they're waiting for the perfect system. Here's what actually happens in your first month, week by week, and how to make the habit stick.
Bullet journaling has a reputation for being either extremely simple (it’s just a notebook and a pen) or overwhelmingly complex (have you seen those Pinterest spreads?). Both are true, which is what makes the first month confusing.
The system Ryder Carroll invented is genuinely minimal. The version you’ve seen online is two years of practiced decoration layered on top. The gap between those two things is where most beginners get lost. This is what the first month actually looks like when you strip all that away.
Week 1: The three collections that matter
You don’t need a weekly spread. You don’t need a habit tracker. You don’t need to design anything.
You need exactly three collections to start, and they fit on the first six pages of any notebook:
The Index goes on pages 1 and 2. It’s a table of contents. Write the page numbers as you fill them; add titles as you create collections. Nothing fancy: this is just how you find things later.
The Future Log goes on pages 3 through 6. Divide these four pages into six boxes (one per month). Any task or event that belongs to a future month goes here instead of today’s page. This is what prevents your daily logs from filling up with “call dentist” entries that belong to October.
The Daily Log starts on page 7 and runs continuously. When a new day starts, write the date as a header. Then log everything beneath it using three bullet types:
• A dot for tasks
- A dash for notes and observations
o A circle for events with a fixed time
That’s the system. Nothing else is required to start.
The most important thing to understand in week one: the system is meant to be ugly. Your first pages will look nothing like what you’ve seen online. They will be messy, inconsistent, and plainly functional. That’s correct. The beauty comes later, if you want it, after the habit is already running.
Week 2: Migration
On day eight, you’re going to do something that makes bullet journaling different from every other planner: migration.
Go back through every open task from the past week (everything marked with a dot that isn’t crossed out). For each one, ask a simple question: does this task still matter? If yes, migrate it (copy it forward to today’s Daily Log, or move it to the Future Log if it belongs to a specific future date). If no, cross it out and let it go.
Migration sounds like extra work. It isn’t. It’s the part of the system that makes the rest work. The act of writing a task again by hand forces you to decide whether it’s actually worth doing. Most tasks that don’t get migrated turn out to be things you never really intended to do: wishful thinking masquerading as plans. Migration is how you edit your life in real time.
Do this every day for week two. Each morning, carry forward what still matters. Each evening, notice whether what you planned aligned with what actually happened. That noticing is the whole point.
At the end of week two, flip to a fresh double-page spread and create your first Monthly Log for the current month.
Left page: write the name of the month at the top, then list every date down the left margin with its day abbreviation (1 F, 2 Sa, 3 Su, etc.). This is your calendar view; fixed events and appointments go next to their dates. Right page: leave it blank for now. This is your monthly task list: the tasks you know need to happen this month but don’t belong to a specific day.
The monthly log does two things a daily log can’t: it gives you a bird’s-eye view of the month ahead, and it keeps fixed commitments from cluttering your daily logs. When something has a date, it lives in the monthly log until that day arrives.
You’ll also want to start a Collections page this week: any collection that’s grown large enough to deserve its own space. A running reading list, a packing list for an upcoming trip, a budget tracker. Pick one. Give it two pages. Add it to the index.
Week 4: Finding your rhythm
By week four, the system either clicks or it doesn’t, and if it isn’t clicking, it’s almost always for one of two reasons:
You’re trying to keep up with a future-self version of your system. You planned habit trackers, daily mood ratings, gratitude logs, and weekly reviews. You’ve been keeping up with about 20% of them and feeling guilty about the other 80%. The fix: delete everything that creates guilt. Keep only the logs you actually use. A bullet journal isn’t a lifestyle project; it’s a tool. If a section of your journal collects dust, remove it.
You’re keeping the journal only when you feel inspired. The system only works if you open it every day. Not for long: three minutes of migration and a quick daily log is enough. But daily. The people who maintain a bullet journal for years are not more disciplined than you; they’ve just made it the first thing they do with a coffee in hand.
At the end of month one, do a brief reflection. Look back at your first week’s daily logs. Notice what tasks recurred. Notice what you migrated repeatedly without ever doing. Notice what Collections you created. This is a data set about how you actually live, not how you think you live. That information is genuinely useful.
What most beginners get wrong
The list is consistent enough that it’s worth naming:
Over-designing the setup. Spending six hours creating a beautiful index and key before writing a single task. The journal exists to serve your daily life, not to be a project in itself.
Treating missed days as failure. They aren’t. Open to today. Write today’s date. Start.
Comparing your journal to YouTube. Those creators have been journaling for years and they film the aesthetically successful spreads. Your ugly functional journal is doing exactly what it’s supposed to do.
Buying too much gear before you know what you need. A notebook and a black pen are everything you need to run this system for a full month. Color and decoration come after the habit is established.
What to do in month two
If the system is working (and a working system means you open the journal most mornings and close it most evenings), a few things will improve your practice:
Start a Weekly Log between your monthly and daily entries. A single page at the start of each week with the seven days, your scheduled events, and a short task list. It takes five minutes to set up and makes Monday mornings significantly less chaotic.
Experiment with one new Collection per month. A workout log. A meal planner. A media tracker. One collection at a time: add it, use it for a month, keep it or abandon it based on actual use.
And if you’re going to add any color or decoration: do it with Zebra Mildliners first. Muted highlighter tones that don’t bleed through dotted paper. The single biggest visual improvement you can make to a functional but plain journal.
Save your money
What you don't need yet
Beginners get pressured to buy a lot of stuff that doesn't help them play
better. Here's what we'd skip on day one.
A ring-bound or disc-bound planner — The flexibility sounds appealing in theory. In practice, the setup overhead means most people stop using it. A bound notebook builds the daily habit faster.
Stencil kits — Rulers for borders, yes. Stencils for icons and decorative shapes: they slow down every entry and get abandoned within a month.
A Hobonichi in year one — Beautiful notebook, dated pages, and thin paper that hates markers. Graduate to it once you know your system is sticky, not before.
Brush pens in week one — Tombow brush pens are genuinely worth owning, but brush lettering is a skill that takes real practice. Buy them after month two, not day one.
A course or workbook — The official BulletJournal.com guide is free and covers everything. Save your money.
First week
Your first seven days
A short, real plan to get from gear-on-doorstep to actually playing.
Read the original Bullet Journal method (15 minutes). · Learn
Do I need a dotted notebook, or will ruled or blank work?
Dotted is strongly recommended. The subtle dot grid gives you alignment guides for headers and borders without cluttering the page; most BuJo spread layouts are designed around dot grids. Ruled works if you write heavy long-form text; blank is really only for artists. Start dotted.
What's the difference between a bullet journal and a regular journal?
A regular journal is prose: you write about your day. A bullet journal is a system for tasks, events, and notes using rapid-logging shorthand (bullets = tasks, dashes = notes, circles = events). The BuJo method is about capturing everything fast and migrating what matters. Most people mix some reflective writing in too, but the structure is task-and-event-first.
What if I miss a few days, or a whole week?
Skip it. Do not try to fill in blank days retroactively. Open to today's date, create a new Daily Log, and start fresh. The bullet journal system is explicitly designed for this: migration means you carry forward what still matters and let the rest go. Missing days is normal and not a failure.
Do I need to be artistic to bullet journal?
No. The original BuJo system is entirely text-based: bullets, headers, and page numbers. The artistic spreads you see online are a creative extension, not a requirement. Many experienced bullet journalers keep it completely minimal. Start with function; add decoration only if it genuinely appeals to you.
Is a Leuchtturm worth the price vs. a cheaper notebook?
Yes, for your second notebook. For your very first, a budget dotted notebook (like the Lemome) is a smart way to test whether the system sticks before spending $25 on a Leuchtturm. If you're still journaling after 60 days, upgrade and don't look back.
What size notebook should I use?
A5 (roughly 5.5" × 8.5") is the standard for good reason: big enough for real spreads, small enough to carry daily. A6 is too small for most trackers and layouts. B5 is fine if you write large. Avoid letter/A4 for a daily carry; it's too big and won't fit in most bags.
BulletJournal.com — Ryder Carroll's official site. The original system, FAQs, and the full method explained. Bookmark the FAQ page; it's the most useful single page on the internet for BuJo beginners.
r/bulletjournal — Active subreddit for sharing spreads and asking questions. The pinned beginner guide is worth reading. Avoid the 'which notebook should I buy' threads; they go in circles.
The Bullet Journal Method (book) — Ryder Carroll's full-length book. More philosophy than system; valuable once you have the basics and want to understand the why. Not required reading before you start.
Amanda Rach Lee (YouTube) — The most beginner-friendly BuJo YouTube channel. Practical setup guides, realistic spreads, and an honest take on what the system actually looks like in daily use.
Boho Berry (YouTube/blog) — Kara Benz's channel is where most people first see BuJo done beautifully. More aspirational than instructional; watch for inspiration once you have the basics.
r/Stationery — For when you've caught the pen-and-paper rabbit hole and want to explore further. Ink reviews, paper comparisons, and notebook deep-dives. A gateway drug.
As an Amazon Associate, JustBeginning earns from qualifying purchases.
We may also earn commission from other affiliate programs linked on this
page. Editorial recommendations are independent; we don't choose
products based on commission rates.
Product prices and availability are accurate as of the date and time
indicated and are subject to change. Any price and availability
information shown on Amazon at the time of purchase will apply.


 Best starter