Diamond painting is part craft, part puzzle, part meditation, and one of the most satisfying hobbies you can start for under $30. You press tiny resin diamonds onto a color-coded adhesive canvas until a full mosaic comes together. No artistic skill required. Just a clear table, decent lighting, and a few free hours. Here's everything you actually need, and what you can skip.
By Colin B. · Published May 24, 2026 · Last reviewed June 17, 2026
A good starter kit plus a light pad and better tools runs $50–80 total. You can start with just a kit for under $30.
We earn commission on qualifying Amazon purchases — see our
affiliate disclosure.
Price tiers and budget totals shown above are editorial estimates;
actual Amazon prices vary.
At a glance
Our top pick in each category
The fastest path through this guide — each best-starter pick by category.
Scroll for the budget and upgrade alternatives.
Start small: a 30×40 cm canvas is the right size for your first project. You can finish it in a weekend, which gives you the satisfaction of a completed piece before committing to a bigger canvas that might take weeks.
Round drills are easier for beginners than square ones. Round drills don't need precise alignment: you just press them down and they settle into place. Square drills snap together more neatly but require more careful placement. Start round, graduate to square if you want the challenge.
A light pad isn't mandatory for your very first canvas, but once you try one you won't go without. The symbol grid on a diamond painting canvas is designed to be read through backlight: under regular overhead light, the faint codes can be hard to read quickly. Budget $15–20 for one.
The kit is the whole hobby in a box: a coded adhesive canvas, bags of resin diamond drills sorted by color, a stylus pen, a wax pad, and a small tray for working. For your first kit, go small (30×40 cm or under), go full-drill (diamonds cover the entire canvas, not just parts), and go round-drill (forgiving to place). Kit quality varies significantly: better kits have sharper symbol grids, stickier adhesive, and consistent diamond shapes. Cheap kits can have drills that won't sit flat or adhesive that dries out before you finish.
Starter Kits — what's the difference?
A few common shapes, each making a different trade.
Round Drills
Forgiving to place: slightly rounded, no alignment needed.
Shape
Round
Gaps
Tiny gaps between drills
Placement
Drop and press
Best for Beginners, faster workflows, most pre-made kits
Tradeoff Tiny gaps visible up close; slightly less coverage than square
Snap-fit coverage and a satisfying click: trickier to align.
Shape
Square
Gaps
No gaps when aligned
Placement
Align edges precisely
Best for Experienced painters, maximum coverage, sharper finished image
Tradeoff Misaligned rows are visible and hard to fix; slower to place
Partial Drill
Cheaper kits where canvas shows through gaps: skip for first.
Coverage
Partial
Cost
Lower
Look
Canvas visible in background
Best for Decorative accent pieces; not a full mosaic look
Tradeoff Unfinished appearance: the printed canvas shows through intentionally
Best starter
ARTDOT
5D Diamond Painting Kit for Adults
$$
★★★★★Our rating
ARTDOT is the most recommended brand in the diamond painting community for a reason: the canvas uses heat-bonded adhesive that holds firmly as you work, the symbol grid is sharp and readable, and the round drills are consistent in shape. The 30×40 size is achievable in a single weekend, which matters for a first project. Everything you need is in the box.
What we like
Heat-bonded adhesive holds firmly: drills don't shift as you work
Sharp symbol grid makes color codes easy to read quickly
Manageable size you can finish in a weekend
What to know
Comes with just barely enough diamonds: be careful not to lose any
Symbol print can be faint in low light: a light pad helps a lot
★★★★☆Our rating· Only 11 left in stock - order soon.
Under $15 and a fine way to test if diamond painting is for you before investing in better supplies. The process is the same as premium kits: you'll know within the first session whether you want to upgrade. Includes the pen, wax, tray, and canvas; nothing is missing.
What we like
Under $15: lowest-risk way to try diamond painting
Includes every accessory you need to start immediately
What to know
Diamond shapes vary more than premium brands: some won't sit flat
Adhesive weakens faster; don't leave large sections uncovered
Once you've finished a small canvas and know you're hooked, a large-format kit is the natural next step. The premium canvas adhesive stays tacky for weeks of extended work, the symbol grid is razor-sharp on the larger format, and the finished piece has real wall presence. Worth the price jump for your second canvas.
What we like
Premium adhesive stays tacky through weeks of work on big canvases
Sharper symbol grid reduces eye strain on long sessions
Large finished piece is genuinely worth framing
What to know
Takes several weeks to finish: real time commitment
Needs more storage containers to manage 50+ color codes
When you want something more ambitious than a beginner kit, Heartful Diamonds offers richer color palettes, tighter quality control on drill consistency, and more artistically detailed designs. A step up from the generic ARTDOT starter without jumping straight to a 50×70 canvas. Good choice for your second project.
What we like
Richer color palette and more dramatic designs than generic kits
Tighter drill-quality control: fewer misshapen diamonds in the lot
Good stepping stone between beginner and large-format canvas
What to know
Pre-designed images only: no custom photo option on Amazon
Slightly higher price than comparable ARTDOT sizes
A light pad illuminates the canvas from behind, making the faint color-code symbols much easier to read: especially on larger or more detailed designs. Your first small canvas can probably be finished without one, but once you try a light pad you won't go back. They're thin, inexpensive, USB-powered, and the single accessory most diamond painters wish they'd bought on day one. Get the A4 at minimum; upgrade to A3 if you plan to do large canvases.
Best starter
ARTDOT
A4 Diamond Painting Light Pad
$9.99 as of Jun 22, 2026
★★★★★Our rating· In Stock
ARTDOT's A4 light pad is the most recommended in the diamond painting community for good reason: brightness is adjustable, USB power is universal, and the A4 size covers most beginner canvases. It's thin enough to work on comfortably, sturdy enough not to wobble, and inexpensive enough that you won't regret buying it on day one.
What we like
Adjustable brightness: bright enough for any room condition
Ultra-thin profile that's comfortable to work on for hours
USB-C powered; works from a phone charger or laptop
What to know
A4 size too small for 50×70 cm canvases: need to reposition
No auto-off; leave it on overnight and it stays on
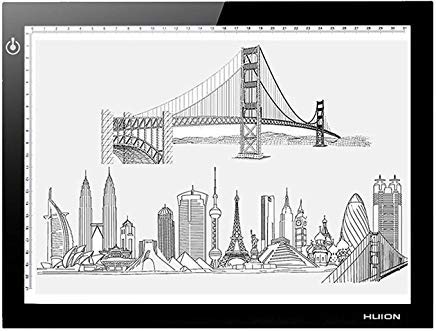
Huion's L4S is a general-purpose tracing pad repurposed perfectly for diamond painting. Same A4 footprint as the ARTDOT but cheaper: it's a solid buy if you want to test the lit workflow without paying the ARTDOT premium. No diamond-specific features, but the essential backlight works exactly the same.
What we like
Often $5–10 cheaper than the ARTDOT A4 for the same footprint
Huion build quality is reliable: consistent backlighting with no hotspots
What to know
Fewer brightness levels than ARTDOT: limited adjustment range
No diamond-painting-specific stand or clip included
An A3 pad covers any canvas size you'll realistically buy, including the large 50×70 cm pieces. Once you've gone large-format, working on an undersized A4 means constant repositioning that breaks your rhythm. Buy the A3 now if you already know you're hooked.
What we like
Covers any canvas size: no repositioning on even the largest kits
Wider brightness range than A4 model
What to know
Takes up significant desk space when in use
Pricier: overkill until you're doing large canvases regularly
Every diamond painting kit includes a single-tipped pen and a small wax pad. That pen is fine for a first canvas, but multi-tip pens that pick up three, six, or nine diamonds at once cut your time significantly on large solid-color sections. The wax that comes in kits is also often tacky and inconsistent: a separate wax cube or gel compound makes pickup more reliable. The electric vibrating pen is the polarizing advanced option: some people love the speed boost, others feel it disrupts the meditative rhythm that's the point of the hobby.
Best starter
ARTDOT
All-Inclusive Diamond Painting Accessories Kit
$16.99 as of Jun 22, 2026
★★★★★Our rating· In Stock
ARTDOT's all-inclusive kit bundles multi-tip pens, bead organizers, a sealer, and a canvas roller in one box. Better value than buying each piece separately, and the sealer alone is worth the purchase. A natural second buy after your first canvas reveals what the included kit pen lacked.
What we like
Multi-tip pens cut time by half on large solid-color sections
Replacement wax lasts months: better tackiness than kit wax
Ergonomic grip reduces hand fatigue on long sessions
What to know
Multi-tip pens are awkward at color boundaries: need the single-tip too
More tools to organize: keep them in the bag to avoid losing tips
The wax pad that came with your kit will dry out after a few sessions. A bag of replacement wax cubes costs $3–5 and keeps your pen picking up diamonds reliably. The most boring but useful consumable in the hobby.
What we like
Under $5: essentially the cheapest usable upgrade in the hobby
Fresher wax means fewer dropped diamonds and faster pickup
What to know
Some cheap wax cubes are too sticky and leave residue on diamonds
Not all brands are compatible with all pen tips: match diameter
An electric drill pen vibrates at high frequency, picking up and placing diamonds far faster than a manual pen on large color fields. Popular with painters who prioritize speed over the slow meditative rhythm. Try it after your second or third canvas: before that you won't have a sense of whether faster is actually what you want.
What we like
Vibration mechanism places diamonds 3–4x faster on large areas
USB rechargeable: no battery hunting
What to know
Too forceful for fine detail or adjacent-color boundary work
Divides the community: some feel it defeats the meditative point
Diamond drills come in small labeled bags, one per color code. On a small canvas with 15–20 color codes, that's manageable. On a 50×70 cm canvas with 40+ codes, you need containers. A set of stackable labeled compartment cases keeps diamonds sorted by code, prevents mixing similar colors, and makes it easy to pour only what you need into the working tray. The nightmare scenario: accidentally mixing two similar shades: is entirely preventable with the right storage.
Best starter
ARTDOT
Diamond Painting Storage Containers with Funnel Lids
$55.99 as of Jun 22, 2026
★★★★★Our rating· In Stock
A 30-slot stackable case with funnel lids and label stickers is how serious diamond painters manage 40+ color codes on a big canvas. Pour a bag of drills in, label the slot with the code, and close the funnel lid: the container tips directly into your working tray with no spilling. Solves the biggest frustration in the hobby.
What we like
Funnel lids pour directly into the working tray: no spilling
Label stickers keep every slot's code visible at a glance
Stackable design stores neatly on a desk or shelf
What to know
30 slots may not be enough for very large canvases with 50+ codes
Small compartments: keep a steady hand when filling
Pharmacy-style pill organizers work perfectly for diamond drills on small canvases: compartments are the right size and they stack. Under $10 and entirely functional for a first or second canvas before you know you need a proper system.
What we like
Under $10 and immediately available at any pharmacy
Right compartment size for diamond drills with tight-closing lids
What to know
Not designed for this use: lids open and spill more easily
No label system: write on masking tape for each slot
A finished diamond painting looks good; a sealed one lasts. Without sealing, diamonds can shift, peel at corners, or gradually fall off over months of hanging. Sealer spray or brush-on Mod Podge takes five minutes and makes your canvas permanent. If you want to display it properly, a canvas stretcher frame is the cleanest solution: it turns a rolled adhesive canvas into something that looks like it belongs on a gallery wall.
Best starter
Plaid
Mod Podge Dishwasher Safe Waterbased Sealer (8 oz)
$4.99 as of Jun 22, 2026
★★★★★Our rating· In Stock
Mod Podge is the diamond painting community's standard sealer: brush on two thin coats and every diamond is permanently locked in place. Dries clear, doesn't yellow, and is available everywhere. Apply it after your finished canvas has been rolled flat for 24 hours.
What we like
Dries completely clear: doesn't dull the sparkle
One coat takes five minutes and protects edges from peeling
Available at every craft store; easy to restock
What to know
Thick coats cause cloudiness: thin coats only
Brush application means slower coverage on large canvases
Stretching a finished diamond painting over a wooden frame transforms a flat adhesive canvas into something that looks like a gallery piece. The frames arrive pre-assembled with notched wood-strip edges; you center the canvas, press the edges onto the notched strips, and fold the corners. A $20 canvas suddenly looks like something worth hanging.
What we like
Transforms a flat canvas into gallery-ready wall art
No tools required: canvas presses onto notched frame strips
What to know
Requires 3–5 cm blank border: tight-margin kits may not stretch
Custom-size canvases need custom-size frames: measure first
Diamond painting clicks faster than you'd think: here's what actually happens in your first session and how to get through a finished canvas without frustration.
Diamond painting has an unusual reputation. People describe it as meditative, addictive, almost hypnotic, and then you see someone doing it and think: they’re just pressing little plastic dots onto a sticky canvas. Both things are true. The appeal only makes sense once you’ve done it for twenty minutes, when the repetition settles in and you stop thinking about anything except the next color code.
This is what your first week actually looks like: the setup, the technique, the things that trip up beginners, and how to get your first canvas from a roll of sticky paper to something worth hanging on a wall.
Before you open the box: set up right
The workspace matters more for diamond painting than most crafts. You’re placing tiny drills for hours at a time, and a bad setup leads to spills, eye strain, and a sore neck.
What you actually need:
A solid, level table. Uneven surfaces mean rolling diamonds.
Good lighting, or better, a light pad. The symbol grid printed on the canvas is readable under overhead light but readable-and-fast with a backlit pad beneath it. If you ordered a light pad, set it up now. If you didn’t, a bright desk lamp aimed at the canvas is the minimum.
A clear space for your diamond bags. You’ll need to open several at once and keep them separate.
Peel the protective film back only 10–15 cm at a time. The adhesive surface is your canvas: it collects dust, pet hair, and table debris if you leave large sections exposed. Most kits include a cover sheet; keep it and replace it over any uncovered area when you’re done for the day.
Your first session: the first hour
Open three or four bags of diamonds: pick one of the most common colors in your design, something with a large area. Pour a small amount into the tray that came with your kit, and shake it gently so the diamonds settle flat-side up.
Dip your pen tip into the wax pad: just a light press, enough to coat the tip. Then touch the tip to a flat diamond in the tray. The diamond sticks to the wax. Carry it to the matching symbol on the canvas and press down lightly. Done.
That’s the whole skill. There’s no wrong way to hold the pen. Most people find a light rolling press: touch, very brief pause, peel: transfers the diamond cleanly without disturbing neighbors. A heavy stab lifts surrounding diamonds. A too-light touch loses the diamond before it reaches the canvas.
Work from one corner outward. Don’t try to work the whole canvas at once. Pick a corner, work all the diamonds of one color in that section, then move to the next color, then the next section. Jumping around creates more chances for color mistakes and leaves large uncovered areas exposed to dust.
In your first hour, you’ll probably cover a 10×10 cm section. That’s roughly 100–200 diamonds, and it will look like nothing on the full canvas. This is normal. Diamond painting is a slow-reveal medium: the image only emerges clearly when you’re 60% or more covered.
The learning curve: what gets easier
After your first session (1–2 hours in):
You’ll have calibrated how much wax to use: too much creates strings; too little drops diamonds.
You’ll understand your own rhythm: how many diamonds to pour at once, how often to refresh the wax.
You’ll have learned that similar color codes really are distinguishable if you look carefully.
After your second or third session:
You stop checking the code legend as often. Familiar symbols register automatically.
If you bought a multi-tip pen, try the 3-tip version on a large single-color section. Pick up three diamonds at once and place them as a unit. On large background areas, this triples your speed without sacrificing accuracy.
You’ll start planning ahead: looking at the canvas, spotting the large color fields, and batching them.
Mixing color codes. The most painful mistake in diamond painting. Two similar shades: say, DMC 3865 (white) and DMC 3866 (warm white): look identical in the bag. Keep bags closed until you need them, and if you suspect a mix-up, hold diamonds under strong light against the canvas color blocks to compare.
Leaving the adhesive uncovered. If you walk away for a day and forget the cover sheet, you’ll come back to a sticky surface full of lint and debris that’s hard to remove without disturbing placed diamonds. Replace the cover sheet every time.
Pressing too hard. A heavy press can push diamonds into the adhesive at an angle, making them stick up slightly and reflect light unevenly. A light, centered press keeps every diamond flush.
Working without a grid reference. On detailed canvases with many similar codes close together, it’s easy to place a row in the wrong column. Count squares from a fixed edge reference before placing each new color. Thirty minutes of careful counting saves two hours of removing and replacing misplaced drills.
Peeling the whole cover sheet at once. Only on a very small canvas is this not a problem. On anything larger than 20×30 cm, peel 10–15 cm at a time.
Finishing your first canvas
When you’ve placed every diamond, step back and look at the full image. You’ll see some diamonds that aren’t perfectly flat: press the back of a book firmly over the entire canvas to seat everything evenly. Some painters roll a brayer (a rubber roller) over the surface for a more consistent press; a heavy flat-bottomed object works just as well.
Then seal it. Mod Podge is the community standard: brush on two thin coats, letting each dry completely. Thin coats only. A thick coat will cloud the sparkle that’s the whole point of the medium. Once sealed, the diamonds are permanent.
If you want to frame it, stretch the sealed canvas over a wooden canvas frame (the notched-edge type designed for this). Center the canvas, press the edges onto the frame’s notched strips, fold the corners neatly. A $20 kit suddenly looks like something you’d pay to hang.
You’ll either feel like you never want to do it again (valid: it’s not for everyone) or you’ll already be looking at your next design. If it’s the latter, a few things that change the trajectory:
Go larger, but not too large. A 40×50 cm canvas is a satisfying next step: bigger image, same manageable time commitment. Save the 60×80 cm canvas until you’ve finished three or four canvases and know your pace.
Try square drills for your third canvas. Once you’ve built the muscle memory from round drills, square drills’ snap-fit coverage is noticeably more satisfying: particularly on geometric designs and landscapes with clean edges.
Get proper storage before your second canvas. The single-session approach of opening bags directly into the tray stops working once you have 40+ color codes. Stackable labeled containers with funnel lids are the single quality-of-life upgrade that separates a relaxing session from a frustrating one.
Diamond painting is one of the few hobbies where the skill ceiling is genuinely low: you really can make something beautiful on your first canvas. The craft is the process, not the endpoint.
Save your money
What you don't need yet
Beginners get pressured to buy a lot of stuff that doesn't help them play
better. Here's what we'd skip on day one.
A canvas rollup storage mat — Useful for storing an in-progress large canvas, but you won't need it until your second or third project.
A diamond painting roller / brayer — Presses diamonds flat for a more even finish. Satisfying tool but unnecessary until you notice uneven placement on a large canvas.
Magnetic sorting trays with dividers — The included single tray is fine. Upgrade to a nicer sorted tray after you've worked through a few canvases and know what irritates you.
A UV resin topcoat — Popular on TikTok for an ultra-glossy finish. Requires a UV lamp and adds cost and complexity. Mod Podge is the practical choice.
An LED display frame — The $60+ lit display frames look great on Instagram. Buy one after you've finished a canvas worth lighting up: not before.
First week
Your first seven days
A short, real plan to get from gear-on-doorstep to actually playing.
Order a beginner starter kit: round drill, 30×40 cm canvas. · Buy
Browse r/diamondpainting for your next canvas: the community posts finished work, identifies good kit brands, and troubleshoots technique. · Action
r/diamondpainting · Reddit · active community with finished work and brand recommendations
FAQ
Common questions
What size canvas should a beginner start with?
30×40 cm is the sweet spot for a first canvas: large enough to produce a satisfying image, small enough to finish in a weekend or two. Don't start with a 50×70 cm canvas; the time investment is real and you want one completed piece under your belt before committing to a multi-week project.
Are round drills or square drills better for beginners?
Round drills. They're slightly rounded so they drop into position without precise alignment: you can place them quickly and they look fine. Square drills snap together more neatly and leave less gap between diamonds, but they require careful row alignment and any drift becomes visible. Start round; upgrade to square after you've finished a canvas and know you want more precision.
How long does a diamond painting take to complete?
A small 30×40 cm canvas takes most beginners 6–15 hours total: spread over a weekend or two of evening sessions. A large 50×70 cm canvas can take 40–80 hours. The meditative pace is part of the appeal, but don't underestimate the time commitment before starting a large canvas.
Do I really need a light pad?
Not for a very first canvas, but most diamond painters wish they'd had one from the start. The symbol grid is designed to be read through backlight. Under standard overhead light the codes are legible, just slower to read. A$15 A4 light pad speeds up the whole process and reduces eye strain significantly.
How do I seal a finished diamond painting?
Brush-on Mod Podge is the community standard. Let your finished canvas sit flat under books for 24 hours to even out any uneven spots, then apply two thin coats of Mod Podge with a foam brush, letting each dry completely. Thin coats only: thick coats cloud the sparkle.
Can I pause in the middle of a canvas and come back later?
Yes: cover the exposed adhesive with the release sheet (or cling film) to prevent dust from sticking. The adhesive stays tacky for months if protected. Large canvases are almost always completed in multiple sessions.
r/diamondpainting — The most active diamond painting community online. Finished work posts, brand recommendations, technique troubleshooting, and a searchable archive of every common question.
Diamond Art Club Blog — Comprehensive beginner guides from one of the top kit brands. Covers round vs. square drills, sealing techniques, and canvas care in depth.
Diamond Painting Corner — Independent review site covering kit brands, light pads, and accessories. Good for comparing specific products before buying.
Diamond Painting Network (YouTube) — Community tutorial channel. The beginner tutorial playlist covers tray technique, pen grip, and sealing in short watchable videos.
As an Amazon Associate, JustBeginning earns from qualifying purchases.
We may also earn commission from other affiliate programs linked on this
page. Editorial recommendations are independent; we don't choose
products based on commission rates.
Product prices and availability are accurate as of the date and time
indicated and are subject to change. Any price and availability
information shown on Amazon at the time of purchase will apply.
Our top pickARTDOT 5D Diamond Painting Kit for Adults


 Best starter