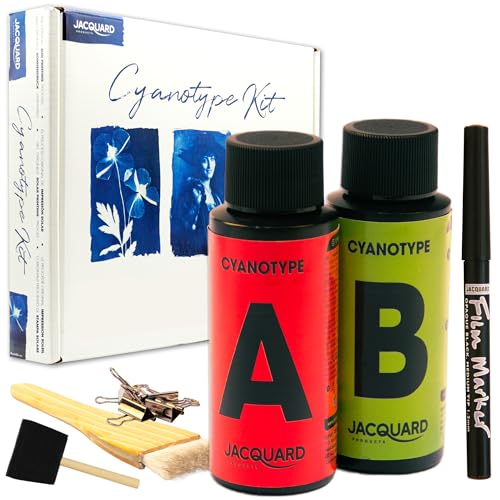
Cyanotype is the oldest photographic process still in regular use. You coat paper with two iron compounds, press objects or a film negative on top, expose to UV light, and rinse in water. Prussian blue appears. No darkroom, no enlarger, no film scanner. The whole setup costs less than $60 to start and makes prints that look like nothing else in photography.
By Colin B. · Published June 13, 2026 · Last reviewed June 13, 2026
A SunPrint kit and direct sunlight gets you started for $20. Proper watercolor paper, a UV lamp, and Jacquard chemistry brings it to around $100-120 total.
We earn commission on qualifying Amazon purchases — see our
affiliate disclosure.
Price tiers and budget totals shown above are editorial estimates;
actual Amazon prices vary.
At a glance
Our top pick in each category
The fastest path through this guide — each best-starter pick by category.
Scroll for the budget and upgrade alternatives.
Start with a pre-coated kit before you mix your own chemistry. Jacquard SunPrint paper lets you make your first cyanotype print the afternoon it arrives. Once you're hooked, mixing from raw chemistry saves money and gives you more control over results.
Sunlight works fine to start. A clear, sunny day gives you 5-15 minute exposures depending on season and latitude. A UV lamp just makes results consistent year-round and indoors. Try sunlight first; buy the lamp once you're printing regularly.
Cyanotype works on almost any porous surface. Paper is the entry point, but cotton fabric, canvas, and even wood take the sensitizer. Once you've mastered paper, that same two-part chemistry unlocks a much wider range of substrates.
The gear
What you actually need
Chemistry & Kits
Cyanotype chemistry is a two-part iron compound: ferric ammonium citrate (Part A) and potassium ferricyanide (Part B). Mix them in equal parts, brush onto any porous surface, let dry in the dark, expose to UV, and rinse in water. A pre-mixed liquid kit is the right call for beginners. You skip the measuring, get consistent sensitizer every time, and start printing same-day. Raw powder chemicals cost less per print once you're producing at volume, but they require accurate measuring and careful storage. Start liquid, switch to powders later if you want.
Chemistry & Kits — what's the difference?
A few common shapes, each making a different trade.
Pre-mixed Liquid Kit
Mix A+B equal parts; no measuring. The fastest start.
Setup
Mix and coat
Yield
~32 sheets 8x10
Shelf life
Mixed: days; unmixed: 1 yr
Best for Beginners; anyone who wants results on day one
Tradeoff More expensive per print than raw powders at volume
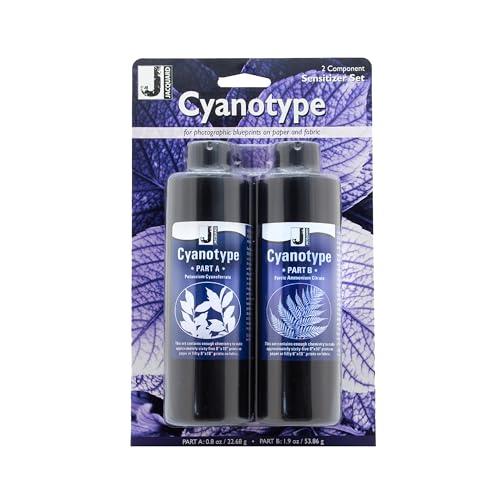
Jacquard's two-bottle liquid kit is the standard beginner entry point: pre-formulated and balanced chemistry, mix equal parts A and B, and you're coating paper same-day. Enough sensitizer for ~65 sheets of 8x10 on paper. Consistent results, no measuring equipment required.
What we like
Pre-formulated and balanced; no lab-scale measuring needed
Makes ~32 sheets of 8x10, enough to learn the whole process
Jacquard is the go-to brand in alternative photo printing
What to know
More expensive per print than raw powder chemistry at volume
Mixed sensitizer has a short shelf life; only mix what you'll use
A complete starter kit: pre-measured cyanotype chemistry, fine-art cyanotype paper, a glass printing frame, and accessories, all in one box. No sourcing individual components. It includes everything needed for your first session and costs less than buying the parts separately.
What we like
Zero setup: pre-coated paper works straight out of the box
Makes real cyanotype prints in sunlight with no chemistry handling
Under $20; a genuine no-risk way to try the process
What to know
Thin paper curls badly in the rinse; not suitable for framing
No control over chemistry; you can't adjust concentration or coating
Raw powder chemistry from the printmaker's gold standard. Costs significantly less per print than liquid kits at volume. You mix your own solutions with distilled water and can dial concentration to your paper and exposure times. Photographers' Formulary is the brand used in fine art programs and by working alternative process photographers.
What we like
Raw powder is significantly cheaper per print at volume
Full control over solution concentration and chemistry ratios
Consistently pure; used in fine art programs worldwide
What to know
Requires accurate measuring and distilled water to mix properly
More complex storage and handling than pre-mixed liquid kits
Not all paper works for cyanotype. You need something porous enough to absorb the chemistry and sturdy enough to survive wet processing without falling apart. The right choice is 100% cotton watercolor paper, 90-140 lb weight. Cheap drawing paper absorbs unevenly and disintegrates in the rinse. Cotton fabric is the other main substrate: cyanotype on muslin, canvas, or linen produces vivid blue prints you can sew into bags, shirts, or wall hangings. Start with paper until you've dialed in your exposure times.
Best starter
Fabriano
Artistico 140 lb Hot Press Block, 12x18
$59.99 as of Jun 22, 2026
★★★★★Our rating· In Stock
100% cotton, acid-free, and sized to hold sensitizer without bleed or uneven absorption. The 140 lb weight survives the wet rinse step without curling into a tube. The 12x18 block is a workable size that gives you multiple test strips per sheet. Fabriano Artistico is the paper working cyanotypists keep buying.
What we like
100% cotton absorbs sensitizer evenly with no uncoated patches
140 lb weight survives wet processing without warping badly
Acid-free; prints won't yellow or degrade over decades
What to know
More expensive than generic drawing paper
Hot-press can require a pre-wet step for even coating
Cyanotype on natural cotton muslin opens up different creative territory. Pre-washed 100% cotton takes the sensitizer beautifully and produces vivid blue prints on material you can sew into tote bags, bandanas, or wall hangings. The natural ecru background gives the blue a warm, earthy tone. Avoid any fabric with softener residue.
What we like
Takes cyanotype chemistry beautifully; rich Prussian blue on white
Printed fabric is washable and permanent after a 24-hour cure
Inexpensive; one yard gives you multiple printing surfaces
What to know
Must be pre-washed and free of fabric softener before coating
Requires longer exposure times than paper; dial in with test strips
Cyanotype is UV-sensitive, which means outdoor sunlight on a clear day works fine as your exposure source. On a sunny day, exposures run 5-15 minutes depending on season and latitude. The problem is consistency: clouds, angle, and time of day make results unpredictable while you're learning. A UV LED lamp gives you the same 2-4 minute exposure every time, indoors, in any weather. For small prints up to 4x5 inches, a UV nail curing lamp under $30 is a legitimate hack. For regular 8x10 work, a 36-54W flat panel lamp is the right investment.
Best starter
Dorhui
60W UV LED Exposure Unit
$33.99 as of Jun 22, 2026
★★★★★Our rating· In Stock
A tabletop UV exposure unit removes the biggest variable in cyanotype: inconsistent sunlight. This 60W panel is explicitly marketed for cyanotypes and handles A4 and larger prints comfortably, giving consistent 2-4 minute exposures year-round. The difference between sunlight and a controlled lamp is immediately obvious in edge sharpness and repeatability.
What we like
Consistent 2-4 minute exposures every time regardless of weather
Covers 8x10 prints comfortably with even UV distribution
Pays for itself quickly in consistent, repeatable results
What to know
Adds $50-80 to the startup cost versus sunlight
Requires eye protection; don't stare directly into the panel
A UV nail lamp works for wallet-sized and 4x5 prints and costs under $30. The UV wavelength is right for cyanotype; exposure times run 3-6 minutes. The print area is limited to the size of the lamp's bed. It's a real creative constraint, but many cyanotypists deliberately work small. A legitimate starting hack before committing to a larger lamp.
What we like
Under $30 and genuinely functional for small-format cyanotype work
Consistent UV output; much more predictable than sunlight
What to know
Print area limited to roughly 4x5 inches; no 8x10 work
Slower exposure times than a full UV panel for the same paper
The coating step shapes your results more than any other variable. You're spreading a thin, even layer of sensitizer across paper, and brush marks show in the final print. A wide hake brush (flat, 2-3 inches, Japanese style) glides across paper in long parallel strokes and produces the smoothest coverage. Work quickly without going back over wet sensitizer, which lifts and streaks. Foam brushes are cheaper and functional, but leave slightly more visible texture and degrade after a dozen or so sessions. Coat under dim indoor light, not in direct sunlight or by a bright window.
Best starter
Pro Art
Hake Brush, 2-Inch
$9.78 as of Jun 22, 2026
★★★★★Our rating· Only 8 left in stock - order soon.
A hake brush has a wide, flat head with soft hair that glides across paper without drag or streaking. Two or three long parallel passes evenly coat an 8x10 sheet. This is what most working cyanotypists and alternative process photographers use for good reason: it's fast, even, and produces clean prints.
What we like
Soft, wide head produces smooth, even sensitizer coverage
Long parallel strokes coat an 8x10 sheet in under 20 seconds
Rinses clean with water; lasts years with proper care
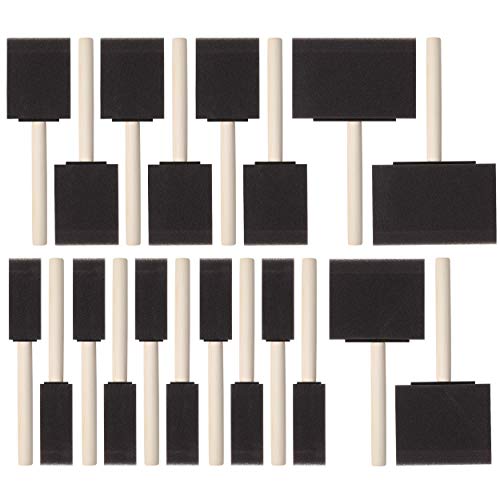
Foam brushes work for cyanotype coating and cost almost nothing. The texture left in the sensitizer coat is slightly more visible in the final print than with a hake brush, but many cyanotypists like that organic quality. Replace them every 10-15 sessions as the foam compresses and starts applying unevenly.
What we like
Inexpensive starter option before committing to a proper brush
Some cyanotypists prefer the subtle textured look foam leaves
What to know
Foam compresses over time and starts applying unevenly
Less smooth coverage than a hake brush on large print areas
After exposure, the print develops in plain tap water. You'll want two or three plastic trays: one for the initial clearing rinse (where unexposed sensitizer washes away as a greenish-yellow tinge) and one or two more for final washing. A contact printing frame presses your transparency film or objects flat against the sensitized paper during exposure, keeping the image sharp. A piece of glass with binder clips is the improvised version and genuinely works. A hinged contact frame is faster to load and unload repeatedly. No additional chemicals are needed beyond water; the iron chemistry is entirely self-developing.
Best starter
Darkroom Print Developing Trays, 8x10, Set of 3
$18.94 as of Jun 22, 2026
★★★★★Our rating· In Stock
You need at least two trays every session: one for the initial clearing rinse and one for the final wash. A three-tray set gets you into a clean water washing sequence that removes all residual sensitizer. These lightweight plastic trays are exactly the right depth, easy to stack for storage, and last for years.
What we like
Three trays enables a proper sequential washing sequence
8x10 size fits standard cyanotype paper without folding
Lightweight plastic cleans easily and stacks flat for storage
What to know
Thin plastic warps slightly if you use boiling water
Trays are not color-coded; mark them with tape to avoid mix-ups
The definitive wooden contact printing frame for alternative processes. Oak construction with a felt-lined hinged back and pressure clips that press your negative and paper together edge-to-edge. A glass pane with binder clips works as a starting substitute; this frame is faster to load, gives more consistent sharpness, and lasts decades. Note: often backordered; order early.
What we like
Hinged back allows you to check registration mid-exposure
Spring tension presses negative and paper together edge-to-edge
What to know
More expensive than a glass pane and binder clips
Spring tension weakens over years; check corner pressure periodically
Cyanotype turns iron chemistry and UV light into vivid Prussian-blue images. No darkroom, no enlarger, no film scanner. Just two chemicals, a brush, paper, and sunlight. Your first real print can happen this afternoon.
Cyanotype is the kind of process that sounds complicated until you do it once, and then feels almost too simple. Two chemicals mixed together, brushed onto paper, dried in a drawer, pressed under some flat objects or a film negative, exposed to UV light, rinsed in water. Prussian blue appears. That’s the whole thing.
It was invented in 1842 by astronomer John Herschel. Anna Atkins used it to document British algae specimens and produced what historians consider the first photographic book. Those prints survive today, still vivid blue, as stable as anything in traditional photography.
You don’t need a darkroom, an enlarger, a chemical developer, or a fixer bath. You don’t need a film camera or a scanner. What you need is a sunny window, a cheap hake brush, some watercolor paper, and a $30 bottle of pre-mixed Jacquard chemistry.
Setting up your workspace
You’re working with a UV-sensitive coating, which means you need to avoid direct sunlight and bright windows during the coating and drying steps. You don’t need total darkness. A normally lit room with indirect daylight is fine. A bathroom or kitchen with one window facing away from sun is fine. You can work in the middle of the day; you just can’t let the coated paper sit under a skylight.
What you’ll need ready before you start:
A flat, protected surface for coating (newspaper works fine)
Your Jacquard Cyanotype Set Parts A and B, premixed equal parts in a small cup
A 2-inch hake brush or foam brush
Sheets of 140 lb watercolor paper cut to your working size
A dark drawer, box, or closet shelf where coated sheets can dry
Two plastic trays and access to a tap for rinsing finished prints
Mix Part A and Part B in equal volumes. The sensitizer is a pale yellowish-green color and looks completely unimpressive. Don’t judge it. Once you’ve mixed what you need, work quickly. Put the bottles back in a dark cabinet; light degrades both the bottles and the freshly coated paper.
Coating and drying
Lay a sheet of watercolor paper on your protected surface. Load the hake brush with sensitizer and apply it in long, parallel, overlapping strokes. The goal is an even, thin coat. Don’t go back over wet areas you’ve already coated; the brush will lift and streak the sensitizer.
An 8x10 sheet takes about 20 seconds to coat. When you’re done, the paper should look uniformly yellowish-green with no dry patches or drips.
Carry the sheet to your dark drying area and lay it flat. Let it dry for at least 90 minutes, or until the paper feels completely dry to the touch. Partially dried paper gives washed-out prints. Impatient is the most common beginner mistake.
Two things to know about drying:
Coat 4-6 sheets at once. Drying time doesn’t compress; you might as well make a batch. Working in multiples is also how you run exposure tests without waiting an hour between every attempt.
Dried sheets keep for a day or two in the dark. Coat in the evening and print the next morning. The chemistry doesn’t have a dramatically shorter shelf life once on paper; it just needs to stay away from light.
Making your first photograms
A photogram is a cyanotype made by pressing flat objects directly onto the sensitized paper. No camera, no negative, no transparency film. Leaves, keys, scissors, a fern frond, a paper doily, your hand. Whatever you can press flat.
Take a dried, coated sheet to your exposure location. Outside in direct sunlight is ideal for your first prints. Place the paper sensitizer-side up. Lay your objects on top, pressing them down as flat as possible. Objects with air gaps underneath will have soft, blurry edges; tight contact means sharp edges.
Expose in direct sunlight. Exposure times vary enormously by season, latitude, and cloud cover. Start with 5-8 minutes on a clear summer day, 10-15 minutes on a hazy or winter day. The exposed paper will shift from yellow-green to a grayish or blue-gray color as it prints. That color change is your visual cue.
After exposure, move indoors. Remove your objects. Fill one tray with tap water and submerge the print. You’ll watch Prussian blue appear almost immediately as the unexposed areas (covered by your objects) turn deep blue and the exposed areas wash to white or off-white. Run a second, clean water rinse for a few minutes. The greenish-yellow cast washes out completely as the print develops.
Lay prints face-up to dry. The colors deepen and stabilize as the print dries. What looks slightly washed-out wet is usually right when dry.
Reading your first results
Your first prints will tell you exactly what to adjust. Here’s how to read them:
Too dark overall, no contrast between the print areas and the image areas: your exposure was too long, or your chemistry is too concentrated. Cut exposure time by a third and reprint.
Too light and washed out, the blue barely distinguishable from white: underexposed. Add 30-50% more time and reprint.
Uneven patches or streaks: coating technique. Try longer, smoother brush strokes and make sure the brush is fully loaded before each pass.
Blue bleeding under object edges: your objects weren’t flat enough, or you moved the print mid-exposure. More weight (a sheet of glass on top) and steady handling help.
The image looks right in the areas that should be dark, but the background isn’t clearing to white: the rinse wasn’t long enough. Run a longer final water wash.
Make a test strip on your second session: coat a full sheet, expose one section at a time (covering the rest with cardboard), stepping up exposure in 2-minute increments. The resulting strip shows you the full exposure range of your paper and chemistry in a single session, and you never have to guess again.
Moving to digital negatives
Photograms are satisfying and you should stay with them longer than you think. But most cyanotypists eventually want to print from photographs.
A digital negative is exactly what it sounds like: a photographic negative printed on transparency film. You print from a computer, load the negative into a contact printing frame against your sensitized paper, expose, and rinse. The result is a photograph in Prussian blue on white.
To make a digital negative:
Open your photo in free software like GIMP or Photoshop.
Convert to grayscale if it isn’t already.
Invert the image (Image → Invert, or Ctrl+I). Shadows become highlights, highlights become shadows.
Print on transparency film using an inkjet printer. Standard inkjet ink works, but dedicated OHP film (like Pictorico) gives better ink density for sharper shadow detail.
Let the transparency dry completely before using it. Wet ink offsets onto the sensitized paper.
One adjustment most cyanotypists add: the process has lower contrast than digital printing, so shadows that look detailed in the original can print as flat black. A modest S-curve (slightly more contrast in the midtones) before inverting compensates. You’ll dial this in over your first dozen negatives.
Every first-session mistake is predictable. Here’s what you’ll run into:
Coating under too much light: the paper starts exposing before you finish drying. Your prints look fogged (no clear whites, muddy shadows). Work in lower-light conditions and dry faster.
Rushing the drying: wet or partially dry paper processes all wrong. Wait the full 90 minutes, even when it seems dry enough.
Forgetting to press objects flat: anything with air under it goes soft-edged. A sheet of glass laid on top during exposure solves this; so does a proper contact printing frame.
Inconsistent sunlight: one cloud cuts your exposure by a third. This is the best argument for a UV lamp: 3 minutes at consistent output every time, regardless of season or weather.
Over-rinsing or under-rinsing: too short a rinse leaves a yellowish tinge in the highlights. Too long a rinse in very cold water can slightly shift the blue. Two clean water rinses of 2-3 minutes each is reliable for almost any chemistry and paper combination.
None of these are permanent failure modes. They’re calibration. Cyanotype is fast enough to reprint within the hour.
What comes next
After you’ve printed a few solid photograms and tried your first digital negative, three directions open up.
Fabric printing: the same chemistry coats cotton muslin beautifully. Cyanotype on fabric produces washable, permanent prints that work as tote bags, bandanas, and wall hangings. The exposure times are longer than paper and the image tone is richer.
Toning: finished cyanotype prints can be treated with tea, coffee, or gold toner to shift the blue to warmer browns or olive tones. Tea toning is free and experimental; gold toning is expensive and precise.
New cyanotype (Mike Ware’s formula): a modified formula that produces finer resolution, deeper shadows, and a wider tonal range than classic cyanotype. More complex to mix but noticeably better for portrait work.
You don’t need any of these on day one. But cyanotype is one of those processes where every solved problem reveals a more interesting problem, and most practitioners keep finding new things to try years in.
Save your money
What you don't need yet
Beginners get pressured to buy a lot of stuff that doesn't help them play
better. Here's what we'd skip on day one.
A vacuum exposure frame — Commercial vacuum units pull perfect contact across a print. A glass pane and binder clips give you 90% of the result for free.
Gold or tea toning chemicals — Toning changes finished prints from cyan-blue to brown or sepia. Interesting, but explore it after you've mastered basic exposure and processing.
Dedicated negative-making RIP software — Free tools like GIMP or Photoshop invert and print digital negatives just as well as expensive raster image processing software.
A professional UV exposure unit — Industrial units are consistent and fast but cost $300-500+. A tabletop UV lamp delivers the same results for a fraction of the price.
A sensitometry kit — Exposure test strips and densitometers are useful for precision calibration. Figure out exposure times by observation first; measure later if you want more precision.
First week
Your first seven days
A short, real plan to get from gear-on-doorstep to actually playing.
Order the Jacquard Cyanotype Set and a pad of 140 lb watercolor paper so both arrive together. · Buy
Set up a dark prep area: a drawer, cardboard box, or closet shelf where coated paper can dry away from light. · Action
Mix Part A and Part B in equal parts under dim indoor light. Brush 4-6 sheets with a hake brush in long, parallel strokes. · Action
Let sheets dry completely in the dark for at least 1-2 hours before exposing. Partially dry paper gives flat, underexposed prints. · Action
Make your first photograms: press flat objects (keys, leaves, scissors, feathers) onto a dried sheet and expose in direct sunlight or under the UV lamp. · Action
Rinse exposed prints in a tray of tap water and watch Prussian blue emerge from the greenish-yellow coating. Run two rinses. · Action
Evaluate your exposure. Too light and washed out means more UV time. Too dark with lost shadow detail means less time. Adjust and reprint. · Action
Try your first digital negative: print a high-contrast photo inverted to negative on transparency film and use it in the contact frame. · Action
FAQ
Common questions
Do I need a darkroom to print cyanotypes?
No. Cyanotype chemistry is far less sensitive than traditional photographic paper. You mix and coat in dim indoor light, avoiding direct sun and bright windows, dry in a dark drawer or box, then expose and rinse in full daylight. No dedicated darkroom required.
Can I just use sunlight instead of a UV lamp?
Absolutely, and most beginners start this way. On a clear sunny day, exposure times run 5-15 minutes depending on season and latitude. The downside is consistency: a passing cloud mid-exposure changes your result. Sunlight is a great way to start; buy a UV lamp once you're printing regularly and want repeatability.
Is the chemistry dangerous?
Mildly. Ferric ammonium citrate is relatively benign. Potassium ferricyanide is a mild skin irritant and should be kept away from strong acids (it releases hydrogen cyanide gas in contact with acid, but this won't happen in normal printing). Wear gloves, work in a ventilated space, and label your bottles.
How long do cyanotype prints last?
Well-kept cyanotype prints can last 100+ years. The Prussian blue pigment is chemically stable. The main risks are prolonged bright-light exposure (colors fade over years) and alkaline environments like some framing materials. Use acid-free matting and avoid displaying prints in direct sunlight.
Can I print from a digital photograph?
Yes. Print an inverted (negative) version of your photo onto transparency film using an inkjet printer. The digital negative goes directly on the sensitized paper in your contact printing frame. Free tools like GIMP handle the inversion; some people add a contrast curve to match the process's response.
How do I know if my exposure time is correct?
Make a test strip: cover a coated sheet in sections with cardboard, exposing each strip 30-60 seconds longer. The correctly exposed strip will show full Prussian blue in the highlights and open shadow detail after rinsing. This is faster than guessing and works regardless of season, latitude, or paper brand.
Cyanotype.ca — Practical cyanotype reference site with formulas, exposure guides, and substrate information. One of the most reliable free resources online.
r/cyanotype — Active community sharing prints, troubleshooting exposure and chemistry problems, and discussing substrates. Good place to post your first prints and ask questions.
Mike Ware's Cyanotype Process Research — Chemist and printmaker Mike Ware's detailed technical writing on the classic and new cyanotype processes. Denser than most guides but authoritative on the chemistry.
Film Photography Project — Broader alternative process community that covers cyanotype alongside lumen prints, anthotypes, and other non-silver processes. Good for context and inspiration.
As an Amazon Associate, JustBeginning earns from qualifying purchases.
We may also earn commission from other affiliate programs linked on this
page. Editorial recommendations are independent; we don't choose
products based on commission rates.
Product prices and availability are accurate as of the date and time
indicated and are subject to change. Any price and availability
information shown on Amazon at the time of purchase will apply.

 Best starter