Film is having a real revival — shooting 36 frames per roll changes how you see. The cost structure surprises most beginners (film + development + scanning adds up fast), so here's the honest guide: which camera to start with, which film stocks to buy, and exactly what it costs to shoot a roll.
By Colin B. · Published May 15, 2026 · Last reviewed August 7, 2026
A modern point-and-shoot, two rolls of film, and lab development gets you started under $100. Add a flatbed scanner to digitize at home; most beginners spend $200–300 in the first month once they're hooked.
We earn commission on qualifying Amazon purchases — see our
affiliate disclosure.
Price tiers and budget totals shown above are editorial estimates;
actual Amazon prices vary.
At a glance
Our top pick in each category
The fastest path through this guide — each best-starter pick by category.
Scroll for the budget and upgrade alternatives.
Factor in film and development costs from day one. A roll of 35mm film costs $12–18 in 2026, and lab development with scans runs another $12–22 per roll. That's $25–40 every time you press the shutter 36 times. It changes how you shoot — in a genuinely good way — but don't discover this after you've already bought a camera.
You don't need an expensive camera to shoot beautiful film. The camera determines very little about the final image. A $40 modern point-and-shoot can produce stunning photos; a $1,500 Leica in bad light with bad film in uninteresting places produces boring photos. Buy cheap, learn fast, upgrade if and when the hobby earns it.
Start with color negative film, not slide film or black-and-white. Color negative (C-41 process) is the most forgiving format: it handles overexposure gracefully, every lab in the country can develop it, and results are available in a day. Slide film (E-6) is beautiful but nearly impossible to find a lab for. Black-and-white is great once you're ready to develop at home — skip it for now.
The camera choice matters less than most beginners think — but here's the honest breakdown. Point-and-shoots are automatic and portable, with a fixed lens. 35mm SLRs give you manual exposure control and interchangeable lenses, with a steeper learning curve and a used-camera market full of hidden issues. Medium format uses larger film for noticeably better image quality but more cost per shot and fewer frames per roll. For most beginners, a cheap and reliable 35mm camera is the right answer. Shoot a dozen rolls before thinking about upgrades.
Cameras — what's the difference?
A few common shapes, each making a different trade.
35mm Point-and-Shoot
Automatic, lightweight, no decisions. The easiest way to start.
Film
35mm (36 exp)
Control
Fully automatic
Lenses
Fixed
Best for Absolute beginners, travel, everyday carry
The Ektar H35 is half-frame — each frame uses half the film area of a standard 35mm shot, so a 36-exposure roll becomes 72 photos. That cuts your cost-per-shot in half while you're learning. It's fully automatic, takes sharp photos in decent light, and looks great doing it. This is the camera we'd hand a curious friend on day one.
What we like
Half-frame doubles your roll to 72 shots, cutting cost-per-frame in half
Fully automatic — zero settings to fumble with on your first roll
Compact and pocketable, easy to carry everywhere you go
What to know
Half-frame resolution is softer than full-frame — fine for sharing, not large prints
No manual controls if you want to learn exposure settings
M38 35mm Film Camera - Focus Free, Powerful Built-in Flash, Easy to Use
$
★★★★☆Our rating
The M38 is a full-frame 35mm point-and-shoot under $30. Simple, automatic, practically indestructible. Correct exposure in decent light, a built-in flash for indoor shots, no learning curve. Not the sharpest lens, but you're spending $30 — that leaves budget for five extra rolls of film. The smart way in.
What we like
Under $30 — the cheapest way to shoot real 35mm film
Built-in flash handles both outdoor and indoor scenes automatically
The AE-1 Program is the most beloved beginner SLR ever made — the camera that taught a generation to shoot film. It runs in fully automatic program mode or full manual, accepts any Canon FD-mount lens, and is built to last decades. Available used on Amazon for $100–180. If you want to grow into manual exposure and interchangeable lenses, this is the upgrade.
What we like
Full manual plus program mode — learn exposure at your own pace
Large FD-mount lens ecosystem available cheaply used
Proven SLR with decades of reliability behind it
What to know
Used condition varies — light leaks and sticky shutters are common risks
★★★★☆Our rating· Only 1 left in stock - order soon.
The Holga is a medium format (120 film) plastic toy camera with a loyal following for its vignetting, light leaks, and dreamy soft focus. Not a serious tool, but a genuinely fun creative one. The larger 120 negative has more detail than 35mm. Treat this as an add-on after you've run 10 rolls through a 35mm camera — medium format film is harder to source and more expensive to develop.
What we like
Larger 120 negative delivers more detail and less grain than 35mm
Intentional vignetting and light leaks create a lo-fi look you can't fake
What to know
120 film is harder to find and more expensive to develop than 35mm
Plastic construction means unpredictable, inconsistent results
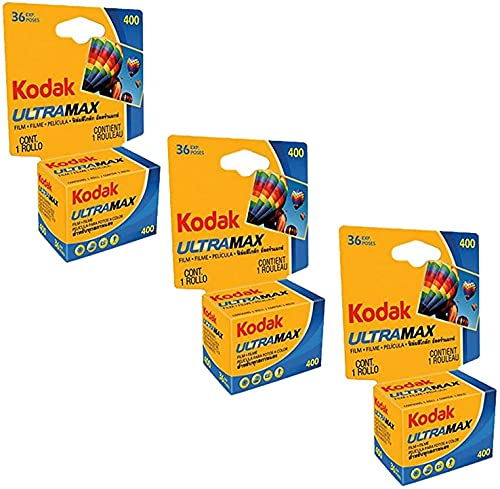
Film stock is your most important creative variable. Different films have different grain texture, color rendition, and contrast response — and that matters far more than you'd expect. For beginners, start with a versatile ISO 400 color negative film that shoots well in almost any light, get comfortable with it across several rolls, then experiment. The real pleasure of film photography is finding a stock that feels like yours and learning its quirks intimately.
Best starter
Kodak
UltraMax 400 35mm Film (3-Pack)
$31.02 as of Jun 22, 2026
★★★★★Our rating· Only 5 left in stock - order soon.
UltraMax 400 is the film we'd put in every beginner's bag for the first three months. ISO 400 handles shade, indoor window light, and full sun equally well, so you never have to think about it. Colors are warm and natural, grain is moderate and pleasing. Available everywhere, consistent across labs. This is the film you learn on.
What we like
ISO 400 handles full sun through open shade without adjustment
Warm, natural colors that flatter portraits and everyday scenes
Available everywhere and consistent from lab to lab
What to know
Less distinctive look than Kodak Portra or Ektar — not a signature film
Kodak Gold is ISO 200 — it wants more light than UltraMax but rewards you with warmer, slightly more vintage-feeling tones. A dollar or two cheaper per roll and a great second film once you understand light. Best for outdoor shooting in full or partial sun. Don't shoot it indoors or on heavy overcast days without flash.
What we like
Warmer, slightly vintage tones than UltraMax for a dollar less per roll
Excellent in full or partial sun — outdoor shots look rich and natural
What to know
ISO 200 struggles indoors and on overcast days — not an all-condition film
Ektar 100 is the finest-grain color negative film available — it produces images with remarkable sharpness and vivid, saturated color. Best in full sun or studio light (ISO 100 needs plenty). Reach for it when you're shooting landscapes, flowers, or architecture and want to see what film can do at its best. A real step up once you know how to expose for it.
What we like
Finest grain of any color negative film — prints large with real sharpness
Vivid, saturated color is distinctive and immediately recognizable
What to know
ISO 100 requires lots of light — punishing in shade, overcast, or indoors
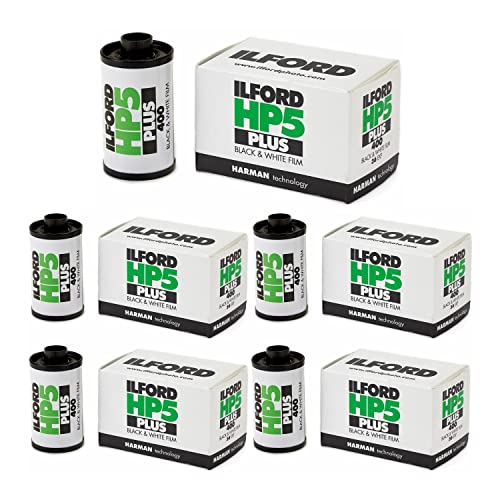
HP5 Plus is the gold standard for beginners in black-and-white film. ISO 400, forgiving of overexposure, and pushes exceptionally well — tell your lab to push one or two stops and it handles ISO 800 or 1600 with beautiful, intentional grain rather than muddy noise. If you catch the black-and-white bug, this is the film you'll still be shooting five years from now.
What we like
Forgiving of overexposure — handles mixed light gracefully where other films fail
Pushes beautifully to 800 or 1600 ISO with pleasing grain, not muddy noise
What to know
Black-and-white processing harder to find locally than standard C-41 color
Once your film is developed at the lab, you have two options: pay the lab for scans (usually $5–15 extra per roll, and perfectly fine to start), or buy a scanner and digitize at home. Home scanning takes time but gives you full control over resolution, cropping, and color correction — and it saves money once you're shooting regularly. Most dedicated film photographers eventually own a scanner. If you're spending $30 per roll on film and development, a $90 scanner pays for itself in a few months of lab-scan savings.
Best starter
Epson
Perfection V39 Color Photo & Document Scanner
$126.00 as of Jun 22, 2026
★★★★★Our rating· Only 1 left in stock - order soon.
The V39 is the most recommended entry-level film scanner because it handles 35mm negatives, slides, and medium format strips out of the box, produces resolution good enough for web sharing and social media, and costs around $90. You scan at home, post-process in Lightroom or the free Darktable, and share immediately. For the first one to two years of shooting, this does everything you need.
What we like
Handles 35mm negatives, slides, and medium format strips for around $90
Outputs files ready for Lightroom or social media without extra conversion
What to know
Scanning a full 36-exposure roll can take one to two hours at max resolution
Resolution tops out below what large-print photographers eventually want
When you want scans you can print large — magazine-quality resolution, less digital noise, true color — the Plustek OpticFilm 8200i is where most serious hobbyists land. Dedicated to film (not a general flatbed), it produces noticeably sharper results than the V39. Includes SilverFast software for color correction. Worth the investment once you're shooting two or more rolls a week consistently.
What we like
Dedicated film scanner produces noticeably sharper results than a flatbed
SilverFast software gives precise color correction and film-type profiles
What to know
Scans 35mm only — medium format shooters still need a separate flatbed
Significant cost premium over the V39 for gains most beginners won't notice
The cheapest way to digitize film: the DigitaLIZA+ holds your negative strip flat with a built-in backlight panel, then you photograph it with your DSLR or mirrorless on a macro setting. With a modern camera, results are sharper than you'd expect — good enough for Instagram and web sharing. A $60 experiment before committing to a proper scanner.
What we like
Cheapest path to digitizing negatives using your existing camera sensor
No waiting for lab scans — shoot and transfer at home immediately
What to know
Requires a DSLR or mirrorless with macro capability — not truly standalone
Quality depends on your camera lens, which adds variability
A few small purchases that matter more than they look. A good wrist or neck strap keeps your camera accessible and protects it from drops — the #1 way cameras get damaged. A lens cleaning kit prevents smudges from getting baked into every frame. And a light meter is essential if you're shooting a manual camera that lacks a built-in meter, or if you want to expose carefully with a fixed-lens point-and-shoot that doesn't tell you what it's doing.
Best starter
Peak Design
Cuff Camera Wrist Strap
$39.95 as of Jun 22, 2026
★★★★★Our rating· In Stock
The Cuff keeps your camera secure on your wrist so you can carry it confidently, shoot quickly, and not drop it. Peak Design's quick-release anchor system lets you detach the strap in one click — useful when you're putting the camera in a bag. It's the wrist strap most film photographers actually use, and it works equally well on 35mm point-and-shoots and heavier SLRs.
What we like
Keeps camera on your wrist, accessible for quick shooting without neck strap bulk
Quick-release anchor detaches cleanly when stowing the camera in a bag
What to know
Pricier than generic wrist straps — you're paying for the anchor ecosystem
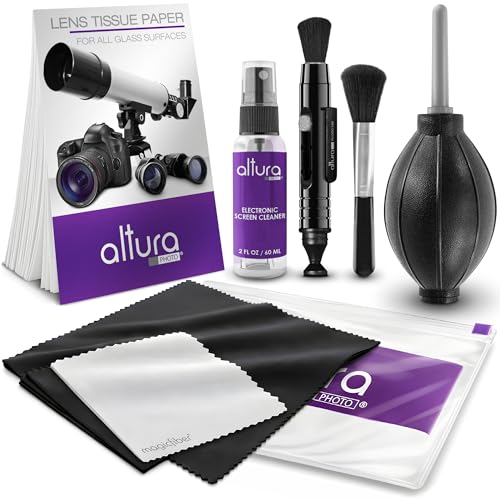
A blower and microfiber cloth keep your lens and viewfinder clean — which matters more on film cameras than digital, because a smudge on your lens is baked into every frame permanently. This $12 kit covers everything: air blower, lens pen, microfiber cloth, and cleaning solution. Buy this when you buy your camera.
What we like
All-in-one kit: blower, lens pen, microfiber cloth, and cleaning solution
Under $15 — inexpensive protection against smudges baked into every frame
What to know
Lens pen and cloths wear faster than premium branded alternatives
If you're shooting a manual camera without a working built-in meter — early Pentax K1000, vintage Leicas, or any camera whose meter has died — you need a handheld light meter. The Sekonic L-308X-U Flashmate is compact, accurate, and handles both incident and reflected metering in one unit. Not needed for automatic cameras, but essential for a properly calibrated manual exposure workflow.
What we like
Handles both incident and reflected metering in a compact form factor
Accurate enough for slide film and any camera with a dead or absent meter
What to know
Completely unnecessary if your camera has a working built-in meter
Small display is hard to read in low light — exactly when you need it most
Most beginners develop their first roll, look at the scans, feel a mix of disappointment and delight, and immediately load a second. Here's what actually happens between buying a camera and understanding why film photographers can't stop.
There’s a version of film photography that’s all aesthetics — the Instagram grain, the light leak, the retro body sitting on a coffee table. That version is fine. But the thing that actually hooks people is something different: the weight of a mechanical camera in your hands, the decisive click of the shutter, and the month-long suspense between pressing the button and seeing what you made.
Film photography is the hobby that slows you down on purpose. You get 36 frames — or 72 if you shoot half-frame — and each one costs something real. That constraint is the whole point.
Here’s what your first month actually looks like.
Rolls 1–2: Load, shoot, wait
Your first roll will probably disappoint you. That’s not a warning — it’s a prediction you should bank on so you’re not discouraged when it happens.
The most common first-roll results: half the shots are underexposed (you shot indoors without flash), a few frames are blurry (camera shake — film is less forgiving than digital), and the ones you thought would be interesting are flat, while a throwaway shot of something ordinary looks unexpectedly alive.
That throwaway shot is the thing to pay attention to.
Load the camera in shade or indoors. Even modern film cameras can fog a frame or two if you load in direct sunlight. Once loaded, the film is safe inside the camera — don’t open the back until you’ve rewound the roll.
Shoot the whole roll in one session. This sounds obvious but many beginners load a roll and then carry the camera around for six weeks, taking one or two shots whenever inspiration strikes. The problem is you learn nothing that way — you can’t connect your choices to your results. Pick a day, pick a subject (a neighborhood walk, a family gathering, a market), and finish the roll. Bring it to the lab the same day.
Send it to a lab, not a drugstore. Your local CVS or Walmart can still develop 35mm film, but the quality of scans varies wildly. Use a dedicated film lab — either a local camera store or a mail-in service. The Darkroom and Indie Film Lab are both consistently good. Budget $15–25 for development plus scans on your first roll.
The second roll is usually better than the first, not because your eye has improved but because you’ve stopped being anxious and started being curious.
By roll three or four, start paying attention to your negatives (the orange-tinted strips in the sleeve the lab sends back), not just the scans. A thick, dark negative means overexposure — you gave the film too much light. A thin, faint negative means underexposure — not enough. You want negatives that look rich and detailed without being so dense you can’t see through them. Most beginners run thin.
Understand your film’s ISO. ISO 400 film (like Kodak UltraMax 400, which is where you should start) handles a wide range of lighting. In full sun, it’s almost impossible to overexpose with a point-and-shoot. In shade or indoors near a window, it handles it gracefully. Indoors at night without flash, it’ll be underexposed — use the flash or accept grainy, dark results as a stylistic choice.
Learn the Sunny 16 Rule if you’re shooting a manual camera. In full sun: set your aperture to f/16 and your shutter speed to 1/[your ISO]. At ISO 400, that’s f/16 at 1/400 (or 1/500). Adjust from there for different conditions — open shade is roughly f/8 at the same shutter speed. This rule works. It’s not a crutch; it’s what the manufacturers calibrated the film for.
Start experimenting with film stocks on roll four or five. After you know what UltraMax 400 looks like, try a roll of Kodak Gold 200 in good light to see the warmer tones. Try a roll of Ilford HP5 Plus if black-and-white appeals to you. The films are different in ways that matter, and you can only learn the difference by shooting them.
The middle of the month: Building a deliberate practice
By roll five or six, you’ve started to slow down between frames. This is the shift that separates film photographers from people who’ve tried film photography.
You notice the light before you raise the camera. You consider the background. You decide whether the shot is worth a frame. Not every frame — some of the best film photography is quick and instinctive — but you start making a decision rather than a reflex.
A few things that accelerate the learning curve:
Keep a small notebook. When you shoot something you care about, write down your aperture, shutter speed, and lighting conditions (bright sun / open shade / overcast / indoors). Match those notes to your scan numbers when the film comes back. You’ll understand your camera’s meter within two or three rolls of doing this.
Try scanning at home. If you’ve been paying for lab scans, consider picking up an Epson Perfection V39 flatbed scanner. Home scanning is slower but gives you far more control: you can adjust the exposure and color correction before exporting, and you’re not locked into the lab’s interpretation of how your negative should look. Many photographers prefer their own scans from the beginning.
Develop your own black-and-white film. This is optional, but if you’ve been shooting Ilford HP5 or Kodak T-Max, home development is simpler than it sounds. You need a developing tank, a few chemical concentrates, and a changing bag or dark bathroom. The process takes about an hour and costs roughly $2 per roll in chemicals once you’ve bought the initial kit. Most serious film photographers eventually develop their own B&W.
Things you’ll get wrong — and that’s the point
Every beginner makes the same handful of mistakes. Knowing them in advance won’t prevent them, but it’ll help you diagnose them when they show up on your scan:
Double exposures. Forgetting to advance the film between shots. On most cameras, the film advance and the shutter mechanism are coupled — you can’t shoot twice without advancing. On older or simpler cameras, this isn’t always true.
Shooting indoors without flash. ISO 400 handles indoor window light in daytime, but not indoor artificial light at night. The result is severely underexposed, muddy frames. Either shoot near a window during the day or use the flash.
Camera shake at slow shutter speeds. If your camera chooses 1/30s or slower in low light, any hand movement will blur the image. A lot of blurry film photos are blamed on the camera or the film when they’re actually camera shake. Brace, breathe, and squeeze — don’t jab.
Forgetting to set ISO on cameras without DX coding. Some older cameras don’t read the DX code on film cartridges automatically — you set the ISO manually. If you set your camera to ISO 100 and loaded ISO 400 film, everything is overexposed by two stops.
None of these are disasters. They’re how you learn. The frame you ruined is more educational than the frame that came out perfectly.
After a month and six to eight rolls, you’ve seen what your camera does, learned what your film stock looks like in different light, and made at least one frame that surprised you.
Here’s what changes the slope of the learning curve from here:
Shoot the same subject multiple times, differently. Pick a subject — a friend’s portrait, your kitchen window, your neighborhood in different weather — and shoot it over and over, varying your approach. Film’s constraint turns repetition into deliberate practice rather than just clicking.
Find a community. The r/analog subreddit is enormous and useful. Local camera clubs run film nights. Emulsive hosts community challenges. Shooting alone is fine; having other people react to your work accelerates the feedback loop.
Pick a second camera with more control. If you started on a point-and-shoot and you want to understand exposure directly, a used 35mm SLR like a Canon AE-1 Program puts aperture and shutter speed in your hands. The difference in control is significant. The difference in image quality is smaller than you’d expect.
You’re not a film photographer at roll one. By roll six, you are — in all the ways that matter.
Save your money
What you don't need yet
Beginners get pressured to buy a lot of stuff that doesn't help them play
better. Here's what we'd skip on day one.
An expensive vintage Leica or Contax — A Leica M6 costs $1,500–3,000 and produces beautiful results — but not meaningfully different from a $40 point-and-shoot in your first year. Spend the difference on film and development.
A home darkroom — Darkroom printing is a genuinely worthwhile rabbit hole, but it's a $500–2,000 commitment that requires a dedicated room. Start there after you've shot 30–50 rolls and know you're staying.
Medium format before 10 rolls of 35mm — 120 film is harder to find, costs more per shot, and most labs have limited developing capacity for it. Learn the fundamentals on 35mm first. Medium format as a deliberate second step is great; as a beginner default it's just harder.
Slide film (E-6 process) — Beautiful if exposed perfectly, but brutally punishing of any exposure error. Almost no labs develop it anymore. Not a beginner format.
A stack of lens filters — A UV filter for lens protection is fine. The polarizer, ND filters, and color-correction gels can wait until you're shooting with an SLR and understand what you're actually correcting for.
A home developing kit in your first month — Developing your own black-and-white film is rewarding and worth doing eventually. But it adds cost and chemistry to the learning curve. Send your first ten rolls to a lab so you can focus entirely on shooting.
First week
Your first seven days
A short, real plan to get from gear-on-doorstep to actually playing.
Buy one camera and two rolls of Kodak UltraMax 400. Don't build a kit — start with one film stock and learn it. · Buy
Find a lab before you load your first roll — either a local camera store or a mail-in service. Know where the film is going before you shoot it. · Action
The Darkroom (mail-in) · The most popular US mail-in lab — pre-paid mailers, scans included, ~1 week turnaround
Indie Film Lab · Alabama-based lab favored for accurate color and careful handling
Shoot your first roll fast — finish it in one afternoon. Don't let it sit for weeks. Momentum matters more than perfection. · Action
Send it to the lab immediately after shooting. The wait is part of the experience — it's also when you plan your second roll. · Action
Study the scans when they come back. Which frames surprised you? Which missed? Load roll two with that knowledge. · Learn
Learn the Sunny 16 Rule: in full sun, set aperture to f/16 and shutter to 1/[your ISO]. At ISO 400, that's f/16 at 1/500. Knowing this rule means you're never stuck without a meter. · Learn
Sunny 16 Rule explained · Wikipedia — concise with adjustment guide for different lighting conditions
FAQ
Common questions
How much does it cost to shoot a roll of 35mm film in 2026?
Plan on $25–40 per roll from start to finish. Film runs $12–18; lab development with scans costs $12–22 depending on the lab and turnaround speed. If you shoot three rolls a month, budget $75–120/month to stay active. This is why film makes you deliberate — each frame costs something real.
Should I buy a new or used film camera?
Both work, but they're different risks. New cameras like the Kodak Ektar H35 or M38 are guaranteed to function and cost under $40. Used cameras (SLRs especially) offer more capability but can have light leaks, sticky shutters, or dead meters — buy from a seller who tests before shipping, or from a reputable local camera shop.
What film should an absolute beginner buy?
Kodak UltraMax 400 for your first three rolls, full stop. ISO 400 handles the widest range of lighting conditions, the colors are natural and forgiving, and every lab can develop it. Avoid expired film until you understand what 'normal' looks like.
Do I need to develop film myself?
No, and we recommend against it for the first 10–20 rolls. Mail-in labs like The Darkroom and Indie Film Lab develop and scan your film for $15–25 per roll and mail the scans back within a week. Home development is a separate skill worth learning eventually — just not in month one.
What's the difference between 35mm and medium format?
35mm is the standard format — 36 exposures per roll, labs everywhere, affordable. Medium format (120 film) uses a larger negative, producing more detail and less grain, but fewer shots per roll (8–16 depending on camera) at higher cost. Start with 35mm. Add medium format later as a deliberate step up, not as a beginner default.
How do I share film photos online?
Pay your lab for digital scans when you drop off the film (included at most services, or $5–15 extra), or scan at home with a flatbed scanner like the Epson V39. You get standard JPEG or TIFF files that edit in Lightroom, Photoshop, or any photo app. Home scanning gives more control but takes more time.
Emulsive — The most respected independent film photography publication. Deep film stock reviews, lab comparisons, and technique guides. Start here.
Film Photography Project — Community-driven site with tutorials, a long-running podcast, and a film supplies store. The podcast is educational for beginners and enthusiasts alike.
r/analog — The largest film photography community online. Search before posting — most beginner questions are answered many times over in the archives. The subreddit wiki is excellent.
r/AnalogCommunity — More casual and photo-forward than r/analog. Good for sharing work and getting feedback without gear debates.
The Darkroom — The most popular US mail-in film lab. Pre-paid mailers, scans included, around one week turnaround. Their film processing guide is also good reference reading.
Indie Film Lab — Alabama-based lab highly regarded for color accuracy and careful film handling. Favored by hobbyists who want consistent, predictable results.
Willem Verbeeck (YouTube) — Practical film photography YouTube channel covering technique, camera reviews, and film stock comparisons with real-world test rolls. Honest and thorough.
Analog Process — A clean blog with well-researched film stock comparisons and shooting guides. Less active than Emulsive but the back catalog is worth reading through.
FILM Ferrania Blog — A small Italian film manufacturer with an excellent technical blog covering film chemistry and what different film characteristics actually mean in practice.
As an Amazon Associate, JustBeginning earns from qualifying purchases.
We may also earn commission from other affiliate programs linked on this
page. Editorial recommendations are independent; we don't choose
products based on commission rates.
Product prices and availability are accurate as of the date and time
indicated and are subject to change. Any price and availability
information shown on Amazon at the time of purchase will apply.
Our top pickKodak Ektar H35 Half-Frame 35mm Film Camera


 Best starter