Art journaling is mixed-media play on paper: acrylic paint, stamps, Gelli plates, collage, and mark-making layered into a bound journal that's yours to fill. The pages are private, the process is the point, and almost any supplies will work once you nail the one thing that matters most: paper weight.
By Colin B. · Published June 17, 2026 · Last reviewed June 17, 2026
A solid art journaling setup runs $60-125. The journal and paints alone cost under $60; the Gelli plate and brush set add another $50-65.
We earn commission on qualifying Amazon purchases — see our
affiliate disclosure.
Price tiers and budget totals shown above are editorial estimates;
actual Amazon prices vary.
At a glance
Our top pick in each category
The fastest path through this guide — each best-starter pick by category.
Scroll for the budget and upgrade alternatives.
Paper weight is the single decision that makes or breaks your early experience. Art journal paper needs to be at least 90 lb to handle paint and stamps without buckling into a crinkled mess. Check the label before you buy a journal; beautiful covers hide terrible paper all the time.
Student-grade acrylics and student-grade journals are genuinely fine to start. Artist-grade pigments are richer, but you won't feel the difference until your layering technique is developed enough to show it. Spend the savings on more pages and more practice.
The Gelli plate feels like a magic trick the first time you pull a print. But you can skip it for your first few weeks while you get comfortable with paint on paper. Start with the journal and paints first if budget is tight; add the plate once you're hooked.
The paper inside your journal determines what's possible. Regular diary paper (under 70 lb) buckles and bleeds under acrylics or stamps. You need at least 90 lb mixed-media paper to use paint without pages warping into a mess. Watercolor paper (140 lb) handles the heaviest wet media but costs more per page. Start with 90-140 lb mixed-media; upgrade once you know your style leans wet.
Best starter
Strathmore
400 Series Mixed Media Art Book, 5.5×8.5"
$16.95 as of Jun 22, 2026
★★★★★Our rating· Only 13 left in stock (more on the way).
Paper weight is the number-one thing that derails new art journalers, and Strathmore's 400 Series fixes it. The 90 lb mixed-media paper handles acrylics, stamps, light washes, and collage without warping. Hardbound, lay-flat construction keeps both hands free while you work. The 5.5×8.5" size is the classic portable format.
What we like
90 lb paper handles acrylics, stamps, and light washes without warping
Hardbound lay-flat construction keeps both hands free while working
30-34 pages, enough room to experiment and make real mistakes
What to know
Per-page cost is higher than buying a loose pad
Cover options are limited; decorate the outside yourself
Under $15 and a solid first surface. The 98 lb paper handles markers, light acrylics, and stamps without buckling badly. Side wire bound, which lays flat for photography and stays open while you work. Canson markets this as a pad, not a journal, but it's what most beginner art journalers actually use.
What we like
Under $15, the right price to experiment freely without hesitation
Spiral binding stays completely flat; easy to photograph finished pages
What to know
Thinner 98 lb paper shows bleed-through under heavy paint layers
Spiral snags tools and supplies when working across the spine
Heavyweight cold-press watercolor paper in a hardbound journal. This is where art journaling and watercolor painting converge. The 140 lb paper takes aggressive washes and heavy paint without a ripple. Once you know your style leans wet and loose, this is where to land.
What we like
140 lb cold-press paper, the gold standard for heavy wet media
Hardbound with linen cover; the journal you keep and display
What to know
Higher price per page; overkill while you're still learning
Fewer total pages than lighter-weight journals at the same size
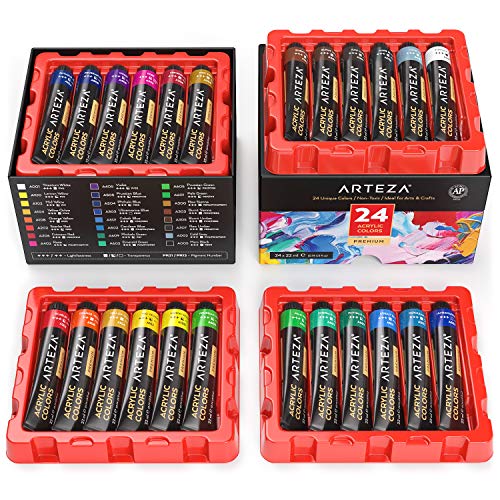
Acrylics are the backbone of art journaling: they dry fast, layer cleanly, and don't bleed through even lighter mixed-media paper. You want student-grade to start, not artist-grade; the pigment concentration difference is real but you won't feel it until your layering technique is developed enough to show it. A 24-color set gives you everything you need to mix any color for your first year.
Best starter
Liquitex
BASICS Acrylic Paint Set, 24 Colors
$52.51 as of Jun 22, 2026
★★★★★Our rating
Liquitex is one of the most trusted names in acrylics, and BASICS is their student-grade line that's genuinely good. 24 colors covers every mix you'll realistically need in your first year. Fast-drying formula means layers stay distinct without muddying into each other. The standard art-journaling recommendation for good reason.
What we like
24 colors covers every mix you need for your first full year
Fast-drying formula keeps layers distinct and clean
Liquitex student-grade is noticeably better than no-name sets
What to know
Small 22 ml tubes drain fast on backgrounds; buy extra white and black
Not lightfast for archival work (fine for journals, not fine art)
Costs less than Liquitex and comes in sets up to 60 colors, useful when you want a wide palette without worrying about running out. Consistent color-to-color quality and widely available. The right pick if you're genuinely unsure art journaling will stick.
What we like
Lower price, with 60-count sets available to build a full color library
Consistent pigment quality across colors; reliable for mixing
What to know
Thinner body than Liquitex; some colors need two coats to cover
Color names don't align with standard mixing terminology
★★★★☆Our rating· Only 18 left in stock - order soon.
Golden's Open formula stays workable for 30-60 minutes instead of the usual 5-10, giving you real time to blend, correct, and layer. Artist-grade pigments make a visible difference once you've developed a layering style. The upgrade to reach for once you've filled a full journal with regular acrylics.
What we like
Stays wet 30-60 minutes, giving real time to blend and correct
Artist-grade pigments; colors stay vivid through heavy layering
What to know
Slower dry time; longer wait between layers than regular acrylics
Higher price; buy individual tubes once you know your palette
A Gelli plate is a soft, gelatin-like printing surface you spread paint across, add texture to (leaves, lace, crumpled plastic wrap, stencils), then press your journal page onto and peel. The result is a unique monoprint background in seconds. It's the technique that gives art journals their characteristic layered, organic look, and the most fun thing you'll do in week one. Size should match your journal page.
Gelli Plates — what's the difference?
A few common shapes, each making a different trade.
Small (4"×6")
Entry price, good for card-size prints and smaller journals.
Print area
4×6 inches
Material
Reusable mineral-oil gel
Best for Beginners on a tight budget; half-page backgrounds on smaller journals
Tradeoff Too small to cover a full journal page in one pull
Standard (6"×6")
The workhorse size, covering a half-page in one clean pull.
Print area
6×6 inches
Material
Reusable mineral-oil gel
Best for Most standard journals; the go-to first plate for beginners
Tradeoff Requires two overlapping pulls to fill a full double-page spread
Gelli Arts invented the modern gel printing plate, and this is the size that made it famous. The 6×6 inch surface covers a half-page of most standard journals in a single pull. Soft, self-leveling surface picks up fine textures from leaves, lace, and fabric. Real Gelli Arts, not a knockoff.
What we like
The original Gelli plate; other brands copy it but this is the real one
Picks up fine textures from leaves, lace, and fabric cleanly
Covers a half journal page per pull, right size to learn the technique
What to know
Requires a separate soft rubber brayer to spread paint evenly
Tears if stored with sharp tools; keep flat between sessions
Full journal-page coverage in a single pull, no seam lines where two smaller pulls meet. The 8×10 is the plate artists reach for when they want to fill a whole page in one composition. More paint per session, more dramatic results.
What we like
Covers a full 8×10 journal page in one pull, no seam lines
More working space means more texture variety per print
What to know
Uses much more paint per pull than the 6×6; can feel wasteful early on
Higher price jump; start with the 6×6 and upgrade with intention
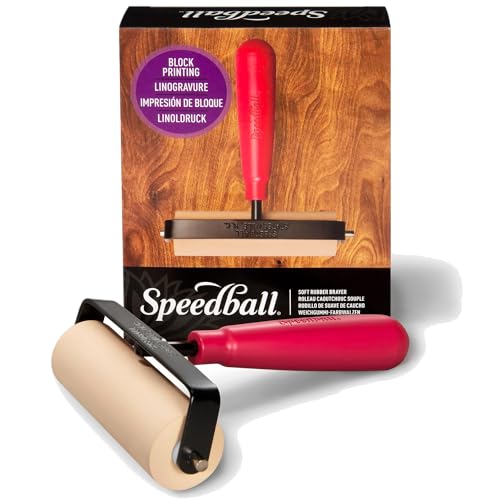
The Gelli plate only works well with a brayer. It spreads paint in the thin, even layer that picks up textures cleanly; a brush or your finger leaves streaks. Speedball's soft rubber version rolls out paint smoothly and works with both the 6×6 and 8×10 plates.
What we like
Soft rubber rolls paint out evenly without streaks or air bubbles
4-inch width works with both the 6×6 and 8×10 Gelli plates
What to know
Must be cleaned between color changes; dried paint ruins the next pull
Handle can loosen; tighten the screws before first use
You need two things: a flat or wash brush for covering backgrounds quickly, and fine-tip tools for adding text, outlines, and small marks on top of dried paint. A 5-6 piece brush set handles most of what beginners need. Paint markers are underrated for beginners: they let you add precise lines and text on wet or dry paint without diluting color or rewetting the paper underneath.
Best starter
Princeton
Snap! Paintbrush Set, 4 Brushes
$$
★★★★★Our rating
Princeton's Snap series was built specifically for mixed-media and acrylic work. Stiff enough to load paint and move it across the page, with enough spring to manage detail. A 5-6 piece set covers flat washes, round details, and the dry-brushing technique that adds texture over Gelli prints.
What we like
Designed for acrylics, stiff enough to load paint and springy for detail
Set covers wash, round, and flat shapes without redundancy
Noticeably better than no-name brush sets at a similar price
What to know
Bristles splay faster than artist-grade brushes in heavy mediums
Synthetic bristles don't survive dried acrylic; rinse every session
★★★★☆Our rating· Only 3 left in stock - order soon.
Posca markers are opaque, water-based paint in pen form: they write on dry acrylics, dark backgrounds, and even over gesso without bleeding or smearing. Use them for outlines, lettering, and layering bright marks on top of everything else. The 10-color set gives you the primaries plus the most-used mixing companions.
What we like
Opaque paint in pen form, writes on dark backgrounds and dried acrylics
Water-based, easy cleanup, and doesn't smell or off-gas
What to know
Fixed nib size; need multiple tip sizes for varied line weights
Nibs clog if pressed too hard on tacky or textured surfaces
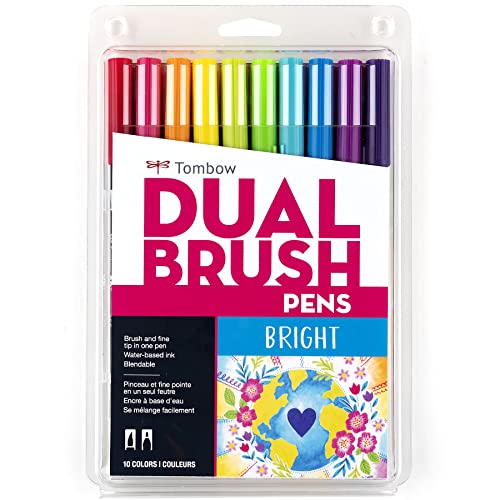
Dual tip: a flexible brush end for soft watercolor-like washes and a fine tip for outlines and lettering. Great for adding soft, transparent color over dried acrylics, or for journaling text that blends into your background instead of sitting on top of it.
What we like
Dual tip: brush end for washes, fine end for lettering and outlines
Water-blendable ink adds soft, transparent washes over dried acrylics
What to know
Ink is transparent, not opaque on dark or heavily painted backgrounds
Fine tip splits permanently from too much pressure; use a light touch
Gesso seals and primes a journal page before you start: it gives paint something to grip, prevents bleed-through on lighter paper, and adds a slight tooth that holds mark-making tools better. Apply one thin layer, let it dry, and paint over it. Mod Podge (matte version) doubles as a collage adhesive and a sealing varnish over finished pages. These two products cover 90% of what beginners need from the adhesive and medium category.
Best starter
Liquitex
Professional White Gesso, 8 oz
$16.99 as of Jun 22, 2026
★★★★★Our rating· In Stock
The benchmark gesso: thick enough to grip even slick covers and cardboard, dries in 20 minutes, and sands smooth when you want a glassy surface. Apply one thin coat before painting any journal page and you'll notice the difference immediately in how paint moves and how ink sits.
What we like
Grips even slick journal covers and card stock with one thin coat
Dries in 20 minutes, sands smooth if you want a glassy surface
What to know
Needs water dilution for very thin layers; practice ratio on scrap first
Brush marks stay visible when dry; treat them as texture, not defects
Mod Podge is the collage essential: it's an adhesive for gluing paper, photos, and fabric to journal pages AND a sealing varnish you brush over finished spreads to protect them. The matte version dries completely flat with no sheen, better than gloss for pages you'll write on.
What we like
Adhesive and sealing varnish in one jar; paste, then seal finished pages
Dries completely flat and matte; won't add unwanted sheen to writing areas
What to know
Cures cloudy if applied thick; use thin coats only
Not truly waterproof when cured; keep finished journals dry
Most beginners freeze in front of a blank journal page, afraid to waste paper they haven't earned yet. Here's what actually happens when you sit down and start anyway.
Art journaling has a reputation as something you discover by accident. You bought a journal to write in, started doodling in the margins, then added paint, then looked up six months later with 200 pages of visual experiments and a shelf of supplies you love. The entry is that casual. But the practice takes real time to develop, and knowing what to expect in the first few weeks makes the difference between a journal you fill and one that sits empty on your desk.
This is what your first month actually looks like.
Week one: your first Gelli pull
The best possible first session is also the most immediately satisfying: a Gelli plate print.
Here’s the process. Squeeze two or three colors of acrylic onto the plate (no blending, just drop them in rough patches). Spread them with a brayer until the plate is evenly coated in a thin layer of paint. Now add texture: press a crumpled piece of plastic wrap into the paint and pull it back up. Press a dried leaf. Press a piece of lace. Each object lifts paint in a unique pattern that can’t be replicated.
Then press a gessoed journal page onto the plate, smooth it flat with your palm, and peel it slowly from one corner. The reveal is the reason people get hooked. Every print is different. The colors mix in ways you couldn’t have planned. The texture from the plastic wrap or leaf reads clearly even through layers of paint. You’ve made something interesting on your first try without any drawing ability required.
Layer over the print while it dries (acrylics dry in minutes). Add a wash of diluted paint in a contrasting color. Stamp a word or pattern with an ink pad. Write something with a paint marker on top: a date, a line of text, a phrase you heard. Add some gesso over part of the spread to tone it back down. Let it dry and add another layer.
You’ve just made your first mixed-media art journal spread. It took about an hour.
Weeks two and three: the ugly phase
Every art journal page goes through an ugly phase. This is when most beginners stop.
The ugly phase happens somewhere in the middle of a spread, when you’ve covered the original Gelli print with paint and it looks muddy and overworked and nothing like the reference image you were vaguely thinking of. The response is usually one of two things: either you close the journal and don’t come back for a week, or you keep going and discover that the ugliness is just a layer, not a final state.
Keep going.
Add white gesso over the parts you hate. Let it dry. Now you have a partially obscured background with texture showing through the thin white layer, which is usually more interesting than either the original or the muddy middle. Add color on top of the gesso. Write over it. Add collage elements: torn pages from old magazines, patterned tissue paper, printed ephemera. The collage pieces don’t have to mean anything; they’re texture and color and contrast.
The specific skills to develop in weeks two and three:
Gesso as paint. White gesso isn’t just primer. It’s a tool for toning down areas, creating highlights, and adding a milky translucence over existing layers. Apply it thin and let color show through, or apply it thick and paint over it with a totally new color scheme. Most experienced art journalers use gesso at every stage of a spread, not just at the beginning.
Layering without muddying. The sequence matters: dark over light works less well than light over dark in acrylics (unless you’re using paint pens or gesso, both of which are opaque). Let each layer dry before adding the next. Work fast or work patient, but not both at once.
Text as a design element. A line of writing across a painted page (your own handwriting, a stamp set, a stencil) does something visually that no amount of additional paint can replicate. It creates scale, contrast, and the sense that the page has something to say. Even if the words are illegible (many art journalers intentionally write so fast that it becomes texture, not language), text grounds the composition.
By the end of your first month, if you’ve been filling pages regularly (even just one or two a week), you’ll notice something: you have preferences.
There are colors you keep reaching for. There are techniques you find yourself using on every page: maybe it’s always the Gelli print as the first layer, or maybe you start every spread with a gesso background and then paint directly onto it. Maybe you’ve discovered that collage makes you happy and paint feels like an obligation, or the opposite. These aren’t rules you’ve been taught; they’re patterns that emerged from doing.
This is the actual value of the practice. Art journaling isn’t about making beautiful pages (though you will make some). It’s about developing a visual vocabulary through repetition. After 20-30 pages you know what you like. After 50-60 you know why. That knowledge is what actually transfers to other creative practices (watercolor, illustration, design, photography, whatever you want to go toward next).
A few things beginners still overthink at week four:
Saving pages. There are no pages to save. The journal is for experiments. Fill every one.
Fixing mistakes. There are no mistakes in the sense you’re imagining. A color that’s wrong is a layer waiting to be covered. A spread you hate is texture for the next layer. You can always go back and add more.
Being original. Every technique you’ll learn in your first year was invented by someone else and taught to someone else and is being used by thousands of people simultaneously. That’s fine. Learning to use a technique fluently is its own kind of originality.
Having the right supplies. The supplies you have are the right supplies. The ones you don’t have yet don’t matter yet. Every art journaler believes they need more than they have; most need fewer.
Fill it completely. Don’t stop at page 20 and move to a new one.
When it’s full, compare the first 10 pages to the last 10. The difference will be visible in a way that’s hard to describe before you experience it. The first pages will look earnest and careful and a little stiff. The last pages will look more confident, messier in good ways, with moments that genuinely surprise you. That’s not because you got better (though you did): it’s because you stopped being afraid of the pages.
Start a second journal. The learning compounds.
Save your money
What you don't need yet
Beginners get pressured to buy a lot of stuff that doesn't help them play
better. Here's what we'd skip on day one.
Alcohol inks — Beautiful fluid effects, but expensive, fume-y, and they destroy paper that isn't Yupo or ceramic tile. Learn acrylics for a full journal first.
Embossing powder and heat gun — A fun rabbit hole, but it belongs in month three, not week one. Acrylic stamping and mark-making achieves the same visual weight without the setup.
Copic or professional alcohol markers — At $6-10 per marker, Copics are a significant investment. Posca paint markers and Tombows do what you need as a beginner for a fraction of the price.
Die-cutting machine (Cricut or Silhouette) — Great for cutting shapes and stencils at volume, but you can hand-cut shapes for months before this matters. Add it after you have a clear use case.
Specialty inks and mists (Distress, Glimmer Mist) — Distress oxides, Heidi Swapp sprays: all lovely, none essential. Start with gesso and acrylics and add specialty inks once you know your layering style.
First week
Your first seven days
A short, real plan to get from gear-on-doorstep to actually playing.
Order your journal and Gelli plate together so they arrive the same day. · Buy
On day one: gesso two or three pages in your journal with a thin coat of white gesso. Let them dry overnight. This is prep work, and it matters. · Action
Do your first Gelli pull: squeeze two or three colors of acrylic onto the plate, spread with your brayer, press a crumpled piece of plastic wrap into the paint for texture, then press a gessoed journal page onto the plate and peel slowly. The reveal is the reason people get hooked. · Action
Layer over the print: add a wash of diluted paint, stamp a word or pattern over it, and write something with a paint marker on top. You've just made your first art journal spread. · Action
Don't save blank pages for when you're 'good enough.' Fill every page with experiments until the journal is done. The only way to get better is to cover more paper. · Action
Order brushes and paint markers so you have detail tools before you finish the first spread. · Buy
Do I need to know how to draw to start art journaling?
No. Art journaling is a mixed-media layering practice, not an illustration exercise. Most of what makes a spread interesting (color, texture, pattern, composition) has nothing to do with drawing ability. Collage elements, stamps, stencils, and Gelli prints do most of the visual work.
How is art journaling different from bullet journaling?
Completely different. Bullet journaling (BuJo) is a productivity and planning system built around lists and trackers. Art journaling is a visual mixed-media art practice where the page is an expressive surface, not a calendar. They share the word 'journaling' and almost nothing else.
What paper weight do I actually need?
At least 90 lb mixed-media paper for acrylics, stamps, and light washes. If you want to use heavy watercolor washes or pour paint, go to 140 lb. Regular composition notebook or diary paper (50-70 lb) will buckle and bleed through immediately.
Can I use watercolors instead of acrylics?
Yes, but you'll need heavier paper, at least 140 lb cold-press watercolor paper. Watercolors require much more water than acrylics and will destroy 90 lb paper in a wet wash. Acrylics are more forgiving of paper weight, which is why they're the standard recommendation for beginners.
What's a Gelli plate and do I really need one?
A Gelli plate is a soft printing surface that makes monoprint backgrounds: you spread paint, add texture with leaves or lace or crumpled plastic, then press your page onto it and peel. You don't need one to start art journaling, but it's the technique most associated with the practice. Skip it the first week if budget is tight; add it once you're sure you're hooked.
r/artjournaling — Active community for sharing pages, asking technique questions, and getting feedback on supplies. Beginner-friendly. Skip gear-recommendation threads from new members; search the wiki and top posts first.
Art Journaling Magazine (Stampington) — Biannual print magazine by the publisher that helped codify the practice. Deep technique features, artist profiles, and supply roundups. Physical issues worth collecting for the spreads alone.
Willowing Arts: Life Book — Annual mixed-media online art course that's been running since 2011. Each year brings 50+ instructors teaching techniques across painting, collage, illustration, and art journaling. Good structured curriculum once you've been practicing independently for a few months.
Art journaling beginner tutorials (YouTube) — Search 'art journaling beginner tutorial' on YouTube. Filter by upload date (last year) and sort by view count. The community is active and tutorials are free. Watch three or four before buying anything else.
Gelli Arts Blog — Tutorials and technique videos from the manufacturer of the Gelli plate. The source for monoprinting techniques, texture ideas, and troubleshooting the plate. Free and genuinely useful for anyone starting with Gelli printing.
As an Amazon Associate, JustBeginning earns from qualifying purchases.
We may also earn commission from other affiliate programs linked on this
page. Editorial recommendations are independent; we don't choose
products based on commission rates.
Product prices and availability are accurate as of the date and time
indicated and are subject to change. Any price and availability
information shown on Amazon at the time of purchase will apply.
Our top pickStrathmore 400 Series Mixed Media Art Book, 5.5×8.5"


 Best starter