Acrylics are the smartest medium to start with. They dry fast, clean up with water, and work on almost any surface. The learning curve is gentler than oils, the gear is simpler than watercolor, and a solid starter kit costs under $80. Here's what actually matters.
By Colin B. · Published May 15, 2026 · Last reviewed August 7, 2026
Masterson Sta-Wet Premier Palette
— The Masterson stay-wet palette keeps your mixes workable for hours. The single biggest upgrade for new painters.
Budget total
$55
Typical total
$100
Acrylic painting is one of the more accessible art hobbies to start. A canvas pad, a basic paint set, and a cheap brush kit gets you going for around $55. Spending $100 gets you a proper stay-wet palette and decent synthetic brushes that'll last.
We earn commission on qualifying Amazon purchases — see our
affiliate disclosure.
Price tiers and budget totals shown above are editorial estimates;
actual Amazon prices vary.
At a glance
Our top pick in each category
The fastest path through this guide — each best-starter pick by category.
Scroll for the budget and upgrade alternatives.
Start with student-grade paint, not professional. The pigment concentration is lower, yes, but the difference is invisible to a beginner's eye. Spend money on more colors and more canvas, not on paint you're not ready to appreciate.
Synthetic brushes only. Acrylics' alkaline water content is hard on natural hair, and synthetic bristles actually hold a crisper edge for hard shapes. The brush marketing that says 'kolinsky sable' is not for you yet.
Get a stay-wet palette before you start. Acrylics dry on a regular palette in 10-30 minutes. A stay-wet palette (damp sponge under a sheet, sealed lid) keeps your colors workable for hours. A paper plate costs nothing but teaches you bad habits from day one.
Student-grade or artist-grade is the first question every beginner asks, and it matters less than the marketing suggests. Student-grade paint has more filler and less pigment; colors are slightly less vibrant and mix slightly less cleanly. For your first year, you won't notice. The reason to buy a set instead of individual tubes: you need to learn what colors you actually reach for before spending $8-15 per tube on artist grade. Get a set, experiment freely, then upgrade specific colors as you run out.
Paints — what's the difference?
A few common shapes, each making a different trade.
Student Grade
More filler, less pigment. Fine for learning. The difference from artist grade is invisible to beginners.
Price per tube
$1–3
Pigment load
Lower
Lightfastness
Good
Best for Beginners, high-volume practice, experimenting with color mixing
Tradeoff Colors mix slightly murkier than artist grade; less vibrant at full saturation
Sixty colors sounds like overkill, but having wide range while you're learning what you like is genuinely useful. The pigment quality is above average for the price, the caps seal reliably, and the selection covers the full spectrum without requiring mixing skills you haven't built yet. This is the set we'd buy on day one.
What we like
60 colors means you can experiment freely without needing mixing skills yet
Above-average pigment quality for the student-grade price
Full spectrum coverage, no obvious gaps to work around
What to know
22ml tubes are small; stock up on titanium white and burnt umber early
Liquitex BASICS is the standard student-grade recommendation from most art instructors. Consistent pigment, reliable colors, and a brand that's been making acrylics for decades. The 24-color set is less overwhelming if you prefer to mix than to reach for pre-mixed colors.
What we like
Instructor-recommended brand with decades of consistent quality
Fewer colors encourages mixing practice for faster skill development
What to know
24 colors means more mixing, frustrating if you'd rather reach than blend
★★★★☆Our rating· Only 18 left in stock - order soon.
Golden makes the best acrylics available, and the OPEN line is specifically formulated to dry slower, addressing one of the biggest frustrations painters eventually hit with standard acrylics. Once you've painted enough to feel colors drying before you can blend them, this is the upgrade. Not before.
What we like
Formulated to stay wet longer, solving the blending frustration of normal acrylics
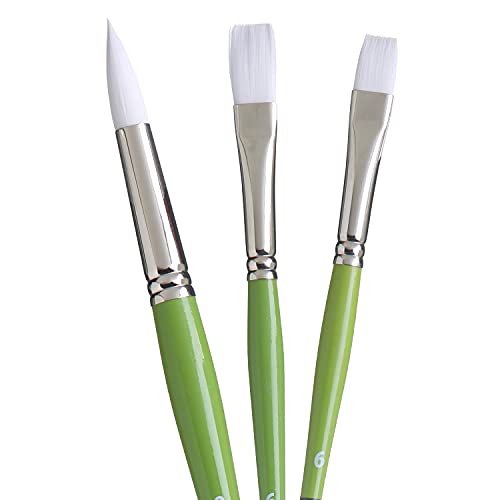
You need three basic brush shapes: a flat for broad coverage, a round for detail and curves, and a filbert (oval-tipped) for blending. Everything else is optional at first. Buy synthetic brushes only. Acrylics' water content is hard on natural hair, and synthetic bristles actually hold up better and spring back cleanly. A good beginner set covers all the shapes you'll need for well under $30.
Best starter
Princeton Artist Brush
Princeton Snap! Paintbrush Set, Assorted Sizes
$14.04 as of Jun 22, 2026
★★★★★Our rating· Only 6 left in stock - order soon.
Princeton makes consistently good synthetic brushes, and the Snap! line is their entry-level set built specifically for acrylics. Assorted sizes covering the shapes you'll actually use (flat, round, and angle shader), comfortable handles, and a price point that means you won't feel guilty working them hard. Wash immediately after each session; dried acrylic ruins any brush permanently.
What we like
Synthetic bristles spring back cleanly, holding an edge better than cheap alternatives
Covers flat, round, and angle shader, covering every shape you'll use in year one
What to know
Don't let them stand in water; it bends bristles permanently
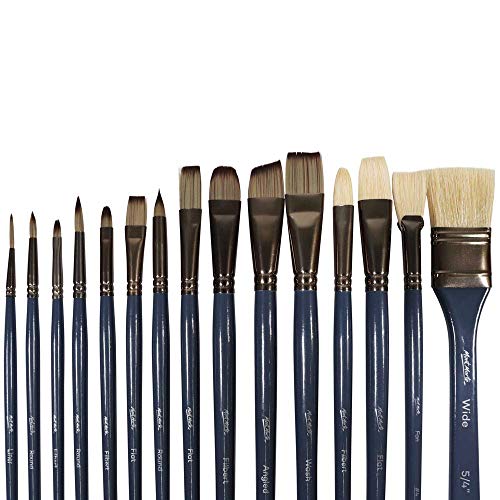
If you want more brushes to experiment with shapes before committing, Mont Marte's student sets give you coverage at low cost. The bristles aren't as springy as Princeton's, but for figuring out what shapes work for how you paint, they're more than adequate.
What we like
15 brushes at low cost let you find which shapes suit your style
Low price means no hesitation working them hard during practice
What to know
Less springy than Princeton's; expect shorter lifespan under regular use
Palette knives aren't just for mixing; they're a distinct mark-making tool that creates textures no brush can match. Even if you never make an exclusively palette-knife painting, you'll use one to scrape, feather, and build impasto texture. A 5-piece stainless steel set costs under $15 and opens up a whole dimension of technique.
What we like
Creates textures no brush can match: scraping, feathering, impasto effects
Under $15 for five shapes opens up a whole new mark-making vocabulary
What to know
Requires a different mindset than brushwork, taking a few sessions to feel natural
Start with a canvas pad. A canvas pad gives you multiple pre-primed surfaces bound like a notepad, perfect for practice without the psychological weight of 'I'm wasting a real canvas.' Canvas panels (rigid board with canvas glued on) are the next step: real canvas texture at low cost, good for finished-ish studies. Stretched canvas (the 3D kind you'd hang on a wall) is for pieces worth keeping. Don't start there.
Best starter
Arteza
Canvas Pad, 9x12 in, Pack of 2 (20 sheets)
$17.70 as of Jun 22, 2026
★★★★★Our rating· In Stock
A canvas-texture pad takes the pressure off. These aren't 'real canvases,' and that's the point. You'll experiment more freely, waste less guilt, and go through a lot of surfaces in your first month of learning. Twenty pre-primed sheets gives you plenty of room to practice without rationing. Start here. Move to panels and stretched canvas once you're making paintings you want to keep.
What we like
Pre-primed sheets remove the guilt of wasting a real canvas
20 sheets per pack, enough to practice freely your entire first month
What to know
Slightly less authentic surface feel than panels or stretched canvas
Canvas panels are the real thing at panel-flat price. Good for studies, small finished paintings, and practice work you might actually keep. The 5x7 format is small enough to finish in one session, the right scale when you're still learning.
What we like
Real canvas texture at flat-panel price, good for keepers
5x7 format is small enough to finish in a single session
What to know
Rigid backing feels slightly different from stretched canvas under the brush
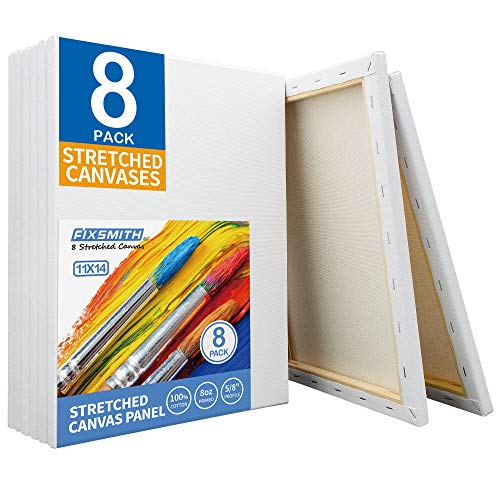
Stretched White Blank Canvas - 11x14 Inch, 8 Pack, Primed, 100% Cotton, 5/8 Inch Profile of Super Value Pack for Acrylics, Oils & Other Painting Media
$21.99 as of Jun 22, 2026
★★★★☆Our rating· In Stock
Once you're making paintings worth keeping, stretched canvas is the right surface. The slight give under the brush feels different from panels in a pleasant way, and a finished piece on stretched canvas goes straight to the wall. Eight canvases at 11x14 is the right quantity for the intermediate phase, enough to experiment, sized large enough to work freely.
What we like
Slight give under the brush feels more satisfying than painting on flat panels
11x14 is large enough to work freely without being overwhelming
What to know
Check texture before painting; rough spots need a gesso coat first
This category makes an outsized difference in your experience. Standard acrylics dry in 10-30 minutes in open air. On a regular palette,, your mixes are gone before you finish the painting. A stay-wet palette uses a damp sponge underneath translucent paper to keep paint workable for hours, sometimes days. It's a small buy that solves one of the most frustrating things about acrylics from your very first session.
Best starter
Masterson
Sta-Wet Premier Palette
$$
★★★★★Our rating
The Masterson is the stay-wet palette everyone recommends because it's the one that actually works. The airtight seal keeps paint workable for days between sessions. Replacement sponges and paper are cheap and available everywhere. If you only upgrade one thing from the bare minimum, make it this.
What we like
Airtight seal keeps paint workable for days between sessions
The single most impactful upgrade for working with acrylics
Replacement sponges and paper are cheap and available everywhere
What to know
Needs regular cleaning; mold grows fast if left with wet paint for days
2X Disposable Palette Paper 9x12 Inches | Mess-Free Paper Artist Palette for Acrylic, Oil Paint
$16.99 as of Jun 22, 2026
★★★★☆Our rating· In Stock
If you're not ready to commit to a stay-wet palette, a disposable palette pad is better than a paper plate: the surface is smooth, sheets peel away cleanly, and you don't scrape dried paint between sessions. Not ideal for long sessions, but fine for short work while you're deciding.
What we like
Smooth surface and clean peel-away sheets, far better than a paper plate
What to know
Paint dries fast in open air, not ideal for sessions over 45 minutes
Ongoing cost vs. the one-time investment of a stay-wet palette
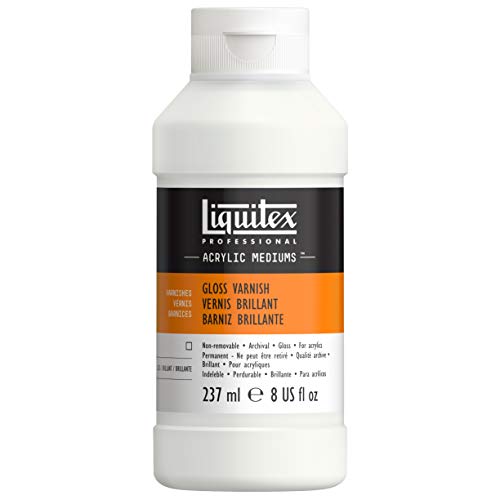
Mediums modify how paint handles. For your first few months, you only need one: a matte medium. Use it to thin paint without the color loss of plain water, and to create transparent glazes. Varnish is how you protect finished work. One coat of varnish over a fully dried painting protects from UV and unifies the surface sheen. Everything else (retarder, flow improver, gel medium) comes later.
Best starter
Liquitex
Professional Matte Medium
$16.97 as of Jun 22, 2026
★★★★★Our rating
Matte medium is the Swiss Army knife of acrylic mediums: it extends paint, creates thin glazes, improves adhesion on unusual surfaces, and gives a consistent matte finish. Start here instead of experimenting with multiple mediums. You won't need anything else for months.
What we like
Extends paint without washing out pigment the way plain water does
Works as extender, glaze medium, and adhesion primer, genuinely versatile
What to know
More than you need in week one; start using it in week two or three
Varnish protects finished work from UV, dust, and moisture. It also unifies the surface. A painting with both matte and gloss passages looks patchy; varnish makes the whole surface read consistently. Apply once your painting has dried at least a week. One coat is usually enough.
What we like
Protects finished work from UV, dust, and moisture long-term
Unifies surface sheen, eliminating patchy matte/gloss mix on finished paintings
What to know
Apply in a dust-free space; airborne particles get trapped in the wet film
Acrylics reward beginners faster than almost any other paint medium. Here's what actually happens in your first four weeks: the stuff that clicks, the frustrations that are normal, and how to get past them.
Acrylic painting has one big advantage over almost every other visual art: the feedback loop is fast. A layer dries in 20 minutes. You can paint over mistakes in half an hour. In a month of regular painting, you’ll learn more than someone doing weekly watercolor classes for a year, not because you’re more talented, but because you’re getting more reps.
The learning curve is real, but it’s not steep. What trips most beginners isn’t the paint. It’s starting with the wrong expectations. This is what your first month actually looks like.
Week 1: Learning the material
Before you make art, you need to understand what you’re working with. Acrylics behave differently than any other medium, and fighting that behavior is the main source of beginner frustration.
The drying problem. Standard acrylics dry fast, surface-dry in 10-30 minutes depending on humidity and paint thickness. This is a feature (you can layer quickly) and a problem (your mixes die on the palette before you finish the painting). A stay-wet palette solves the second half. Get one before your second session. Mist your palette lightly between strokes.
The color-shift problem. Wet acrylic colors dry slightly darker and more matte than they look in the tube. This surprises everyone. It means the color you mixed while painting is not quite the color you wake up to the next morning. After a month of painting, you’ll start predicting the shift. For now, know it’s coming and don’t touch a painting you like until it’s fully dry.
Do this in week one: Fill a whole canvas pad sheet with color swatches. Load a small amount of each color in your set, brush it on, let it dry, and compare wet vs. dry. Then mix your primaries (red + yellow, yellow + blue, blue + red) and see what you get. Watch what white does to each color. This exercise is boring and it is the most useful thing you’ll do all month.
In week two, you need to make a painting, not a study, not swatches, but an actual picture. It doesn’t have to be good. It has to be finished.
Pick a simple subject. A piece of fruit. A coffee mug. The view out your window. Still lifes are still the best beginner subject for a reason: they don’t move, they have volume, and they require you to actually look. A vase of flowers is more educational than an abstract blob, because the flowers will tell you when you got the color wrong.
The one rule for week two: Work dark to light. Lay in the darkest shadows first, then the midtones, then the lightest highlights. This is how most opaque painting works, and it’s the structural principle that makes everything feel cohesive. Beginners often paint light areas first and try to add shadows on top; the shadows end up murky and disconnected.
On composition: Don’t center your subject exactly. Move it slightly to one side. This sounds like a small thing and it immediately makes paintings feel more intentional. That’s it. That’s all the composition advice you need for week two.
Don’t be precious about the result. The goal is a finished painting, not a good one. Finishing something (deciding it’s done, putting down the brush) is a skill, and it’s harder than it sounds.
By week three, you’ve probably identified your specific frustrations. Most beginners hit a predictable short list:
Muddy colors. This is almost always caused by either over-mixing (blending colors on the canvas past the point where they should stop) or using too much water to thin paint (which washes out the pigment). Use matte medium to thin instead of water. Mix colors to the edge of what you want on your palette, not on the canvas.
Edges too hard or too soft. A painting where everything has the same sharp, painted-outline edge looks flat. So does one where everything blurs together. The skill is controlling edge quality deliberately: hard edges where two areas of high contrast meet, soft edges where one area transitions gradually into another. Practice painting a sphere: the highlight is soft, the shadow edge where it turns away from the light is soft, but the cast shadow has a sharp edge near the object and softens away from it.
Proportions that feel off. You drew the apple and it looks wrong. This isn’t a paint problem; it’s a drawing problem. Spend 10 minutes before each painting session doing quick sketches of the subject with a pencil. The act of measuring and drawing trains your eye faster than painting the same subject multiple times.
This is when a lot of beginners feel discouraged. That’s normal. You’re now good enough to see what’s wrong with your work, and not yet good enough to fix it. This is the most important phase. Keep going.
Week 4: When things click
Around week four, something shifts. You stop thinking about the paint and start thinking about the subject. The muscle memory for brush loading, palette management, and thin vs. thick application is becoming automatic. You have enough vocabulary to start making intentional decisions.
Value is everything. If you haven’t thought about value yet (the lightness or darkness of a color, independent of its hue), week four is when it becomes urgent. Two colors can be very different in hue (orange vs. blue) but very close in value (both medium gray when photographed in black and white). Paintings that feel flat are usually suffering from insufficient value contrast. Before you paint, sketch your subject in grayscale or squint at it until the colors disappear. You’re looking for a range from near-white to near-black.
One thing to try: Take a painting you’ve already finished and photograph it. Convert the photo to grayscale on your phone. Does it read clearly as a picture in black and white, or does it flatten into gray mush? If it’s mush, your values are too similar. This is the most useful feedback trick in painting.
Things you’ll fail at (and that’s completely normal)
Every beginner fails at the same handful of things. You will too:
Overworking wet paint. You keep brushing at an area that was fine three strokes ago. The color gets muddy. Stop sooner. If an area looks good, leave it. Move to something else.
Painting too small. Small canvases seem less intimidating but they’re actually harder: every brushstroke is visible, every proportion error is magnified. Work at 8x10 minimum to start.
Using too much water. Thin paint with matte medium or glazing medium, not plain water. Water weakens the binder that holds pigment to canvas and causes paint film to crack over time.
Comparing your week-one work to advanced paintings. The people posting beautiful acrylic paintings online have either been painting for years or carefully selected their best work. Your week-two painting is not supposed to look like that.
What to do in month two
A few things accelerate improvement dramatically once you have the basics:
Copy a master. Find a painting you love (a landscape, still life, anything) and reproduce it. Copying forces you to look hard at decisions you’d otherwise skip: where is the edge? Is that really that color? This is how artists have trained for centuries.
Take one structured class. Online or in-person, a single course that walks you through a complete painting step by step will expose you to workflow decisions you’d take months to discover on your own. Domestika, Skillshare, and Will Kemp’s site all have good options.
Keep every painting. Even the bad ones. Month-six you will want to see where you started.
Save your money
What you don't need yet
Beginners get pressured to buy a lot of stuff that doesn't help them play
better. Here's what we'd skip on day one.
Artist-grade paint — Student-grade is genuinely fine until you can feel the difference in how colors mix. That takes months of painting, not weeks.
Gesso — Almost all canvas pads, panels, and stretched canvases come pre-primed. You don't need gesso until you're painting on unusual surfaces like wood or cardboard.
A retarder medium — Once you're actually frustrated by paint drying too fast mid-blend, a retarder or switching to Golden OPEN acrylics solves it. Don't add complexity yet.
A standing easel — Painting flat on a table works fine. Buy a standing easel once you find yourself wishing you could step back and see the painting from a distance.
Natural hair brushes — Natural-hair brushes (kolinsky sable, etc.) are for oil painting and watercolor. Acrylics will ruin them.
A projector or light pad for tracing — Transferring images mechanically is a valid technique, but it bypasses the observational skills that make everything else easier. Learn to look first.
First week
Your first seven days
A short, real plan to get from gear-on-doorstep to actually playing.
Order the paint set and canvas pad first; they arrive fast and you can start painting before the brushes. · Buy
Set up a dedicated painting spot. Acrylics clean up with water when wet, but the dried plastic film stains fabric and wood permanently. Use a drop cloth or work on a surface you don't mind marking up. · Action
Do a color-mixing exercise your first session. Load small amounts of each primary color (red, yellow, blue) plus white, and see how many colors you can make. You'll learn more about your paint from 30 minutes of mixing than from an hour of watching technique videos. · Learn
Paint every day for the first week, even for 20 minutes. Motor memory builds fast and consistency matters more than session length. · Action
Find one instructor and stick with them for the first month. Too many teachers too early creates conflicting mental models. · Learn
Lena Danya (YouTube) · Clear, methodical beginner instruction. Great for complete newcomers to painting.
Will Kemp Art School · Structured lessons focusing on painting fundamentals and color theory.
Add the stay-wet palette by session two or three, as it changes how long your mixes stay usable and teaches you to work more deliberately. · Buy
Should I start with student-grade or artist-grade paint?
Student-grade. The pigment difference is real but invisible to a beginner's eye. You'll learn more from having a wide range of colors to experiment with than from having premium pigment in fewer tubes. Upgrade specific colors to artist-grade as you run out and discover which ones you actually rely on.
Can I paint over mistakes?
Yes, easily. This is one of the best things about acrylics. Once a layer dries (usually 10-30 minutes), you can paint directly over it. The dried layer won't reactivate. Keep painting over until you get what you want. Some painters finish a piece by painting out everything they don't like three or four times over.
How do I keep paint from drying on my palette?
Use a stay-wet palette: a damp sponge under palette paper keeps acrylics workable for hours. In a pinch, lightly mist your palette with a water spray bottle. Both strategies buy time; the stay-wet palette is the real solution. A regular palette is more frustration than it's worth with acrylics.
Do acrylics work on any surface?
Almost. Acrylics stick well to canvas, paper, wood, cardboard, and most rigid surfaces. They won't adhere to oily or wax-coated surfaces. For non-canvas surfaces, a coat of gesso first improves adhesion significantly.
What's the difference between matte and gloss finish?
Matte is non-reflective and slightly chalky-looking when dry. Gloss is shiny and makes colors look more saturated. You can mix them to get satin. For most beginners, matte medium is the versatile choice, easier to photograph, and you can always varnish with gloss at the end if you want the richness.
How long do acrylics take to dry fully?
Surface-dry in 10-30 minutes depending on paint thickness. Fully cured (hard enough to varnish safely) takes 1-2 weeks for thick impasto layers, a few days for thin applications. Don't varnish too soon; moisture trapped under thick paint can turn a gloss varnish milky.
Lena Danya (YouTube) — One of the best beginner-friendly acrylic channels. Clear instruction, good fundamentals, no jargon. Start here if you want structured guidance.
Will Kemp Art School — Free structured lessons covering color theory, composition, and painting technique. Especially strong on color-mixing fundamentals.
Proko (YouTube) — Drawing fundamentals channel. Acrylic painting builds on the ability to see and draw. Proko's videos on construction and proportion will accelerate your painting faster than paint-specific content.
Golden Artist Colors Learning Center — Deep technical content on acrylic chemistry, mediums, and archival concerns. Way more than you need to start, but invaluable when you hit a specific problem: why is my paint cracking? What makes a work archival?
r/learnart — Friendly subreddit for beginners seeking critique and guidance. Post your work, ask questions, browse the wiki for structured learning paths.
r/acrylicpainting — Community of acrylic painters across skill levels. Good for seeing what's possible, asking medium-specific questions, and getting comfortable posting work.
As an Amazon Associate, JustBeginning earns from qualifying purchases.
We may also earn commission from other affiliate programs linked on this
page. Editorial recommendations are independent; we don't choose
products based on commission rates.
Product prices and availability are accurate as of the date and time
indicated and are subject to change. Any price and availability
information shown on Amazon at the time of purchase will apply.


 Best starter