Oil painting has a five-hundred-year track record for a reason: the paint is blendable, forgiving, and produces depth no other medium can match. The learning curve is real — solvents, drying times, fat-over-lean rules — but none of it is complicated. Here's what to buy first and what to ignore.
By Colin B. · Published May 15, 2026 · Last reviewed June 1, 2026
Oil painting has a higher startup cost than acrylics — solvents and mediums add up. A functional starter kit (paint set, brushes, canvas boards, Gamsol, and a tabletop easel) runs $80-150. Spend less if you're unsure it'll stick; spend more on brushes if you know you're committed.
We earn commission on qualifying Amazon purchases — see our
affiliate disclosure.
Price tiers and budget totals shown above are editorial estimates;
actual Amazon prices vary.
At a glance
Our top pick in each category
The fastest path through this guide — each best-starter pick by category.
Scroll for the budget and upgrade alternatives.
Start with student-grade paint, not professional. The pigment concentration is lower, but the difference is invisible to a beginner. Spend that money on canvas to paint more freely — you'll improve faster through volume than through marginally better paint.
Get Gamsol (odorless mineral spirits) before you get anything else. Traditional turpentine and cheap brush cleaner have fumes that are genuinely unpleasant — and potentially harmful over time. Gamblin Gamsol is the modern standard: nearly odorless, effective, and far safer. Do not skip the ventilation.
Learn the fat-over-lean rule before your second session. Each subsequent layer of oil paint should contain more oil (fat) than the layer beneath it (lean). Reversing the order causes top layers to dry faster than bottom layers, eventually cracking. It sounds technical. It is not hard. Look it up once, follow it forever.
Student grade vs. artist grade is the first question everyone asks, and the honest answer is: don't buy artist grade yet. Student-grade paints have less pigment and more filler, but for your first year you won't be able to tell — you're still learning to mix and apply, not to detect subtle pigment quality. Buy a set rather than individual tubes. The reason: you don't yet know which colors you'll reach for constantly and which you'll ignore. A starter set lets you experiment freely, and you upgrade specific colors to artist grade when you run out and know you love them.
Paints — what's the difference?
A few common shapes, each making a different trade.
Student Grade
More filler, less pigment. The right choice for your first year — the gap from artist grade is invisible to beginners.
Price per tube
$3–8
Pigment load
Lower
Mix clarity
Good
Best for First year, learning to mix, experimenting freely
Tradeoff Colors slightly less vibrant; some hue replacements for expensive pigments
Winton is the benchmark student-grade oil paint — the set most art teachers recommend first, and for good reason. Consistent pigment, reliable colors, and a brand that's been making paint for nearly two centuries. The 10-tube, 21ml selection covers the whole spectrum without overwhelming you with choices. Titanium white goes fastest; buy an extra large tube separately.
What we like
Trusted brand with nearly 200 years of paint-making behind it
10-color range covers the full spectrum for mixing
Consistent pigment quality you can count on across the set
What to know
Cadmium colors are hue replacements — not the real cadmium pigment
Titanium white runs out three times faster than any other tube
More colors at a lower price per tube than W&N Winton. The pigment quality is a step below Winton, but for learning color mixing and building brush confidence, it's entirely adequate. Good pick if you want a wider range from day one without the Winton price.
What we like
24 colors at a lower price per tube than Winton
Wide range lets you experiment with mixes from day one
What to know
Pigment quality a step below Winton — less vibrant in final mixes
Some colors more translucent than the tube's opacity label suggests
Gamblin's 1980 line sits between student and artist grade — high pigment load, no cheap fillers, priced for painters not ready for the full artist-grade jump. This Exclusive Set includes 8 colors in 37ml tubes plus a free cradled wood panel. Once you've been painting a few months and want noticeably cleaner mixes, this is the right step up.
What we like
High pigment load without the full artist-grade price jump
Includes a free cradled wood panel — one less thing to buy
What to know
Several colors lean transparent — not great as flat opaques
You will go through titanium white three times faster than any other color — it's in almost every mix. Whatever starter set you buy, pick up a large tube of white separately. This is not optional.
What we like
200ml tube means you won't run out mid-painting
Matches the Winton starter set exactly — no mixing compatibility worries
What to know
Student-grade pigment limits ultimate mixing punch at advanced levels
Oil painting brushes come in two main types: hog bristle (stiff, natural, good for thick paint and visible texture) and synthetic filament (smoother, better for blending and fine detail). Beginners should start with a bristle set — oil paint is thick, and bristle brushes move it the way it wants to be moved. You'll want a few flat or filbert shapes in sizes 4, 6, and 8, plus a small round for details. Don't buy 20 brushes. Buy six.
Best starter
Winsor & Newton
Winton Long Handle Bristle Brush Set, 5-Pack
$49.89 as of Jun 22, 2026
★★★★★Our rating· In Stock
A well-curated five-piece set covering the shapes most used in oil painting: a round, filbert, flat, bright, and fan. Good quality hog bristle that holds up to scrubbing and heavy paint loads. The step up from dollar-store brushes is immediately noticeable — these move paint intentionally, not randomly.
What we like
Five shapes cover everything you need in one purchase
Quality hog bristle moves thick oil paint the way it wants to go
What to know
Fan brush is rarely useful for beginners — don't plan around it
★★★★☆Our rating· Only 20 left in stock - order soon.
Under $15 for a full set of white bristle brushes in a reusable zip pouch. Not as well-made as W&N, but entirely adequate for learning — they move paint, they clean up, and losing one or ruining one through misuse doesn't sting. The right starter if you're not sure you'll stick with oil painting.
What we like
Under $15 for a full set — losing one doesn't sting
Zip pouch keeps brushes organized and protected between sessions
Synthetic filament brushes come into their own once you're doing blending and glazing work. The Princeton Aspen series is specifically designed for oil, gouache, and acrylic — softer than hog bristle, they spring back cleanly and are excellent for smooth transitions, fine detail, and applying oil mediums. Add a couple to your kit once you've been painting for a month or two.
What we like
Soft synthetic filament is excellent for smooth blending and glazing
Springs back cleanly — gives precise, controlled strokes
What to know
Too soft for heavy paint loads and textured impasto work
Overkill before you have basic bristle brush technique down
For beginners, canvas boards (rigid, flat, inexpensive) are better than stretched canvas (softer, springy, more expensive). The rigid surface is easier to work on, won't flex under heavy paint, and doesn't require an easel — you can lean it against a stack of books. Canvas paper pads are even cheaper for practice, but the surface texture feels different from canvas and can create bad habits. Start with canvas boards at 8×10 or 9×12 — small enough to finish, large enough to paint with a real brush.
Best starter
Fredrix
Artist Series Primed Canvas Panels, 8x10, 12-Pack
$
★★★★★Our rating
Fredrix has been making painting surfaces since 1868 and their canvas boards are the industry standard. Primed cotton duck, consistent texture across the pack, and cheap enough that you can paint freely without anxiety. Twelve boards means twelve paintings — more than enough to learn with. Buy two packs.
What we like
Industry standard since 1868 — consistent primed cotton duck texture
12-pack price is low enough to paint freely without anxiety
What to know
Cotton is less archival than linen for finished work you want to keep
12-board minimum is a bigger upfront buy than some beginners want
Competitive price per panel, and close enough in quality to Fredrix for learning. The surface texture is slightly smoother, which some painters prefer. Good backup stock for studies and color experiments when you don't want to 'waste' a good board.
What we like
Slightly smoother surface texture than Fredrix suits some styles
14-pack gives more painting sessions per purchase
What to know
Quality just below Fredrix — slight inconsistency across the pack
★★★★☆Our rating· Only 2 left in stock - order soon.
Linen is what most serious oil painters eventually migrate to. It's smoother, more durable, and has a natural tooth that makes paint feel better to apply. The archival linen surface changes the experience of painting noticeably from cotton. Try one after you've painted 10-15 cotton boards and see if you prefer it.
What we like
Natural linen tooth makes paint feel noticeably better to apply
Archival quality worth using for finished work you want to keep
What to know
Sold individually — significantly more expensive per panel than cotton
Weave shows through thin underpaintings if you don't seal it first
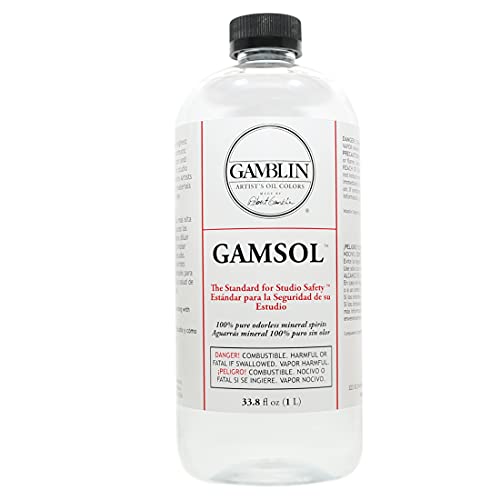
This is the category that trips up most oil painting beginners. You need exactly two things to start: a solvent (to thin paint and clean brushes) and optionally a drying medium (to speed up oil paint's notoriously slow drying time). Everything else — copal, Damar varnish, stand oil, poppy oil — is advanced territory you don't need to visit in your first year. Gamsol for the solvent. Liquin if you want faster layers. That's it.
Best starter
Gamblin
Gamsol Odorless Mineral Spirits, 32 oz
$28.94 as of Jun 22, 2026
★★★★★Our rating· In Stock
Gamsol is the safest, most widely recommended solvent for oil painting. Nearly odorless, low toxicity compared to traditional turpentine, and effective at both thinning paint and cleaning brushes. Gamblin specifically formulated it with painters' health in mind. This is the one — don't substitute cheap odorless turp or hardware-store mineral spirits, which are less refined and more fume-heavy.
What we like
Nearly odorless — safe to use at home near an open window
Safer and more refined than hardware-store mineral spirits
What to know
Still requires ventilation — don't use in a fully enclosed space
32 oz bottle is large and slightly awkward for small studio setups
Oil paint dries slowly — surface-dry in days, fully cured in weeks or months. Liquin Original is an alkyd medium that cuts that time dramatically: surface-dry in 12-24 hours, which lets you paint in layers without a multi-day wait. Once you're working in glazes or building textured passages, this becomes indispensable. For your first month, it's optional. After that, it's hard to paint without.
What we like
Cuts drying time to 12-24 hours — enables painting in layers fast
Industry standard; used by painters at every skill level
What to know
Makes paint more transparent and fluid — easy to overdo it
Slight odor; use with ventilation even if you're using Gamsol
Linseed oil is the original medium — the 'fat' in fat-over-lean. Adding a small amount to later paint layers increases flexibility, transparency, and sheen. It slows drying (the opposite of Liquin), so use it in final glazing layers, not underpaintings. A small bottle lasts a long time. Cold-pressed is paler and more stable than regular linseed oil.
What we like
The original fat medium — adds flexibility and sheen to final layers
Cold-pressed version is paler and more stable than regular linseed oil
What to know
Slows drying further — use in final glazing layers only
Too much yellows over decades; a few drops per session is enough
You don't strictly need an easel to start — canvas boards can lean against a wall or sit on a table tilted toward you. But the right easel posture (surface vertical, painting at eye level) genuinely improves how you work: you stop hunching, you step back to check your painting more naturally, and you can see the full canvas without moving. A tabletop easel is the starter move. A floor easel is the long-term piece.
Best starter
MEEDEN
Table Top Easel, H-Frame
$$
★★★★★Our rating
A solid beechwood H-frame tabletop easel that holds canvas up to 21 inches — plenty for beginner work. Adjustable height, sturdy enough not to wobble while you're painting, and compact enough to stow in a closet. The right first easel for anyone who doesn't have a dedicated studio space.
What we like
Solid beechwood holds canvas to 21 inches without wobbling
Compact enough to store in a closet between sessions
What to know
Tabletop height limits how far back you can step to check your work
No storage shelf for brushes and supplies like floor easels have
A proper standing floor easel changes how you paint — you step back, you paint with your whole arm, and your posture improves. The Nantucket adjusts to hold canvases up to 43 inches high and includes a storage drawer and shelf for supplies. The natural step up once you're painting regularly and want to work larger.
What we like
Standing height lets you step back and paint with your whole arm
Storage drawer and shelf keep brushes and mediums right at hand
What to know
Takes up real floor space — measure before you order
Assembly required; significant price jump over a tabletop easel
Oil painting looks slow and intimidating from the outside. It isn't — but you do need to understand the material before it stops fighting you. Here's what your first four weeks actually look like, without the mythology.
Oil painting has a reputation for being the most serious, most demanding, most adult art medium. Five centuries of master painters will do that. But the reputation is mostly theater. The actual experience of starting oil painting is quieter: a lot of looking, a lot of mixing, a lot of watching paint behave differently than you expected — and then, gradually, learning to predict it.
What makes oil painting genuinely different from acrylics or watercolor isn’t difficulty — it’s time. Oil paint dries in days, not minutes. That single fact changes everything about how you work, what mistakes are fixable, and what you learn to love about the medium.
Week 1: Understanding what you’re working with
Before you make a painting, spend a session learning how the paint behaves. This sounds boring. It is the most valuable hour you’ll spend all month.
Set up your space. Oil painting requires some ventilation — even Gamsol, the safest solvent, should be used near an open window. Get a glass jar for your solvent (don’t use plastic — Gamsol will dissolve the lining over time). Have paper towels within arm’s reach.
Do a paint-out. Squeeze small amounts of every color in your set onto your palette. Mix each one with a small amount of Gamsol to get a thin, fluid consistency. Brush each color onto a canvas board in a fat stripe. Wait two days. Come back and see what changed: some colors shift slightly, some stay identical, all of them lose the wet sheen. This is what you’re working with.
Try the fat-over-lean rule immediately. For your first layer (the underpainting), thin your paint with a lot of Gamsol — the consistency of cream. For the next layer, use slightly less solvent and maybe a drop of linseed oil. For the final layer, use paint straight from the tube or with just a touch of linseed. You’re making each layer fatter (oilier) than the last. This is not optional if you want paintings that don’t crack in ten years.
What to actually paint in week one: A monochromatic study. One color, plus white and black. Paint a simple object — an egg, a lemon, a crumpled piece of cloth — using only that single hue. The constraint forces you to focus on value (light vs. dark, not color) and it teaches you how oil paint moves without color-mixing confusion getting in the way.
In week two, you make a painting — not a study, a painting. Something with color, a subject you chose, a composition you arranged.
Keep the subject simple. A piece of fruit. A coffee mug. A single flower in a glass. Still lifes have been beginner subjects for five hundred years because they’re good beginner subjects: they don’t move, they have volume, and they force you to actually look hard. A red apple on a white cloth teaches you more about painting than any abstract exploration you’re ready for in month one.
Start with a toned ground. Before painting anything, brush a thin coat of burnt umber or raw umber, thinned with Gamsol, over the whole canvas. Let it set for an hour (oil paint doesn’t dry to the touch overnight, but thin washes get tacky enough to paint over in an hour or two). Then wipe away the lightest areas with a rag, establishing your composition in this single brown value before you touch a color tube.
This is called the “toned ground and wipeout” method, and it’s the fastest way to get a structured painting going as a beginner. You’re not building from white — you’re building from a mid-tone down into darks and up into lights simultaneously.
On color mixing: Start with a limited palette. Four to six colors is all you need: a warm and cool version of each primary — cadmium yellow and yellow ochre, cadmium red and burnt sienna, ultramarine blue and cerulean — plus titanium white. You can mix almost anything from this selection, and it forces you to learn how colors actually combine rather than reaching for a tube that’s close enough.
The third week is where oil painting either hooks you or loses you. The drying time, which felt like a problem in weeks one and two, starts revealing itself as the feature it actually is.
Wet-on-wet vs. wet-on-dry. Oil paint is workable for hours after you put it down. If you’re painting wet paint over a wet surface, the colors blend into each other — useful for soft transitions, landscapes, smooth gradients. If you let a layer dry fully (usually 24-72 hours depending on paint thickness and humidity) before painting over it, you can put hard, clean strokes on top without disturbing what’s underneath. Both approaches are valid. The trick is choosing deliberately rather than just running out of patience.
Glazing. Once a layer is dry, you can apply a thin, oil-rich, transparent layer over it — a glaze. Glazing is how traditional oil painters built up the depth and luminosity in those rich old-master shadows. It’s also how you deepen a color without obliterating what’s already there. Try it on a finished painting: mix a transparent color (burnt sienna, ultramarine, or viridian work well) with Liquin until it’s very fluid, and brush it thinly over a dry area. See what it does.
The problem most beginners hit in week three: Overworking. You have a good passage — a background, a shadow, an area that finally looks right — and you keep touching it. Stop. Oil paint forgives almost everything, but it doesn’t forgive being scraped and re-scraped six times in one session. When something looks good, put down the brush and paint something else.
Week 4: Building a practice
By week four, the material stops feeling foreign. You know roughly how long things take to dry. You know which brushes you reach for. You have a sense of your palette.
Start every session with a few warm-up strokes. Load a big brush with your most-used color, make five strokes on a scrap board, and look at them. Are you tense? Is the paint too thick? Are you fighting the brush? Warm-up strokes cost nothing and tell you immediately what’s happening with your control that day.
Value before color, always. If you squint at your painting until you can barely see it, what you see in that blurry near-darkness is the value structure — the map of light and dark areas. That map should be legible independent of color. If it reads as a muddy flat field of similar grays, your values are too similar and the painting will feel flat no matter how nice the colors are. Take out your phone, photograph the painting, convert the photo to grayscale, and look. That grayscale image doesn’t lie.
What you’ve actually learned by month’s end: How to thin paint for underpaintings. How to apply fat layers on top of lean ones. How to build a still life from a toned ground. How to not wreck a good passage by overworking it. How to use Gamsol safely. How your palette’s colors interact.
That’s more material foundation than most self-taught painters build in six months, because oil painting forces you to learn the rules — the drying, the chemistry — in a way acrylics don’t require.
Things you’ll fail at — and that’s normal
Impatient overpainting. You paint over a layer that wasn’t ready, the colors mud up, and everything goes brown. Wait longer. If you can’t wait, use Liquin to speed the underlying layer.
Too much solvent. Gamsol-heavy paint gets thin and runny and has trouble staying where you put it. You don’t need much — a little goes a long way.
Painting too small. An 8×10 canvas board feels tiny but isn’t. A 5×7 is genuinely too small for most beginner technique. Work at 8×10 minimum.
Skipping the toned ground and panicking at the white canvas. Just tone it. A thin wash of burnt umber takes three minutes and makes everything easier.
Giving up on a painting too early. Oil paintings go through ugly phases — especially around the second session, when you’ve covered the clean underpainting but haven’t refined anything. This is normal. Keep going.
What to do in month two
Copy a painting you love. Find a painting — a Sargent portrait, a Hopper interior, anything — and reproduce it. Copying forces you to read decisions you’d never examine in your own work: where is that edge? Is that color actually that warm? This is how European painters trained for centuries and it still works.
Work from life, not photos. Photos flatten value relationships and destroy color temperature information. Painting from life — even a simple still life you set up on your kitchen table — teaches you to see in a way that working from photos doesn’t.
Take a class around month two or three. Not before. After a month of painting, you have enough context to know what to ask — and a single session with a competent teacher who can look at your actual work will identify the two things holding you back faster than six months of YouTube.
Save your money
What you don't need yet
Beginners get pressured to buy a lot of stuff that doesn't help them play
better. Here's what we'd skip on day one.
Artist-grade paint from day one — You genuinely cannot tell the difference yet. Student grade is the right call for your first year. Spend the money on more canvas instead.
Expensive traditional solvents (turpentine, hardware-store mineral spirits) — Fumes are real and unnecessary. Gamblin Gamsol costs a few dollars more and you won't get a headache. There's no upside to cheap solvent.
Oil cups / dippers — The metal cups that clip to your palette for solvent and medium look professional. You don't need them. Small glass jars work fine and won't tip over.
A French easel — Beautiful, expensive, and heavy. Buy one when you're painting en plein air regularly. Not before.
Varnish — Oil paintings should cure for 6-12 months before varnishing. You won't need this for a long time.
Specialty mediums (copal, stand oil, Damar resin) — These are for specific advanced techniques. Ignore them entirely until you have a year of painting behind you and a reason to need them.
First week
Your first seven days
A short, real plan to get from gear-on-doorstep to actually playing.
Order Gamsol — you can't safely start without it. · Buy
Do a monochromatic study first. Pick one color plus white and black, and paint a simple object entirely in that single hue. It teaches value (light vs. dark) without the confusion of color mixing. · Action
Set up ventilation before you open the Gamsol. An open window is enough for most spaces. Take it seriously. · Action
Make your first full painting in week one — a piece of fruit, a coffee mug, anything with simple shapes. It doesn't need to be good. It needs to be finished. · Action
FAQ
Common questions
How long does oil paint take to dry?
Surface-dry: 1-3 days for thin layers, up to a week for thick ones. Fully cured: weeks to months. Adding Liquin medium cuts surface dry time to 12-24 hours. Oils' slow drying is both the main frustration and main advantage — you can blend and rework for hours after putting down a stroke.
Do I need special ventilation for oil painting?
Yes, but not dramatically so. An open window is sufficient for most home studios when using Gamsol. Traditional turpentine requires much stronger ventilation — one reason we strongly recommend Gamsol instead. Never paint in a fully enclosed space with any solvent.
Can I use water to thin oil paint, like acrylics?
No. Oil paint and water do not mix — literally. You thin oil paint with solvents (Gamsol) or with oil mediums (linseed oil, Liquin). Adding water destabilizes the paint film. Water-mixable oil paints exist as a special product, but standard oil paint requires solvents.
What is fat over lean, and why does it matter?
Fat (oil-rich) paint dries more slowly and flexibly than lean (solvent-thinned) paint. If you put lean paint on top of fat, the bottom layer stays flexible while the top dries rigid — eventually the top cracks. Painting fat over lean means your earliest layers are lean (thinned with just solvent) and later layers contain progressively more oil. Simple rule: thin first, richer later.
Should I start with oils or acrylics?
Start with acrylics if you want faster feedback (they dry in minutes), easier cleanup (water), and lower startup cost. Start with oils if you want longer working time for blending, a more traditional painting experience, or you already know you're committed. Oils are not harder — just different. Many painters start with acrylics and move to oils.
Do I need to prime my canvas?
Most commercially prepared canvases and canvas boards come primed with gesso — ready to paint on. You only need to add your own gesso if you're painting on raw canvas or an unconventional surface. Don't add extra coats of gesso before your first painting unless you want a very smooth surface.
Will Kemp Art School — The clearest free resource for beginner oil painters on the internet. Start with his 'how to paint still life' series. Detailed, opinionated, and actually useful.
Evolve Artist Method (YouTube) — Mark Carder's structured approach to oil painting. Heavy on fundamentals — color mixing, value, form. Best for painters who like a methodical curriculum over free exploration.
Proko (YouTube) — Primarily a drawing channel, but drawing fundamentals directly improve oil painting. Proko's figure drawing and form lessons are some of the best free art education available.
Gamblin Artist Colors — Gamblin's website has some of the most practical technical information about oil painting materials available anywhere — fat over lean, solvents, mediums. Bookmark their 'Making Paintings' section.
r/learnart — Active community for beginner visual artists across all media. Good for feedback on early work and answers to 'is this normal?' questions. Search before asking — common questions are well-answered in the wiki.
The Artist's Handbook — Ralph Mayer — The definitive technical reference for painters. Dense and comprehensive — not a beginner read, but the book to have on the shelf when you hit a technical question none of the YouTube channels answer.
As an Amazon Associate, JustBeginning earns from qualifying purchases.
We may also earn commission from other affiliate programs linked on this
page. Editorial recommendations are independent; we don't choose
products based on commission rates.
Product prices and availability are accurate as of the date and time
indicated and are subject to change. Any price and availability
information shown on Amazon at the time of purchase will apply.
Our top pickWinsor & Newton Winton Oil Color Paint Set, 10 Tubes


 Best starter