Glass fusion is kiln-fired magic: arrange compatible glass pieces, fire them, and they melt into a seamless whole. The barrier to entry is real — you need a kiln — but once you have it, this is one of the most immediately rewarding art forms around. Here's exactly what you need to get started, and what you can skip.
By Colin B. · Published June 1, 2026 · Last reviewed June 1, 2026
The kiln is the big purchase ($500–1200). Glass and supplies run $50–150 per project. Budget kilns are real and capable — you don't need to spend $1,000 to make beautiful work.
We earn commission on qualifying Amazon purchases — see our
affiliate disclosure.
Price tiers and budget totals shown above are editorial estimates;
actual Amazon prices vary.
At a glance
Our top pick in each category
The fastest path through this guide — each best-starter pick by category.
Scroll for the budget and upgrade alternatives.
COE compatibility is the single most important concept to understand before buying glass. COE stands for Coefficient of Expansion — how much glass expands when heated. COE 90 and COE 96 are incompatible with each other. Mix them in the same piece and it will crack. Pick one system, buy everything in that system, and don't deviate.
A cheap ceramic kiln from a craft store is not a glass fusing kiln. Glass fusing requires precise ramp-speed control — how fast the temperature rises and falls. A dedicated kiln controller, or a kiln designed for glass work, is non-negotiable. The Skutt Firebox and Paragon kilns made for glass fusion have this built in.
Your first ten projects will be small: coasters, pendants, small tiles. Don't buy a huge kiln — a compact one gives you faster cycle times, lower electricity costs, and teaches you the medium more efficiently. Upgrade when you know exactly what you want to make.
The gear
What you actually need
Kilns
The kiln is the heart of glass fusion — and the first thing beginners overthink. For small-format work (coasters, pendants, tiles, small plates), a compact kiln in the $500–700 range is all you need. The key specs are firing area (8×8″ is plenty to start), a programmable controller (so you can dial in ramp speeds), and 120V operation (no special wiring). When you're ready for larger work, glass-kiln retailers carry mid-size models (14–18") that require 240V.
Kilns — what's the difference?
A few common shapes, each making a different trade.
Compact (8" square)
Perfect for pendants, coasters, tiles. Fires fast, standard outlet.
Firing area
8×8″
Power
120V standard
Best for
Pendants, coasters, tiles
Best for True beginners, small-scale work, home studios
More room for plates, bowls, panels. Usually needs 240V.
Firing area
14–18″
Power
240V (usually)
Best for
Plates, bowls, larger panels
Best for Fusers ready to make larger decorative and functional work
Tradeoff Usually requires 240V wiring — check your studio before ordering
Best starter
Skutt
Firebox 8 Kiln With Pyrometer
$$$
★★★★★Our rating
The Skutt Firebox 8 is the kiln most glass fusers start on and never outgrow for small work. Programmable controller, fast heat-up, and a proven track record with fusible glass. The 8×8″ chamber handles coasters, pendants, tiles, and small plates — the projects that teach you the medium. Skip cheaper ceramic kilns; they lack the ramp-speed control glass fusing demands.
What we like
Built-in programmable controller — set ramp speeds precisely
120V operation, no special wiring needed
Skutt is the most trusted brand in hobby kilns
What to know
8" area limits project size — plates wider than 8" won't fit
Full firing cycle runs 4–8 hours; plan your schedule around it
★★★★☆Our rating· Only 8 left in stock - order soon.
Paragon's SC2 costs a bit less than the Skutt and fires glass well. Fiber construction heats faster and more efficiently than a brick kiln, and the Sentry 3 controller handles precise glass ramp schedules. If you want to spend less upfront and don't mind a slightly smaller round firing area, this is a legitimate entry into kiln-fused glass.
What we like
Fiber construction heats faster and costs less to run than brick
Paragon has been making kilns for 70+ years — solid reputation
Sentry 3 controller handles glass ramp schedules well
Not all glass is created equal for fusing. You need fusible glass that's been tested for compatibility — either COE 90 or COE 96. Pick one system and stick with it. COE 96 (formerly System 96) is slightly more available from craft suppliers and works well in most beginner kilns. COE 90 has a long track record in the glass-fusing community. Do not mix systems in the same piece.
Best starter
Oceanside / Wissmach
COE 96 Fusible Glass Assortment — 20 Sheets
$68.00 as of Jun 22, 2026
★★★★★Our rating· In Stock
This pack bundles sheets from Oceanside, Wissmach, and Spectrum — all COE 96 compatible — giving you 20 sheets of varied colors to work with from day one. Consistent 3mm thickness, guaranteed COE compatibility within the pack, and available without committing to a single brand's catalog. Exactly the variety you need to start designing real pieces.
What we like
20-sheet multi-brand assortment covers your first 10-15 projects
All sheets are COE 96 — no compatibility guesswork
Standard 3mm thickness works with all common fusing schedules
What to know
Smaller range than a full supplier catalog — you'll want more colors soon
Doesn't include frit; order a sampler separately for texture work
Frit is crushed glass — coarse, medium, or fine — that you sprinkle onto sheet glass before firing to create texture and shading effects. This COE 96 sampler gives you seven colors across fine and medium grind to experiment with. Essential for adding the depth you can't get from flat sheet glass alone.
What we like
Frit adds depth and texture impossible with flat sheet glass alone
Seven-color sampler lets you explore before buying full jars
What to know
Fine frit is a respirable hazard — always wear a respirator when scooping
Mixing COE 90 and 96 frit causes stress fractures; match your system
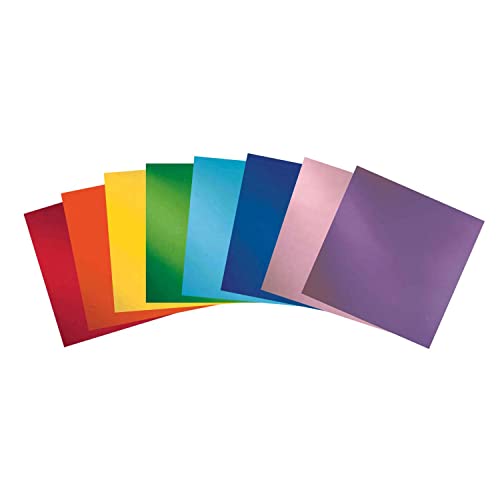
Oceanside's Rainbow Transparents pack gives you a spectrum of COE 96 colors in a single order — perfect for your first few projects without committing to individual 12×24" sheets. Transparent colors let you see how glass changes when light passes through, which is part of what makes fusion results so surprising.
What we like
Transparent colors are stunning in finished fused pieces with backlight
Single-order variety without buying full 12×24" sheets
What to know
Transparent only — you'll want opalescent colors too for contrast
Smaller sheet sizes mean more cuts for larger designs
Glass fusing doesn't require many tools, but the ones it does require matter. A good glass cutter and running pliers let you score and snap clean breaks without wasting glass. A grinder (rotating diamond bit on a water-cooled table) lets you smooth edges and resize pieces precisely. Buy the cutter and pliers first; add the grinder once you know you're hooked.
Best starter
Toyo
Custom-Grip Supercutter Glass Cutter
$28.75 as of Jun 22, 2026
★★★★★Our rating· In Stock
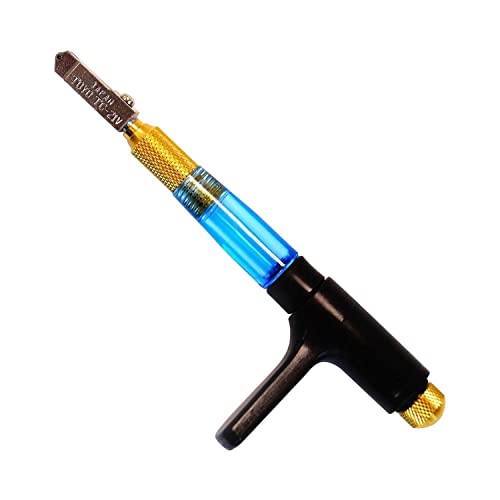
The Toyo Custom-Grip Supercutter is what glass artists reach for when they stop using disposable cutters — self-oiling carbide wheel, ergonomic grip, and a consistent score every time. Toyo's flagship hand cutter, and the one you won't replace for years. Cuts 3mm fusible glass cleanly on the first stroke.
What we like
Self-oiling carbide wheel — no separate oil bottle needed
Comfortable pistol grip reduces hand fatigue on longer sessions
Professional-grade tool beginners don't outgrow
What to know
Costs more than basic cutters — but $8 versions are false economy
Needs refilling with cutting oil eventually; takes a few minutes
Running pliers apply even pressure across a score line to produce a clean break without crushing. The Silberschnitt BO 700.0 is a professional-grade German tool that works on straight or gently curved scores, letting you work with shapes that are otherwise very difficult to break cleanly by hand. Under $25 and you'll use them on every project.
What we like
Professional-grade tool — clean straight breaks without crushing edges
Adjustable jaw depth handles different glass thicknesses
What to know
Takes a few sessions to dial in the right jaw pressure
Won't substitute for a grinder on tight curves and intricate shapes
A glass grinder's rotating diamond bit spins in a water bath, letting you smooth and reshape pieces precisely. Not needed for the first few projects — but once you're cutting tight curves, this is the tool that makes accurate fitting possible. The Wizard IV is Inland's workhorse studio grinder: sturdy, quiet enough for home, and reliably accurate.
What we like
Diamond bit grinds wet — no glass dust, smooth edges every time
Quiet enough for a home studio or garage workshop
Inland has supported the studio-glass hobby for 30+ years
What to know
Overkill for your first 5–10 projects; buy after you know you're hooked
Every firing needs a few consumables that prevent your glass from welding itself to the kiln shelf. Fiber paper (Thinfire is the brand name everyone uses) goes under every piece, every time. Kiln wash goes on the shelves. These aren't glamorous, but running out mid-project is genuinely miserable — stock up before your first firing.
Best starter
Bullseye
Thinfire Shelf Paper — 25 Pack
$165.53 as of Jun 22, 2026
★★★★★Our rating· Only 3 left in stock - order soon.
Thinfire is the thin ceramic fiber paper that goes between your glass and the kiln shelf — without it, your fused piece bonds to the shelf permanently. One sheet per firing, cut to size. The 25-sheet pack gets you through your first 25 projects. This is a consumable you'll always need; buy in quantity.
What we like
One sheet per firing keeps your glass from fusing to the shelf
Burns clean — no residue transferred to your finished piece
25-sheet pack covers your first 25 firings at minimal cost
What to know
Single-use; you'll burn through a pack in a few months of regular firing
Handle spent paper outdoors — ceramic fibers irritate airways
Kiln wash is the chalk-like coating you paint onto shelves so glass drips and bubbles don't bond permanently. Primo Primer is the go-to wash for glass fusing — finer texture than general ceramics wash, so it releases cleanly after firing. Apply before your first firing and touch up as it wears.
What we like
Fine-particle formula releases glass from kiln shelves cleanly
1.5 lb covers a typical 8" shelf many times over
What to know
Must dry fully between coats or it cracks during firing
Not the same as ceramics kiln wash — use glass-specific formulas only
Glass work has two real safety concerns: eye protection when cutting (shards travel fast and far) and respiratory protection when working with frit powder (fine glass dust is a long-term lung hazard). Both are cheap and easy to address. Don't skip them.
Best starter
3M
Nassau Safety Glasses — ANSI Z87 with Side Shields
$
★★★★★Our rating
Cutting glass sends tiny shards in unpredictable directions. You need side-shielded eye protection — not reading glasses, not sunglasses. 3M's Nassau glasses are ANSI Z87.1-rated, comfortable to wear for hours, and cheap enough to keep two pairs. Wear them every time you cut or break glass, no exceptions.
What we like
ANSI Z87.1 rated — certified for impact protection, not just splash
Integrated side shields block shards that don't come straight at you
Comfortable enough to forget you're wearing them
What to know
Not designed for frit dust — add a respirator for powder work
Fine glass frit is essentially fine glass dust, and repeated inhalation is a long-term lung hazard. An N95 respirator is all you need when measuring, pouring, or sifting frit. The 3M 8511 has a Cool Flow valve for comfort on longer sessions. One 10-pack lasts most fusers a full year.
What we like
N95 filters the fine glass particles in frit and kiln dust
Cool Flow valve makes extended sessions comfortable in warm studios
What to know
Doesn't address kiln off-gassing fumes — ventilate your space too
One-time use; don't re-use a collapsed or saturated mask
Glass fusion's learning curve is mostly about the kiln — understanding firing schedules, COE compatibility, and what heat does to glass. Here's how your first week actually goes, from your first score to your first successful firing.
Glass fusion has a reputation for being intimidating — kiln, compatible glass, ramp speeds, annealing. The terminology sounds like chemistry class. But the actual experience of your first week is simpler than the vocabulary suggests. Most of what you need to understand fits in a single afternoon of reading, and the rest you learn by doing.
Here’s what your first week actually looks like, day by day, with the decisions that matter and the things you’ll be tempted to worry about but shouldn’t.
Day 1–2: Understand COE before touching a kiln
The single most important thing to get straight before buying anything is COE compatibility. COE stands for Coefficient of Expansion — it’s a measure of how much glass expands when heated. Every piece of fusible glass is manufactured to expand at a specific rate, and glass from different COE systems expands at different rates.
The two systems you’ll encounter are COE 90 and COE 96. They are not compatible. Put COE 90 and COE 96 glass in the same piece, fire it, and the stress from unequal expansion will crack the piece — sometimes immediately, sometimes days later as the glass continues to settle. Pick one system before you buy a single sheet of glass, and commit to it.
Which one? For most beginners, COE 96 (formerly called System 96, now carried primarily by Oceanside and Wissmach) is slightly easier to find at craft stores and online retailers. COE 90 — associated with Bullseye Glass Co. — has a larger selection and a deeper community of resources, but it’s harder to find on short notice. Either is a fine choice; the commitment is what matters.
Once you’ve chosen, make a simple rule for yourself: everything in your studio is one COE. No exceptions, no “just this one piece.”
Day 2–3: Your first cuts
Glass cutting is less scary than it looks, and more precise than it feels at first. The tool is a glass cutter — a small handheld wheel that scores a line into the surface of the glass. You then flex the glass slightly along that score line and it snaps cleanly along the path.
A few things make the difference between a clean break and a disaster:
Score once, firmly. Run the wheel from edge to edge in a single continuous stroke with consistent pressure. If you hear the wheel grinding rather than a clean scratching sound, you’re pressing too hard. The score should sound like a zipper being pulled. If you hesitate or lift mid-stroke, you’ll get a jagged break.
Break immediately. Don’t let a scored piece sit for more than a few minutes — the score can heal slightly as stress redistributes. Score, then snap.
Use running pliers for straight breaks. Center the pliers over the score line and squeeze gently until the glass snaps. You’ll feel it give before it breaks. It’s satisfying in a way you don’t expect.
For your first projects, stick with straight cuts. Squares, rectangles, triangles. Curves come later. The goal in your first week isn’t to make beautiful shapes — it’s to understand how the glass behaves.
A kiln schedule is the recipe that tells your kiln how fast to heat up, how long to hold at peak temperature, and how to cool down. Get it right and you get a beautiful, stress-free piece. Get it wrong and you get cracking, devitrification (a milky haze on the surface), or an underworked piece where the glass didn’t fully fuse.
The basic schedule for a full fuse has four phases:
Ramp up — heat climbs at a controlled rate (usually 300–500°F per hour for thin pieces). Heating too fast can crack cold glass.
Process temperature hold — for a full fuse, this is typically around 1480–1500°F held for 10–20 minutes, until the glass edges round and the pieces merge completely.
Flash cool — drop temperature quickly to around 1050°F to stop devitrification.
Anneal and slow cool — hold at ~1000°F for 30–60 minutes to relieve internal stress, then drop to room temperature at 100°F per hour or slower.
Your kiln almost certainly came with a programmable controller. Enter this schedule as a program before your first firing. Bullseye and Warm Glass both publish free firing schedules online; start with one of their beginner templates rather than trying to write your own.
One rule above all others: don’t open the kiln until it’s fully cooled. Room temperature. If you open it at 400°F because you’re curious, the sudden temperature shock will crack your piece. A fully programmed anneal-and-cool cycle takes 8–12 hours. Do something else while you wait.
Day 5–7: Your first firing
Before you load the kiln, make sure:
Thinfire shelf paper is cut to size and laid under every piece
Pieces are clean and free of fingerprints (oils can cause surface defects)
Glass pieces are arranged and designed — once the kiln closes, you’re committed
Safety glasses are on whenever you’re handling raw glass
Load the kiln, close it, start your program. Walk away. The hardest part of glass fusing is not interfering.
When the kiln has cooled to room temperature — open it slowly. The transformation is genuinely astonishing the first time. Edges that were sharp and angular are now soft and rounded. Colors have shifted slightly, deepened. The pieces have merged into something that looks like it was always one object.
You’ll notice a few things:
Edges are soft — this is correct and beautiful for a full fuse
Surface might be slightly textured — depending on how you prepped the glass and how long you held at temp
Color may have shifted slightly — some colors are affected by the firing atmosphere; this is normal and part of the medium
Your first piece will probably surprise you — either better than you expected, or with a specific flaw you now know how to fix. That’s exactly right. Glass fusing teaches you through each firing.
Every beginner hits the same set of problems. You will too. Knowing them in advance doesn’t prevent them, but it takes the sting out:
Mixing COE accidentally. You buy a beautiful sheet of glass without noticing it’s a different COE than the rest of your stock. It cracks. Label everything. If you don’t know the COE, don’t fuse it.
Rushing the cool. Opening the kiln too early is the most common way to crack a finished piece. Your kiln is programmed to do this correctly — trust the program.
Trying curves too early. Tight curves require a grinder and a lot of practice. Stick to straight cuts for your first 10–15 pieces.
Firing pieces that aren’t flat. Thick glass stacked unevenly creates uneven stress. Aim for uniform thickness across each piece until you understand how glass moves in the kiln.
None of these mistakes are disasters. You lose a piece, you learn something specific, you fire again.
What you have after one week
After seven days of cutting and one or two firings, you’ll have:
A clear understanding of COE compatibility (the single skill that separates beginners from crashers)
Decent control over straight cuts and basic shapes
One or two finished fused pieces — probably small, probably asymmetrical, probably genuinely beautiful
You’re not a skilled glass fusionist yet. You’re something more useful: someone who understands what the kiln is doing and why, and can now start developing real intuition through repetition.
The medium rewards patience and iterative improvement in a way that’s unusual — every firing is a small experiment, and every experiment teaches you something specific about how glass, heat, and time interact.
Save your money
What you don't need yet
Beginners get pressured to buy a lot of stuff that doesn't help them play
better. Here's what we'd skip on day one.
Lead came and copper foil tools — That's stained glass — a related but entirely different craft. No kiln, no fusing. Worth exploring later, but not the same thing.
A glass torch or blowpipe — Blown glass is a completely different discipline. Glass fusing happens in a kiln, not at a torch.
Slumping molds — Slumping (bending flat glass over a mold) is the next step after fusing. Master flat fusing first — then molds make sense.
Dichroic glass — Beautiful, expensive, and teaches bad habits early. Master COE compatibility and basic cuts before adding this.
Acid etching supplies — An advanced finishing technique. Save it for month six when you're looking to add surface effects to finished pieces.
First week
Your first seven days
A short, real plan to get from gear-on-doorstep to actually playing.
Choose your COE system — COE 90 or COE 96 — before buying a single sheet of glass. Your kiln, glass, and frit all need to match. · Action
Order a starter kiln. The Skutt Firebox 8 is the default choice. · Buy
Design and cut your first three pieces — aim for simple rectangular and square shapes while you learn the cutter. · Action
Run your first full firing cycle. Load your kiln, set the schedule, walk away, and don't peek until it's cooled. · Action
FAQ
Common questions
What's the difference between COE 90 and COE 96?
COE (Coefficient of Expansion) describes how much glass expands when heated. COE 90 and COE 96 expand at different rates and are incompatible in the same firing. Pick one system and buy all your glass — sheets, frit, and stringers — within that system. Most beginners choose COE 96 (formerly System 96) for its wider retail availability.
Can I use a regular ceramics kiln for glass fusion?
Not reliably. Ceramics kilns typically fire much hotter than glass needs, and their controllers often lack the fine ramp-speed control that glass fusing requires. Glass-specific kilns like the Skutt Firebox line are programmed with precise heat curves ceramics kilns can't replicate. Some experienced fusers adapt ceramics kilns with aftermarket controllers, but it's not a beginner path.
How long does a firing take?
A typical full-fuse firing cycle runs 8–12 hours total: a slow ramp up, a hold at full-fuse temperature (around 1480°F), a rapid drop to the annealing range, a slow anneal hold, and a slow cool to room temperature. Don't rush the cooling — glass that cools too fast develops internal stress and can crack days later.
Is glass fusing different from stained glass?
Very different. Stained glass is cold work — you cut, grind, foil or lead-came, and solder, with no kiln involved. Glass fusion involves cutting, arranging, and kiln-firing pieces until they melt together. The cutting and grinding skills overlap, but the glass types, tools, and techniques diverge significantly.
What can I realistically make in the first few months?
Coasters, pendant blanks, small decorative tiles, sun catchers, and small plates are all within reach in the first month. Bowls and larger pieces require slumping molds — a second technique — and come later. Most beginners produce genuinely beautiful small work within their first three to five firings.
How much does each project cost once I have the kiln?
A small project (coaster, pendant) uses a few dollars of glass and one sheet of Thinfire paper. Electricity for a firing adds roughly $1–3 depending on kiln size and local rates. Realistically, most beginners spend $10–25 per project on consumables once the kiln is paid for.
As an Amazon Associate, JustBeginning earns from qualifying purchases.
We may also earn commission from other affiliate programs linked on this
page. Editorial recommendations are independent; we don't choose
products based on commission rates.
Product prices and availability are accurate as of the date and time
indicated and are subject to change. Any price and availability
information shown on Amazon at the time of purchase will apply.

 Best starter