Pastels are one of the most immediately satisfying art mediums — vivid color on your first stroke, no drying time, no brush-cleaning. The learning curve is real but gentle, and you can make something genuinely beautiful in your first session. Here's exactly what you need to start.
By Colin B. · Published May 24, 2026 · Last reviewed June 15, 2026
Krylon Workable Fixatif Spray
— Fixative is non-negotiable — this is the brand artists actually trust to preserve finished work.
Budget total
$40
Typical total
$90
A full starter kit runs $40–90. The biggest quality jump comes from the paper choice, not expensive pastels.
We earn commission on qualifying Amazon purchases — see our
affiliate disclosure.
Price tiers and budget totals shown above are editorial estimates;
actual Amazon prices vary.
At a glance
Our top pick in each category
The fastest path through this guide — each best-starter pick by category.
Scroll for the budget and upgrade alternatives.
Decide between soft and oil pastels before buying anything. They look similar but work completely differently. Soft pastels are chalk-dry, intensely blendable, and what 90% of tutorials teach. Oil pastels are waxy and require a different technique. Start with soft pastels — this guide covers them first.
Regular copy paper doesn't work for pastels. You need paper with tooth — a textured surface that grabs pigment and lets you layer. Canson Mi-Teintes is the standard. Buying the wrong paper is the fastest way to get frustrated in your first hour.
You need fixative to preserve finished work. Pastel is physically sitting on top of the paper as dry pigment particles — it smudges instantly without a protective spray. Budget $10–15 for a can before your first session, not after.
The gear
What you actually need
Pastels
The first decision is soft pastels vs. oil pastels — and it matters more than brand. Soft pastels are chalk-dry and highly blendable with fingers or a stump. They require fixative to preserve your work. Oil pastels are waxy, more permanent, and can be dissolved with mineral spirits for paint-like effects. Most tutorials, books, and YouTube channels assume soft pastels. Start there. The variants below explain the difference in detail. Within soft pastels, any set from a real art brand in the 48–64 color range will serve a beginner well — resist the urge to buy a 200-color set before you've learned to blend six.
Pastels — what's the difference?
A few common shapes, each making a different trade.
Soft Pastels
Chalk-dry, intensely blendable. The standard starting point for most artists.
Texture
Dry, chalky
Fixative
Required
Blending
Finger, stump, brush
Best for Portraiture, landscapes, most tutorial subjects
The most-recommended beginner soft pastel set for a reason. 48 colors covers warm, cool, and neutral ranges across every hue family you'll need. Rich pigmentation for the price — noticeably more vivid than other student-grade sets. Mungyo makes real artist pastels; this isn't a toy kit. The individual sticks can be replaced when a color runs out, which matters once you have favorites.
What we like
48 colors covers all major hue families — enough to start any subject
Vivid pigmentation punches above its student-grade price
Individual sticks can be replaced when a color runs out
What to know
Crumblier than premium brands — fragile during shipping
Color consistency varies slightly between production batches
The brand serious pastelists graduate to. Consistent texture across every color, exceptional blendability, and each stick is labeled with its lightfastness rating so your finished work won't fade. Half-sticks save money over full sticks and work well for most applications. Buy these when you know the hobby will stick — they're worth it.
What we like
Professional-grade pigment density — each color is consistent stick to stick
Lightfastness rated so you know which colors are archival
Exceptionally smooth blending, especially for skin tones and skies
What to know
Premium price — a full set runs $80+ for 30 half-sticks
Half-sticks limit broad coverage on larger paper sizes
★★★★☆Our rating· Only 20 left in stock - order soon.
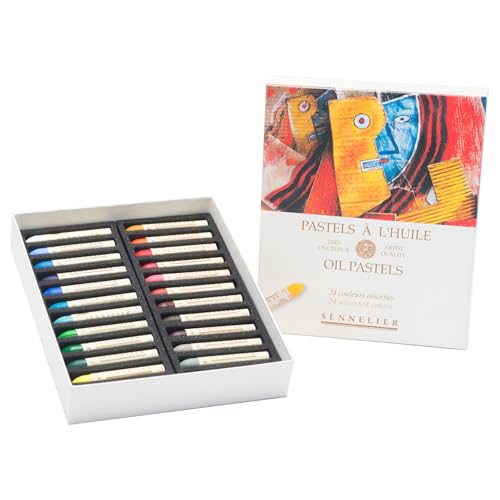
If you want oil pastels rather than soft, Sennelier is the gold standard. These are waxy, richly pigmented, and don't require fixative. You can blend them with your finger or dissolve them with a drop of mineral spirits for watercolor-like washes. Different enough from soft pastels that it's almost a different medium — but worth trying if you hate the dust and cleanup of soft pastels.
What we like
No fixative needed — colors stay put without a finishing spray
Dissolves with mineral spirits for luminous wash effects
No chalk dust — cleaner studio, easier cleanup
What to know
Waxy texture limits fine detail work compared to soft pastels
Cannot be erased or blended as finely — more committed strokes
Paper is where beginners make the most expensive mistake: buying regular sketchbook paper and wondering why their pastels won't stick. Pastel needs tooth — a textured surface for pigment to grip. The two main options are tinted pastel paper (like Canson Mi-Teintes, the industry standard) and sanded pastel paper (like UART, which holds dramatically more layers). Start with Mi-Teintes, which is widely available and priced for experimentation. Upgrade to sanded paper once you're ready for longer, more finished pieces.
Best starter
Canson
Mi-Teintes Pastel Paper Pad 9x12
$11.53 as of Jun 22, 2026
★★★★★Our rating· In Stock
The paper every pastel tutorial assumes you're working on. Mi-Teintes has a fine honeycomb texture on one side and a smoother woven texture on the other — both work for pastel, so you get two surfaces per sheet. Comes in warm tones that harmonize with most subjects. At 98 lb weight, it handles multiple layers without buckling.
What we like
Industry-standard surface — what every tutorial assumes you're using
Two usable textures per sheet: fine honeycomb and smoother woven side
Tinted sheets add depth to artwork without extra work
What to know
Holds fewer layers than sanded paper — you'll hit a saturation limit
Some vivid tones compete with your pastel marks as a background
★★★★☆Our rating· Only 4 left in stock - order soon.
The surface professional pastelists use for finished work. The abrasive grit holds far more layers of pastel than regular paper, allowing the rich buildup that defines serious pastel technique. Works with both soft and oil pastels, and accepts water-underpainting for mixed-media effects. Once you've finished a painting-level piece on UART, you won't go back.
What we like
Holds many more pastel layers than any tinted paper
Accepts water-underpainting for luminous mixed-media starts
Professional choice for archival-quality finished work
★★★★☆Our rating· Only 8 left in stock - order soon.
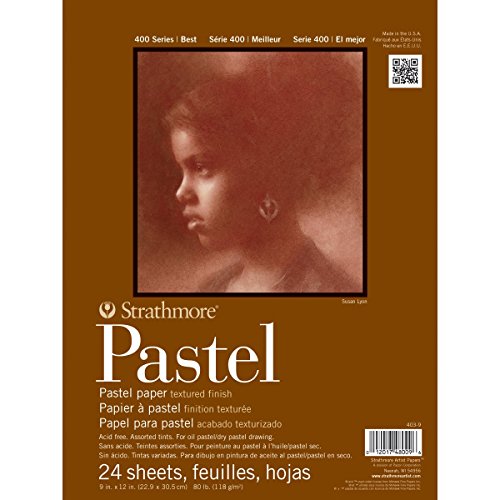
Strathmore's reliability at a price that won't sting for practice sessions. Decent tooth for soft pastels, consistent quality across the pad, and widely available at craft stores when you need more paper on short notice. Good for studies, exercises, and color tests before committing a subject to better paper.
What we like
Available at most craft stores — easy restocking between orders
Consistent quality batch-to-batch for reliable practice sessions
What to know
Shallower tooth than Mi-Teintes — hits saturation limit faster
Neutral white surface offers no tonal head start for your composition
Fixative is not optional. Pastel is dry pigment physically resting on the paper surface — without a protective spray, a finished piece smudges from a passing breeze. There are two types: workable fixative (which you spray between layers so you can add more pastel on top) and final fixative (which seals the finished piece permanently). Start with a workable fixatif — it does both jobs. Never use hairspray as a substitute; it yellows within months and is not archival.
Best starter
Krylon
Workable Fixatif Spray
$8.28 as of Jun 22, 2026
★★★★★Our rating· In Stock
The workable fixatif pastelists actually buy. Spray between layers to lock in color and add more pastel on top without disturbing what's underneath — or use as a final coat to seal a finished piece. Minimal color shift, fast-drying, and available at most craft stores. The 'workable' formula is smarter for beginners: it lets you keep working after spraying.
What we like
Workable formula lets you add more pastel after spraying — more forgiving
Fast-drying, minimal color shift compared to permanent alternatives
Available at most craft stores for emergency restocking
What to know
Solvent fumes require ventilation — not safe to use in a closed room
Slight darkening of very light values — test on scrap paper first
The archival-grade option for work you care about preserving. Less yellowing over time than most alternatives, and the artist-grade formula shifts colors minimally even on very light passages. Use this for pieces you're framing or giving away — the extra cost per can is worth it when the work matters.
What we like
Artist-grade formula — less yellowing over time than budget alternatives
Minimal color shift even on very pale, delicate light areas
Trusted by professional pastelists for archival finished work
What to know
Higher cost per can — overkill for practice sketches
Still requires ventilation like any solvent-based fixative
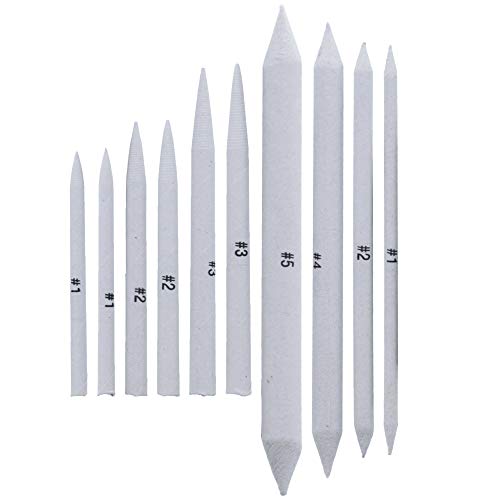
Your fingers are your first blending tool, and they work remarkably well. But they also pick up pigment and transfer it everywhere, which muddies colors after a while. Blending stumps (tortillons) let you blend specific areas without contaminating adjacent colors. Silicone colour shapers push and sculpt pastel like a brush, making them ideal for textural marks and lifting highlights. Start with a stump set — cheap, versatile, and immediately useful. Add colour shapers once you're working on tighter, more detailed pieces.
Best starter
US Art Supply
Blending Stumps and Tortillons Set
$4.49 as of Jun 22, 2026
★★★★★Our rating· In Stock
Multiple sizes in one inexpensive set. Small stumps handle fine detail; large stumps cover broad areas without fifty separate strokes. Paper construction picks up just enough pigment to blend without muddying adjacent colors. Clean a loaded stump by dragging it across scrap paper between colors. Replace every few months of regular use — they're cheap enough.
What we like
Multiple sizes handle both detail work and broad blending in one set
Paper construction picks up minimal pigment — blends without mudding
Cheap enough to replace without guilt when they get too loaded
What to know
Load up with pigment quickly — need frequent cleaning on scrap paper
Smallest sizes bend easily under firm pressure on sanded paper
★★★★☆Our rating· Only 4 left in stock - order soon.
Silicone tips push and move pastel like a brush, releasing no pigment of their own. Excellent for sculpting highlights, creating textural marks, and moving color where stumps can't reach. Scoop up a dab of pastel and deposit it elsewhere — a technique that feels more like painting than drawing. Once you've used these for detail work, stumps feel crude.
What we like
Silicone releases no pigment of its own — zero color contamination risk
Creates sculptural marks and textures that stumps physically cannot
Lifts and repositions pastel precisely for highlights and corrections
What to know
Requires firm pressure — can disrupt paper tooth on lighter surfaces
Less effective for broad blending than a large tortillon
Pastels need two things from storage: physical protection from breaking, and color organization so you can find the right stick quickly. Loose sticks rolling around in a box will shatter within weeks. Foam-lined trays or compartmentalized boxes keep them separated and legible by color family. Beyond the pastels themselves, finished pastel work needs glassine paper or a smooth sheet placed over it during transport — pastel smudges from any surface contact. A small roll of glassine is one of those $5 purchases you'll be grateful for immediately.
Best starter
Richeson
Roz Pastel Organizer Tray
$26.96 as of Jun 22, 2026
★★★★★Our rating· Only 17 left in stock - order soon.
Pre-cut foam with individual slots that keep each pastel separated and protected. Stacks flat, fits most pastel sets, and the lid means you can travel without breakage anxiety. The organization payoff is immediate — once you've spent 30 seconds finding a particular blue in a loose box, you'll appreciate rows of sorted sticks you can scan at a glance.
What we like
Pre-cut foam slots keep every stick separated — no crumbling against neighbors
Lid allows transport without breakage anxiety
Stackable design — add trays as your collection grows
What to know
Slot dimensions may not fit every pastel brand's stick size
Foam discolors with pigment dust over time — purely cosmetic
★★★★☆Our rating· Only 3 left in stock - order soon.
Four removable foam trays, a secure latch, and a carry handle make this the travel pastel box serious pastelists actually use. Individual foam slots keep every stick separated. Stackable trays let you reorganize by color family. Once your collection outgrows a basic tray and you are actively working outside the studio, this is what you upgrade to.
What we like
Built for travel — survives bags and outdoor sessions without breaks
Decades-long lifespan with proper care — not a consumable
Custom foam can be configured to fit your specific brands and sizes
What to know
Premium price is hard to justify for a small beginner collection
Overkill for studio-only artists who never transport their pastels
Pastels reward you immediately — vivid color, real texture, no drying time. Here's what actually happens in your first seven days, from choosing your medium to completing your first finished piece.
Pastel has a reputation as a fussy medium — something grandmothers do on rainy days with delicate florals. That reputation is wrong. Pastel is physically immediate in a way that oil painting and watercolor are not: you pick up a stick, make a mark, and see full color on the first stroke. No palette setup, no drying time, no water-to-pigment ratios to calibrate.
The learning curve is real — blending, layering, and controlling the medium takes practice. But the feedback loop is short. You will make something genuinely pleasing in your first session. Here’s what to expect across your first week.
Day 1: Choose your medium and set up your workspace
Before you pick up a pastel, decide whether you’re starting with soft pastels or oil pastels. Most tutorials, books, and YouTube channels assume soft pastels — the chalk-dry kind that blend easily with your fingers. Oil pastels are waxy and require different technique. For your first week, start with soft pastels and a pad of Canson Mi-Teintes pastel paper.
Your workspace needs two things: a hard surface behind your paper (a drawing board or a clipboard works), and something to prop it at a slight angle so pastel dust falls away from the drawing rather than sitting on it. Flat tables let dust accumulate and muddy your work.
One thing people skip and shouldn’t: order fixative before you start. You’ll want to spray your first finished piece, and waiting two days for fixative to arrive after a good drawing session is genuinely frustrating.
Days 2–3: Your first marks and the basics of blending
Your first real exercise is a color chart. Take a sheet of your pastel paper, divide it into squares, and fill one square per stick — all 48 colors, labeled. This sounds boring. It’s not. You’ll refer to this chart for months, and the act of making it teaches you how each stick behaves: which ones are harder, which are powdery, which spread easily and which resist.
After the chart, practice blending. Put down two adjacent colors — a warm orange and a cool yellow, or a dark blue and a medium blue — and blend them into each other using your finger. Then try a blending stump. Then try layering one color on top of another without blending at all, using hatched strokes. These three techniques — smooth blending, stump blending, and layered strokes — cover probably 80% of what you’ll do in your first year.
What beginners get wrong in the first session:
Using too much pressure. Pastels don’t need force — the pigment transfers from light contact. Pressing hard uses up the stick fast and fills the paper tooth quickly.
Starting with your best paper. Use cheap practice sheets for exercises. Save the Mi-Teintes for attempts you care about.
Trying to erase. You can lift pastel slightly with a kneaded eraser, but erasing isn’t really how this medium works. Layer over mistakes instead.
Days 4–5: Your first complete drawing
Pick the simplest possible subject: one piece of fruit, a ceramic mug, or a plain glass bottle. Not a landscape, not a portrait. One object with clear light and shadow.
Start with your darkest tones and work toward your lightest. This is the opposite of how you’d approach pencil drawing, where you build from light marks to dark. With pastel, blocking in dark tones first gives you a tonal structure to work against, and light-colored pastels show up dramatically over dark backgrounds.
Spend more time observing than drawing. The most common beginner problem isn’t technical — it’s rushing. Look at your subject for ten seconds before every mark. Ask: where is the darkest value? Where is the lightest? What color is the shadow, actually? (It’s never just gray.)
When you’ve filled the paper and reached something resembling your subject, stop. Don’t overwork it. The point of this drawing isn’t to be finished — it’s to see what you’re drawn to and what frustrates you.
Day 6: Fixative and finishing
Take your first completed piece outdoors or near an open window. Shake your can of workable fixatif, hold it 12 inches from the paper, and spray in a light, even pass — like misting a plant, not hosing it down. Let it dry for 30 seconds, then do a second thin coat.
A few things will happen:
Colors may darken slightly. This is normal and unavoidable.
The surface will accept more pastel layers if you want to keep working.
The piece will no longer smudge from casual contact.
Now store it between two sheets of glassine paper (smooth, non-stick) or in a flat portfolio. Don’t put it in a sleeve — the sleeve will pick up pigment even through fixative.
Day 7: Noticing what you actually want to do
After a week, you have a narrow but real sense of what the medium is like. The question worth sitting with: what subjects actually interest you?
Pastel artists tend to cluster around landscapes (the medium captures atmospheric light exceptionally well), portraiture (skin tones in pastel have a warmth that’s hard to match in oil), and florals (fast, expressive, forgiving of loose edges). All three are valid. None of them are what you pick in week one — you pick them after you’ve seen what you’re drawn to while you’re drawing.
At the end of week one, here’s what matters: did you make things? Did any of them surprise you? If yes to either, you’re exactly where you should be.
For your second week:
Try a different subject (move from still life to a simple outdoor scene, or vice versa)
Watch two Karen Margulis videos before your next session — she explains value and mark-making for landscapes with unusual clarity
Consider whether you want to try sanded paper (UART) for a more layered, ambitious piece
Save your money
What you don't need yet
Beginners get pressured to buy a lot of stuff that doesn't help them play
better. Here's what we'd skip on day one.
A full 200-color pastel set — You can't mix pastels like paint — each stick is a fixed color. But 48 sticks is genuinely enough to start; a bigger set overwhelms more than it helps.
Dedicated pastel easel — A board propped against a stack of books is a valid setup for years. Buy an easel when the setup becomes a physical inconvenience, not before.
Pastel pencils — Great for fine detail in finished work, but confusing to use before you understand how regular sticks behave. Add them at month two or three.
Kneaded eraser (for pastel) — You can lift pastel to some degree, but erasing isn't how you correct pastel drawing — you layer over mistakes. A kneaded eraser helps but isn't a beginner priority.
UV-protective glass for framing — Real consideration for archival finished work, but irrelevant before you've produced work you want to keep permanently.
Colour wheels or mixing guides — Pastel doesn't mix — you layer and optically blend. A colour wheel is less useful here than in other mediums. Learn by doing, not by studying colour theory diagrams.
First week
Your first seven days
A short, real plan to get from gear-on-doorstep to actually playing.
Order your starter pastel set and Canson Mi-Teintes paper pad so they arrive together. · Buy
On your first session: do a color chart. Fill a quarter-page with every stick, labeled. You'll use it as a reference for months. · Action
Practice blending two adjacent colors into each other. Use your finger, then a stump, then try layering one color on top of another. An hour of blending exercises beats an hour of following a tutorial. · Action
Try a simple still life — one piece of fruit or a ceramic mug — before attempting a landscape or portrait. Simple shapes teach you everything about mark-making and light. · Action
Watch Karen Margulis or Richard McKinley on YouTube before your second session — both explain pastel technique at a beginner level without assuming prior painting knowledge. · Learn
Spray your first finished piece with fixative, outdoors or near an open window. Do it at arm's length, thin coats. · Action
FAQ
Common questions
What's the real difference between soft pastels and oil pastels?
Soft pastels are chalk-dry, blend easily with fingers or a stump, and require fixative to prevent smudging. Oil pastels are waxy and stick permanently without fixative, but they're harder to blend precisely. Most tutorials and books assume soft pastels. Start with soft pastels unless you have a specific reason to want the oil pastel look.
Can I draw with pastels on regular sketchbook paper?
No — regular paper has almost no tooth and pastels won't adhere. You need textured pastel paper like Canson Mi-Teintes, or sanded paper like UART for more serious work. Trying regular paper is the #1 first-session frustration that sends beginners back to pencils.
Do I really need fixative, or can I skip it?
You really need it. Pastel is literally dry pigment sitting on paper — touching a finished piece smears it instantly. Spray a workable fixatif between layers and again at the end. Krylon Workable Fixatif is $8 and lasts for many pieces.
Is pastel dust a health concern?
Mild concern, worth being aware of. Pastel dust is mostly chalk or clay — not inherently toxic, but you shouldn't breathe it habitually over years. Work with ventilation, don't blow dust off your paper, and wash your hands before touching your face. A dust mask is smart for long sessions.
How do I store finished pastel work without smudging it?
Fix it first with a workable fixatif. Then place a sheet of glassine paper (smooth, non-abrasive) over the surface before stacking or storing. Never use regular copy paper — it will pick up pigment. Framed work behind glass is the safest long-term storage.
How many colors do I need to start?
48 is the sweet spot. Fewer and you'll be reaching for colors you don't have; more and the selection paralysis is real. The Mungyo 48-set covers warm, cool, and neutral ranges in every hue family — that's enough for landscapes, still lifes, and portraiture without overwhelming you.
Is pastel drawing expensive compared to other mediums?
Moderately. The starter investment is $40–90, on par with watercolor and less than oil painting. The ongoing cost is paper and replacement sticks — plan on $15–25 per month if you draw regularly. Premium pastels are expensive per stick but last a surprisingly long time.
Pastel Society of America — The national organization for pastel artists in the US. Annual exhibitions, regional chapters, and educational resources.
Karen Margulis (YouTube) — One of the most-watched pastel educators online. Landscape-focused, approachable for beginners, daily painting challenges. Start here.
Richard McKinley (YouTube and blog) — Master pastellist whose teaching focuses on value, edges, and composition. More technical than Karen Margulis — watch after your first few weeks.
The Pastel Journal — Long-running magazine from Artists Network. Profiles of working pastelists, technique breakdowns, and supply reviews. The most substantive print resource in the medium.
r/Pastel — Active community of pastelists from beginner to professional. Good for technique questions, paper comparisons, and seeing what a wide range of skill levels produces.
"Pastel Painting Atelier" by Ellen Eagle — The most thorough technical book on pastel technique. Covers materials, surface preparation, drawing approach, and composition. Not for absolute beginners — best after a month of practice.
As an Amazon Associate, JustBeginning earns from qualifying purchases.
We may also earn commission from other affiliate programs linked on this
page. Editorial recommendations are independent; we don't choose
products based on commission rates.
Product prices and availability are accurate as of the date and time
indicated and are subject to change. Any price and availability
information shown on Amazon at the time of purchase will apply.
Our top pickMungyo Gallery Soft Pastel Squares 48-Set

 Best starter