Pottery is one of the oldest crafts on earth and, as it turns out, one of the most meditative. Turning a lump of clay into something you can eat soup from is genuinely satisfying. Most beginners start at a community studio, and that's exactly the right call. Here's how to navigate the gear, whether you're heading to a class or setting up at home.
By Colin B. · Published May 15, 2026 · Last reviewed June 5, 2026
The studio route (a 6-week class + basic tools) runs $200–400. Building a home throwing studio means a wheel ($400–700) plus eventual kiln ($700+) — a sensible second-year investment once you know the craft is yours.
We earn commission on qualifying Amazon purchases — see our
affiliate disclosure.
Price tiers and budget totals shown above are editorial estimates;
actual Amazon prices vary.
At a glance
Our top pick in each category
The fastest path through this guide — each best-starter pick by category.
Scroll for the budget and upgrade alternatives.
Take a class before you buy a wheel. A 6-week community ceramics class costs $150–300, gives you hands-on time with a real wheel, and tells you whether throwing is actually your thing before you spend $500 on a wheel that collects dust. Most studios also offer pay-to-fire services — which handles your kiln problem for at least a year.
The wheel and the kiln are separate purchases, and the kiln can wait. A home wheel without kiln access is just a very expensive clay-spinning device. Before buying a kiln, exhaust your alternatives: community studios that fire for a fee, local potters offering bisque services, and co-op studio memberships. The kiln decision can usually wait a full year without limiting your practice.
Hand-building is a serious craft, not a consolation prize for people without a wheel. Coil building, slab work, and pinch pots require $50 in tools and clay — no wheel or kiln needed if you use air-dry clay. Many skilled ceramicists never touch a wheel. Don't assume wheel throwing is the goal until you've tried both.
Clay is the material everything else is built on — literally. For beginners, the choice comes down to firing temperature, texture, and quantity. Stoneware is the all-around beginner clay: strong, forgiving, and fires predictably in most studio electric kilns. Clay with grog (particles of pre-fired clay mixed in) is especially good for beginners because the grit gives your hands something to grip while centering. Buy at least 25 lbs to start — you'll use more than you expect, especially on a wheel where you center and recenter the same clay several times. If you don't have kiln access yet, air-dry clay lets you practice hand-building at home with no firing required.
Best starter
AMACO
High Fire Moist Stoneware Clay, 25 lbs
$$
★★★★★Our rating
AMACO is the standard in ceramics classrooms for good reason — consistent, reliable, and widely available. This high-fire white stoneware is forgiving to center, strong when fired, and used in studios everywhere. Fires to cone 6 in most studio electric kilns. Buy two bags — you'll go through more clay than you expect.
What we like
Studio-standard cone-10 stoneware — what most teachers use
Ready to throw out of the bag — no wedging out hard chunks
Holds shape well on the wheel from day one
What to know
Heavy (25 lbs) — costs more to ship than smaller bags
Needs a cone 5-10 kiln to fire — studio access required
★★★★☆Our rating· Only 1 left in stock - order soon.
If you're not ready to invest in kiln-fire clay and just want to practice the feel of hand-building at home, DAS is the classic choice. Air-hardens to a stone-like finish without any firing, holds paint and glaze, and costs almost nothing. Perfect for pinch pots and coil work while you're deciding whether to pursue pottery seriously.
What we like
Air-dries with no kiln required — start at home today
2.2 lb size is cheap enough to experiment freely
Forgiving for hand-building before you commit to the wheel
What to know
Brittle once dry — not for functional pieces like mugs
★★★★☆Our rating· Only 7 left in stock - order soon.
B-Mix is the clay that experienced potters talk about the way coffee people talk about their single-origin. A semi-porcelain blend — smoother than stoneware but more forgiving than true porcelain — it throws beautifully and produces clean, refined surfaces. Save this for when you can center 3 pounds reliably. Before that, you won't feel the difference.
What we like
Porcelain-like white body that takes glazes beautifully
Fires at cone 5 — accessible to mid-range kilns
Smooth throwing texture once you're past the learning curve
What to know
Less forgiving than darker stoneware — shows every fingerprint
The wheel is the signature piece of pottery gear, and the one beginners agonize over most. Our honest advice: take a class first. You'll spend 6 weeks on a school-quality wheel, develop real muscle memory, and know exactly what to look for before spending $500+. When you're ready, here's the landscape. Electric wheels are the default for beginners — consistent power, easy speed control, no physical fatigue from kicking. A 1/3-horsepower motor handles most beginner to intermediate throwing. Kick wheels are beautiful and meditative but require physical coordination that fights with centering when you're still learning. Avoid them until you can center reliably on an electric wheel.
Pottery Wheel — what's the difference?
A few common shapes, each making a different trade.
Entry Electric
Consistent power, forgiving speed control. Where every beginner should start.
Motor
1/3 HP
Wheel head
11"
Max clay
~8 lbs
Best for First-time throwers, home hobbyists, studio supplements
Tradeoff Less torque for large pieces; fan noise while running
Human-powered, meditative, no electricity needed. Harder to learn on.
Power
None required
Wheel head
14–16"
Max clay
50+ lbs
Best for Experienced potters who want a traditional, unplugged practice
Tradeoff Steep physical learning curve; your legs tire before your hands do
Best starter
Speedball
Artista Pottery Wheel
$629.00 as of Jun 22, 2026
★★★★★Our rating
Speedball has equipped ceramics classrooms for decades. The Artista is their beginner electric wheel — 1/3 HP motor, 11-inch wheel head, and a belt-drive system that runs quietly enough for apartment use. Handles everything from tiny sake cups to medium bowls. Reasonable footprint, reliable brand, and good customer support if something goes wrong.
What we like
Bench-top form fits a small studio or apartment corner
Reversible direction works for left- and right-handed throwers
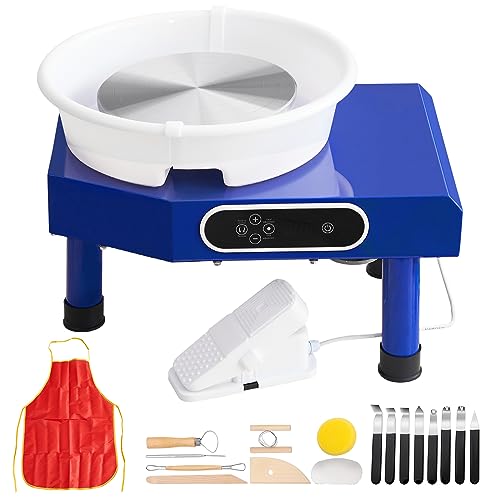
If $500 is too much to test whether pottery will stick, VEVOR's entry wheel gets the job done for significantly less. The 350W motor, foot pedal, and detachable splash basin are all included. It's not as smooth or quiet as a Speedball and the build quality shows the price difference. But if you're genuinely unsure and want a wheel at home before committing, it's a reasonable gamble.
The Whisper earns its name — the direct-drive brushless motor runs nearly silently, a genuine quality-of-life upgrade if you throw for an hour at a time. The 1/2 HP motor handles large vessels, and the foot pedal sensitivity is noticeably better than entry wheels. When you're throwing 3–4 times a week and the Artista starts feeling like a limitation, this is where most serious home potters land.
What we like
Whisper-quiet brushless motor — barely audible at full tilt
Studio-grade reliability; lasts decades with maintenance
Smooth speed control from creep to full speed
What to know
Premium price ($1,400+) — overkill until you're committed
Every potter uses the same core set of five tools regardless of whether they throw or hand-build: a wire tool to cut clay off the wheel head, a needle tool to level rims and test wall thickness, a rib to smooth and compress walls, a sponge for adding water while throwing, and a loop or ribbon tool for trimming feet at leather hard. A good starter kit covers all of these for $25–40. You don't need more than this for the first year. The specialty tools — different rib hardnesses, serrated fettle knives, texture rollers — are for when you have specific techniques in mind.
Best starter
Kemper
Pottery Tool Kit, 8-Piece
$17.24 as of Jun 22, 2026
★★★★★Our rating· Only 6 left in stock - order soon.
The original 8-piece set from Kemper — one of the most established tool brands in ceramics education. Includes a wire clay cutter, needle tool, wood potter's rib, loop tool, ribbon tool, sponge, modeling tool, and steel scraper. Everything you need from your first class to your hundredth. At this price, you don't have to be precious with them.
What we like
Industry-standard kit you'll see in every classroom
Eight essential tools at less than $1 each
Durable wire, plastic, and wood survive years of clay
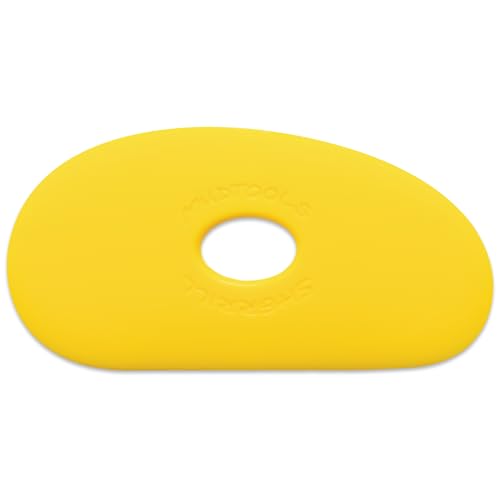
Once you've been throwing a few months, you'll notice the rib in your starter kit doesn't give you much feel for the clay. Mudtools polymer ribs come in hardnesses from Yellow Soft (flexible, for finessing curves) to Blue Firm (rigid, for compression). Serious potters use these for years. Get one when the cheap rib starts feeling limiting.
What we like
Soft polymer flexes around curves — better than stiff metal
The kiln is the most expensive piece of pottery equipment and the least urgent for a beginner. Before buying one, exhaust your alternatives: community studios that fire for a per-pound fee ($0.50–1.00), local potters who offer bisque services, and ceramics co-ops. A home kiln starts at $700 for a small test kiln, and most require a dedicated 240V outlet — budget for an electrician if your space doesn't have one. When you're genuinely ready (typically after your first year, once you're producing more work than a studio can handle on your timeline), start small. The entry option below is a real kiln that fires real work, not a toy.
Best starter
Skutt
KM-614 TableTop Kiln
$$$$
★★★★★Our rating
Skutt is the most trusted name in ceramic kilns, and the KM-614 is their entry-level home option. A 14-inch interior handles mugs, bowls, small platters, and test tiles. Fires to cone 10 — more than you'll ever need as a beginner. The digital controller takes the guesswork out of programming firing schedules. This is the kiln that stays in your studio for a decade.
The step-up for potters doing serious production. The KM818 has a 23-inch interior and can fire a full load of mugs, bowls, and plates at once. At 8 cubic feet, it handles a month of work in a single firing — which is when the per-firing math starts to favor owning over paying for studio time.
Glaze is what transforms a bisque-fired pot from a dust magnet into a real, usable object with color and waterproofing. For beginners, underglazes are the easiest starting point: you brush them on like acrylic paint, they fire with predictable color shifts, and they're food safe after a full firing when topped with a clear overglaze coat. AMACO Velvet Underglazes are the industry standard — the set every ceramics classroom buys, and the one most potters still reach for years later. Don't try to get creative with glaze chemistry in your first month. Brush underglaze, top with clear, fire, and see what happens.
Best starter
AMACO
Velvet Underglaze Set, 12 Colors
$111.99 as of Jun 22, 2026
★★★★★Our rating· In Stock
The set every ceramics classroom buys for a reason: predictable color shifts, consistent coverage, and food safe after a full cone 06 firing. The 12-color set covers everything from earthy terra cottas to vivid blues and greens. Apply with a brush, apply a clear overglaze topcoat, and fire. Simple, reliable, and you'll still be reaching for these in year three.
What we like
12 colors covers the basic palette for any project
Underglazes don't run during firing — predictable color
★★★★☆Our rating· Only 1 left in stock - order soon.
Applied over underglazes, a clear gloss glaze makes work food safe, dishwasher safe, and gives that smooth, glassy finish that distinguishes a finished pot from a bisque piece. This is the final step before firing for any functional ware. One pint covers a lot of work — dip or brush it on over your underglazes, let dry, and fire.
What we like
Food-safe clear coat for finishing functional pieces
Zinc-free won't interact with underglazes underneath
Pint is enough for ~25 standard mugs
What to know
High-fire only (cone 5+) — won't work on low-fire clay
The first time you sit at a wheel, the clay does whatever it wants. The second time, you start to understand why. Here's what your first month of pottery actually looks like — the skills that stack, the frustrations that are universal, and when it starts feeling less like a battle and more like a craft.
Pottery has a threshold. On one side of it, the clay flies off the wheel, your walls collapse, and nothing looks like the bowl you had in mind. On the other side, your hands know what to do and the clay follows. Most people cross that threshold somewhere in the third or fourth week, usually mid-session when they’re centering what feels like the hundredth lump and realize they’ve stopped thinking about their hands.
This is what your first month actually looks like.
Week 1: Your first class (and your first collapsed cylinder)
Most beginners show up to their first ceramics class expecting to leave with a bowl. They leave with clay under their fingernails and a genuine respect for anyone who can make something round.
The thing nobody tells you before day one: pottery is a physical skill first and an artistic skill second. The hardest part isn’t design — it’s getting the clay to cooperate on a spinning wheel. That starts with centering.
Centering is the process of compressing a lump of clay until it’s spinning perfectly symmetrically on the wheel head, with no wobble, before you can open it up and pull walls. It requires pressing down and inward simultaneously while the wheel spins fast, using both hands, with a pressure and posture that feels completely wrong until it suddenly feels right. Most beginners take 3–6 sessions to center reliably. Some take more. Do not measure your progress in bowls.
If your studio starts you on hand-building: start with a pinch pot. Take a ball of clay the size of a baseball, push your thumb into the center, and pinch the walls between thumb and fingers while rotating. No wheel required, and the technique teaches you how clay moves and responds to pressure before you’re fighting a spinning wheel.
Once you can center semi-reliably, you move to opening: pressing your thumbs into the centered clay to create the floor of your vessel, then using your inside and outside fingers to pull the walls upward.
This is where beginners collapse their cylinders. A lot.
Wall collapse is not failure. It is clay telling you that you moved too fast, applied pressure unevenly, or let the walls get too thin at the base while the top stayed thick. When your cylinder collapses, wire it off, wedge it back into a ball, center again, and go. You will do this many times. That is practice.
One technique that helps immediately: keep your hands connected. Your inside hand and outside hand should be braced against each other or against your arm so pressure is steady, not jerky. When your hands separate, the walls wobble. When the walls wobble, they collapse.
The goal this week isn’t a finished pot. It’s a cylinder that stands up. Celebrate the cylinders.
Week 3: Trimming your first leather-hard pot
A thrown pot has to dry to leather hard — damp but firm — before you can trim it. This takes overnight, sometimes longer depending on humidity. At leather hard, the clay holds its shape but is still soft enough to carve cleanly.
Trimming removes excess clay from the base and creates a foot ring — a raised rim that lifts the pot off a flat surface and makes the piece look intentional rather than lumpy-bottomed. Flip your pot upside down on the wheel head (use a little water to hold it in place), attach it securely, and use a trimming tool to shave away clay in controlled passes.
Trimming is satisfying in a way throwing isn’t. It’s slower, quieter, and more deliberate. The pot stops looking like a beginner made it and starts looking like someone made it on purpose.
After trimming: smooth any rough edges with a damp sponge, sign the bottom if you want (the classic move is to carve your initials with a needle tool), and set it to dry completely before firing.
Week 4: Glaze day and your first firing
Bisque firing turns raw, bone-dry clay into a porous ceramic — fragile but permanent, no longer affected by water. Glaze firing adds the glassy coating that makes a pot waterproof, food safe, and finished. Most beginning pottery students let the studio handle both firings; your job is to glaze correctly.
Before glazing: wax the foot ring of your pot with kiln wax so glaze doesn’t bond it to the kiln shelf. Then brush or dip your chosen underglaze color, let it dry, and apply a clear gloss overglaze coat. The colors will shift in firing — the gray-green becomes sage, the brown becomes amber. Don’t try to predict exactly what will happen your first time. Trust the clay and the kiln.
The most important rule of glazing: nothing on the foot ring. If glaze melts onto the foot ring, it fuses your pot to the kiln shelf and you’ll need a chisel to separate them.
Wait at least 12 hours after the kiln reaches temperature before opening it. Pull out your first fired piece. It will look different from what you glazed — more saturated, more glassy, more permanent. Hold it. It’s a real ceramic object made from a lump of clay by your hands. That part never stops being good.
All beginners fail at the same handful of things. Here’s yours, so you know to expect it:
Throwing too tall too fast. You center, open, pull twice, and the walls are shaking at a foot tall. Then they collapse. Slow down. Three to five deliberate pulls instead of two ambitious ones.
Wrong water levels. Too little water and the clay drags and dries against your hands. Too much and the clay goes soft and loses structural strength. Use water sparingly — a wet sponge for the outside, a few drops at a time inside.
Centering too briefly. If you rush centering and move to opening while the clay still has wobble, you spend the next ten minutes fighting that wobble. Center until there’s no wobble. Really.
Forgetting to wire the pot off. When you’re done throwing, use a wire tool to cut the pot off the wheel head before it dries down. Pots that dry hard to the wheel crack when you pry them off.
Impatience with leather hard. Trimming clay that’s still too wet just squishes. Come back tomorrow.
Nobody’s first pots are good. Some people’s first ten pots aren’t good. The only measure that matters is whether you’re learning something each session.
What changes in month two
After a month, you have something real: a working feel for clay, a few pots that survived to firing, and a clear understanding of what’s hard and why.
In month two:
You’ll start developing preferences — stiffer clay versus softer, wider wheel heads, specific rib hardnesses
You’ll learn to read the leather-hard window before it closes
You’ll throw something you actually want to use
Find a studio you like and keep showing up. The gap between “I made this” and “I made this well” closes faster than you’d expect.
Save your money
What you don't need yet
Beginners get pressured to buy a lot of stuff that doesn't help them play
better. Here's what we'd skip on day one.
A pottery wheel in your first month — Take a class first. You'll get genuine wheel time at a studio, confirm the craft is yours, and arrive at the purchase knowing exactly what you want.
A home kiln in your first year — Studio firing services ($0.50–1/lb) solve the kiln problem cheaply while you're learning. Own one when you're producing more than a studio can fire on your timeline.
Porcelain clay — Porcelain is slippery, less forgiving, and harder to center than stoneware. Start with standard stoneware and switch when you can center 3 lbs reliably.
A kick wheel — Beautiful and meditative, but harder to learn on than an electric wheel. Get your centering and pulling solid first — ideally in your second or third year.
Specialty stamps, texture rollers, and slip trailers — Decoration tools are for when you've got your forms under control. Your first year is about centering, pulling, and trimming — not surface decoration.
A pug mill or clay reclaimer — Expensive equipment for recycling dried clay scraps back into workable form. Studios handle this for you. Worth owning after year two if you're burning through 100+ lbs a month.
First week
Your first seven days
A short, real plan to get from gear-on-doorstep to actually playing.
Find a local ceramics studio, community college, or arts center and sign up for a beginner wheel-throwing class. · Action
While you wait for class to start, buy a small block of air-dry clay and practice pinch pots at home. The physical feel of clay matters and there's no substitute for working it with your hands. · Buy
At your first class: focus entirely on centering. Don't worry about making a finished shape. Everything else in pottery is downstream of this one skill. · Action
Come back for your second class, even if the first session was frustrating. Session one is always frustrating and means nothing about your aptitude. · Action
FAQ
Common questions
How much does it cost to start pottery?
It depends on your path. The studio route — a 6-week beginner class at a community ceramics center — costs $150–300 and is the smartest starting point. Add $50–100 for tools and clay. Building a home throwing studio means a wheel ($400–700) and an eventual kiln ($700+), which makes sense in year two once you know the craft is yours.
Do I need my own kiln?
Not for at least a year. Most ceramics studios fire work for a per-pound or per-piece fee, and many potters never own a kiln. A home kiln becomes worth it once you're producing more work than the studio can fire on your timeline — or when you want to experiment with your own glaze schedules.
Should I start with wheel throwing or hand-building?
Take a wheel-throwing class and find out. Many beginners who are certain they want to throw on a wheel discover they prefer the slower pace of hand-building — and vice versa. The two paths share fundamentals (wedging, clay prep, basic firing) so nothing is wasted. If you're starting at home without a class, hand-building (pinch pots, coil work) is more accessible with minimal gear.
How long does it take to learn to center clay?
Most beginners can center reliably after 3–6 class sessions. Some take longer. Centering is a physical, muscle-memory skill — there's no shortcut, and watching tutorials helps far less than it feels like it should. The moment it clicks is unmistakable and deeply satisfying. Put in the reps.
Can beginners make functional pottery like mugs and bowls?
Yes, and most beginners do within their first 6-week class. Your first mug will be lopsided and thick-walled and you'll love it anyway. The functional part comes quickly. The beautiful, refined part — consistent forms, even walls, elegant proportions — takes a couple years of regular practice. That's the game.
Ceramic Arts Network — The most comprehensive online resource for ceramicists. Technique articles, video tutorials, firing guides, and a glaze chemistry database. Start here for anything technical.
Simon Leach Pottery (YouTube) — Patient, detailed, and genuinely great for beginners. His centering and basic forms series is the standard recommendation for new throwers.
Florian Gadsby (YouTube) — Beautiful slow-work videos. Slightly above beginner level, but watching someone throw at this quality sets the standard you're aiming for.
r/Pottery — Active community with honest, helpful feedback. Good for identifying what went wrong with your first pieces and getting glaze troubleshooting advice.
AMACO Glazes — AMACO's site has a color chart for every glaze in their catalog showing fired vs. unfired appearance. Bookmark this before you glaze your first piece.
As an Amazon Associate, JustBeginning earns from qualifying purchases.
We may also earn commission from other affiliate programs linked on this
page. Editorial recommendations are independent; we don't choose
products based on commission rates.
Product prices and availability are accurate as of the date and time
indicated and are subject to change. Any price and availability
information shown on Amazon at the time of purchase will apply.