Nature journaling sits at the crossroads of art and science. You're outside, watching, drawing, writing, and noticing things you'd walk right past otherwise. The gear is simple and portable. Here's what to carry, what to leave home, and how to get started.
By Colin B. · Published June 14, 2026 · Last reviewed June 14, 2026
A decent sketchbook and a pen are all you truly need to start. Add a watercolor field kit and you're under $80 total.
We earn commission on qualifying Amazon purchases — see our
affiliate disclosure.
Price tiers and budget totals shown above are editorial estimates;
actual Amazon prices vary.
At a glance
Our top pick in each category
The fastest path through this guide — each best-starter pick by category.
Scroll for the budget and upgrade alternatives.
Start with a pen and a cheap notebook. Seriously. The biggest mistake beginners make is building an elaborate kit before ever sitting outside and drawing a leaf. Do one session with whatever is in your desk drawer first; you'll learn more about what you actually need.
Paper quality matters more than brush quality. Cheap watercolor brushes and good paper look better than expensive brushes on paper that buckles and pills. Spend money on the sketchbook, not the brushes.
Field watercolors are not the same as student-grade pan sets. The pigment density in a quality field kit (Winsor & Newton Cotman, Schmincke Akademie) is dramatically better than what comes in a generic 24-pan set at the craft store. One good tin of 12 beats three bad tins of 24.
Your sketchbook is the most important gear decision. Nature journaling almost always involves water media (watercolor washes, wet brush, even just a damp finger), so you need paper that can handle moisture without warping. Look for 90 lb (190 gsm) or heavier. Format matters too: most journalers prefer a 5x8 or A5 book that fits in a jacket pocket or day pack. Hardcover or lay-flat spiral bindings beat floppy softcovers for field use.
Sketchbooks — what's the difference?
A few common shapes, each making a different trade.
Spiral-bound
Lay-flat convenience, snags on bags. Best for field sessions.
Binding
Spiral
Lays flat
Yes, fully
Best for Active field sketchers, pack-in hikers
Tradeoff Spiral can bend; pages don't archive as cleanly
Hardcover bound
Cleaner, more archival, acts as its own surface.
Binding
Sewn hardcover
Lays flat
Partially
Best for Journalers who also write, slow-paced observation sessions
The Zeta series uses 270 gsm extra-white paper that handles multiple watercolor washes without buckling. Lay-flat spiral binding means the book stays open on uneven surfaces. The 5.5x8.5 size is the sweet spot for field work: big enough to draw a bird, small enough for a daypack pocket.
What we like
270 gsm paper handles heavy watercolor washes without buckling
Lay-flat spiral stays open on uneven ground or a knee
Extra-white surface makes colors pop compared to cream-toned books
What to know
Spiral binding can snag on bag pockets
Pricier than generic sketchbooks but the paper difference is real
A German-quality hardcover at a fair price with 150 gsm paper, fine for pen-and-ink days and very light washes, and the hardcover doubles as a writing surface in the field. Good starting point if you're not sure watercolor will become a regular thing.
What we like
Hardcover acts as a portable writing surface, no clipboard needed
150 gsm handles pen-and-ink and light washes well
Numbered pages and index built in for cataloging observations
What to know
150 gsm buckles under heavy washes; keep layers thin
A5 format is slightly small for detailed bird or plant spreads
300 gsm cold-press paper in a landscape-format hardcover. This is what serious nature journalers eventually land on. The texture grabs pigment the way studio watercolor paper does, and the landscape orientation suits panoramic scenes and plant spreads. Buy it after you've filled your first two books.
What we like
300 gsm cold-press handles the most ambitious washes without complaint
Landscape format ideal for panoramic scenes and botanical spreads
Hahnemuhle paper holds color saturation better than student grades
What to know
Expensive per page; you'll feel it when you make a mistake
Landscape orientation awkward for quick single-subject sketches
The cardinal rule of nature journaling pens: whatever ink you use has to be waterproof. You'll add watercolor over your pen lines, and a water-soluble ink turns your crisp drawing into muddy smears. Pigment-based fineliner pens (Sakura Micron, Staedtler Pigment Liner) are the standard. Once you're confident with fineliners, many journalers add a fountain pen with waterproof ink for smoother line variation.
Best starter
Sakura
Pigma Micron Fineliner Set (6-pack)
$17.34 as of Jun 22, 2026
★★★★★Our rating· In Stock
The Micron is the nature journaling pen. Pigment-based ink is fully waterproof once dry, sizes 005 through 08 give you everything from hair-thin details to bold outlines, and they're archival so your journals last. Every nature journaling instructor you'll meet recommends these first.
What we like
Fully waterproof once dry: add watercolor over lines with no bleeding
Archival pigment ink; your journals will look the same in 20 years
6 nib sizes in one pack covers every detail level you'll encounter
What to know
Nibs dry out if left uncapped in direct sun; cap between uses
Tips can splay on rough watercolor paper if you press hard
Carbon black fountain pen ink is waterproof, and a fountain pen lets you vary line weight with pressure in a way fineliners can't. The Platinum Carbon Desk is the affordable entry into waterproof fountain pens, a quality nib at a fraction of what a Lamy or Kaweco costs. Load it with Platinum Carbon Black ink (sold separately) and it becomes your most expressive field tool.
What we like
Variable line weight with pressure: more expressive than fineliners
Carbon black ink is fully waterproof once dry
Refillable; cost per page is a fraction of disposable fineliners
What to know
Carbon ink clogs nib if pen sits unused more than a week
Requires separate ink purchase; initial setup has a learning curve
Field watercolors need to be portable, have decent pigment density, and dry in the tin without cracking. Tube paints squeezed into your own palette, half-pan sets, and compact travel tins all work. For beginners, a pre-loaded half-pan set is the most convenient start: no filling, no mixing ratios, just open and paint. Stick to 12-color sets at first; you can color-mix your way to any hue you need.
Best starter
Winsor & Newton
Cotman Watercolor Field Travel Set
$39.76 as of Jun 22, 2026
★★★★★Our rating
The Cotman Field Plus is the go-to beginner field kit for a reason: 12 half-pan colors that cover a full nature palette (earth tones, sky blues, foliage greens), a mixing palette built into the lid, and a collapsible travel brush included. Cotman pigments are student-grade but the quality floor is high enough that your results will look good.
What we like
12 colors cover the full nature palette: earth tones, greens, sky blues
Flip-lid mixing palette built in, no separate palette to carry
Compact tin fits in a coat pocket or small pack pocket
What to know
Included travel brush is stiff; budget for a replacement round brush
Student-grade pigments; some colors are less lightfast than artist grade
If you want more colors to experiment with before committing to a quality set, Arteza's field kit gives you 36 half pans at a price that makes experimentation painless. The pigments aren't as dense as Cotman, but for practice sessions and getting your color-mixing instincts calibrated, it's fine.
What we like
36 colors lets you experiment with mixing before narrowing your palette
Lowest cost of entry for getting actual watercolors in your kit
What to know
Lower pigment density; colors look thin compared to Cotman
Tin is bulkier than 12-pan kits, harder to carry in a jacket pocket
Schmincke's Akademie line hits just below professional grade at a price that's still reasonable. The pigment density is noticeably richer than Cotman, colors stay vivid when dry, and German-made consistency means every pan performs. 12 well-chosen pans cover the full nature palette when you know your colors well.
What we like
Near-professional pigment density; colors stay vivid after drying
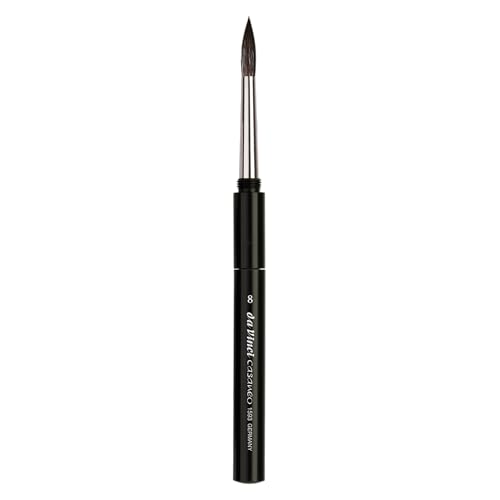
For field watercolor, you only need one or two brushes. A travel brush that collapses into its own handle, plus a small round for detail work. Kolinsky sable holds more water and snaps back to a point better than synthetic, but a good synthetic round works fine for field use. The key feature for field brushes: a travel case or cap so the tip doesn't get crushed in your bag.
Best starter
Princeton Artist Brush
Princeton Neptune Series 4750 Travel Brush Set
$70.42 as of Jun 22, 2026
★★★★★Our rating· Only 9 left in stock - order soon.
Princeton's Aqua Elite synthetics are the best in the category for field use: they hold a sharp point like sable, hold water better than most synthetics, and the handles break down into compact travel form. A size 8 round and a size 4 round handle 90% of nature journaling situations.
What we like
Synthetic sable holds a fine point and snaps back reliably
Travel form collapses to protect the tip in your pack
Holds more water than cheaper synthetics; fewer trips to the water cup
What to know
Bristles splay if dried watercolor builds up in the ferrule
Two-brush set covers most situations but you'll want a third for fine detail
A single collapsible travel brush at a budget price. The synthetic fiber holds a decent point, the metal cap protects the tip, and the handle is compact enough for any kit. If you want to start with one brush and see how you like field watercolor, this is it.
What we like
Collapsible handle with protective metal cap fits any kit
One brush handles most field watercolor tasks at low commitment
What to know
Single brush limits versatility; you'll want a second size quickly
Synthetic fiber doesn't hold water as long as premium alternatives
The best nature journalers are observers first and artists second. Two tools dramatically improve what you see and can record: a loupe for close-up insect and plant detail, and a good field guide. John Muir Laws specifically recommends a 10x loupe as standard kit. A water brush (built-in reservoir) is also worth having for sessions where you can't carry a water cup.
Best starter
Carson
MagniGrip Magnifier with Carabiner
$
★★★★★Our rating
A 10x loupe reveals insect structure, leaf venation, lichen texture, and seed detail that the naked eye misses entirely. The Carson MagniGrip has an LED ring light so you can use it in shadow, and the rubber grip means you can hold it without it rattling around. John Muir Laws recommends 10x specifically; it's the right magnification before you get into microstructure.
What we like
10x magnification reveals insect wing structure and seed detail
Built-in LED ring light works in shadow and under bark
Compact and light enough to carry on a key ring or lanyard
What to know
LED requires a button battery that dies without warning
10x field of view is small; requires steady hand for a clear view
A water brush is a brush with a built-in water reservoir in the handle: squeeze the barrel, water flows to the tip. For sessions where you can't carry a water cup (scrambling on rocks, trail running, birding on a hillside), a water brush means you're never stranded. The Pentel Aquash is the market standard: reliable flow, good tip variety, easy to clean.
What we like
Built-in water reservoir means no cup needed in the field
3 tip sizes (fine, medium, flat) in one pack covers most situations
Market-standard reliability; flow is consistent and controllable
What to know
Overfilling reservoir causes pigment to run too fast; fill halfway
Less precise water delivery than a dip brush for controlled washes
John Muir Laws wrote the book on this hobby, literally. His illustrated guide covers observational technique, how to draw birds and insects step-by-step, writing prompts that deepen your noticing, and how to build a regular practice. Most journaling instructors across the country use this as the course text. Worth more than any piece of gear.
What we like
Written by the field's leading teacher and used in courses nationwide
Covers drawing, observation, and writing practice in one volume
Step-by-step bird and insect drawing sequences for absolute beginners
What to know
Covers techniques broadly rather than deep-diving any single subject
Physical book stays at home; the field habits you learn go with you
The habit that changes how you see the outdoors. You don't need to draw well, you just need to sit down and look. Here's how the first month actually goes.
Nature journaling has a disarming entry point: you sit down somewhere outside, look at something, and write or draw what you see. No experience required. The barrier to a first session is lower than almost any other hobby.
What takes a month is the practice: learning to stay with one subject instead of drifting, learning to notice what’s actually there rather than what you assume is there, and building the sessions into your week often enough that it becomes a habit rather than an occasional outing.
This is what your first month actually looks like.
Week 1: Sit down and look
The single most common mistake beginners make is spending week one buying gear and watching tutorials instead of going outside. Reverse that order. Take whatever pen is in your pocket and whatever notebook is on your desk, find something outside (a weed growing through a sidewalk crack, a bird on a wire, a plant in a pot) and draw it for twenty minutes.
Don’t try to make it look good. Try to notice something true. How many petals does the flower have? Are the leaves opposite each other on the stem or alternating? What direction is the light coming from?
John Muir Laws’s central insight is that the purpose of the drawing is not the drawing: it’s the observation the drawing forces. You notice things when you’re drawing them that you’d walk past in a photograph. The moment you try to draw a leaf’s edge, you have to actually look at it.
Your first week assignment: Sit with one subject per session. Fill the page: drawing, measurements, written observations, questions. “Why does the bark peel in strips?” is a valid nature journal entry. You don’t need answers.
By week two, you’ve sat outside a few times and you know what it feels like. Now add one layer: a small watercolor kit and a brush.
The approach that works for beginners is called “line then wash.” Sketch first in waterproof pen, then add flat watercolor washes loosely over the drawing. You’re not trying to paint a realistic picture; you’re adding color notes. “The berry was this particular red-orange.” “The shadow under the log was this cool gray-green.”
A few things that will frustrate you this week:
The watercolor will look nothing like what you see. That’s fine. You’re not matching reality; you’re noting it. A rough color approximation is useful information in a journal.
You’ll want to add too much water. Start with less water than you think you need. A brush that’s damp but not soaked gives you more control than one dripping wet.
The paper will buckle if you’re on a thin sketchbook. This is a problem to solve by upgrading your book, not your technique. Heavy paper (90 lb and up) doesn’t buckle under light washes.
This is the week most beginners either deepen or drift. Sessions that feel productive early can start to feel rote. You’ve drawn a few leaves, a bird, a mushroom, and you’re wondering if you’re “doing it right.”
You’re doing it right. The instruction is: go slower.
John Muir Laws recommends spending at least five minutes just looking before you pick up your pen. Sit with your subject. Notice behavior. Where does the bird look when it’s nervous? How does the light change the color of the bark from morning to midday? What’s eating the leaves?
The shift from “drawing what I think is there” to “drawing what is actually there” is the central skill of the whole practice, and it only comes from deliberate slowing down.
A useful tool for week three: a 10x loupe. Looking at a butterfly wing under magnification, or the surface of a mushroom cap, or the seed head of a thistle. It changes what you’re able to record. Detail you couldn’t see is suddenly available.
Week 4: Build the habit
The journalers who stick with this do one thing that drifters don’t: they schedule it. “I journal on Tuesday mornings before work and Sunday afternoons” beats “whenever I feel like getting outside.”
Nature journaling doesn’t require a park or a hike. Window journaling (a bird feeder, a potted plant, the tree in the yard) counts. Five-minute sessions where you sketch just one thing count. The practice scales down as well as up.
By week four, you should have somewhere between 10 and 20 pages of observations. Look back through them. The early pages will look rougher than you remember. The later pages will have things you’ve started to notice that you weren’t looking for in week one: patterns, questions, returning subjects.
Drawing from photos instead of life. Photo drawing is its own skill and it’s not nature journaling. The observation is the point.
Waiting for a “good” day to go out. Overcast light is actually better for observation than harsh sun. Go out on ordinary days.
Too much planning, not enough sitting. The impulse to read about technique is strong. Reading John Muir Laws’s book is worth doing. But it doesn’t substitute for time outside.
Comparing your pages to finished journal spreads online. Instagram nature journals are the highlight reel. Every journaler’s early pages look exactly like yours.
What comes next
At the end of your first month, the question is usually about depth rather than technique: which group of organisms do you want to know better? Birds, insects, plants, fungi, and geology are all separate languages with their own field guides, community experts, and seasonal rhythms.
Pick one group and go deep. A serious beginner botanist with a regional plant field guide and a loupe will observe things in a city park that a casual generalist misses in a national park.
iNaturalist is worth adding to your toolkit now. Photograph things you can’t identify in the field, upload them, and the community will name what you drew. It fills the identification gap while your field guide library builds.
Save your money
What you don't need yet
Beginners get pressured to buy a lot of stuff that doesn't help them play
better. Here's what we'd skip on day one.
A professional watercolor palette — Artist-grade Daniel Smith or Winsor & Newton Professional paints are wonderful. You can't tell the difference from a good student set until you've filled at least three sketchbooks.
A tripod or spotting scope — You're not trying to photograph. You're trying to observe. A slow, close-up session with a loupe teaches more than a perfect telephoto image.
Watercolor pencils — A popular beginner purchase that most journalers abandon. They feel like a bridge between drawing and painting but work less well than either. Start with pens and watercolor separately.
An expensive field guide library — Start with one field guide for the species group you're most curious about: birds, plants, or insects in your region. iNaturalist handles everything else for free.
Specialty drawing tools — Ruling pens, crow quills, and brush pens all have their uses, but for the first six months a Micron set is all the mark-making you need.
A camera for reference shots — Drawing from a photo teaches you to copy pixels, not observe nature. Sit with the subject. If it flies away, that's part of the practice.
First week
Your first seven days
A short, real plan to get from gear-on-doorstep to actually playing.
Grab a Sakura Micron set and any paper you have and sit outside for 20 minutes. Draw whatever is in front of you. Don't open YouTube first. · Action
Order your sketchbook and watercolor kit so they arrive by the weekend. · Buy
Pick one specific subject (a single plant, a bird you see regularly, an insect on your window) and fill an entire page with observations about it. Write and draw. · Action
Create a free account on iNaturalist. Upload your observations to get species IDs and connect with local naturalists. · Action
iNaturalist · Free community-powered species identification tool
Watch one John Muir Laws YouTube video on observation technique. His channel is the best free resource in the hobby. · Learn
Do I have to be able to draw to start nature journaling?
No. Nature journaling is about observation and recording; drawing is one tool among several, alongside writing, measurement, and notation. John Muir Laws's whole teaching approach starts with the assumption that you can't draw yet. The drawing skill follows the observation habit, not the other way around.
How is nature journaling different from regular journaling?
Regular journaling is about your inner life. Nature journaling is about the external world: you're documenting species, behavior, weather, habitat, and your specific observations. The tools are also different: waterproof pens, water media, and field guides rather than a diary and a ballpoint.
What's the right kind of paper for nature journaling?
Paper that can handle water without buckling: 90 lb (190 gsm) minimum for light washes, 140 lb (300 gsm) for heavy watercolor work. The Stillman & Birn Zeta (270 gsm) is the most commonly recommended beginner book because it handles both techniques without complaint.
Can I use any watercolor paints?
Almost any watercolor works for the technique itself, but pigment density matters for results. The Winsor & Newton Cotman field kit is the standard recommendation: real pigments, compact tin, built-in palette. Generic craft-store pan sets have weaker pigments and make color mixing harder to learn from.
How long should I spend in one journaling session?
20 to 45 minutes is the sweet spot for beginners. Long enough to actually observe something, short enough that it doesn't feel like a production. John Muir Laws recommends sitting with one subject for the full session rather than walking and sketching multiple things; the depth of observation is where the learning happens.
Is iNaturalist useful for nature journalers?
Extremely useful. You photograph what you see, upload it, and the community identifies the species. It fills the field-guide gap for beginners who haven't built a reference library yet, and connecting with local naturalists gives you observation leads for your area.
John Muir Laws (YouTube + Website) — The closest thing the hobby has to a central authority. Free tutorials, observation prompts, and the curriculum behind the best-selling guide. Start here.
iNaturalist — Free species ID tool and naturalist community. Upload photos from your journal sessions to identify what you drew and connect with local experts.
Nature Journal Club (Facebook group) — John Muir Laws's community group. Active daily sharing, critique, and prompts. The most supportive beginner-friendly community in the hobby.
Field Notes from Elsewhere (YouTube) — Practical field technique tutorials: how to draw birds quickly, how to use a loupe, how to structure observation pages. Excellent complement to the Laws approach.
r/naturejournaling — Active subreddit. Good for gear questions, page shares, and identifying what species you drew but couldn't name. Skip the comparison spirals.
As an Amazon Associate, JustBeginning earns from qualifying purchases.
We may also earn commission from other affiliate programs linked on this
page. Editorial recommendations are independent; we don't choose
products based on commission rates.
Product prices and availability are accurate as of the date and time
indicated and are subject to change. Any price and availability
information shown on Amazon at the time of purchase will apply.
Our top pickStillman & Birn Zeta Softcover Sketchbook (5.5x8.5)


 Best starter