Camp cooking is either sad granola bars and cold beans, or it's the best meal you've eaten outside a restaurant. The difference isn't skill. It's knowing which three pieces of gear actually matter. Here's what to buy, what to skip, and why the camping aisle is lying to you.
By Colin B. · Published June 17, 2026 · Last reviewed June 17, 2026
A reliable two-burner stove, one good pot or Dutch oven, and a utensil kit covers everything for car camping. Add $50-100 for a Dutch oven once you're hooked.
We earn commission on qualifying Amazon purchases — see our
affiliate disclosure.
Price tiers and budget totals shown above are editorial estimates;
actual Amazon prices vary.
At a glance
Our top pick in each category
The fastest path through this guide — each best-starter pick by category.
Scroll for the budget and upgrade alternatives.
Figure out if you're car camping or backpacking before buying anything. Car camping gear is heavier, more capable, and much cheaper. Backpacking gear is ultralight and expensive. Most beginners are car camping and should not overbuy ultralight gear they don't need.
A Dutch oven is not required gear on day one. A simple pot and two-burner stove gets you through the first season just fine. The Dutch oven is the upgrade you buy once you want to make cobbler, braises, and one-pot meals that people actually brag about.
Cast iron requires maintenance. It rusts if stored wet or washed with soap regularly. If that sounds annoying, start with an enameled or aluminum set. Real cast iron rewards the attention you give it. It's not for everyone.
Your stove determines every other cooking decision. Two-burner propane stoves are the right call for 90% of car campers: they're powerful, predictable, and cheap to run. Canister stoves (isobutane) are for backpacking or ultralight trips where weight matters. Wood-burning stoves are for adventurers who want to cook with what's on the ground. Start with propane unless you're certain you're backpacking.
Camp Stoves — what's the difference?
A few common shapes, each making a different trade.
Propane Two-Burner
Car camping default. Two burners, powerful output, cheap fuel.
Fuel
Propane (standard canisters or bulk)
Burners
2
Weight
~9-11 lbs
Best for Car camping, group cooking, Dutch oven use
Tradeoff Too heavy for backpacking; stays in the car
Burns sticks and pine cones. No fuel to pack or buy.
Fuel
Sticks, bark, pine cones
Burners
1
Weight
3-8 oz
Best for Bushcraft, ultralight camping, fire-restriction-free areas
Tradeoff Needs dry fuel; banned in many fire-restricted zones
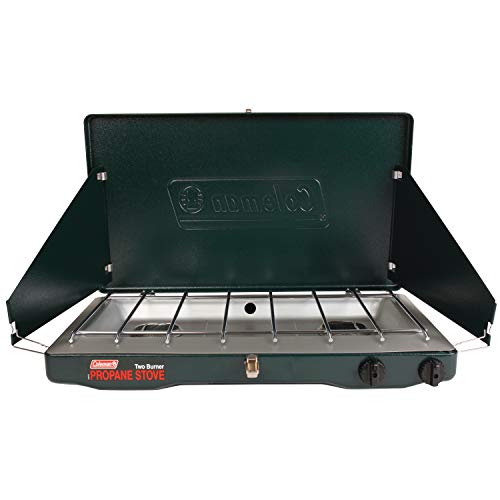
Best starter
Coleman
Classic Propane Two-Burner Stove
$
★★★★★Our rating
This is the stove every car camper has owned at some point. Two burners, adjustable flame, a windscreen that actually works, and a price that won't sting. Runs on standard 1-lb propane canisters or a larger tank with a hose adapter. Proven over decades of real camping. The choice is boring and correct.
What we like
Two burners handle simultaneous cooking without juggling pots
Adjustable flame gives real simmer control, not just on or off
Works with bulk propane tanks via hose adapter, saving money
What to know
Bulky and heavy; not for backpacking or cramped car trunks
Windscreen helps but fails in sustained wind over 20 mph
More BTUs, better simmer control, and the stove serious camp cooks upgrade to after the Coleman. Matchless ignition, a recessed cooking surface that blocks more wind, and a design that actually supports a 12-inch Dutch oven without wobbling. If you're cooking for groups or doing real camp meals, this is where most people land after their first season.
What we like
20,000 BTU per burner; water boils noticeably faster
Recessed cook surface blocks wind better than flat competitors
Stable base handles a full Lodge Dutch oven without flexing
What to know
Costs 2-3x more than the Coleman for similar basic use
Larger footprint; won't fit most standard folding camp tables
If you're backpacking or want a stove that fits in a jacket pocket, the PocketRocket 2 is the answer. Screws onto any standard isobutane canister, weighs 73 grams, and boils water in under three minutes. A specialist tool, not a car-camping stove, but the one most people want once they start doing overnight trips.
What we like
73 grams; disappears into any pack without meaningful weight penalty
Precise flame from simmer to full blast on a 3-arm burner head
Works with any standard isobutane canister sold worldwide
What to know
Single burner only; one-pot meals or sequential cooking required
Canister fuel costs more per BTU than bulk propane over time
The Dutch oven is the single piece of gear that elevates camp cooking from functional to impressive. Coals on top, coals underneath: you can bake bread, braise meat, make cobbler, and simmer stew all in one pot. Key distinction for beginners: camp Dutch ovens have legs and a flat, flanged lid so you can pile coals on top. Regular kitchen Dutch ovens don't. Make sure you're buying the right one.
Best starter
Lodge
4 Quart Camp Dutch Oven
$69.90 as of Jun 22, 2026
★★★★★Our rating· In Stock
The 12-inch, 4-quart camp Dutch oven is the right size for 2-4 people and the best starting point. Three legs keep it level over coals, the flat flanged lid holds a ring of coals on top, and it comes pre-seasoned. Lodge has made this exact product for over a century. Just buy this one.
What we like
Three legs and flanged lid designed specifically for coal cooking
Pre-seasoned at the factory and ready to use on the first trip
Lasts multiple lifetimes with basic care; you buy it once
What to know
Bare iron rusts if stored wet; needs occasional seasoning attention
Heavy at about 8 lbs empty; not for backpacking or carry-in sites
Same proven design, 50% more capacity. The right call when you're regularly cooking for 4-8 people or want to do larger braises, full bread loaves, or a whole chicken. The 14-inch flanged lid also makes a large flat frying surface when inverted over coals.
What we like
14-inch size handles full roasts, bread loaves, and large stews
Flanged lid inverts over coals to become a large camp skillet
What to know
Approaches 12 lbs empty; real weight consideration for carry-in sites
Needs more coals to heat evenly; steeper learning curve on temperature
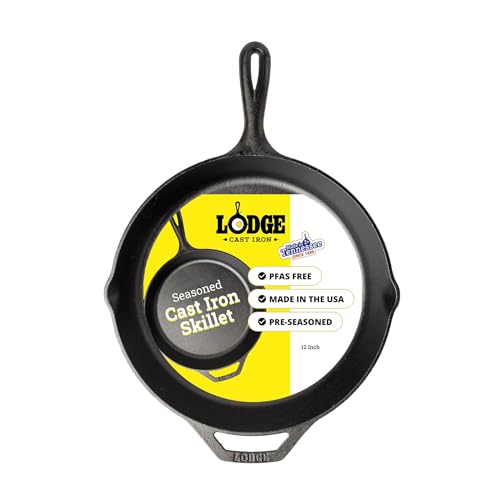
Before investing in a Dutch oven, prove the concept with a cast iron skillet. Same lifetime durability, same cleaning rules, infinitely versatile for camp bacon, eggs, fish, and vegetables. Under $40 and the right starting point if you're not ready for Dutch oven-level commitment.
What we like
Under $40 and virtually indestructible with basic care
12-inch size handles everything from bacon strips to seared trout
What to know
No lid; can't bake, braise, or do Dutch oven-style one-pot cooking
Cast iron care still applies: dry promptly, don't soak in water
This is the category the camping aisle gets most wrong. You don't need a $40 fire-starting kit or a fancy tinder pouch. You need three things: a lid lifter so you can safely pull a 400-degree cast iron lid, heat-resistant gloves so you can handle coals and pots safely, and a chimney starter so your charcoal is ready in 15 minutes instead of an hour. That's the whole list.
Best starter
Lodge
Camp Dutch Oven Lid Lifter
$15.95 as of Jun 22, 2026
★★★★★Our rating· In Stock
A $10 tool you will use every single time you cook with a Dutch oven. It hooks the handle and edge of the lid and gives you a steady grip to lift a 400-degree cast iron lid without dropping it or burning your knuckles. Using a camp fork or improvised stick instead is how people ruin meals and injure themselves.
What we like
Designed specifically for Lodge camp Dutch oven handle geometry
Keeps hands well clear of 400-degree cast iron lids every time
What to know
Single-function tool, but you'll use it on every single cook
May not fit non-Lodge Dutch oven handles; verify before buying
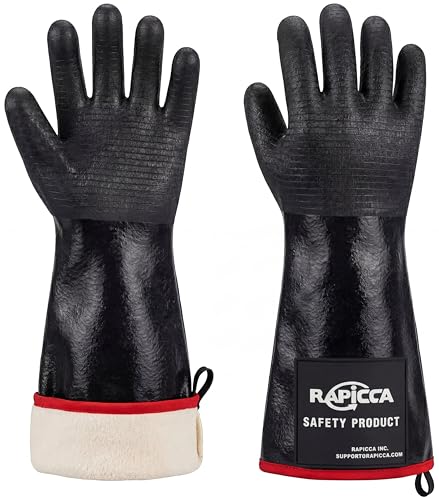
Heat-resistant to 500 degrees and long enough to protect your forearms from coal glow. Better than silicone oven mitts (which snag on everything) and infinitely better than dish towels. These are the gloves camp cooking videos never show but that serious camp cooks all own.
What we like
500-degree rating handles Dutch oven lids and coal repositioning
Forearm-length coverage protects against radiant heat from coals
What to know
Not waterproof; don't dip into hot water or steam
Bulkier than kitchen gloves; fine motor tasks are awkward
If you're using charcoal under and on top of your Dutch oven (the standard technique), a chimney starter gets coals ready in 15 minutes without lighter fluid fumes. Newspaper underneath, coals on top, one match. Cheap, reliable, and why experienced camp cooks always start with hot coals, not raw briquettes.
What we like
15-minute coal lighting without lighter fluid taste or toxic fumes
Large enough capacity for a full Dutch oven load of briquettes
What to know
Only useful with charcoal; irrelevant if you're cooking on gas
Handles get hot in the final minutes; gloves required for pouring
Not everyone wants to cook with cast iron, and that's completely fine. Lightweight aluminum and hard-anodized cooksets are the right answer for backpacking, couples trips, and anyone who doesn't want to haul a 10-pound Dutch oven. These sets handle the same meals and clean up faster. They just don't do coal-baked cobbler.
Best starter
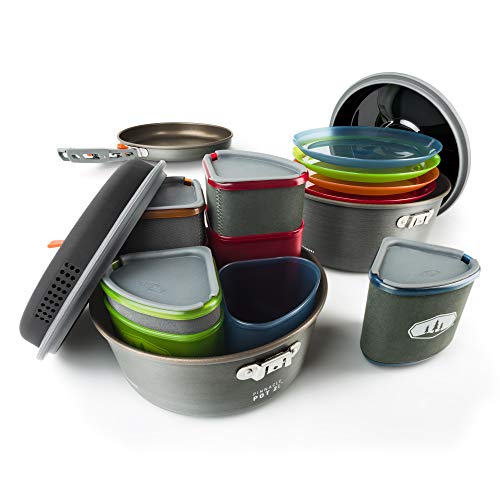
GSI Outdoors
Pinnacle Camper Cookset
$$
★★★★★Our rating
Two pots, two lids that double as bowls, two mugs, a frying pan insert, and a strainer all nested into one compact stack that fits in a backpack pocket. Hard-anodized aluminum heats evenly without hot spots, and the non-stick coating makes cleanup realistic at a campsite sink or water jug.
What we like
Complete cook-eat system for 2-3 people nested into one small pack
Hard-anodized aluminum holds up to years of camp conditions
Strainer lid eliminates a whole extra piece of gear to carry
What to know
Non-stick needs soft utensils; metal spatulas will scratch it
Shallow pots not ideal for large batches or deep-frying
Enamel over steel: durable, easy to clean, and inexpensive. The set includes two pots and lids plus plates and cups, covering most camp meals for small groups. No non-stick coating means you can use metal utensils and scrub hard when something burns, which is the right call for beginners who don't want to baby their gear.
What we like
Metal-utensil safe; no non-stick coating to worry about scratching
Easy to scrub clean; enamel doesn't absorb food smells or stains
What to know
Enamel chips on rock impact and the exposed steel rusts at chips
Heavier than hard-anodized aluminum at similar capacities
Camp kitchens get messy fast. A proper utensil set (spatula, tongs, ladle) sized for camp pots, plus a compact spice kit, covers 90% of what makes the difference between a good camp meal and a great one. Buy a camp-specific utensil set rather than raiding your kitchen drawer. The pieces are sized right, have hanging loops, and you won't accidentally leave your good spatula at the site.
Best starter
Gold Armour
Camp Kitchen Utensil Organizer Travel Set
$$
★★★★★Our rating
Spatula, tongs, ladle, scissors, knife, and cutting board in a roll-up nylon organizer bag. Sized correctly for camp pots. Stainless steel tools last years and the organizer bag keeps everything together so nothing gets left at the campsite.
What we like
Stainless steel construction survives years of camp conditions
Roll-up organizer bag keeps all pieces together and findable
What to know
Tongs shorter than standard kitchen tongs; less reach over open fire
No can opener included; bring a separate one or a multi-tool
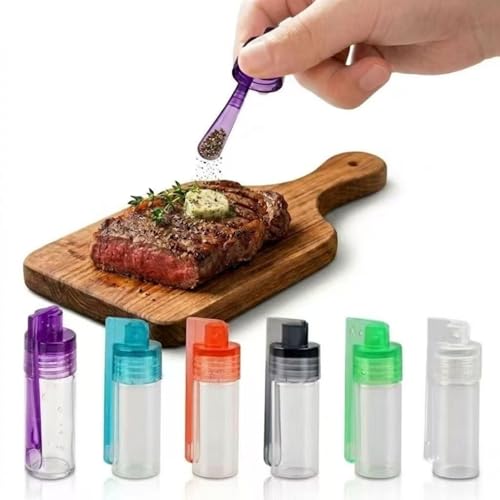
Camp food tastes like camp food until you bring good spices, then it tastes like dinner. Six mini spice containers with leak-proof lids pack into any bag side pocket. Fill with the spices you actually cook with. This is the highest-leverage upgrade for anyone who understands that meals are the point.
What we like
Six containers add negligible weight and fit in any bag pocket
Refillable design lets you customize exactly which spices you carry
What to know
Tins are small; restock on multi-week trips or bring backup bags
Lids can unscrew in a jumbled pack; orient upright or tape-seal
One titanium long-handle spoon that reaches the bottom of any camp pot without burning your hand on the rim. Ultralight backpackers own one; car campers should too. The long handle is genuinely useful when stirring a Dutch oven and titanium won't melt, corrode, or add any flavor to your food.
What we like
Long handle keeps hands away from pot rims and hot steam
Titanium won't corrode, react with food, or add any off-flavor
What to know
Single utensil; still need a spatula and tongs for full cooking
Spoon bowl heats up at high flame; use a cloth when stirring long
Most camp cooks start with granola bars and end up making Dutch oven cobbler by their third trip. Here's what actually moves you from one to the other.
The first camp cooking skill isn’t a technique. It’s discipline: cook what you already know how to make.
Every beginner who brings a recipe they’ve never made at home ends up eating half-cooked food in the dark, hungry and annoyed. The campsite introduces so many variables at once — unfamiliar stove, no counter space, wind, fading daylight, children demanding snacks — that adding an unfamiliar recipe on top of all that is a recipe for a miserable meal.
Cook the pasta you make at home. Make the eggs you cook every weekend. Bring the soup you’ve made a hundred times. Your first few trips, the challenge is executing familiar food in an unfamiliar context. That’s enough.
The single biggest mistake beginners make is overplanning meals. Three-course dinners, multi-pot breakfasts, elaborate foil packet experiments. All of it collapses on contact with a dark campsite, tired kids, and a stove you’ve never used in the wind.
The one-pot rule for trip one: every meal requires one pot maximum. That’s it. Chili from a can, heated through. Pasta with a jar of sauce. Rice and beans from a camping pouch. Instant oatmeal. These are not compromises. They are correct beginner camp meals.
What you’re learning on trip one:
How your stove behaves. Gas stoves run hot and have a narrow simmer range. You’ll burn things. Expect it.
How long everything takes. Water takes longer to boil at altitude. Wind steals heat. Adjust timelines.
How much gear you actually need. Everything you carried but didn’t use is weight you’ll leave next time.
Run a shakedown cook in your backyard before the first trip. Seriously. Boil water on your stove, make a simple dinner, practice lighting it and adjusting the flame in low light. Five minutes of backyard practice prevents two hours of frustration on-site.
Trip two: building toward real meals
By trip two, you’ve figured out the stove, you know your gear, and you can stop thinking about setup. Now you can start cooking.
Two-burner cooking: if you bought a two-burner stove, this is when you actually use both burners. Vegetables on one, protein on the other. Keep it simple but make something that feels like real cooking. A stir-fry over a camp stove is fast, requires minimum cleanup, and impresses people.
The camp breakfast: scrambled eggs with camp sausage, all in one cast iron skillet. The skillet holds heat better than a thin pan, the eggs don’t stick once the pan is properly hot, and the whole thing takes eight minutes. This is the meal that makes people realize camp cooking can be genuinely good.
Meal prep before you leave: chopped vegetables in zip bags, marinated protein, pre-measured spices in your spice kit. Everything that can be done at home should be done at home. The campsite is not a prep kitchen.
Around trip three or four, if you’re cooking with a Dutch oven, something changes.
The Dutch oven runs on a different logic than stove cooking. Instead of direct heat with constant adjustment, you’re working with coals and radiant heat from multiple directions. The food cooks more slowly, more evenly, and in ways that aren’t possible on a stovetop: real bread, slow braises, desserts.
The entry recipe is cobbler. One box of yellow cake mix, one can of pie filling (cherry, peach, apple — your call), mixed together in the Dutch oven. Ten coals underneath, fourteen on top. Thirty to forty minutes. Do not open the lid until thirty minutes have passed. You will open the lid, and there will be cobbler. People at the campsite will look at you differently.
Coal management is the skill. The rule of thumb: total briquettes equals target temperature divided by 25. For 350 degrees that’s 14 briquettes total. More coals on top than bottom, roughly 2:1, so the heat comes from above the way an oven does rather than scorching from below.
Replace coals every 30-45 minutes for long cooks. Bring a chimney starter and have fresh coals ready before the first batch burns out.
What beginners consistently get wrong
Not enough heat at the start. Camp stoves need to preheat just like a kitchen stove. Heat the pan before you add oil. Heat the oil before you add food. Beginners who skip this step get sticking and uneven cooking every time.
Opening the lid too often. Every time you peek into a Dutch oven, you drop the internal temperature 25-50 degrees and add 10-15 minutes to the cook time. Resist.
Underestimating water. Camp cooking requires more water than you think: drinking water, cooking water, cleanup water. Plan for at least two liters per person per day for cooking and cleanup alone, before drinking water.
Food safety in the backcountry. Keep raw proteins cold (in a cooler, below 40 degrees) until they go into the pan. Don’t leave cooked food sitting out for more than two hours. These aren’t optional suggestions at a campsite with no refrigerator to save you.
A realistic first-season arc
Trips 1-2: one-pot meals on a two-burner stove. Goals are getting the stove working reliably and building a meal rhythm.
Trips 3-4: cast iron skillet enters. Real breakfasts, stir-fries, seared proteins. Learning heat management without scorching.
Trips 5-6: Dutch oven if you bought one. Cobbler first, then stews and soups, then bread if you’re ambitious.
By trip six or eight, camp cooking stops feeling like a logistical challenge and starts feeling like the best part of the trip. The food genuinely tastes better outside. The cleanup is simpler. The ritual of cooking over a stove or fire with nothing else to do is one of the better reasons to go camping in the first place.
Save your money
What you don't need yet
Beginners get pressured to buy a lot of stuff that doesn't help them play
better. Here's what we'd skip on day one.
A dedicated camp kitchen table — Any folding table from a home goods store works fine until you're camping often enough to justify a $150 roll-up camp kitchen station.
Freeze-dried meals as a staple — Freeze-dried meals are for fast backpacking, not for learning camp cooking. You're here to cook.
A cast iron tripod — Useful when you're suspending a Dutch oven over an open wood fire, but irrelevant for stove cooking and a specialty item even for serious fire cooks. Buy one after your first season if you get into fire cooking specifically.
A camp percolator — A simple pour-over cone or a Moka pot on your camp stove makes better coffee with fewer parts to clean and less to haul.
A propane hose adapter set — Useful once you're running a bulk 20-lb tank, but a standard 1-lb canister handles a full weekend easily. Buy the adapter when you're camping 10+ nights a year.
First week
Your first seven days
A short, real plan to get from gear-on-doorstep to actually playing.
Buy a stove and at least one cooking vessel. Nothing else happens without them. · Buy
Run a shakedown cook in your backyard before the first trip. Boil water, make a one-pot meal, learn the flame controls. The campsite is the wrong place to figure out your stove for the first time. · Action
Plan meals by how many pots they need. One pot is easiest. Two pots is manageable. Three pots is for experienced camp cooks who've done this before. · Learn
If you bought a Dutch oven, season or re-season it at home before the first trip. Lodge comes pre-seasoned but a second coat of flaxseed oil in a home oven builds a better surface. · Action
Make a detailed meal plan for your trip: breakfast, lunch, and dinner for each day. Pack only ingredients you've confirmed you can cook on camp gear. Overplanning camp menus is the most common beginner mistake. · Learn
Try a Dutch oven cobbler on your first trip. One box of cake mix, one can of pie filling, coals on top and bottom. The payoff will convince you the cast iron was worth every pound. · Action
FAQ
Common questions
Do I need a Dutch oven to cook well at camp?
No. A two-burner stove and a basic pot handles most camp meals: pasta, rice dishes, stir-fries, soups. The Dutch oven unlocks baking and slow-cooked braises, which are legitimately impressive. Most beginners do fine without one for the first season.
Is cast iron worth the weight and maintenance?
For car camping, yes. Cast iron heats evenly, holds temperature better than lightweight pots, and lasts generations. For backpacking, no — use titanium or hard-anodized aluminum. The maintenance is five minutes: dry it promptly and oil it occasionally.
How many charcoal briquettes do I need for Dutch oven cooking?
A rough rule: target temperature in Fahrenheit divided by 25 equals total briquettes. For 350°F that's 14 briquettes: about 10 on top and 4 below. More coals on top than bottom is the correct ratio — too many underneath scorches the food.
Can I use my camp stove inside a tent or vestibule?
Never. Every camp stove is a carbon monoxide source. Running a gas stove in a tent, vestibule, or enclosed shelter is how people die — CO is odorless. Cook in open air, minimum six feet from your tent, regardless of weather.
What should I cook on my first camp trip?
Something you already know how to make. The campsite is not the place to try a new recipe. Cook the pasta or omelet you make at home and let yourself focus on the equipment and conditions. Save new recipes for your third or fourth trip.
Is propane or isobutane better for camp cooking?
Propane for car camping: cheaper, available everywhere, works well in cold weather. Isobutane canister stoves for backpacking: lighter and more compact, but lose pressure when cold and cost more per BTU. Match the fuel to the trip type.
The Lodge Cast Iron Cookbook — The canonical resource for Dutch oven and cast iron cooking. Camp-specific chapters cover coal temperature charts and outdoor technique in detail.
Camp Chef (YouTube) — The brand's channel has some of the best Dutch oven tutorials online. Real technique, not marketing content.
Dutch Oven Dude (YouTube) — Deep-dive Dutch oven camp cooking channel covering coal counting, temperature management, and dozens of tested camp recipes.
r/camping — Active subreddit with gear threads and meal planning posts. The recurring 'what do you cook at camp' threads surface the best beginner recipes.
Outdoor Life — Camp Cooking — Solid camp cooking section covering gear reviews, fire techniques, and backcountry food safety from a long-running outdoors publication.
As an Amazon Associate, JustBeginning earns from qualifying purchases.
We may also earn commission from other affiliate programs linked on this
page. Editorial recommendations are independent; we don't choose
products based on commission rates.
Product prices and availability are accurate as of the date and time
indicated and are subject to change. Any price and availability
information shown on Amazon at the time of purchase will apply.
Our top pickColeman Classic Propane Two-Burner Stove


 Best starter