Fire cooking is as old as humanity, and the basics haven't changed: hardwood coals, cast iron, and patience. A Dutch oven over campfire coals is one of the most satisfying meals you'll ever cook. Here's the gear you actually need, what to buy first, and what can wait until you've got your first fire under control.
By Colin B. · Published June 12, 2026 · Last reviewed June 12, 2026
You can start for $80 with a Lodge Dutch oven and a pair of welding gloves. Add a fire grate and tripod as you find your style.
We earn commission on qualifying Amazon purchases — see our
affiliate disclosure.
Price tiers and budget totals shown above are editorial estimates;
actual Amazon prices vary.
At a glance
Our top pick in each category
The fastest path through this guide — each best-starter pick by category.
Scroll for the budget and upgrade alternatives.
Get a camp Dutch oven with legs, not a kitchen Dutch oven. This sounds obvious until you're standing in a store holding a beautiful Le Creuset thinking it'll work. It won't. Kitchen Dutch ovens have flat bottoms and domed lids. Camp Dutch ovens have legs that hold them above coals and flanged lids designed to hold coals on top for even heat. They are different tools.
Plan to burn your fire down to coals before you cook. Cooking over active flames is for marshmallows. Fire cooking is coal cooking: you need 45-60 minutes of burn time to build a proper coal bed. Start your fire early and get comfortable with this rhythm before dinner is on the line.
Open fire cooking is not BBQ smoking. Smoking is low, indirect heat over hours. Fire cooking is direct heat, faster, more hands-on. If you already smoke briskets, fire cooking is a new craft, not a progression. Different gear, different instincts, equally worth learning.
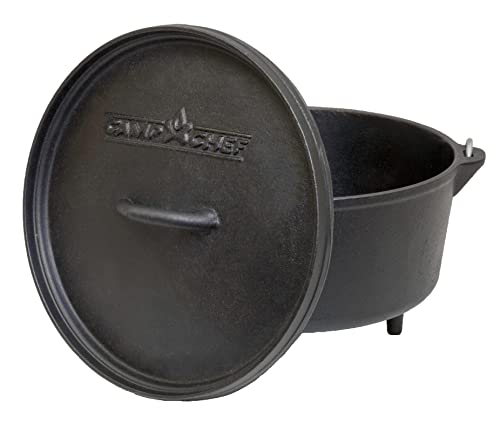
A camp Dutch oven is the one piece of gear that separates cowboy cooking from grilling hot dogs. The legs and flanged lid are what make it a camp Dutch oven: legs hold it above coals, and the flat lid holds coals on top for even heat from above and below. That's how you bake cornbread, braise a chuck roast, or simmer a campfire chili. The 12-inch / 6-quart is the right starting size for most beginners: big enough to cook for four, light enough to carry, and the size most camp recipes are written around. Cast iron is forgiving, nearly indestructible, and improves with every cook.
Dutch Ovens — what's the difference?
A few common shapes, each making a different trade.
10-inch / 4-quart
Lighter and faster to heat; ideal for solo or couple camping.
Diameter
10"
Capacity
4 quarts
Weight
~7 lbs
Best for Solo campers, couples, backpack-friendly setups
Tradeoff Too small for most family recipes; you'll want 12-inch within a season
12-inch / 6-quart
The standard size; fits most camp recipes and serves 4-6 people.
Diameter
12"
Capacity
6 quarts
Weight
~8 lbs
Best for Most beginners; family camping; the size most camp recipes use
Tradeoff Slightly heavy for backpacking; perfect for car camping
For group cooking and large roasts; heavy but maximally versatile.
Diameter
14"
Capacity
10 quarts
Weight
~12 lbs
Best for Groups of 6+, large roasts, batch cooking at basecamp
Tradeoff Too heavy for anything but car camping; harder to heat evenly
Best starter
Lodge
12-inch Camp Dutch Oven
$79.99 as of Jun 22, 2026
★★★★★Our rating· In Stock
Lodge has been making cast iron in Tennessee since 1896, and the camp Dutch oven is their most iconic product. The 12-inch is the sweet spot: big enough to feed four people, light enough to carry, and the size most fire-cooking recipes are written around. The flanged lid holds coals perfectly, the legs sit stable on a coal bed, and the pre-seasoning means you can cook day one.
What we like
Made in the USA since 1896; the most trusted name in camp cast iron
Flanged lid holds coals on top for true baking and braising
Pre-seasoned out of the box; cook on day one
What to know
Weighs about 8 lbs empty; not ideal for backpacking
Lid handle gets scorching hot; a lid lifter tool is not optional
If you're cooking roasts, whole chickens, or bread, extra depth matters. Camp Chef's 12-inch deep version gives you the same diameter as the standard Lodge but significantly more depth for larger cuts and taller loaves. Same camp-style legs and flanged lid. Worth the upgrade once you've got a season under your belt.
What we like
Extra depth handles whole roasts and bread loaves Lodge can't fit
Same legs and flanged lid design; no new technique required
What to know
Heavier than the Lodge equivalent at the same diameter
Less widely stocked; expect a few extra shipping days
When you're cooking for six or more, the 14-inch becomes the right tool. Two extra inches of diameter adds meaningful volume for stews and chilis, and more surface area for browning. It's heavy at roughly 12 pounds before food, so it lives in the car rather than a pack. For family camping and group cookouts, it earns its weight.
What we like
10-quart capacity easily feeds 6-8 people
Same Lodge quality and lifetime guarantee as smaller sizes
What to know
Weighs ~12 lbs empty; impractical for anything but car camping
Needs a larger coal bed; takes longer to heat evenly than the 12-inch
A fire grate is how you cook directly over fire the same way you'd use a stovetop burner: set your cast iron skillet or pot on it and cook. The critical thing is height adjustment. You manage temperature with a grate by moving it closer to or farther from the flame, not by adjusting the fire itself. An adjustable-height grate is worth the extra few dollars over a fixed one. Most public campgrounds have fire rings but no grates, so this is the piece you bring yourself.
Best starter
Texsport
Heavy Duty Swivel Camp Grill
$54.99 as of Jun 22, 2026
★★★★★Our rating· In Stock
The backbone of camp cooking when you want to cook over open flame. The Texsport adjusts in height so you can manage heat distance, straddles most standard fire rings, and holds up to 50 pounds. Grill steaks, cook a cast iron skillet, or park your Dutch oven on it for high-heat cooking. Folds flat for the truck bed. Every serious camp kitchen eventually has one.
What we like
Height-adjustable legs work over most standard fire rings
Rated to 50 lbs; handles any cast iron setup you put on it
Folds flat; fits in any camp bag or truck bed
What to know
Legs can sink into soft or sandy soil; bring tent stakes as anchors
Chrome finish (not stainless) will rust if stored wet
A compact hibachi-style portable grill that uses any fuel (charcoal, briquettes, or hardwood). Lodge's cast iron cooking grate holds heat beautifully and leaves a proper sear on anything you put on it. Not for group cooking, but for a solo fire-grilled steak or two burgers, it's the most versatile small live-fire grill available.
What we like
Cast iron grate produces restaurant-quality sear marks
Works with charcoal, wood chunks, or briquettes interchangeably
What to know
Small cooking surface; practical for 1-2 people only
Heavy for a compact grill; this one lives in the truck, not the pack
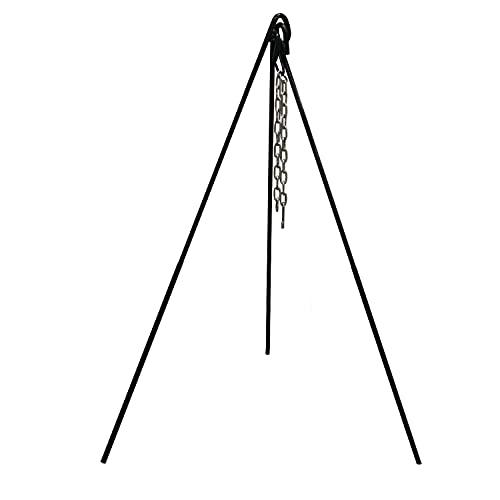
A campfire tripod hangs your Dutch oven or pot directly over the fire, suspended by an adjustable chain. The hook height controls temperature: higher up means gentle simmer, lower means a hard boil. The tripod method is slower to set up than a grate but gives you the most immersive fire-cooking experience and is ideal for soups, stews, and boiling water. Traditional camp setup: tripod for the main pot, grate for steaks and skillets.
Best starter
Stansport
Cast Iron Camp Cooking Tripod
$34.99 as of Jun 22, 2026
★★★★★Our rating· In Stock
The classic tripod setup for hanging a Dutch oven over fire. Adjustable S-hook chains let you control heat by raising or lowering the pot into the flame. The set includes a lid lifter and pot hook. Stands 36 inches tall over the fire. This is how cowboys and chuckwagon cooks have done it for 150 years, and it still works beautifully for stews and chilis.
What we like
Adjustable chain height gives precise temperature control over fire
Includes pot hooks and S-hooks for multiple hanging configurations
What to know
Legs splay wide; needs 3-4 feet of clear space around the fire
S-hooks can slip if overloaded; respect the weight rating
When the Stansport feels undersized, the Texsport campfire tripod is a step up: heavier-gauge steel, rated to 50 pounds, and built with a swivel lantern hanger that keeps your pot level as you reposition it around the fire. Once you're cooking seriously, the sturdier frame gives you more confidence handling a full Dutch oven.
What we like
Heavy-gauge steel rated to 50 lbs; handles a full Dutch oven without shaking
Swivel hanger keeps pot level when repositioning around the fire
What to know
Noticeably heavier than the Stansport; feels overbuilt for casual use
Swivel takes a few minutes to figure out the first time
Fire cooking tools are long-handled versions of kitchen tools because your hands need to stay 18 inches from the fire. The three you'll use constantly: a lid lifter (the single most important dedicated tool for Dutch oven cooking), long-handled tongs for adjusting coals and food on the grate, and a long-handled fork or turner. All of these need to be all-metal: no plastic parts. Most kitchen tongs melt. Your kitchen spatula is too short. Budget $20-40 for a decent set and you won't think about it again.
Best starter
Lodge
4-in-1 Camp Dutch Oven Tool
$15.95 as of Jun 22, 2026
★★★★★Our rating· Only 5 left in stock - order soon.
Lodge's 4-in-1 camp tool is purpose-built for Dutch oven cooking: it functions as a lid lifter, bail lifter, trivet, and lid stand: four jobs in one heat-treated steel piece. No plastic, no melting, no worrying about grabbing the wrong kitchen gadget. The single most useful tool purchase for a beginner setting up a fire kitchen.
What we like
Four functions: lid lifter, bail lifter, trivet, and lid stand in one tool
Long enough handle keeps hands clear of coal heat
Heat-treated steel; no plastic parts to melt or burn
What to know
One tool per function at a time; get separate tongs for grill work too
If you already have tongs and forks, the lid lifter is the one specialized tool worth buying separately. Dutch oven lids sit in a ring of coals on top and are scorching hot at 400°F+. The Camp Chef lifter hooks into the lid knob and lets you peek inside or fully remove the lid with one controlled hand, with no glove juggling required.
What we like
One-handed lid removal keeps your other hand free for a mitt
Hooks securely into the lid knob; doesn't slip under load
What to know
Confirm fit before ordering; not universal across all Dutch oven brands
Heavy gloves are not optional in fire cooking. You will handle a 12-pound Dutch oven that's been sitting in coals at 400°F. You will grab a grate that's been over direct flame. You will instinctively reach in to stop something from tipping over before you can think about it. Silicone oven mitts don't cut it: they grip poorly, degrade at sustained high heat, and leave your forearms exposed. You need something long, made of leather or aramid fiber, and rated for real fire temperatures.
Best starter
RAPICCA
BBQ and Fireplace Gloves
$18.99 as of Jun 22, 2026
★★★★★Our rating· In Stock
The most important safety purchase in fire cooking. RAPICCA's aramid-fiber and leather gloves are rated to 662°F and long enough to protect your forearms when reaching into a coal bed. Unlike silicone oven mitts, they give you real dexterity to grip a Dutch oven lid or move a hot grate. The articulated thumbs mean you can actually pinch and handle things.
What we like
Rated to 662°F; handles Dutch oven lids straight from coal beds
14-inch length covers forearms when reaching over fire
Articulated thumbs give real dexterity; you can grip and pinch
What to know
Thicker than leather; fine dexterity tasks are harder
Hand wash only; machine washing degrades the heat rating
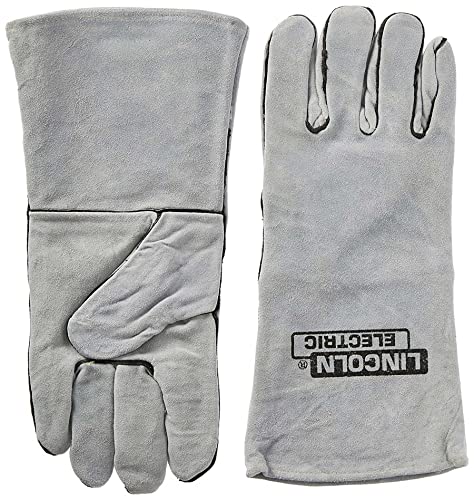
True welding gloves from a hardware store do the same job as specialty BBQ gloves for less. Lincoln's cowhide welding gloves are rated for arc welding temperatures, handle camp cooking heat easily, and cost about half as much as RAPICCA. The catch: they absorb grease and smoke over time and will eventually need replacing.
What we like
Available at any hardware store for under $15; no shipping wait
Rated for welding temperatures; handles camp cooking heat easily
What to know
Absorb grease and smoke; plan to replace them once they're saturated
Less dexterity than aramid-fiber gloves on fine grip tasks
Most people get their first campfire cook wrong: they try to cook over flames. Fire cooking is coal cooking. Here's the mental shift and the real skill curve for your first dozen fires.
Open fire cooking has exactly one piece of counterintuitive knowledge at its center, and if you learn it before you start, everything else falls into place: you are not cooking over a fire. You are cooking over coals.
Active flames are too hot, too uneven, and too unpredictable to cook on reliably. What you want is the patient, even, controllable heat that comes after the flames die down: orange-red coals covered with a thin layer of white ash. Getting there takes 45 to 60 minutes from a full fire. Your first job is building and tending a fire until it’s ready to cook on, and that is a skill in itself.
Day one: Build the fire, then cook
Start your fire earlier than you think you need to. If you want to eat at 7pm, your fire should be lit by 5:30pm. Sounds like a lot of lead time. It’s not.
Use hardwood (oak, hickory, apple, or whatever local split wood is available). Softwoods like pine burn fast and produce resins that make food taste off. Avoid charcoal for your first fire; learn to read natural wood coals first, then add charcoal technique later when you understand what you’re managing.
Build a log-cabin or tepee structure. Once it’s going, add wood steadily until you have a fire big enough to generate a serious coal bed (six to eight logs’ worth for a Dutch oven cook). Then stop adding wood and let it burn.
How do you know when it’s ready? The flames die down. The coals glow orange-red with a ring of white ash forming on the outer edges. You can hold your hand about 10 inches above the coals for three seconds before pulling away. That’s roughly 350–400°F, the right temperature for most Dutch oven recipes.
The first time most beginners open a camp Dutch oven over a fire, they put it directly on the coals and pile more coals on top. This is correct, and it’s also surprising: you are essentially building a little oven inside the fire ring.
The standard setup for 350°F in a 12-inch Dutch oven:
Place 8 coals in a ring underneath the Dutch oven legs
Place 16 coals on the lid in an even pattern
Check every 15-20 minutes; rotate the lid a quarter turn and the oven base a quarter turn in the opposite direction to prevent hot spots
That two-to-one ratio (more coals on top than below) is the baking setup. For stews and soups where you mostly need bottom heat, flip the ratio: more coals underneath, just a ring on the lid to keep moisture from escaping.
Temperature isn’t precise in this work. You’re managing a range, not a setting. The goal is to keep the coals alive and even for the duration of the cook, usually 45 minutes to 2 hours depending on what you’re making. Add fresh coals from the fire as the original ones fade.
Your first cook: Dutch oven chili
The best first fire-cooking recipe is a Dutch oven chili. It’s forgiving (a wider temperature range is fine), it takes about 90 minutes of coal time, and it introduces you to the lid-and-coals method without requiring precision.
Brown ground beef or chopped chuck in the Dutch oven over direct flame before moving to coals. Add canned tomatoes, beans, chili powder, garlic, cumin. Lid on, coal setup, 90 minutes. Check at 45 minutes, stir, add coals if they’re fading. Eat.
You will almost certainly overcook or undercook something on your first attempt. That’s fine. The lesson isn’t in a perfect chili. The lesson is in watching what happens to the coals over time, how the temperature shifts as they fade, and what the Dutch oven looks like at different stages.
The mistakes beginners make (and that you will too)
Cooking over flames instead of coals. The most common one. When you see smoke rising from your food and the outside is charred but the inside is raw, you cooked over flames. Let the fire burn down longer.
Not rotating the oven and lid. Hot spots form where the coals are unevenly placed. Every 15-20 minutes, a quarter turn on the lid and a quarter turn in the opposite direction on the base evens out the cook. Skipping this gives you cornbread that’s burned on one side and raw on the other.
Opening the lid too often. Every time you open the Dutch oven, you lose 10-15 minutes of built-up heat. Set a timer and commit to not opening it until the check interval.
Using too much food. A 12-inch Dutch oven makes 6-quart portions, but filling it to the brim leaves no headroom for steam and makes uneven heat worse. Fill to about two-thirds capacity on your first few cooks.
Not bringing enough water for the fire. The bucket of water or camp fire extinguisher isn’t for when things go wrong. It’s for managing errant coals, controlling flare-ups, and fully extinguishing at the end of the night. Bring it before you light the match.
What changes after a few fires
Around your third or fourth cook, you’ll stop being anxious about whether it’s working and start actually watching the coals. You’ll notice the difference between a good bed of mature coals and a bed of coals that’s too fresh and still crackling. You’ll start reading the sizzle inside the Dutch oven without opening it. You’ll have an instinct for when to add coals and when to let it ride.
That’s when this hobby becomes genuinely enjoyable, when you’re not troubleshooting anymore but just cooking outside, managing a fire, and producing something real from the process.
From there, the progression is natural: bread in the Dutch oven, then a roast, then trying the tripod setup, then eventually moving beyond chili and stew into the broader world of campfire recipes. Every one of those skills builds on reading coals and managing heat. The foundation is the same.
Save your money
What you don't need yet
Beginners get pressured to buy a lot of stuff that doesn't help them play
better. Here's what we'd skip on day one.
A BBQ smoker — Different hobby, different equipment, different skill set. Start here; add smoking later if the mood strikes.
A propane camp stove — Useful for convenience but works against the whole point. Learn fire cooking on fire, not a gas burner.
Specialty fire starters and fire logs — Newspaper and dry kindling build a perfect coal bed. Fire starters are for when you're in a hurry; you're not in a hurry.
A cast iron cleaning kit — Hot water and a stiff brush clean a Dutch oven after every cook. Soap is fine occasionally. No kit required.
A wood-splitting maul or hatchet — Pre-split campground firewood works for your first dozen fires. Buy a splitting tool once you're sourcing your own hardwood.
First week
Your first seven days
A short, real plan to get from gear-on-doorstep to actually playing.
Order your Dutch oven now so it arrives before the weekend. · Buy
Season the Dutch oven before your first cook: coat with a thin layer of vegetable oil and bake upside-down at 400°F for an hour. · Action
Watch one Cowboy Kent Rollins video on Dutch oven fire cooking. His channel is the best intro to this hobby. · Learn
Kent Rollins on YouTube · The most-watched live-fire cooking channel for beginners. Start with any Dutch oven chili or stew video.
Practice starting and tending a fire before cooking anything. Get comfortable reading the coals. · Action
First recipe: Dutch oven chili. It's forgiving, takes about 90 minutes of coal time, and introduces you to the lid-and-coals method without fine technique. · Action
Keep a bucket of water or a fire extinguisher within reach. Not optional. · Action
FAQ
Common questions
Can I use my kitchen Dutch oven over a campfire?
No. Kitchen Dutch ovens (Le Creuset, Staub, Lodge's enameled line) have flat bottoms and round dome lids. Camp Dutch ovens have three legs to sit above coals and flat flanged lids designed to hold coals on top. These are different tools. Using a kitchen Dutch oven in coals risks breaking the enamel and won't cook evenly anyway.
What kind of wood is best for cooking?
Hardwoods: oak, hickory, apple, cherry, or whatever is locally available. Softwoods like pine burn fast and produce too much resin for cooking. But for your first fires, use whatever split campground firewood is available and focus on building a good coal bed. Wood sourcing is a refinement, not a prerequisite.
How do I know when the coals are ready to cook on?
When the flames die down and the coals glow orange-red with a layer of white ash on the edges, you're ready. That usually takes 45-60 minutes from a full fire. The ash tells you the volatile gases have burned off. Cooking over active flames chars the outside and leaves the inside raw.
How do I clean a Dutch oven after campfire cooking?
While the oven is still warm (not scorching hot), pour in a cup of hot water, scrub with a stiff brush, and dump it out. That's it. Dry it immediately over low heat and apply a thin wipe of oil. No soap required unless you've got burned-on protein. Never put it in a dishwasher or let it soak in water.
Is fire cooking safe for campgrounds?
Check fire regulations before you cook. Many campgrounds have fire restrictions, especially during dry seasons. Always use established fire rings, keep a bucket of water handy, and never leave the fire unattended. In open country, bring a portable fire pan to cook on if there's no established ring.
How many coals do I put on top vs underneath a Dutch oven?
A rough starting rule: use about twice as many coals on top as underneath for baking (bread, cornbread). Use a mostly-underneath split for stews and braises. The 'thirds rule' works for 350°F: use the diameter of your oven in inches as the total number of charcoal briquettes (24 for a 12-inch oven), with one-third below and two-thirds on top.
Cowboy Kent Rollins (YouTube) — The most-watched live-fire and Dutch oven cooking channel for beginners. Accessible, practical, and genuinely fun. Start here.
Dutch Oven Society — The oldest organized community around Dutch oven cooking. Cook-offs, recipes, and members who've been doing this for decades.
Lodge Cast Iron — Lodge's own recipes and guides are worth bookmarking. The camp section specifically covers Dutch oven fire techniques.
r/DutchOvenCooking — Active subreddit covering both campfire and stovetop Dutch oven cooking. Good for troubleshooting heat management questions.
A Taste of Cowboy (Kent Rollins book) — Kent Rollins's cookbook with 120 recipes adapted for home and camp cooking. Worth owning after you've done a handful of fires.
As an Amazon Associate, JustBeginning earns from qualifying purchases.
We may also earn commission from other affiliate programs linked on this
page. Editorial recommendations are independent; we don't choose
products based on commission rates.
Product prices and availability are accurate as of the date and time
indicated and are subject to change. Any price and availability
information shown on Amazon at the time of purchase will apply.


 Best starter