Bread is one of the most rewarding hobbies you can start at home, and the learning curve is gentler than you think. The gear list is short: a scale, a Dutch oven, and a loaf pan cover ninety percent of what you'll bake for the first year. Here's what to buy first and what to skip until you've made twenty loaves.
By Colin B. · Published May 15, 2026 · Last reviewed August 7, 2026
A quality Dutch oven runs $40-80 on the budget end; a scale is $15-25. Add a loaf pan ($15) and a bench scraper ($10) and you're fully equipped for under $150. You'll spend more on flour.
We earn commission on qualifying Amazon purchases — see our
affiliate disclosure.
Price tiers and budget totals shown above are editorial estimates;
actual Amazon prices vary.
At a glance
Our top pick in each category
The fastest path through this guide — each best-starter pick by category.
Scroll for the budget and upgrade alternatives.
Buy a scale before anything else. Bread dough is built on ratios (baker's percentages), and scooping flour by volume introduces enough variance to explain most beginner failures. A $15 kitchen scale eliminates nearly all of them. This is the one piece of advice every experienced baker agrees on.
Start with a simple yeasted loaf, not sourdough. Sourdough adds the complexity of maintaining a living starter on top of the already-unfamiliar mechanics of dough. Get comfortable with basic yeast bread first. When you understand fermentation and shaping, sourdough's quirks make sense. You can transition in month two or three.
A Dutch oven is not optional if you want crusty bread. Home ovens don't produce steam, and steam is what gives artisan loaves their shiny, crackly crust and open crumb. A Dutch oven traps the loaf's own steam for the first 20 minutes of baking. Nothing else replicates this at home scale. Budget for one alongside your scale.
A Dutch oven is the closest thing bread baking has to a must-have. When you bake bread inside one with the lid on, the steam released from the dough stays trapped around the loaf, giving you that shiny, blistered crust and open crumb structure you see in artisan bakeries. Lift the lid for the last 15-20 minutes and the crust browns and crisps. Without it, home ovens simply can't replicate this. Any heavy, enamel-coated cast iron pot in the 5-7 quart range works. You do not need a Le Creuset to get great results.
Dutch Oven — what's the difference?
A few common shapes, each making a different trade.
5–5.5 Quart
Fits most standard loaves up to 850g. More manageable weight.
Loaf size
Up to ~850g dough
Weight
~11–12 lbs
Best for
Smaller households, lighter lifting
Best for Standard loaves, smaller kitchens, lighter lifting
Tradeoff Tight for large boules; dough may touch the walls
Lodge makes the best-value Dutch oven in America. The 6-quart size fits a standard 1-kg loaf with room to rise. The enamel coating means no seasoning required and easy cleanup. It goes from room temperature to a 500°F oven without complaint. The dark interior makes it harder to see browning on braises; for bread, it doesn't matter.
What we like
Best-value Dutch oven in America, real enamel at half the Le Creuset price
6-quart bowl fits a full 1kg loaf with room to rise
No seasoning required; enamel wipes clean after every bake
What to know
Lid knob rated to 400°F on older models; wrap in foil before 500°F bakes
Chef's Classic Enameled Cast Iron 5-Quart Casserole
$72.99 as of Jun 22, 2026
★★★★☆Our rating· In Stock
Under $60 on sale, the Cuisinart is a genuine alternative to Lodge if you catch it at the right price. The 5-quart capacity is tight for larger loaves (stay under 850g of dough), but for standard sandwich-sized loaves it's fine. Good choice if you're genuinely uncertain whether bread baking will stick.
What we like
Genuine budget alternative to Lodge, often under $60 on sale
Perfectly adequate for standard sandwich-sized loaves under 850g
What to know
5-quart is tight for larger boules; dough may touch the walls and bake unevenly
Enameled Cast Iron Signature Round Dutch Oven, 5.5 qt.
$295.29 as of Jun 22, 2026
★★★★☆Our rating· Only 15 left in stock - order soon.
The upgrade everyone talks about, and the hype is mostly warranted. Le Creuset's enamel is thicker, more chip-resistant, and the cream-colored interior actually lets you see what's happening inside. The lid fit is tighter, which means better steam retention. Worth it if you're already cooking in it daily. Not worth it if bread is the only reason you're buying.
What we like
Thicker, more chip-resistant enamel than any budget Dutch oven
Cream interior lets you see inside the pot while baking
Tighter lid seal means better steam retention for crustier loaves
What to know
Price premium is hard to justify if bread is the only reason you're buying it
Baking is chemistry. A cup of flour can weigh anywhere from 120g to 160g depending on how it's scooped, how humid the kitchen is, and which bag you opened. That 40g swing changes the hydration of your dough and produces a different loaf every time. A kitchen scale eliminates that variable entirely. It also makes baker's percentage math trivial; scale the recipe up or down in seconds. Fifteen dollars fixes your most common failure mode. No excuse not to own one.
Best starter
OXO
Good Grips 11-Pound Stainless Steel Food Scale with Pull-Out Display
$54.92 as of Jun 22, 2026
★★★★★Our rating· In Stock
The OXO is the scale bakers and cooks consistently recommend because the display pulls out from under the platform so you can still read the number when a large bowl is sitting on it. Reads in 1g increments up to 5kg, and the platform is big enough for a full mixing bowl. Tare function works perfectly. Runs on two AAA batteries that last years. This is the one to buy.
What we like
Pull-out display stays readable when a large bowl covers the platform
1g precision eliminates the most common beginner failure: inconsistent flour
Wide platform fits full mixing bowls and Dutch ovens without tipping
What to know
Pricier than bare-bones scales, but it's the one bakers consistently keep
Under $15 and accurate to 1g. Doesn't have the pull-out display, so you'll need to use a bowl you can see over. For bread baking specifically that's rarely a problem; you're usually weighing directly into the bowl anyway. If your budget is tight, this gets the job done without compromise on accuracy.
What we like
Under $15 and accurate to 1g, all the precision bread baking actually needs
Compact footprint; stores easily in a small kitchen
What to know
No pull-out display; large bowls block the readout; position the scale at an angle
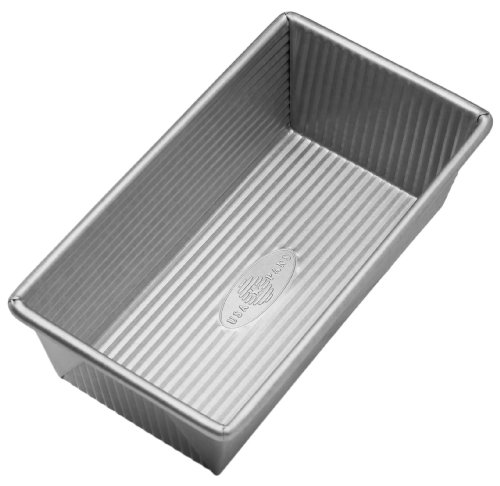
For sandwich bread (soft-crusted, sliceable, everyday loaves) you need a loaf pan. The Dutch oven is for artisan boules; the loaf pan is for everything else. A good pan conducts heat evenly, releases the bread cleanly, and doesn't warp. Aluminized steel is the best material at the price: it bakes more evenly than glass, doesn't rust like bare metal, and doesn't overshoot browning the way dark non-stick pans can. A standard 1-lb pan (8.5 x 4.5 inches) is the size most recipes are written for.
Best starter
USA Pan
Nonstick Standard Bread Loaf Pan, 1 Pound, Aluminized Steel
$17.05 as of Jun 22, 2026
★★★★★Our rating· In Stock
USA Pan makes the loaf pan King Arthur Flour recommends, and for good reason. The aluminized steel bakes evenly without hot spots, and the corrugated surface promotes airflow underneath the loaf. The AMERICOAT coating is light and effective; bread slides right out. This pan will outlast your mixer. One of the best-value pieces of baking equipment you can own.
What we like
King Arthur Baking's top loaf pan pick, tested in thousands of home ovens
Aluminized steel bakes more evenly than glass or dark non-stick pans
AMERICOAT coating releases bread cleanly without spray or parchment
What to know
Slight premium over bare-metal pans, but the even browning is worth the difference
If you already own this dish, it works fine. Glass conducts heat more slowly than metal, which means you'll add 5-10 minutes to most recipes, but you can see the browning through the sides, which is genuinely helpful for beginners. At under $15, it's a reasonable placeholder until you're ready to invest in USA Pan.
What we like
Good choice if you already own one; no extra purchase needed
Transparent sides let you see browning progress without opening the oven
What to know
Bakes unevenly; adds 5-10 minutes to most recipes compared to metal pans
Three cheap tools that make the hands-on part of bread baking dramatically easier: a bench scraper for dividing and moving dough (indispensable), a banneton for proofing artisan loaves (optional but great), and an instant-read thermometer for knowing exactly when a loaf is done. None of these are glamorous. All three will be on your counter every bake day within a month.
Best starter
OXO
Good Grips Stainless Steel Multi-Purpose Scraper & Chopper
$
★★★★★Our rating
A bench scraper is the bread baker's most underrated tool. Use it to divide dough, clean sticky bits off your work surface, fold and move slack dough without tearing, and portion loaves by weight. The OXO has a comfortable grip and inch markings etched into the blade. You'll use this every single bake.
What we like
Divides, moves, and cleans sticky dough off the counter in one tool
Inch markings on the blade let you portion loaves by size on the fly
Comfortable handle that won't fatigue on full bake days
What to know
So cheap that a bare-metal version works nearly as well if you're tight on budget
Banneton Proofing Basket, 9 Inch Round with Bread Lame and Liner
$
★★★★☆Our rating
Bannetons hold a shaped boule during its final rise and imprint those beautiful concentric rings on the crust. You don't need one for sandwich bread, but for artisan loaves it's a real upgrade. Dust with rice flour (not AP, which clumps), turn the loaf out into your Dutch oven, and score. The WERTIOO kit includes a lame and liner.
What we like
Imprints classic concentric rings that make any boule look bakery-quality
Kit includes a lame and liner so you're ready to score and bake immediately
What to know
Sheds rattan fibers on first few uses; dust heavily with rice flour to prevent sticking
The internal temperature of bread when it's done is 190-210°F depending on the loaf. This is more reliable than any tap-and-check method. The Thermapen ONE reads in one second (genuinely one second) and is the thermometer pastry chefs, competition cooks, and obsessive home bakers all use. Overkill for a first loaf, but once you own one you'll never second-guess your bread again.
What we like
One-second read time, fastest thermometer on the market by a wide margin
Eliminates all guesswork on doneness for bread, meat, candy, and deep-frying
Waterproof and built to last a decade of daily kitchen use
What to know
Expensive for bread alone; the ThermoPop gives 80% of the value at half the price
A stand mixer is optional for bread; plenty of great bakers never use one. Kneading by hand takes 8-10 minutes and teaches you dough feel you can't learn any other way. But if you bake weekly or want to tackle enriched doughs (brioche, challah, cinnamon rolls), a mixer pays for itself in time and effort. The KitchenAid Artisan is the default recommendation because it's reliable, widely supported, and the attachment ecosystem is enormous. Don't buy one on day one. Buy one after you've made ten loaves by hand and know the habit will stick.
Best starter
KitchenAid
Artisan Series 5-Quart Tilt-Head Stand Mixer
$379.95 as of Jun 22, 2026
★★★★★Our rating· In Stock
The KitchenAid Artisan is the most-gifted, most-reviewed stand mixer in America, and the attachment ecosystem is unmatched: pasta roller, meat grinder, ice cream maker, vegetable spiralizer. For bread specifically, the dough hook handles most yeasted doughs at low speed without complaint. At speed 2 for 8 minutes, you'll have a properly developed dough. The 5-quart bowl handles a double batch.
What we like
Dough hook handles enriched doughs (brioche, challah) that hand-kneading struggles with
Attachment ecosystem unmatched: pasta roller, meat grinder, ice cream maker
5-quart bowl handles a full double batch without protest
What to know
Motor overheats on very stiff doughs like bagels; stay at speed 2 or lower
Under $70 and capable of handling standard bread doughs, not as powerful as KitchenAid, but if you're testing whether a mixer makes sense for you before committing $400, this is the experiment to run. Don't expect it to handle stiff bagel dough or double batches of whole wheat. For basic loaves, it's a legitimate intermediate option.
What we like
Under $70, a legitimate test before committing $400 to a KitchenAid
Handles standard white and sandwich bread doughs cleanly
What to know
Incompatible with KitchenAid attachments; upgrading means replacing everything
Bread is more forgiving than its reputation suggests. Here's what the first four weeks actually look like: what to make, when it gets hard, and how to read a loaf before you cut into it.
Bread has a reputation for being difficult. That reputation is mostly wrong, or at least it’s wrong for the kind of bread you’re going to make in your first month. A basic yeasted loaf requires fewer active minutes than dinner. The wait times look long on paper but they’re unattended. You start it Saturday morning, and by Saturday afternoon you have a loaf that’s genuinely better than anything you can buy at the grocery store.
What bread actually requires is attention and consistency. Not skill. You’re not improvising; you’re following a ratio, watching a few physical signals, and repeating until the patterns become instinct. This is what the first month looks like.
Week 1: Make your first loaf
Don’t start with sourdough. Don’t start with a challenging recipe. Start with Jim Lahey’s no-knead bread or King Arthur’s basic white sandwich loaf; both are beginner-proof, widely tested, and will give you a real loaf on your first attempt.
Your only goal this week is to make bread and eat it. Not to optimize it. Not to troubleshoot. Just to do the process once, end to end, so you know what it feels like.
Here’s what will happen: the dough will feel too wet and too sticky. This is correct. Most bread doughs are wetter than you’d expect, wet enough that working them feels wrong. Resist the impulse to add more flour. A slightly slack dough is almost always better than a stiff one.
The yeast is doing the work, not you. Your job in week one is to get out of its way.
What to watch for: Did the dough double in size during the bulk ferment? (It should, in 1-2 hours at room temperature.) Is the crust golden-brown all over? Does the loaf sound hollow when you knock on the bottom? These are your three doneness signals. The internal temperature should be 190-200°F if you have an instant-read thermometer.
Let the loaf cool for at least 30 minutes before you cut it. I know. Do it anyway. Cutting hot bread compresses the crumb and makes it gummy. The structure is still setting.
Make the same loaf again. Same recipe, same method. But this time, observe the fermentation.
The transformation from flour and water to bread happens because yeast eats sugars and releases carbon dioxide. Those gas bubbles get trapped in the gluten network, the stretchy web of proteins that forms when you mix flour and water. More gluten development = better gas retention = more open crumb and better rise.
Why fermentation time matters: Under-fermented dough doesn’t rise properly and tastes bland. Over-fermented dough (especially with commercial yeast) can collapse, smell boozy, and have a sticky, gummy crumb. The right ferment ends when the dough has roughly doubled, feels light and airy when you press it, and has visible bubbles near the surface.
Temperature is the lever. Yeast ferments faster at 75°F than at 65°F. If your kitchen is cold, the bulk ferment will take longer. Don’t watch the clock, watch the dough. In a hot summer kitchen, your dough may be ready in 45 minutes instead of 2 hours.
Bread flour vs. all-purpose: In week two, try bread flour if you used all-purpose in week one (or vice versa). Bread flour has more protein (12-14% vs. 10-11%), which produces more gluten and a chewier, more structured crumb. It’s not automatically better; it depends on the loaf. All-purpose makes a softer sandwich bread. Bread flour makes a more rustic, chewy boule. Notice the difference in how the dough handles and how the finished loaf tastes.
This week’s bake will be noticeably better than week one’s. You’ll know why, because you paid attention.
This is where bread baking gets tactile. Shaping is the step most beginners skip or rush; it’s the step that determines whether your loaf holds its form during the final rise and bakes evenly.
Pre-shaping: After the bulk ferment, gently dump the dough onto an unfloured surface. Use your bench scraper to fold it over itself a few times, then let it rest for 15-20 minutes. This rest (called the bench rest) relaxes the gluten and makes final shaping easier.
Final shaping for a boule: Cup your hands around the dough and drag it toward you along the surface, building surface tension. The top of the loaf should feel taut, like a drum skin. You’re not pushing the air out; you’re organizing it. Place it seam-side up in a floured banneton (or a bowl lined with a floured kitchen towel) for the final proof.
Scoring: Just before baking, you score the loaf: make a slash or series of cuts in the surface with a sharp knife or razor blade. Scoring controls where the loaf expands in the oven. Without it, the bread bursts randomly (which still tastes fine, but looks chaotic). One decisive slash at a 30-45 degree angle, about 1/2 inch deep. Commit to the cut; hesitation produces a ragged score.
By week four, you have the muscle memory for the process. You know roughly how your dough should feel at each stage. You can tell under-proofed from over-proofed by sight. This is the inflection point. From this point, your bakes will improve faster than they did in the first month, because you have the vocabulary to troubleshoot.
Reading a loaf before you cut it
Experienced bakers can assess a loaf before cutting. Here’s what to look for:
Crust color: Deep golden-brown all over, including the sides and bottom, means properly baked. Pale means underbaked; add 5-10 more minutes. Dark brown-black on top with pale sides means the oven is running hot or the Dutch oven lid came off too early.
Rise pattern: A loaf with good oven spring (dramatic rise in the first 15 minutes) means proper fermentation and scoring. A flat loaf that didn’t spring much means under-fermentation, over-fermentation, or a score that was too shallow.
Hollow knock test: Pick up the loaf and knock on the bottom with your knuckle. A hollow sound means the interior has finished baking. A dull thud means it needs more time; put it back in the oven directly on the rack for 5-10 more minutes.
Wait before cutting: Seriously. 30 minutes minimum, one hour is better. The crumb is still setting as it cools.
What to make at month two
After four weeks of basic loaves, you have options in all directions:
Sourdough starter: You’re ready. The technique is the same; you’re just replacing commercial yeast with a wild culture. Expect a 2-3 week ramp-up to get your starter active. The Perfect Loaf has the definitive beginner sourdough guide.
Enriched doughs: Add butter, eggs, and sugar to the mix: brioche, challah, cinnamon rolls. These handle differently (slower rise, denser) but the shaping techniques are the same.
Whole grain loaves: Replace 20-30% of white flour with whole wheat or rye. Adds flavor complexity and a denser crumb. Don’t go above 30% whole grain until you’re comfortable with how it affects fermentation.
Focaccia: The no-knead bread’s more social cousin. High-hydration dough, olive oil, dimpled, baked flat. Weeknight-friendly and crowd-pleasing.
You don’t need to rush toward any of these. Two or three months of weekly white loaves will build more skill than a month of ambitious variety. The repetition is the point.
Save your money
What you don't need yet
Beginners get pressured to buy a lot of stuff that doesn't help them play
better. Here's what we'd skip on day one.
A bread machine — It automates everything, which means you learn nothing about how dough behaves. The bread is fine but you'll plateau immediately. Bake by hand for a few months first, then decide if you want to automate.
A proofing box — A bowl of dough covered with plastic wrap in your oven with just the light on, or on top of the fridge, maintains a perfectly adequate proofing temperature. Buy one only if your kitchen is genuinely cold (under 65°F year-round).
A bread lame — A sharp serrated knife or a single-edge razor blade from the hardware store scores bread perfectly well. A proper lame is a nice tool after you care about consistent scoring depth; not a priority in month one.
Specialty flours — Learn the standard recipe with all-purpose first. High-protein bread flour, whole wheat, rye, and emmer are interesting variables to add once you know what a good loaf feels and tastes like.
A stand mixer — Hand-kneading builds the dough intuition that makes you a better baker. Start there. Buy the mixer after you've made 10-15 loaves and know you'll use it weekly.
First week
Your first seven days
A short, real plan to get from gear-on-doorstep to actually playing.
Buy a kitchen scale: this is the one thing you need before anything else. · Buy
Pick one recipe for your first loaf. Jim Lahey's no-knead bread or King Arthur's classic white sandwich loaf are both beginner-proof and well-tested. · Learn
Make your first loaf. Follow the recipe exactly: no substitutions, no adjustments. You're gathering data, not expressing creativity. · Action
Taste it honestly. Note what worked (did it rise? brown evenly? have good crust?) and what you'd want different. This becomes your bake log. · Action
Make a second loaf before the week is out. Repetition is the only thing that builds dough intuition. · Action
FAQ
Common questions
How much do I need to spend to start baking bread at home?
Around $60 bare minimum: a $15 scale, a $40 Lodge Dutch oven (on sale), and whatever flour and yeast you need. If you also want to make sandwich bread, add a $15 USA Pan loaf pan. You can be fully equipped for $75-100 before you buy a stand mixer.
Why does my bread come out dense?
The three most common culprits: your yeast is dead (test it in warm water with a pinch of sugar; it should foam in 5-10 minutes), your dough didn't ferment long enough, or you measured flour by volume instead of weight. Fix the scale problem first, then check your yeast.
Do I need a Dutch oven to bake bread?
For crusty, artisan-style loaves? Yes, practically speaking. You can bake on a preheated stone or sheet pan with a pan of water in the oven for steam, but it's finicky and produces inferior crusts. For sandwich bread in a loaf pan, no Dutch oven needed; the soft crust is baked uncovered.
Should I start with sourdough or yeasted bread?
Yeasted bread first. Sourdough adds the complexity of maintaining a starter, a living culture that requires regular feeding and takes weeks to establish. Get comfortable with how dough behaves (fermentation, shaping, scoring) using commercial yeast, then tackle sourdough. Most people are ready to switch after 2-3 months of weekly baking.
Can I bake bread without a stand mixer?
Absolutely. Most experienced bakers knead by hand. It takes 8-10 minutes per loaf and teaches you how dough should feel at every stage: shaggy, tacky, smooth, elastic. That feel is the skill. A mixer is a time-saver, not a requirement.
What flour should I use for beginner bread?
All-purpose flour for your first few loaves. It's forgiving, widely available, and most beginner recipes are written for it. Bread flour (higher protein content) gives you a chewier, more structured crumb once you want that, but it's not the variable you should be changing in month one.
King Arthur Baking Company — The best free bread recipe archive on the internet, full stop. Every recipe is tested obsessively, the flour weights are accurate, and the tips are written for home ovens. Start every new bread type here.
The Perfect Loaf — Maurizio Leo's site is the gold standard for sourdough, with excellent technique deep-dives on hydration, fermentation, and shaping that apply to all bread baking. Come here at month two.
Serious Eats: Bread — The 'Food Lab' approach applied to bread. Explains the why behind every technique. J. Kenji López-Alt's no-knead pizza dough article is essential reading even if you're not making pizza.
Brian Lagerstrom (YouTube) — The most practical bread YouTube channel for home bakers. No-nonsense, real kitchen, real results. His basic white bread video is the best starter resource on the platform.
Joshua Weissman (YouTube) — Entertaining, accessible, covers a wide range of breads from simple to ambitious. Good for inspiration and visual technique. Watch Brian Lagerstrom first for mechanics, then Weissman for variety.
r/Bread — Friendly community. Post a photo of your loaf's crumb with your recipe and process, and you'll get a thoughtful diagnosis of what went wrong (or right) within an hour.
Flour Water Salt Yeast by Ken Forkish — The book to buy when you're ready for a real reference. Forkish's Saturday White Bread is the loaf that converts people from 'occasional baker' to 'I bake every weekend.' Excellent technique grounding.
As an Amazon Associate, JustBeginning earns from qualifying purchases.
We may also earn commission from other affiliate programs linked on this
page. Editorial recommendations are independent; we don't choose
products based on commission rates.
Product prices and availability are accurate as of the date and time
indicated and are subject to change. Any price and availability
information shown on Amazon at the time of purchase will apply.
Our top pickLodge 6 Quart Enameled Cast Iron Dutch Oven


 Best starter