A food dehydrator turns raw meat, fruit, and vegetables into shelf-stable snacks you made yourself. Jerky is the gateway: cheap cuts of beef, a seasoning packet, eight hours of low heat, and you have something better than anything at the gas station. Once that first batch disappears in a day, you will be making trail mix, dried apples, and backpacking meals too.
By Colin B. · Published May 29, 2026 · Last reviewed August 7, 2026
A decent dehydrator and a seasoning pack gets you started for around $120. Add a vacuum sealer and a mandoline and you are at $260, which covers everything you will use for years.
We earn commission on qualifying Amazon purchases — see our
affiliate disclosure.
Price tiers and budget totals shown above are editorial estimates;
actual Amazon prices vary.
At a glance
Our top pick in each category
The fastest path through this guide — each best-starter pick by category.
Scroll for the budget and upgrade alternatives.
Start with jerky. It's the highest-reward, lowest-risk first project. Cheap cuts of beef (eye of round or top round), a seasoning and cure packet, and a dehydrator set to 160°F. You cannot really mess it up, and the result is genuinely excellent.
The cure packet is not optional for meat. Sodium nitrite in the cure inhibits bacterial growth at low dehydrating temperatures. Skip it and you're gambling. Pre-mixed cure-and-season packets (Hi Mountain, Nesco) handle this for you, buy one before you start.
Horizontal fan dehydrators are better than vertical ones for meat. Vertical (round) dehydrators have uneven heat that requires rotating trays every few hours. Horizontal (rectangular) dehydrators push air across every tray evenly. For set-it-and-forget-it jerky, horizontal wins.
The gear
What you actually need
Dehydrators
The most important purchase. Two designs dominate: round/vertical (fan on top or bottom, trays stack) and rectangular/horizontal (fan in back, air flows across every tray evenly). Vertical models are cheaper and fine for fruit and vegetables. Horizontal models heat more evenly, critical for jerky and meat, where hot and cool spots affect both flavor and food safety. For a first dehydrator, get at least 6 trays, an adjustable thermostat up to 165°F, and a built-in timer.
Dehydrators — what's the difference?
A few common shapes, each making a different trade.
Horizontal Fan (Rectangular)
Even heat on every tray, no rotating required.
Fan location
Back of unit
Tray count
6–10 trays
Best for
Meat, jerky, large batches
Best for Meat jerky, large batches, set-and-forget overnight runs
Tradeoff Larger countertop footprint; costs more than round models
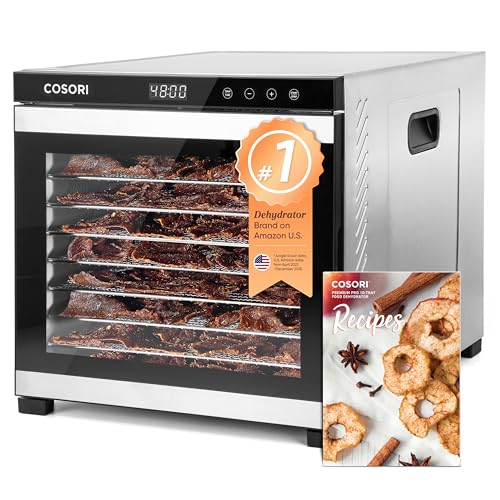
The Cosori is where most serious beginners land and stay. Ten stainless steel trays, a horizontal rear fan that distributes heat evenly across every tray, a 48-hour digital timer, and a temperature range of 95–165°F (the 160° setting is what you need for safe meat jerky). Runs quietly enough to leave overnight. Trays are dishwasher safe. Under $150 most days.
What we like
Horizontal rear fan gives even heat, no tray rotation needed
48-hour digital timer with auto-shutoff for overnight runs
Stainless steel trays are dishwasher safe and don't warp
What to know
Larger footprint than round models, needs dedicated counter space
The Nesco is the honest budget entry, under $75, expandable to 12 trays (sold separately), and capable of turning out solid fruit chips and decent jerky. The vertical airflow means you'll rotate trays halfway through for even drying, but that's a small trade for the price. A smart buy if you're not yet sure the hobby will stick.
What we like
Under $75 and expandable to 12 trays as your hobby grows
Wide thermostat range (95–160°F) covers all common foods
What to know
Vertical airflow requires rotating trays every 2-3 hours for meat
Fan noise is louder than horizontal models, not for light sleepers
Excalibur is what serious dehydrating communities default to eventually. Parallelflow technology pushes warm air horizontally across every tray simultaneously, the most even heat of any home dehydrator. Nine trays hold a full camping trip's worth of food in one run. Overkill for occasional use; worth every dollar if you dehydrate weekly.
What we like
Parallelflow system dries every tray identically, the gold standard
Nine large trays fit a full backpacking season in one session
Built-in 26-hour timer on the 3926T model
What to know
Expensive ($280–$350), hard to justify until you're dehydrating weekly
Bulky 17" × 19" footprint; needs dedicated counter real estate
Seasoning packets that include a cure (sodium nitrite) are not optional for meat jerky, they inhibit the bacteria that thrive in the temperature range where dehydrators run. Pre-mixed cure-and-season packets handle the chemistry for you. Buy a variety pack for your first few batches, find two flavors you love, then stock those. Wet marinades work too but require a different process: marinate overnight, pat dry, and finish the meat to 160°F.
Hi Mountain's cure-and-season packets are the jerky-making standard. Each packet handles one pound of meat and includes both the seasoning and the sodium nitrite cure, so the food safety is baked in. The variety pack covers original, hickory, and Cajun. Follow the directions exactly your first time; you'll have shelf-stable, deeply seasoned jerky in 8 hours.
What we like
Cure included, no separate sodium nitrite sourcing needed
Variety pack lets you find your flavor in the first few batches
Each packet = exactly 1 lb of meat, foolproof portioning
What to know
Per-batch cost ($3-4/lb of meat) adds up vs. buying cure in bulk
Flavor intensity skews toward classic American jerky, not very complex
NESCO's 3-flavor variety pack (original, cracked pepper, and teriyaki) is the grab-it-now option, stocked at most hardware and sporting goods stores. The packets include cure and seasoning together. Slightly less nuanced than Hi Mountain, but they work and they're cheap per batch.
What we like
Widely stocked in hardware and sporting goods stores
Includes cure, safe for first-time meat dehydrating
What to know
Flavor profile is simpler than Hi Mountain or premium blends
Bags are smaller, check packet sizing before portioning
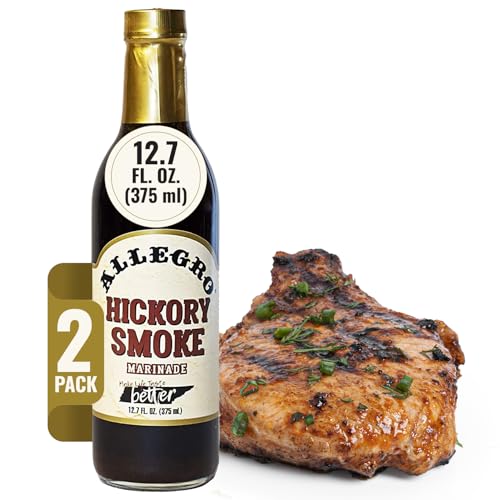
For wet-marinated jerky instead of a dry cure: soak strips in Allegro overnight, pat dry, dehydrate. The smokiness soaks in deeper than any dry rub. Important: with wet marinades you must still hit 160°F, either use a dehydrator that reaches it or finish strips for 10 minutes in a 275°F oven. This is for batch #3 or #4, not your first run.
What we like
Deep smoke flavor that penetrates the meat, not just the surface
Flexible, works for beef, venison, turkey, and pork
What to know
No cure included, you must manage food safety separately
Wet marinade makes a mess on trays; use liner sheets underneath
Plain mesh trays work fine for jerky and thick-cut vegetables, but sticky foods, fruit leather, marinaded meat, sauces, will bond to the mesh and tear apart when you try to remove them. Non-stick liner sheets sit on top of the tray and lift off cleanly. You need at least 2-4 sheets to cover a batch. Buy sheets matched to your dehydrator's tray shape: square for Cosori and Excalibur, round for Nesco.
Best starter
Aieve
Silicone Dehydrator Sheets 14x14, Non-Stick Liner Set (6-Pack)
$32.99 as of Jun 22, 2026
★★★★★Our rating· In Stock
These 14x14-inch silicone sheets fit Cosori, Excalibur, and most square-tray dehydrators. Silicone doesn't absorb odors, cleans up in seconds, and handles fruit leather, honey-glazed jerky, and sticky marinades without tearing. A 6-pack covers a full batch. Reusable indefinitely.
What we like
Reusable indefinitely, one purchase covers years of batches
Silicone releases sticky marinades and fruit leather without tearing
What to know
Must match your dehydrator's tray size, check dimensions first
Slightly reduces airflow; some foods take 30-60 min longer on liners
Excalibur's own sheets are made for their 14-inch trays and are the reference standard for fruit leather and liquid applications. Thicker than generic silicone mats, they hold shape at high temps and won't slide. If you have an Excalibur, these are the right match, don't try to force generic mats to fit.
What we like
Made for Excalibur's 14" trays, exact fit, no improvising
Thicker material handles high-moisture purées without buckling
What to know
Only useful if you own an Excalibur, don't buy for other brands
More expensive per sheet than generic silicone alternatives
Properly dehydrated jerky lasts 1-2 months in a zip-lock bag at room temperature. Vacuum-sealed in the fridge, it lasts up to 6 months. Vacuum-sealed and frozen, a year-plus. If you're making food for backpacking trips or just want to batch-cook efficiently, a vacuum sealer is the piece that makes the whole system work. It also pays off for marinating, vacuum-sealed meat absorbs marinade in 30 minutes instead of overnight.
Best starter
FoodSaver
FM2435 Vacuum Sealer Machine
$$
★★★★★Our rating
FoodSaver is the vacuum sealer most home kitchens end up with, and for good reason, it's reliable, the bags are widely available, and it handles both bags and canisters. The FM2435 adds a built-in bag cutter and roll storage so you cut the exact size you need. A machine you'll use long after your first dehydrating batch.
What we like
Built-in bag cutter and roll storage, cuts any size you need
Compatible with FoodSaver canisters for soft or liquid foods
Widely available bags at grocery stores when you run out
What to know
FoodSaver bags cost more per bag than generic alternatives
Bulkier than budget sealers, takes up counter or drawer space
Half the price of FoodSaver and one of the best-reviewed budget sealers on Amazon, with 13,000+ ratings. Works with any standard embossed vacuum bag, has separate dry and moist modes, and comes with bags and a bag cutter included. Compact enough to store in a drawer between uses. For sealing batches of jerky and dehydrated produce, it does exactly what you need.
What we like
Works with any standard embossed vacuum bag (no brand lock-in)
Compact footprint stores in a drawer between uses
Dry and moist modes handle jerky and wet-marinated foods
What to know
No built-in bag roll storage; you cut from a separate roll
Less consistent seal quality on very wet or oily foods
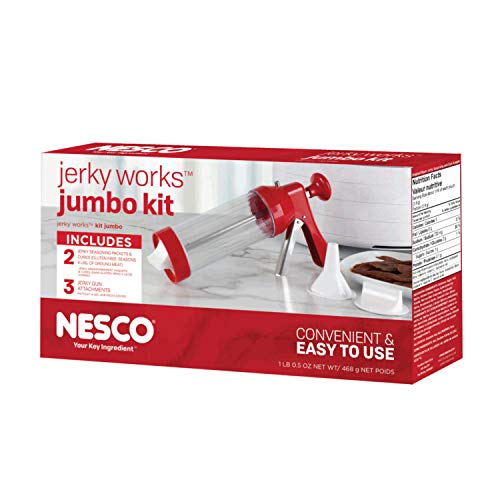
Even cuts dry evenly. Uneven slices mean some pieces finish hours before others, you end up with jerky that's simultaneously tough and underdone in the same batch. A mandoline gets you uniform 1/8-inch strips in a quarter of the knife time. The jerky gun is a different tool: fill it with seasoned ground beef and extrude strips directly onto the trays. Ground-meat jerky is cheaper per pound than whole-muscle cuts and more beginner-forgiving.
Best starter
Mueller
Austria Adjustable Mandoline Slicer
$34.99 as of Jun 22, 2026
★★★★★Our rating· In Stock
The Mueller mandoline gives you consistent 1/8-inch slices of beef, chicken breast, or produce in seconds. Adjustable thickness from paper-thin to over 1/4 inch covers everything from fruit chips to thick jerky strips. The handguard actually works, use it every time. Even thickness is the single biggest factor in even drying.
What we like
Consistent 1/8" slices, the #1 factor in even drying
Four blade settings covers jerky strips through thin fruit chips
Handguard included and actually functional
What to know
Razor-sharp blade requires full attention, non-negotiable
Plastic frame flexes slightly on very firm root vegetables
The jerky gun works like a caulk gun: pack the barrel with seasoned ground beef, extrude strips directly onto trays. No slicing, no whole-muscle cuts required. Ground beef is cheaper per pound than eye of round, and the resulting sticks are dense and chewy, different from whole-muscle jerky, not better, just different. Great for batch variety.
What we like
Makes uniform ground-meat strips, no slicing or whole-muscle cuts
Ground beef is cheaper per pound than eye of round for whole jerky
Includes multiple tip shapes for strips and sticks
What to know
Ground-meat jerky has a different texture than whole-muscle, not for everyone
Barrel cleaning takes time; disassemble immediately after use
Dehydrating food is one of those hobbies that looks more complicated than it is. There’s a thermostat, some trays, and a lot of waiting. That’s most of it. The part that matters — the food safety — boils down to a few rules you’ll know by heart after your first batch.
Most people start with beef jerky. This is the right call. Jerky is forgiving, it tastes genuinely excellent when made at home, and the result is so obviously better than anything in a store that you immediately want to make more. From there, the hobby expands: fruit chips, backpacking meals, dog treats, trail mix components, dried herbs. But jerky first.
Week one: Your first batch of jerky
The equipment you need: a dehydrator, a jerky seasoning packet with cure, and a piece of beef. That’s it.
The meat: Eye of round or top round. Cheap, lean, and easy to slice. Fat goes rancid during dehydrating — stay lean. Buy a two-pound piece.
The slice: 1/8 inch, against the grain. Slicing against the grain shortens the muscle fibers, which gives you jerky you can bite through instead of jerky that pulls like rope. A mandoline makes this fast and consistent. A sharp knife and a steady hand works too, but freeze the meat for 45 minutes first to firm it up.
The cure: Use the packet. Sodium nitrite inhibits bacteria at the low temperatures a dehydrator runs. Without it, you’re depending entirely on temperature to make the meat safe — which requires hitting 160°F throughout, which is tricky to verify. The cure-and-season packets from Hi Mountain or Nesco handle both the seasoning and the safety chemistry. Follow the instructions exactly. Mix the seasoning and cure with the sliced meat, refrigerate for 6-8 hours or overnight, then load the trays.
The dehydrator: Set it to 160–165°F. Arrange strips so they don’t touch or overlap. Don’t stack. Let it run 4-6 hours, then start checking. Properly done jerky bends without breaking and has no moist spots in the center.
Week two: Fruit chips and the temperature chart
After jerky, the second easiest win is apple chips. No cure, no seasoning, no food safety complexity. Slice thin (1/8 inch on the mandoline), optionally toss with cinnamon, lay flat on the trays, and run at 135°F for 6-8 hours. The result: crisp, concentrated, actually sweet apple chips that taste like what fruit is supposed to taste like.
This is where you learn the temperature chart. There are three zones:
95–115°F — herbs, flowers, and things you want to preserve raw enzymes in. Gentle and slow.
125–135°F — fruit, vegetables, and anything you don’t want to cook. Long drying times (8-16 hours for dense produce).
155–165°F — meat. Non-negotiable for food safety. Shorter total time (4-8 hours depending on thickness).
The USDA and National Center for Home Food Preservation publish time-and-temperature tables for every food type. Bookmark those before your first non-jerky batch. You’re not improvising — there are tested numbers for strawberries, peppers, mushrooms, and everything else.
What to try this week: Apple slices at 135°F. Banana slices at 135°F (they come out like candy). Sliced mushrooms at 125°F (fastest dehydrating food there is — 4-6 hours and they’re done).
Weeks three and four: Backpacking food and batch cooking
This is where dehydrating starts paying off at scale. Pre-made backpacking meals from companies like Mountain House cost $10-15 per serving and weigh more than they need to. Dehydrating your own camp food costs a fraction of that and tastes significantly better because you made it from real food.
The approach: cook something at home (a rice-and-bean dish, a pasta sauce, a stew), spread it thin on non-stick liner sheets on the dehydrator trays, and dry at 135°F until it’s brittle and snaps instead of bending. Crumble it. Pack it into a zip-lock or vacuum-sealed bag. In camp, add boiling water and wait 10-15 minutes.
Meals that dehydrate well: rice and lentils with spices, pasta with a tomato-based sauce, bean soups, stir-fried rice dishes. Things that don’t dehydrate well: anything with significant fat (sauces with cream, fatty meats), fresh dairy, high-water-content vegetables like cucumber or lettuce.
The vacuum sealer starts earning its keep here. Dehydrated backpacking meals vacuum-sealed last 12+ months in a cool, dark place. Zip-locked, they’re good for a few months. If you’re building a trip food supply in advance, seal and label everything with the date and contents.
A note on storage: Light and heat are the enemies of dehydrated food. Store in a cool, dark cabinet or the fridge. Mylar bags with oxygen absorbers extend shelf life even further for long-term storage (1-5 years) — worthwhile if you’re prepping for a long trip or making large batches.
Uneven slices: The parts of a batch that are thicker take hours longer than the thin parts. By the time the thick pieces are done, the thin ones are overdone and brittle. A mandoline solves this immediately. Knife-cut jerky by an experienced hand is fine; beginners averaging 1/4-inch pieces need the mandoline.
Not using liner sheets for sticky food: Wet-marinated jerky and fruit leather will bond to mesh trays. You’ll tear the food trying to get it off. Non-stick silicone liner sheets go on top of the tray before you load food. Buy them before your first wet-marinade batch.
Not finishing the oven step with wet marinades: If you use a wet marinade without a cure, the USDA recommends finishing jerky strips in a 275°F oven for 10 minutes after dehydrating to ensure the center reaches 160°F. It’s an extra step, but it closes the safety gap.
Opening the dehydrator constantly: Every time you open it, you lose heat and add humidity. Check at the first realistic done time, not before. For jerky at 160°F, that’s about 4 hours in. Trust the process.
What month two looks like
By month two, you’ve probably made four or five batches of jerky, tried a few kinds of fruit, and figured out which trays in your dehydrator run hotter than others (it happens — rotate the trays if you notice it). The hobby has settled into a rhythm: slice on Saturday, season Friday night, load the machine Saturday morning, done by afternoon.
The next frontiers: dehydrated vegetables for soups (drop them straight into a pot of broth from the bag), fruit leather (blend fruit, spread on liner sheets, dry at 135°F until pliable), and herb drying (faster and cheaper than buying dried herbs at the store). Each one is one new technique, not a new skill set.
You’re not a beginner anymore after a month. You’re just someone who makes their own snacks and trail food — which turns out to be a better hobby than it sounds from the outside.
Save your money
What you don't need yet
Beginners get pressured to buy a lot of stuff that doesn't help them play
better. Here's what we'd skip on day one.
A water activity meter — Food scientists use these to verify shelf stability. For home jerky, the bend test and appearance are enough, if it bends without snapping and isn't sticky, it's done.
A commercial dehydrator — Commercial units (Ronco, Magic Mill) are designed for restaurants. They're loud, expensive, and overkill for home use.
Freeze dryer — Completely different machine, removes moisture by freezing, not heat. Ten times the price of a dehydrator. Excellent shelf life, but not where you start.
Bulk sodium nitrite (Prague Powder) — Pre-mixed seasoning-and-cure packets handle this safely for you. Bulk cure is for experienced makers doing large batches, easy to mis-measure at home scale.
A dedicated dehydrating cookbook — The NCHFP website has all the time-and-temperature tables you need for free. Save the book purchase until you've got ten batches under your belt.
First week
Your first seven days
A short, real plan to get from gear-on-doorstep to actually playing.
Order your dehydrator and a jerky seasoning variety pack so they arrive together. · Buy
Beef jerky. High reward, forgiving process, and the result is objectively good. Use eye of round or top round, slice 1/8 inch against the grain, use a cure-and-season packet, dehydrate at 160°F for 4-6 hours. That's it. Apple chips are the easiest if you're nervous about meat, 135°F, 6-8 hours, no cure needed.
Is it safe to make jerky at home?
Yes, if you use a cure (sodium nitrite) and reach 160°F throughout. The sodium nitrite in pre-mixed seasoning packets (Hi Mountain, Nesco) is what makes home jerky food-safe at dehydrating temperatures. Skip the cure or skip 160°F and you're taking a real risk. Follow the packet directions exactly for your first few batches.
How long does dehydrated food last?
Jerky in a zip-lock at room temperature: 1-2 months. Vacuum-sealed in the fridge: up to 6 months. Vacuum-sealed and frozen: 12+ months. Dehydrated fruit and vegetables last longer than meat, 6-12 months in a sealed container at room temperature is typical. Store away from light and heat.
What is the difference between a round and rectangular dehydrator?
Round dehydrators (Nesco, Presto) have a fan on top or bottom and stack trays vertically, cheaper and compact, but airflow is uneven and you'll need to rotate trays every 2-3 hours for meat. Rectangular dehydrators (Cosori, Excalibur) push air horizontally across every tray at once, even heat, no rotation needed. For jerky specifically, rectangular horizontal fans are noticeably better.
Do I need a vacuum sealer?
Not for your first few batches, jerky disappears fast anyway. But if you're making food for backpacking, hunting trips, or want to batch-cook efficiently, a vacuum sealer is what makes the whole system work. A basic FoodSaver is around $100 and extends shelf life from weeks to months. Worth it once you're making regular batches.
Can I use my oven instead of a dehydrator?
Sort of. Most ovens don't go below 170°F, which is too hot for fruit and vegetables (they case-harden on the outside before drying through). For jerky at 160°F+, a low oven with the door propped open works, but you'll spend 6-8 hours monitoring it. A dehydrator uses less electricity and holds the exact temperature automatically. The oven is a trial run, not a long-term substitute.
National Center for Home Food Preservation — The authoritative source for time-and-temperature tables for drying every food type. Bookmark the drying section before your first batch.
USDA FSIS: Jerky and Food Safety — Official USDA guidance on safe meat jerky temperatures and handling. Read before making any meat product.
r/jerky — Active community of home jerky makers. Search before posting, common questions (cure ratios, drying times, troubleshooting texture) are well covered in the wiki and old threads.
r/dehydrating — Broader community covering fruit, vegetables, backpacking food, and more. Good for seeing what people are making beyond jerky.
The Dehydrator Bible (book) — Jennifer MacKenzie's reference covers 450+ recipes and techniques. A worthwhile buy after your first 10 batches, overkill before that.
As an Amazon Associate, JustBeginning earns from qualifying purchases.
We may also earn commission from other affiliate programs linked on this
page. Editorial recommendations are independent; we don't choose
products based on commission rates.
Product prices and availability are accurate as of the date and time
indicated and are subject to change. Any price and availability
information shown on Amazon at the time of purchase will apply.
Our top pickCosori Premium Food Dehydrator (10-Tray)
 Best starter