Camping is the rare hobby where going in underprepared and overdressed both create problems. The good news: you can have a genuinely comfortable first trip for under $300, and half the gear you already own. Here's exactly what to buy, what to borrow, and what to ignore for now.
By Colin B. · Published May 14, 2026 · Last reviewed August 7, 2026
Klymit Static V Sleeping Pad
— Inflatable sleeping pad that fits in your fist, lightweight enough to not hate, insulating enough to actually sleep.
Budget total
$150
Typical total
$300
You can have a solid first camping setup for around $300. The tent, bag, and pad are the real investments; everything else is cheap or borrowable.
We earn commission on qualifying Amazon purchases — see our
affiliate disclosure.
Price tiers and budget totals shown above are editorial estimates;
actual Amazon prices vary.
At a glance
Our top pick in each category
The fastest path through this guide — each best-starter pick by category.
Scroll for the budget and upgrade alternatives.
Borrow before you buy, especially the tent. If you have a friend who camps, borrow their tent for trip one. You'll learn what size you need, whether you care about weight, and whether you prefer a single-door vs. two-door layout. Thirty minutes of pitching a borrowed tent beats an hour of reading reviews.
Temperature ratings on sleeping bags are 'survival' ratings, not 'comfort' ratings. A bag rated to 32°F will keep you alive at 32°F, but you will not sleep well. The rule of thumb: buy a bag rated 10–15°F colder than the coldest night you expect. If your camping is mostly summer weekends, a 20°F bag handles almost everything in the continental US.
Start with car camping. Dispersed wilderness camping requires navigation, water treatment, bear safety, and Leave No Trace discipline. Car camping (at a designated campsite with a car ten feet away) is where everyone should start. You still get the stars, the fire, the morning quiet. You don't need ultralight gear or years of experience.
The tent is your single most important purchase. You need: freestanding (so it holds its shape without staking, critical for setting up on gravel or hard ground), a rainfly that covers the whole body (not just the top), and at least 2-person capacity even if you're sleeping solo (you need somewhere to put your gear). For car camping, you don't need to care about weight. For any future backpacking plans, get a 3-season tent rated for wind and rain, not a summer-only model.
Tent — what's the difference?
A few common shapes, each making a different trade.
Car Camping (heavy/roomy)
Heavier, larger, cheaper. Weight doesn't matter when it goes in a car trunk.
Typical weight
6–12 lbs
Typical price
$60–$200
Rainfly
Full (ideally)
Best for First-timers, families, anyone camping at a designated site
Multiple rooms, stand-up height, fits families of four or more.
Typical weight
15–30 lbs
Typical price
$100–$400
Rainfly
Varies
Best for Family camping trips, car camping with kids
Tradeoff Way too heavy for any trail use
Best starter
Coleman
Skydome 2-Person Camping Tent
$
★★★★★Our rating
The Skydome is the starter tent we'd point a friend toward on Amazon. Fully freestanding, full rainfly with a weatherproof WeatherTec floor, nearly vertical walls giving 20% more headroom than a traditional dome, and a 5-minute setup once you've done it once. Around $80, Coleman-backed, and exactly right for car camping.
What we like
Near-vertical walls give 20% more headroom than a traditional dome
5-minute setup once you've practiced it at home once
Full rainfly with WeatherTec floor handles real rain
What to know
'2-person' means two bodies; get the 4-person if you're camping with gear
Under $60, and Coleman has been making tents since your parents were camping. The Sundome is the baseline, fine for fair-weather car camping in summer. Its rainfly is partial (doesn't cover the screened roof mesh at the top), so step up to the Skydome if there's any chance of real weather.
What we like
Under $60 from the most trusted name in entry-level camping gear
Simple single-door design pitches easily the very first time
What to know
Partial rainfly will let you get wet in a real rainstorm
When you're ready to spend real money, this is where serious campers land. Under 3 lbs, dual-door, full rainfly, aluminum hub poles that make setup genuinely pleasant. Fully packable for backpacking, and it grows with you. Wait until you've done five or six camping trips before deciding whether this is the right move.
What we like
Under 3 lbs with full rainfly, genuinely backpackable when you're ready
Dual-door design and aluminum hub poles make setup genuinely pleasant
What to know
$500+ is hard to justify until you've camped at least 5-6 times
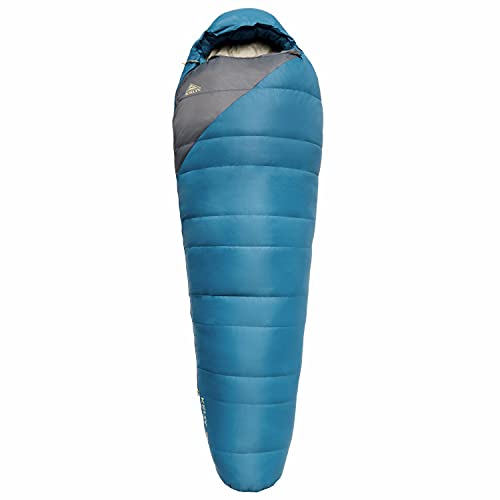
The sleeping bag is the gear decision that actually affects how you feel the next morning. Buy for the coldest night you expect, then subtract another 10 degrees, because the temperature rating is a survival minimum, not a comfort guarantee. For three-season camping in most of the US, a 20°F bag is the right call. Synthetic fill is cheaper and works when wet (crucial for beginners who haven't learned to keep gear dry yet). Down is warmer, lighter, more packable. Buy down when you know you'll use it enough to justify it.
Best starter
Teton Sports
Celsius Regular Sleeping Bag
$
★★★★★Our rating
Rated to 20°F with synthetic fill, a full-length zip, and a right/left zipper so you can zip two bags together. It's heavier than a down bag (around 5 lbs), but it's warm, roomy, and under $60. A college student or weekend warrior has no business spending more than this their first year.
What we like
20°F rating handles three-season car camping across most of the US
Left/right zipper lets you connect two bags together for couples
What to know
At ~5 lbs, too heavy for backpacking; strictly a car-camping bag
When you're ready to spend a bit more, Kelty's Cosmic 20 delivers real down warmth at a fair price (around $130). It's lighter and packs smaller than any synthetic bag in this range, which matters if you're transitioning to backpacking. Kelty has been making sleeping bags for 70 years, and the Cosmic is the bag they've dialed in over decades.
What we like
Lighter and packs smaller than any comparable synthetic bag at this price
Kelty has refined this design over 70 years, and the quality shows
What to know
Down loses insulation when wet; a leaky tent turns this into a problem
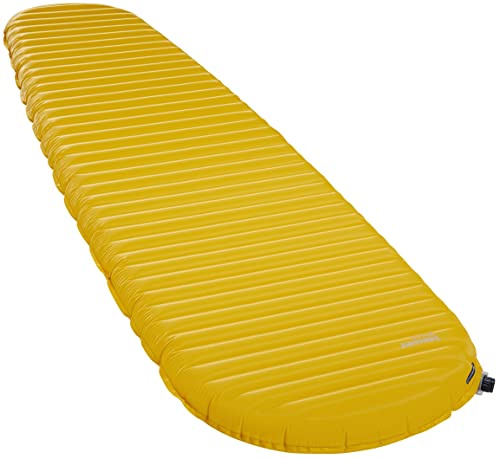
Most beginners skip the sleeping pad or use an air mattress from Target. This is a mistake. Sleeping pads serve two purposes: cushioning (comfortable, nice) and insulation from the ground (critical, non-negotiable). The ground will pull heat out of your body faster than cold air will. An air mattress is fine for cushioning but terrible for insulation. Get a closed-cell foam pad or a self-inflating pad with a decent R-value: anything above R-2.5 handles three-season camping. For car camping, a self-inflating pad is the sweet spot.
Best starter
Klymit
Static V Sleeping Pad
$45.18 as of Jun 22, 2026
★★★★★Our rating
The Static V inflates in about 10 breaths, weighs 1.6 lbs, and fits in a fist-sized stuff sack. The V-shaped chambers are shaped around your body so you don't roll off it at 2am. Adequate insulation for three-season camping, and at around $50 it's the right answer for most car campers and beginning backpackers.
What we like
Inflates in 10 breaths, packs to fist-size, weighs only 1.6 lbs
V-shaped chambers keep you centered so you don't roll off at 2am
What to know
R-value adequate for three-season use but not cold-weather camping
True self-inflating foam pad: open the valve, it expands on its own, top off with a few breaths. The foam inside gives it real R-value for cold ground. Heavier than inflatable pads (2.5 lbs) but simpler and nearly impossible to damage. Good choice if you want something bulletproof for car camping.
What we like
Self-inflates on its own; just open the valve and wait a few minutes
Foam core retains insulation even if the outer shell gets punctured
What to know
Heavier than inflatable pads at 2.5 lbs, best for car camping only
The benchmark for ultralight sleeping pads. Under 13 oz, R-value of 4.5, and packs to the size of a water bottle. It costs around $220, which is a real number, but if you're backpacking seriously, there's nothing better at this weight. Therm-a-Rest invented the self-inflating pad; they've been doing this longer than anyone.
What we like
Under 13 oz with R-4.5 insulation, the best warmth-to-weight ratio available
Packs to water-bottle size; fits inside a sleeping bag stuff sack
What to know
Internal baffles crinkle loudly every time you shift position at night
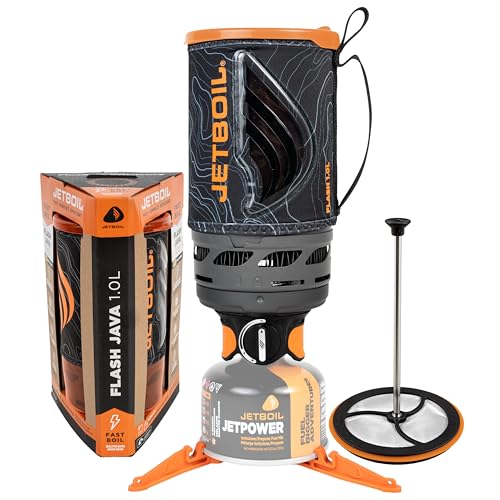
You don't need a camp stove for trip one; you can eat sandwiches and granola bars and have a perfectly good time. But if you're camping more than one night, a hot meal and a cup of coffee in the morning will transform your experience. Canister stoves (the kind that screw onto a small isobutane fuel can) are by far the easiest for beginners: no priming, no spillable liquid fuel, no maintenance. They weigh almost nothing. The only real downside: fuel canisters aren't refillable, and they get expensive if you're cooking elaborate meals over a full week.
Best starter
MSR
PocketRocket 2 Camp Stove
$49.95 as of Jun 22, 2026
★★★★★Our rating· In Stock
The PocketRocket 2 is the answer when someone asks 'what camp stove should I get?' It weighs 2.6 oz (seriously), screws onto any isobutane canister, boils a liter of water in 3.5 minutes, and has been refined over years into something bulletproof. Pack it in a shirt pocket. It's around $50 and will outlast you.
What we like
Weighs 2.6 oz total, literally packs in a shirt pocket
Boils a liter in 3.5 minutes on any standard isobutane canister
What to know
Isobutane canisters aren't refillable and add up cost on longer trips
Under $15 and surprisingly competent. Same canister-screw mechanism as the MSR, similar boil times, and adequate for the casual car camper who wants hot water for coffee and ramen. Not as refined or as durable, but if you're not sure how much cooking you'll do, this is the smart way to find out.
What we like
Under $15, a low-risk way to try camp cooking before committing more
Same canister system as pricier stoves; no separate learning curve
What to know
Less precise flame control and less durable than name-brand stoves
A self-contained cooking system: insulated cup, stove, lid, and push-igniter all in one. Boils a liter in 100 seconds, which sounds like marketing until you're cold and hungry at 6am on a mountain. The Jetboil is what serious backpackers and alpine climbers use. Worth it once you're cooking on every trip.
What we like
Boils a liter in 100 seconds, faster than any open-burner camp stove
Self-contained system: cup, stove, lid, and igniter all nest together
What to know
Proprietary cooking cup; needs an adapter to use with other pots
A headlamp is not optional. A phone flashlight is annoying (tied up your phone), bad at illuminating trails (no angle adjustment), and dead by 3am if you've been using it all night. A real headlamp costs $20–$40, runs for 40+ hours on fresh batteries, and keeps your hands free for firewood, cooking, and the midnight bathroom trip. Buy one before you go. This is the category where you should not improvise.
Best starter
Black Diamond
Spot 400 Headlamp
$59.95 as of Jun 22, 2026
★★★★★Our rating· In Stock
400 lumens is more than enough for camp and trail use, there's a dedicated red night-vision mode (so you don't blind your campsite neighbors), and the waterproofing is real. Black Diamond is the headlamp brand. It's the model that shows up at search and rescue trainings and ultramarathons alike. Around $40 and will last you a decade.
What we like
400 lumens handles trails and camp tasks; red mode protects night vision
Real waterproofing, rated IPX8, not just splash-resistant
What to know
At ~$40 it costs more than budget options, though it lasts a decade
Under $20, uses common AA batteries, and has a 360-degree tilt. Not as refined as the Black Diamond, but more than functional for car camping and occasional trail use. The brand has massive retail distribution, so you can grab batteries anywhere.
What we like
Under $20; runs on AA batteries available at any gas station
360-degree pivot reaches angles most fixed headlamps can't
What to know
Not rated for heavy rain; better for car camping than wet trails
You don't need a full kitchen setup on trip one. But a lightweight cook pot to heat water and food, a spork, and a small cutting board will dramatically expand what you can eat. Buy an integrated pot that fits your stove (most canister stoves work with standard pots). Skip the full camp kitchen sets with multiple pans for year one: one pot, one spork, one mug. The rest is weight.
Best starter
GSI Outdoors
Halulite Boiler Camp Pot
$37.46 as of Jun 22, 2026
★★★★★Our rating
A 1.1-liter hard-anodized aluminum pot with a strainer lid, folding handles, and a nesting mug, everything you need to cook one or two servings. Hard-anodized aluminum heats fast and doesn't corrode. GSI Outdoors makes exceptionally solid camp cookware at fair prices. This is the pot to start with.
What we like
Strainer lid and nesting mug included, a complete one-pot solution
Hard-anodized aluminum heats fast and resists corrosion for years
What to know
1.1L capacity works for one person; two people will want a larger pot
MSR's lightest complete cook set: a 590ml pot and lid that together weigh 4 oz and nest around a fuel canister for packing. Perfect for the solo camper who just wants to heat water for coffee and a freeze-dried meal. The hard anodized finish is durable and easy to clean. Around $35.
What we like
4 oz total weight, nothing lighter exists at this price point
Nests around a fuel canister for a perfectly compact pack setup
What to know
590ml is barely enough for anything beyond one freeze-dried meal
Titanium spork with a serrated edge and a knife on the end of the handle. Weighs half an ounce, works for everything from ramen to a camp steak. One piece of utensil that covers every eating situation. Every camper owns at least three of these.
What we like
Half-ounce titanium that survives decades of camp use without bending
Serrated edge and knife tip handle everything from ramen to camp steak
What to know
Knife tip is awkward for spreading; a separate butter knife helps
Everyone's first camping trip has at least one thing go wrong. Here's how to make it a funny story instead of a reason to never go again.
Camping has a learning curve that no one talks about honestly. It’s not technical — it’s just a series of small, predictable surprises that catch every beginner the same way. The tent is harder to pitch than it looks. The ground is colder than you expected. The morning is more beautiful than you could have imagined on a Tuesday.
This is what your first camping weekend actually looks like, from the parking lot to driving home with dirty boots and a reservation for next month.
Before you leave home: the setup session
The single best thing you can do before your first trip is pitch your tent in your backyard. Or your living room. Somewhere that is not a campsite at 7pm with the light fading.
Every tent has a learning curve. Poles slot into grommets in a specific order. The fly has to go on the right way — most people put it on backwards the first time. Staking out the vestibule takes five minutes when you know what you’re doing and twenty minutes when you’re guessing.
Do this at home, once. Roll it up. Now you can set it up in ten minutes on actual dirt.
The same applies to your stove. Screw the canister on, light it, boil some water. Some canisters are fussy about seating. Some stove ignitors need three clicks. Find out before you’re cold and hungry.
Things to pack that beginners always forget:
Camp towel (microfiber — your beach towel takes two days to dry)
Garbage bags (you pack out everything you pack in)
A lighter and matches (backup ignition — the stove lighter will fail once in your life at the worst moment)
Toilet paper and a trowel (if dispersed — designated sites have bathrooms)
Ibuprofen and moleskin (you will hike more than planned)
A dry bag or Ziploc for your phone and headlamp batteries
You will underestimate how cold the ground is. Everyone does. The air temperature could be 60°F and you will still wake up at 3am feeling the chill creeping up through your sleeping pad because ground temperature is almost always lower than air temperature — and convection happens fast.
This is why the sleeping pad is non-negotiable. Not for cushioning — for insulation. Your sleeping bag is rated for the ambient air temperature around you. The ground is not the air.
Here’s what a good night looks like:
Get into camp at least 90 minutes before dark. Setting up a tent in headlamp light your first time is a rite of passage you should skip.
Set up camp first, eat second. The order matters — if dinner takes longer than expected, you don’t want to be struggling with tent poles at 9pm.
Put on a layer before you think you need it. The temperature drop at sunset is faster than it feels.
Eat something hot. Coffee, soup, ramen — doesn’t matter. Hot food warms you from the inside, which matters more than you think when you’re about to spend eight hours in a sleeping bag.
Get horizontal earlier than you would at home. There is nothing to do after dark at camp except talk, stargaze, and sleep. This is a feature.
The sleeping bag is your world from 10pm to 6am. If you’re cold, you have two options: add a layer inside the bag (wool socks and a beanie — your body heat does the rest), or sleep with your water bottle filled with hot water at your feet (genuinely works, lasts all night).
The morning of a camping trip is the reason people go camping.
You wake up earlier than you would at home — the light comes in and your body responds to it in a way that an alarm clock never quite replicates. The air is cool. The camp is quiet. If you got there before dawn, the birds start up in the specific order they always do, species by species.
Boil water. Make coffee. Do nothing for twenty minutes.
This is not productivity. This is the point.
Your first full day:
Most beginners camp two nights and do one full day of activities between them. Here’s how to spend it:
Hike a nearby trail. AllTrails lists what’s close to almost every established campsite. Download the trail the night before — cell coverage at campgrounds is unreliable. A 4–6 mile hike with some elevation is plenty for day one.
Cook a real camp meal. Lunch is easy — sandwiches, trail mix, no cooking required. Dinner is where you cook something. Start simple: pasta with a sauce packet, a freeze-dried mountain meal, or a foil-packet dinner over coals if you’re at a site with fire rings.
Learn where everything is. Water source. Bathrooms. The camp host’s site (important if something goes wrong). The bear box or lockable area for food at night.
On fires: Most established campgrounds allow fires in designated rings. Buy firewood from the camp store or at a gas station near the campground — don’t bring wood from home, and definitely don’t forage it from the forest around you (it’s usually prohibited and bad for the ecosystem). The rule is: if you can hold your hand over the coals safely, the fire is out. Pour water on it; stir it; pour more water. A smoking fire ring in the morning is an embarrassing legacy.
The tent gets wet inside. You left the rainfly vents closed and condensation built up from your breath. Open the vents slightly at the top — a small crack, not a gap. Cold, dry air helps; warm, humid breath does not.
You can’t get the stove to light. Nine times out of ten, the canister isn’t fully seated. Unscrew it, wipe the threads, reseat it, and try again. If the ignitor sparks but nothing lights, hold it in the airstream — the gas may be slow to flow on a cold morning.
You’re colder than expected at 3am. Put on a hat. Your body loses most heat through your head, and a wool beanie inside a sleeping bag is a legitimate solution at any age.
Someone in your group gets a blister. Moleskin. Cut a donut around the blister — not over it — and the padding relieves the pressure without contact. Don’t pop it.
You forgot something important. Almost every established campground is within 20 minutes of a gas station or a gear store. A forgotten item is an errand, not a disaster.
Coming home: the protocol that makes you a good camper
Break camp in the reverse order you set it up. Tent last to go down (it stores gear while you pack everything else), food and trash first (so nothing gets left behind).
The campsite should look better than you found it. Pick up any garbage — including previous campers’ — and pack it out. Scatter any leftover firewood; don’t leave a log fort. If you dug any holes, fill them in.
The Leave No Trace principles are worth reading once. They’re not complicated — they’re mostly obvious once you know them. But “pack it in, pack it out” and “leave it better than you found it” are the two that apply to every trip, every time.
Save your money
What you don't need yet
Beginners get pressured to buy a lot of stuff that doesn't help them play
better. Here's what we'd skip on day one.
A camping chair — Nice, not necessary. Borrow or sit on a log for trip one. If you like camping enough to go twice, then buy a chair.
A GPS device — Car camping is fully covered by AllTrails + your phone. A dedicated GPS is for backcountry navigation, which isn't where beginners start.
A camp shower — You're camping for two nights. You can handle it.
Ultralight titanium everything — Weight matters when you're hiking 15 miles to a campsite. It does not matter when your car is 20 feet away. The ultralight tax is real; pay it only when you're actually going ultralight.
A generator or portable power station — Car camping sites often have electrical hookups if you need power. If the site doesn't have power, you don't need a generator; you need to disconnect for a weekend.
First week
Your first seven days
A short, real plan to get from gear-on-doorstep to actually playing.
Pick your first campsite; a state park within 2 hours is perfect for trip one. · Action
Reserve America · Books state and federal campgrounds (most designated sites)
How much does it cost to get started with camping?
Around $150–$300 for a solid first setup (tent, sleeping bag, pad, headlamp). The tent is the biggest purchase. If you can borrow one, do that for trip one; you'll learn what size and features matter before you spend $150 on something that doesn't fit your style.
What temperature sleeping bag do I need?
For three-season camping in most of the US, a 20°F bag handles almost everything. Temperature ratings are survival ratings, not comfort ratings. A bag rated to 20°F will be comfortable to around 30–35°F. If you're camping in summer only, a 35°F bag is fine and lighter.
Do I need a permit to camp?
For designated campgrounds (state parks, KOA, national forest campgrounds), you book a site on Reserve America or Recreation.gov; no separate permit. For dispersed camping on public land or popular wilderness areas, you may need a permit. Start with designated sites; the infrastructure is there and the rules are clear.
What should I do about food and bears?
In most established campgrounds, a locked car or a bear box (provided at the site) is sufficient for food storage. In backcountry areas, you'll need a bear canister or properly hung bear bag. Check the specific regulations for wherever you're going; campsite reservation pages list this requirement.
Can I start camping without a lot of experience?
Absolutely. Designated campgrounds are specifically designed for beginners. There's usually a ranger on site, level tent pads, fire rings, and access to bathrooms. The learning curve is minimal. Start there before you try dispersed or wilderness camping.
What's the difference between car camping and backpacking?
Car camping means you drive to a designated campsite, park your car, and carry gear 50 feet to your tent. Backpacking means you hike into a site (sometimes for days) carrying everything on your back. Start with car camping. It's where everyone learns, and the experience is genuinely excellent.
REI Co-op Expert Advice — REI's camping checklist is the most practical starting point for new campers. Covers gear, food, personal items, and campsite setup.
Leave No Trace Center for Outdoor Ethics — The authoritative source for responsible outdoor recreation. Read the seven principles before your first trip and you'll camp better than most people who've been doing it for years.
Recreation.gov — Books national park, national forest, and BLM campgrounds. Comprehensive, government-run, and accurate for permit requirements.
Reserve America — State park campground reservations across most of the US. Your first stop for finding a campsite close to home.
r/CampingandHiking — Active, beginner-friendly subreddit. The wiki has solid gear recommendations. Good for trip reports and 'is this campsite worth it' research.
The Mountaineers (YouTube) — Long-running outdoor education organization. Their beginner camping and backcountry basics videos are practical and well-produced.
AllTrails — Best app for finding and navigating hiking trails near your campsite. Download the trail offline before you go; cell coverage at campgrounds is often poor.
As an Amazon Associate, JustBeginning earns from qualifying purchases.
We may also earn commission from other affiliate programs linked on this
page. Editorial recommendations are independent; we don't choose
products based on commission rates.
Product prices and availability are accurate as of the date and time
indicated and are subject to change. Any price and availability
information shown on Amazon at the time of purchase will apply.


 Best starter