Bushcraft is thriving in the woods on minimal gear and maximum skill: building fires from sparks, shelters from tarps, and tools from what you carry. The good news: one quality knife unlocks the whole system. Here's exactly what to buy first and what to ignore.
By Colin B. · Published May 24, 2026 · Last reviewed June 10, 2026
Fiskars X7 14" Hatchet
— The Fiskars X7 hatchet, universally recommended and built to last a decade of hard camp use.
Budget total
$60
Typical total
$200
A Mora knife, a ferro rod, and a budget tarp get you started for under $100. The upgrade path runs deep if you want it.
We earn commission on qualifying Amazon purchases — see our
affiliate disclosure.
Price tiers and budget totals shown above are editorial estimates;
actual Amazon prices vary.
At a glance
Our top pick in each category
The fastest path through this guide — each best-starter pick by category.
Scroll for the budget and upgrade alternatives.
Light My FireLight My Fire Flint Fire Starter Ferro Rod Survival Tool Scout Fire Steel Bushcraft Gear Flint and Steel Magnesium Fire Starter Kit 2-in-1 Fire Starters for Campfires 3,000 Strikes
The knife is the one purchase worth getting right on day one. Everything else can be borrowed, improvised, or upgraded later. The gear world will try to sell you a $300 'bushcraft knife' with a skeletonized handle and tactical finish. Ignore it. A $20 Mora Companion is the honest answer.
Carbon steel vs. stainless is a real question with a real answer. Carbon steel takes a finer edge and sharpens on any stone, including ones you find in the field. Stainless resists rust without oiling. If you live somewhere wet (Pacific Northwest, UK, Southeast), start stainless. Everywhere else, carbon.
Ferro rods vs. lighters: carry both, but learn the ferro rod first. A lighter is faster, but runs out of fuel, malfunctions in cold, and teaches you nothing. A ferro rod forces you to prepare your tinder properly, which is the actual skill. Buy both on day one.
Your knife is the central tool in bushcraft: not a survival knife, not a tactical blade, but a working knife with a Scandinavian grind designed for carving, batoning, and field sharpening. The most important thing to know: you don't need an expensive knife. A $20 Mora Companion outperforms $300 custom knives in practical field tests. The real debate is steel type (carbon vs. stainless), which comes down to maintenance habits and local climate, not skill level.
Fixed-Blade Knife — what's the difference?
A few common shapes, each making a different trade.
High Carbon Steel
Sharpens on field stones, takes a finer edge, requires oiling.
Sharpenability
Very easy; any stone works
Rust resistance
Low; needs oiling
Edge retention
Excellent
Best for Traditional bushcraft, field sharpening, dry climates
Tradeoff Will rust if left wet; requires drying and light oil after wet use
Companion Heavy-Duty Carbon Steel Fixed-Blade Knife with Sheath, 4.1 Inch
$
★★★★★Our rating
The Mora Companion is the knife that shows up in every honest bushcraft forum, YouTube channel, and field guide, not because it's cheap, but because it outperforms knives at 5x the price. Scandi grind sharpens on any flat stone you find in the field. It holds an edge, handles batoning, and barely registers in pack weight. Buy this until you've put 100 hours into the woods.
What we like
Scandi grind sharpens on any flat stone, including ones found in the field
Under $25 and outperforms knives at 5x the price in practical field use
Light enough to forget about, strong enough to baton through 3-inch wood
What to know
Carbon steel rusts without care; wipe dry after every wet outing
Plastic sheath is functional but unimpressive for the price
When you're ready to spend real money on a fixed-blade, the ESEE 4 is where serious bushcrafters land. SK5 high carbon steel handles abuse that would chip a fancier blade. Made in the USA, backed by a no-questions warranty that actually means something. The full flat grind is more versatile than Scandi for heavy camp processing work.
What we like
SK5 high carbon steel handles abuse that would chip a more expensive blade
Lifetime warranty: ESEE replaces any blade that breaks for any reason
Full flat grind is more versatile than Scandi for heavy processing work
What to know
Flat grind requires more sharpening technique than a Scandi bevel
Heavier and thicker than the Mora, not a do-everything lightweight carry
The Benchmade Bushcrafter 162 is the pro-tier pick for the bushcrafter who knows exactly what they want. S30V stainless steel, made in the USA, with Benchmade's legendary tolerances. The drop-point blade is optimized for fine carving and food prep, where the ESEE's SK5 is overkill. Buy when you've earned the right opinion on what you need.
What we like
S30V stainless holds an edge longer than carbon steel between sharpenings
Drop-point geometry optimized for fine carving and food processing
Made in the USA with Benchmade's legendary build quality
What to know
S30V is hard to sharpen freehand; a diamond stone is required
Premium price ($200+), overkill for anyone under 100 hours in the field
Every bushcrafter's kit has a ferro rod, a lighter, and something that works when both fail. The ferro rod vs. lighter debate is real: a ferro rod never runs out of fluid, handles cold temperatures, and lasts thousands of strikes. A lighter is faster when it works. Most experienced bushcrafters carry both and reach for the ferro rod first, because learning it forces you to actually prepare your tinder, which is the real skill.
Best starter
Light My Fire
Flint Fire Starter Ferro Rod Survival Tool Scout Fire Steel Bushcraft Gear Flint and Steel Magnesium Fire Starter Kit 2-in-1 Fire Starters for Campfires 3,000 Strikes
$14.95 as of Jun 22, 2026
★★★★★Our rating
The FireSteel Scout is the ferro rod Ray Mears uses on television and that survives military issue. Not bad for an $18 piece of gear. Three thousand strikes per rod, works in rain and cold where lighters fail, and the red handle is easy to find in leaf litter. The scraper is built into the sheath. Small enough to always carry, proven enough to trust.
What we like
3,000 strikes per rod; outlasts a decade of weekend trips
Works in rain and cold where lighters and matches regularly fail
Integrated scraper in the sheath, ready to use immediately
What to know
Scout rod has fewer strikes than the Army model; sized for day trips
Requires dry, properly prepared tinder; technique matters more than gear
Every bushcrafter has a lighter, and a Zippo is the honest choice: refillable with standard lighter fluid, repairable with a $3 flint kit, and built to survive decades of pocket carry. A disposable BIC is cheaper, but a Zippo is the forever lighter: wind-resistant, repairable, and the right backup to a ferro rod kit.
What we like
Refillable and repairable indefinitely, the last lighter you'll ever buy
Wind-resistant design works where disposable lighters routinely fail
What to know
Fuel evaporates when stored unused for weeks; refill before each trip
For the scenario where everything else fails: waterproof matches that ignite in wind and rain and burn for 15 seconds each. The case is waterproof and floats if you drop it crossing a creek. The third line of defense that every experienced bushcrafter carries and almost never needs to touch.
What we like
Ignites in wind and rain and burns for 15 seconds, a real emergency backup
Waterproof floating case; survives a dunking in a stream
What to know
One-use only; no refilling once the matches are gone
Slower to light than a lighter under normal conditions
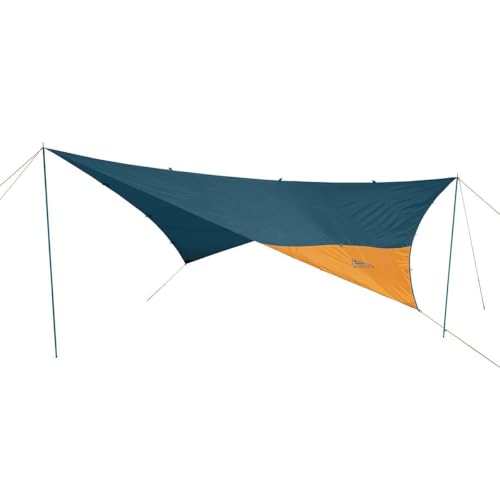
A tarp covers 90% of bushcraft camping needs: it's lighter, more versatile, and teaches rigging skills that a tent skips entirely. The tarp vs. bivy debate is worth understanding: a tarp handles rain and keeps the fire-front open (critical for warmth). A bivy is bombproof against wind and precipitation but encloses you completely. Most beginners start with a mid-size tarp and add a bivy later for cold or exposed conditions.
Best starter
Aqua Quest
Defender Tarp 3x3m
$$$
★★★★★Our rating
The Aqua Quest Defender is the tarp on every serious wilderness guide's shortlist: 20D ripstop nylon, 100% waterproof (not water-resistant), and every guyout point properly reinforced for hard use in wind. The 3x3m size covers two people with fire-front room. Heavy enough to feel real, light enough to carry on a long hike.
What we like
100% waterproof (not water-resistant), genuinely waterproof under rain
Every guyout point reinforced for hard use in sustained wind
3x3m size covers two people with room for a fire-front setup
What to know
Higher price than discount tarps; you're paying for real waterproofing
Bright blue color is visible in emergencies (and from the trail)
A genuinely capable budget tarp from a brand with 70 years in outdoor gear. The Kelty Noah's 9 (9-foot square) gives real coverage for one person in serious rain. Polyester construction doesn't pack as tight as nylon, but it's rugged and the price makes it the easy entry-point recommendation if the Aqua Quest feels like too much commitment.
What we like
From a brand with 70 years in outdoor gear, reliable construction
9-foot square gives real single-person coverage in serious rain
What to know
Polyester doesn't pack as small as nylon; adds bulk vs. premium tarps
Corner tie-outs functional but less reinforced than higher-end tarps
When a tarp isn't enough (sustained wind, heavy rain, exposed ridgeline), the SOL Escape Bivvy closes the gap. Breathable, reflective, and rated for genuine emergency conditions. Fits over your sleeping bag inside a tarp shelter. The correct answer to 'what if conditions get worse than expected.' Weighs 8.5 ounces.
What we like
Breathable and reflective; stays dry inside unlike a standard space blanket
Weighs 8.5oz, negligible pack weight for the protection it adds
What to know
Not fully waterproof in sustained rain; needs a tarp overhead
One-size-fits-most; taller users may find headroom tight
A hatchet is the first axe for most bushcrafters: it splits kindling, bucks small logs, and does light limbing without the weight of a full felling axe. The golden rule: a sharp hatchet is safer than a dull one, because you swing harder with a dull blade and lose accuracy. The Fiskars X7 comes sharp from the factory. If you're car camping, this is the wood-processing tool that earns its keep every trip.
Best starter
Fiskars
X7 14" Hatchet
$34.98 as of Jun 22, 2026
★★★★★Our rating· In Stock
The Fiskars X7 is the first hatchet recommendation on every beginner's list because it actually works. The FiberComp handle won't crack, rust, or loosen. Ever. Convex blade geometry splits kindling better than most camp hatchets twice its price. Comes sharp from the factory and costs under $50.
What we like
FiberComp handle won't crack, rust, or loosen after years of hard use
Convex blade geometry splits kindling better than most hatchets at this price
Arrives sharp from the factory; useful from day one
What to know
Lighter than a full axe; struggles on logs bigger than 6 inches
Plastic handle is unromantic but genuinely indestructible
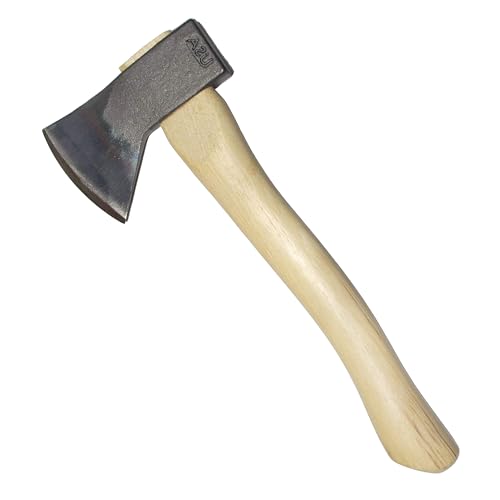
Hudson Bay Camp Axe - 1.25 lbs One-Handed Axe with 14" Curved Hickory Handle & Drop Forged Steel Head - SU125HB14C
$$
★★★★☆Our rating
American-made, hand-finished hickory handle, genuine high-carbon steel bit. The Council Tool Hudson Bay Camp Axe punches above its price. Designed for general camp and trail work, it swings lighter than a full axe and bites deeper than a lightweight hatchet. The mid-range option for the beginner who wants real steel, not fiberglass.
What we like
American-made carbon steel bit with a hand-finished hickory handle
Bites deeper than a lightweight hatchet on the same swing
What to know
Handle needs oiling on arrival and seasonally to prevent cracking
Heavier than the Fiskars X7, not ideal for long pack carries
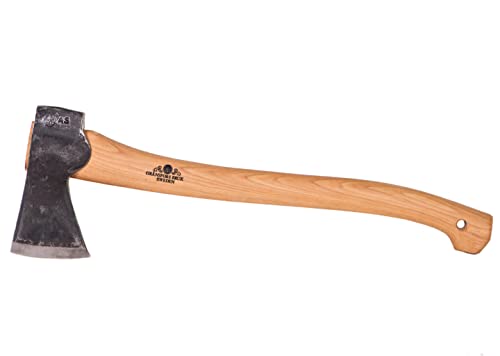
When you're ready to spend serious money on an axe, Gransfors Bruks is where you land. Hand-forged in Sweden, each axe signed by the smith who made it. The hickory handle is repairable and replaceable. This axe will outlast you; it's the kind of gear that gets passed down. The upgrade buy when you want one axe for the rest of your life.
What we like
Hand-forged in Sweden, signed by the smith: genuinely lifetime quality
Hickory handle is repairable and replaceable indefinitely
Better geometry for limbing and splitting than a camp hatchet
What to know
Premium price ($150+); the 'one forever' axe, not the first axe
Handle needs seasonal oiling; head needs eventual sharpening
The folding saw is the most underrated tool in a beginner's bushcraft kit. For processing logs under six inches diameter (which covers most of your firewood), it's faster than a hatchet, quieter, and effortless once you learn the pull stroke. The Bahco Laplander is to folding saws what the Mora is to knives: the consensus pick at every experience level, used by guides from Scandinavia to Scotland.
Best starter
Bahco
396-LAP Laplander Folding Saw
$23.68 as of Jun 22, 2026
★★★★★Our rating· Only 20 left in stock - order soon.
The Bahco Laplander is the consensus folding saw recommendation everywhere from Scandinavian trail guides to UK bushcraft schools. The 7-tooth-per-inch blade cuts on the pull stroke through 4-inch logs in seconds. Folds safely, locks open reliably, and fits in a jacket pocket. The blade is user-replaceable for about $10 when it eventually dulls.
What we like
7-tooth pull-stroke blade cuts 4-inch logs in seconds with zero strain
Folds safely, locks open reliably, fits in a jacket pocket
Blade is user-replaceable for ~$10 when it eventually dulls
What to know
Struggles on green/wet wood larger than 5 inches in diameter
Lock mechanism needs a confident snap; check before every cut
Tools 10-Inch RazorTOOTH Folding Pruning Designed for Single Use | Curved Blade Hand Saw | Cuts Branches Up to 6" in Diameter | RS16150, Red
$
★★★★☆Our rating
The Corona RazorTOOTH is the budget folding saw that actually works, and 'actually works' is not guaranteed in the bargain folding saw market. SK5 steel holds an edge well for the price. If you're not sure yet whether a saw belongs in your kit, start here before spending Bahco money.
What we like
SK5 steel holds a decent edge at a fraction of the Bahco's price
Works well for occasional use and light firewood processing
What to know
Blade dulls faster than Japanese or Swedish steel under heavy use
Lock mechanism feels less positive; double-check before every cut
★★★★☆Our rating· Only 11 left in stock - order soon.
When you're processing bigger timber (logs over 4 inches, bucking trail windfalls), the Silky Gomboy cuts circles around the Bahco. Impulse-hardened Japanese steel, 8 teeth per inch in a curved blade that makes long cuts through serious wood feel effortless. The upgrade buy when you know you need more saw capacity.
What we like
Impulse-hardened Japanese steel cuts faster than any Western folding saw
Curved blade makes long cuts through timber feel effortless
What to know
Blade replacement needs Silky's proprietary tool; not field-swappable
Price is roughly 2x the Bahco; hard to justify without heavy use
Most people overthink the start. Here's what to actually do your first weekend: lighting a fire with a ferro rod to rigging a tarp that won't soak you at 2am.
Bushcraft has a reputation for being the serious end of the outdoors spectrum, the hobby where you need five years of training before you’re allowed to leave the house. That reputation is wrong, and it’s keeping people out of the woods.
The truth is simpler: bushcraft is a collection of practical skills, and practical skills are learned by doing them, not by reading about them. Your first weekend won’t look like a Ray Mears episode. It will look like a beginner learning, which is exactly right.
Here’s what that weekend actually looks like, and what you’ll walk away knowing.
Before you go: the three things to practice at home
The worst time to meet a new tool for the first time is in the dark, in the rain, when you actually need it. Spend 30 minutes at home before your first trip:
Light ten fires with your ferro rod. Gather a small pile of dry material (newspaper, dried leaves, a cotton ball). Strike the rod over it. Get the spark into the tinder. Do this until it feels mechanical, not mysterious. The motion is: hold the rod near the tinder, draw the scraper backward across the rod (not the rod across the scraper), and let the spark fall into your nest. This takes most people three to five tries before the first fire. Ten more and it feels natural.
Practice the tarp ridgeline. Find two trees, tie a length of paracord between them at head height, and drape your tarp over it. Then peg the corners out at an angle to create a lean-to shape. This takes about four minutes. The goal isn’t a perfect shelter. It’s understanding which direction the rain runs and which edge needs to be downwind. You’ll solve this problem differently in the field every time.
Carry the knife for an afternoon. Get used to the sheath on your belt. Practice opening and closing it without looking. Any knife feels unfamiliar the first few hours; familiar by the second day.
Day one: fire and shelter before dark
Arrive at your campsite with enough daylight to do two things: rig your shelter and make fire. In that order. Shelter first, because if the fire takes longer than expected, you want a dry place to sleep.
Rig the tarp first, before you’re hungry or tired. Find two trees roughly 10-12 feet apart and run your ridgeline taut between them. Drape the tarp over the line and peg the back edge close to the ground (this blocks wind from behind). Angle the front edge outward and downward; you want a steep enough pitch that rain runs off rather than pooling. Leave the front open for fire access.
Three things new riggers always get wrong: ridgeline too low (you’ll crouch all evening), front edge not steep enough (rain comes in), and guylines not staked (first puff of wind collapses everything). Add two or three guylines to the tarp’s midpoints and angle them out wide.
Gather tinder before you light anything. This is the step beginners skip, and it’s the reason their fires fail. You need three sizes: fine tinder (dried grass, birch bark, cattail fluff, or the dry underside of leaves, anything that catches a spark immediately), medium fuel (small sticks the diameter of a pencil), and logs (wrist-sized). Collect more than you think you need. Seriously, triple your initial estimate. Cold nights go through wood faster than anyone expects.
Light the fire. Build a small nest of fine tinder. Add pencil-sized sticks in a loose teepee above it, leaving room for the spark to breathe. Strike the ferro rod over the nest. When the tinder catches, blow gently to grow the ember. Add sticks in order of size as the fire builds. Don’t rush the transition from tinder to larger fuel; this is where beginners smother a fire that was working fine.
A small, hot fire is better than a big, lazy fire. You’re not trying to heat a barn; you’re trying to warm a space 18 inches in front of you.
The first night is honest feedback, delivered without judgment. Here’s what you’ll probably do wrong and why it’s useful:
The tarp will leak at a seam. Adjust the ridgeline angle, re-peg the guylines, and figure out where the water is coming from. This is actual problem-solving. The answer is always in the physics: water finds the lowest point and follows gravity. Once you see it once, you see it forever.
The fire will go out twice. Usually from not enough tinder, or adding too-large wood too early. The second fire is always better than the first. The tenth is better still. Fire-lighting is a skill that improves through reps, not through more YouTube.
You’ll be colder than expected. A tarp open to the air loses heat fast. The fire solves this, but only if you’re close enough to it. Move toward the fire. The whole point of the open-front shelter design is to put your bed in the fire’s radiant-heat zone.
You’ll want more cordage than you brought. Bring at least 50 feet of paracord for a single-night trip. More won’t hurt.
Day two: skills that open up on a second day
The second day is when the skills start to click. You woke up dry (or you fixed what made you wet). The morning fire will light faster. You’ll spend less time problem-solving and more time observing.
Use your knife for something real. Whittle a tent peg from a straight-grained piece of greenwood: pull a branch, split it roughly to shape with your knife, and shave it to a point. This is the quintessential bushcraft exercise because it uses every basic cut: chest lever, knee brace, thumb brace. The wood teaches you where the grain runs and how pressure works. You’ll make ten bad tent pegs before you make a good one, and then you’ll know how wood behaves under a blade.
Practice reading your fireplace. What made it burn well yesterday? What made it struggle? What wood lasted longest? The species of wood matters: soft woods (pine, cedar) catch fast but burn quick; hard woods (oak, hickory, ash) take longer to ignite but hold coals. Pay attention to this rather than just adding fuel. You’re learning the material, not just using it.
Try finding natural tinder. Birch bark is the best natural fire-starter in most of North America; look for the papery outer bark of a dead birch tree (not a live one). Cattail fluff from a wetland is almost magic with a ferro rod. Dry pine needles work. The fun of day two is testing these against each other and seeing what the landscape gives you.
After a weekend, you’re not an expert. But you’ve done the thing. That matters more than any book or YouTube series.
The bushcrafters who get good are the ones who go out consistently, even for one night, even locally, even in weather that’s slightly worse than comfortable. The skills don’t decay if you use them; they do decay if you read about them but never apply them.
Here are the next things worth learning, in order of usefulness:
Knots. Learn four: the bowline (creates a loop that won’t slip), the taut-line hitch (adjustable tension for ridgelines), the timber hitch (securing cordage around a log), and the clove hitch (attaches cordage to anything). These four handle 90% of what you’ll encounter in the woods.
Natural cordage. Inner bark from certain trees (basswood, elm, cedar) can be twisted into usable cordage. Knowing this gives you confidence that the tools you need are often already present.
Navigation basics. Map and compass before GPS. Understanding how to read a topographic map (what the contour lines mean,, how to identify ridges vs. valleys, how to take a bearing), makes every trip safer and more interesting.
Save your money
What you don't need yet
Beginners get pressured to buy a lot of stuff that doesn't help them play
better. Here's what we'd skip on day one.
A full-size felling axe — A hatchet handles 90% of camp wood processing. Add a full axe only if you're processing serious timber on extended wilderness trips.
A '50-piece survival kit' — These kits are packed with garbage: cheap wire saws, tiny compasses, single-use fire starters. Buy individual quality items instead.
Paracord bracelets — Buy 100 feet of real Type III paracord for $10 instead. The bracelet is novelty; the spool is the thing.
A tactical survival knife — Skeletonized handles, saw backs, and tactical finishes are marketing. A plain Mora outperforms in every practical field test.
A GPS device — Learn map and compass first. GPS batteries die; navigation skills don't. Add a GPS after you can navigate without one.
First week
Your first seven days
A short, real plan to get from gear-on-doorstep to actually playing.
Order the Mora Companion Carbon Steel. It arrives sharp and ready. · Buy
Order the Light My Fire FireSteel Scout and practice lighting it at home first. · Buy
Gather local tinder (dried leaves, birch bark, cattail fluff) and test them with your ferro rod before you're doing it in the dark. · Action
Watch Ray Mears' firecraft fundamentals on YouTube. One hour of solid instruction before your first trip matters more than any piece of gear. · Learn
Find your nearest National Forest or State Forest; dispersed camping is usually free and fire rings are typically allowed outside fire-ban season. · Action
Join r/Bushcraft and read the wiki before posting questions; the community is unusually patient with genuine beginners. · Action
r/Bushcraft · Active community with a solid beginner wiki
FAQ
Common questions
How much do I need to spend to get started in bushcraft?
Under $100 gets you genuinely started: a Mora Companion ($20), a Light My Fire ferro rod ($18), and a budget tarp ($60). The upgrade path runs deep if you want it, but those three items unlock the core skills.
Is bushcraft different from camping or survival?
Yes, meaningfully. Camping leans on modern gear and comfort. Survival is emergency preparation. Bushcraft is the space between: thriving comfortably in the woods using traditional skills and minimal kit. You're not surviving; you're living well outdoors with intention.
Carbon steel or stainless steel knife: which should I choose?
Carbon for field sharpening ability and traditional feel; stainless for low maintenance in wet climates. Mora makes both versions of the Companion at the same price. Either works for a beginner; skill gap matters more than the steel. Wet climate? Start stainless. Dry climate? Carbon.
Do I need to take a class or can I just learn from YouTube?
You can self-teach from YouTube and books: Ray Mears, Paul Kirtley, and Coalcracker Bushcraft cover the fundamentals well. That said, one day-long course with a skilled instructor compresses six months of trial-and-error into eight hours. Worth it once you have the basic gear.
Is it legal to make fires and use axes on public land?
Depends heavily on location and season. National Forests generally allow dispersed camping and ground fires in established rings. Many state parks require permits or use designated sites only. Always check current fire restrictions before you go; they change seasonally and can shift with a single hot week.
What's the difference between batoning and chopping?
Batoning is using a stick to drive your knife blade through wood by striking the spine, useful for splitting kindling without an axe. Chopping is a swinging strike with an axe or hatchet. Both are valid bushcraft techniques; batoning lets you process smaller wood with just the knife you already carry.
r/Bushcraft — Active community with a well-maintained wiki. Read the beginner FAQ before posting; most first questions are covered.
Paul Kirtley's Blog — One of the most respected UK bushcraft instructors. Articles are practical, deep, and free. Start with his firecraft series.
Coalcracker Bushcraft (YouTube) — Pennsylvania-based channel. Highly practical, no fluff. Best for fire starting, shelter rigging, and knife skills.
Ray Mears Bushcraft (YouTube) — The classic. Mears' BBC series is still the best introduction to bushcraft principles. Start with his firecraft episodes.
TA Outdoors (YouTube) — UK channel covering bushcraft, wild camping, and traditional skills. Well-filmed, honest gear reviews.
Thomas J Coyne Survival (YouTube) — Solid fundamentals on fire starting and knife skills. Good for beginners wanting a US-focused perspective.
Mors Kochanski: Bushcraft (Book) — The foundational text. Dense and academic, but the reference everything else in the field is derived from.
Recreation.gov — US National Forest permit reservations and dispersed camping information. Check fire restrictions before every trip.
As an Amazon Associate, JustBeginning earns from qualifying purchases.
We may also earn commission from other affiliate programs linked on this
page. Editorial recommendations are independent; we don't choose
products based on commission rates.
Product prices and availability are accurate as of the date and time
indicated and are subject to change. Any price and availability
information shown on Amazon at the time of purchase will apply.
Our top pickMorakniv Companion Heavy-Duty Carbon Steel Fixed-Blade Knife with Sheath, 4.1 Inch


 Best starter