Home charcuterie (curing, fermenting, and drying salami, pancetta, and coppa) is one of the most obsessive cooking hobbies you can pick up. The barrier to entry is real: a curing chamber to build, controllers to wire, and months of waiting. But once you taste homemade guanciale, the store-bought stuff stops being acceptable.
By Colin B. · Published May 24, 2026 · Last reviewed June 17, 2026
Simple bag-cures (guanciale, pancetta) need only a precision scale and curing salt, under $50. A full curing chamber setup with controllers and grinder runs $400-600.
We earn commission on qualifying Amazon purchases — see our
affiliate disclosure.
Price tiers and budget totals shown above are editorial estimates;
actual Amazon prices vary.
At a glance
Our top pick in each category
The fastest path through this guide — each best-starter pick by category.
Scroll for the budget and upgrade alternatives.
Start with a bag cure before committing to a full chamber setup. Guanciale and pancetta need only curing salt, a zip-lock bag, and your regular fridge for the initial cure phase. Make one first; if you love the process, then spend money on a chamber.
Prague Powder #1 and #2 are not interchangeable. No. 1 is for short cures under 30 days (bacon, pancetta, guanciale). No. 2 is for long fermented meats like salami and coppa. Using the wrong one is a genuine food safety issue.
Weigh your curing salts to the decimal. A kitchen scale accurate to 0.5g is not precise enough. You need a scale that reads 0.01g or better, a $20 purchase and the difference between safe and unsafe curing.
Temperature fluctuations kill projects. A 3°C swing inside your curing chamber can cause case hardening or unwanted mold growth. The temperature controller is the engineering that makes this food-safe and repeatable.
The gear
What you actually need
Curing Chamber
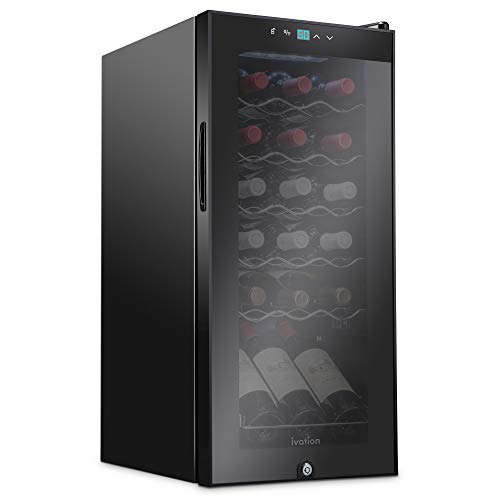
The curing chamber is the heart of your setup, a temperature and humidity-controlled space where meat hangs and transforms over weeks. Most beginners convert a wine cooler (18-28 bottle compressor type) because the operating range overlaps perfectly with curing conditions. Add an Inkbird controller and a small USB humidifier and you have a functional chamber for under $300. Compressor models are non-negotiable. Thermoelectric coolers run too warm and variable for consistent curing.
Curing Chamber — what's the difference?
A few common shapes, each making a different trade.
Wine Cooler Conversion
Preconfigured temp range, built-in fan. Most popular beginner setup.
Operating range
45-65°F
Typical capacity
18-28 bottles / 5-8 kg
Controller needed
Yes (Inkbird ITC-308)
Best for Most beginners, the easiest path to a functional curing chamber
Tradeoff Costs more than a used mini fridge but needs less DIY work
Largest capacity. Full temp control. For committed hobbyists.
Operating range
Fully controller-dependent
Typical capacity
5-12 cu ft
Modifications needed
Controller, fan, humidity system
Best for High-volume curers making 4+ projects simultaneously
Tradeoff Most complex build; best reserved for after your first year
Best starter
Ivation
18-Bottle Compressor Wine Cooler
$279.99 as of Jun 22, 2026
★★★★★Our rating· In Stock
The 18-bottle compressor wine cooler is the community's standard starter chamber. Compressors maintain temperature more accurately than thermoelectric units, the internal fan promotes airflow, and the 45-65°F operating range is exactly what curing calls for. Pair with an Inkbird ITC-308 and a USB humidifier and you're operational within an afternoon.
What we like
Compressor runs consistently cold, far more stable than thermoelectric
Built-in fan circulates air, essential for even drying
45-65°F operating range matches most curing recipes exactly
What to know
Compressor cycles on/off; an external controller tightens temp hold
Any compact refrigerator becomes a curing chamber with the right controllers. The Midea 3.1 Cu Ft runs under $130, the shelves remove completely for hanging space, and it's widely available. You'll add a small USB fan for airflow and wire in an Inkbird; one weekend of DIY gets you a functional chamber.
What we like
Cheapest functional path, under $130 new, even less used
Shelves remove completely to create hanging space
What to know
No built-in fan; you must add a small USB fan for airflow
Stock thermostat is imprecise; requires an external controller
When you outgrow the 18-bottle setup, the 43-bottle dual-zone cooler gives room for multiple projects simultaneously. Different zones for cheese aging versus meat curing, or multiple sausage batches at different stages. Most serious home charcutiers migrate here after 6-12 months of regular production.
What we like
Two independent zones, different temperature profiles at once
Large capacity for 12-15 kg of hanging product simultaneously
What to know
Large footprint; measure your space before ordering
Upgrade pricing only makes sense if you're curing regularly
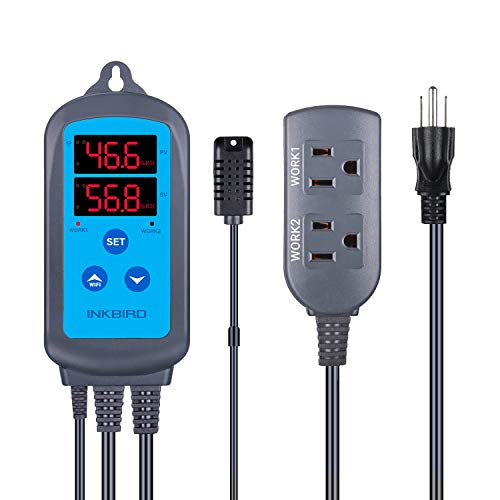
Your chamber needs two independent control loops: one for temperature (typically 50-55°F / 10-13°C) and one for relative humidity (70-85% RH). Most beginners run a dedicated temperature controller and a separate humidity controller, each switching an outlet that powers either a heating/cooling device or a humidifier/dehumidifier. The Inkbird lineup covers both, and their shared app makes monitoring easy from your phone.
Best starter
Inkbird
ITC-308 WiFi Dual Stage Temperature Controller
$49.99 as of Jun 22, 2026
★★★★★Our rating· In Stock
The ITC-308 WiFi is the most-recommended temperature controller in every home charcuterie forum. Dual-stage means one outlet for cooling, one for heating. Plug your chamber into the cooling outlet and a seedling heat mat into the heating outlet. WiFi monitoring from your phone, ±1°F accuracy, and a decade of community trust.
What we like
Dual stage: separate outlets for heating and cooling
WiFi monitoring; check chamber temp from your phone remotely
±1°F accuracy is tight enough for fermented sausage
What to know
Temperature only; needs a separate humidity controller
The humidity half of your controller setup. Plug a USB ultrasonic humidifier into the humidifying outlet and a small fan into the dehumidifying outlet. The IHC-200 WiFi keeps relative humidity within a 3-5% band and monitors via the same Inkbird app as the ITC-308, one dashboard for both loops.
What we like
Maintains ±2-3% RH, tight enough for fermented sausage
Same Inkbird app as the ITC-308, one dashboard for both
What to know
Doesn't control temperature; the ITC-308 handles that
WiFi pairing is slow on first setup; allow 20 minutes
Before committing to a full controller setup, a wireless sensor lets you see what's happening inside your fridge, with temperature and humidity logged over time. Many beginners buy this first to understand their existing fridge's baseline behavior before investing in controllers.
What we like
Wireless logging shows temperature and humidity trends over days
Under $25, cheap enough to buy before committing to controllers
What to know
Monitor only; no ability to switch any device on or off
Battery life runs 2-3 months; replace before a critical project
You don't need a grinder for whole-muscle cures. Bresaola, guanciale, and pancetta are never ground. But once you want to make salami, 'nduja, or coppa, a dedicated grinder is essential. The critical feature: enough power to work with half-frozen meat, which you need to keep fat from smearing into the mix. Cheaper grinders run hot and smear; a #8 or larger doesn't. A dedicated sausage stuffer is the companion purchase that takes stuffing from functional to clean.
Best starter
LEM Products
#8 Big Bite Meat Grinder
$$$
★★★★★Our rating
The #8 Big Bite is the grinder home charcutiers land on and stay on. The 1/2 HP motor pushes through partially frozen meat without smearing fat, the critical difference between emulsified mush and clean salami texture. Stainless auger and plates are dishwasher safe. Most users keep it for 10+ years.
What we like
1/2 HP motor handles half-frozen meat without smearing fat
Stainless plates and auger are dishwasher safe, no rust
Built to run for a decade with basic care
What to know
#8 plates are less common than #12; specialty plates cost more
Larger footprint than budget grinders; needs dedicated shelf space
The STX-3000 is the best of the budget grinders: three grinding speeds, three plate sizes included, and $80-100 less than the LEM. The motor runs warmer on sustained grinds, so work with cold meat in small batches. Adequate for pancetta-level projects and occasional salami work.
What we like
Three plate sizes and two blades included out of the box
Sausage stuffing tubes included for small stuffing jobs
What to know
Motor runs hot on sustained use; cold meat and short batches required
Plastic housing shows wear after 12-18 months of regular use
Using a grinder's stuffing tube for fermented salami smears fat and incorporates air. A dedicated vertical stuffer fills casings cleanly, at the right pressure, without overworking the mix. It's the single tool that makes your salami look and texture like the real thing. Buy it alongside or shortly after the grinder.
What we like
Fills casings cleanly without smearing or overworking the mix
Gear-driven piston gives consistent pressure and no air pockets
What to know
Single-purpose tool; doesn't double as a grinder
Easier with two people until you develop solo-stuffing technique
Weigh everything. Equilibrium curing (the modern method) works by applying curing salts as a precise percentage of meat weight. A typical formula: 2.75% kosher salt and 0.25% Prague Powder by meat weight. For a 1 kg pork belly, that's 2.5g of curing salt. A kitchen scale that reads to 0.5g is not precise enough. You need two scales: a jeweler's-style scale for tiny curing salt quantities, and a standard kitchen scale for meat.
Best starter
American Weigh Scales
Gemini-20 Milligram Scale
$34.99 as of Jun 22, 2026
★★★★★Our rating· In Stock
The Gemini-20 is the home charcuterie community's standard precision scale. The 20g capacity and 0.001g resolution means you can weigh 2.5g of Prague Powder accurately. It's a jeweler's scale repurposed for meat curing, and at $20-25, there's no excuse for imprecision on the most safety-critical step in the process.
What we like
0.001g resolution, accurate for any curing salt calculation
Includes a calibration weight; verified precision, not assumed
The community standard, used across thousands of batches
What to know
20g max capacity; weigh salts in batches for large projects
Sensitive to drafts and vibration; use on a flat, still surface
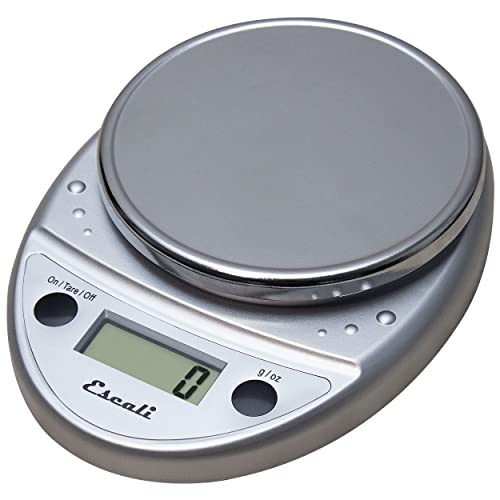
Your larger scale for weighing whole muscle cuts and mixed batches. The Escali Primo reads to 0.1g and handles up to 11 lbs, enough for a full pork belly. You need both: the Gemini-20 for curing salts, the Escali for the meat. The tare function resets to zero with any bowl or container.
What we like
Reads to 0.1g up to 11 lbs, handles whole roasts and small spices
Tare function resets to zero with any vessel
What to know
0.1g not precise enough for curing salts; use Gemini-20 for those
Curing salts aren't seasoning; they're the chemistry that keeps botulism out. Prague Powder #1 (6.25% sodium nitrite) goes in everything cured under 30 days: bacon, pancetta, guanciale. Prague Powder #2 (sodium nitrate plus nitrite) goes in long-fermented products: salami, coppa. The nitrate converts slowly to nitrite over the weeks-long drying period, sustaining protection throughout. Natural hog casings are for stuffed products; they breathe and dry with the sausage in a way collagen casings can't match.
Best starter
The Sausage Maker
Prague Powder No. 1
$15.99 as of Jun 22, 2026
★★★★★Our rating· Only 7 left in stock - order soon.
Prague Powder #1 is what you use for every short-cure project: guanciale, pancetta, bacon, corned beef, pastrami. The Sausage Maker is the most trusted supplier in the US home curing community: consistent potency, clearly labeled with usage rates, and sold in sizes that won't go stale before you finish the bag.
What we like
Covers all short-cure projects, one formula for most beginners
The Sausage Maker's consistent potency reduces batch variance
What to know
For short cures only (≤30 days); you'll need No. 2 for salami
Pink color is a safety dye; expected, not an error
Once you move to fermented, dried sausages (salami, coppa, 'nduja), you need Prague Powder #2. It contains sodium nitrate alongside nitrite: the nitrate converts slowly over the weeks-long drying period, sustaining protection throughout. Same brand as No. 1 for consistent, predictable results across your whole operation.
What we like
Required for all long-cured fermented projects: salami, coppa
Slow nitrate-to-nitrite conversion protects through a full cure
What to know
Not interchangeable with No. 1; wrong salt in wrong recipe is unsafe
Long cures mean weeks before you know if something went wrong
Natural casings breathe; they let moisture escape during the drying phase while keeping the salami structure intact. Collagen casings are easier to use but don't dry and develop the characteristic wrinkled finish of a real salami. For fermented and dried products, natural casings are the right call. They come packed in salt and store indefinitely in the fridge.
What we like
Natural casings breathe; moisture escapes during drying as intended
Develop the characteristic wrinkle and sheen of dried sausage
What to know
More prep than collagen casings; soak and rinse before use
Natural variance in diameter can affect stuffing consistency
Home charcuterie is patience made edible. Here's what actually happens (week by week) between buying your first curing salt and pulling your first finished product out of the chamber.
Home charcuterie attracts a specific kind of obsessive: someone who reads ingredient lists on prosciutto, who has opinions about which Italian region makes the best guanciale, who thinks waiting eight weeks for a project to finish is a feature, not a bug.
If that’s you, welcome. The learning curve is real, the equipment costs are real, and the first time you slice open a salami you made from scratch is one of the most satisfying moments a home cook can have.
Here’s what your first eight weeks actually look like.
Week 1: The bag cure, no chamber needed
The best way to start home curing is to not buy anything expensive first. Every beginner should make guanciale or pancetta before setting up a chamber, because the process teaches you the fundamentals: equilibrium curing, rest time, fat-to-salt ratio, without requiring any special equipment.
Equilibrium curing is the modern approach: apply curing salts and salt as a precise percentage of meat weight. For a simple guanciale (cured pork jowl), a typical formula is 2.75% kosher salt, 0.25% Prague Powder #1, 0.5% sugar, and whatever aromatics you want (black pepper, thyme, bay leaf, juniper) by meat weight.
Weigh your meat. Weigh your curing salts on a milligram-scale to 0.01g accuracy. Rub the cure evenly over all surfaces. Vacuum-seal or zip-lock the meat, label it with the date and weight, and put it in your regular fridge.
Leave it there for one day per 5mm of thickness, typically 10-14 days for a pork jowl. Flip it every other day. That’s the initial cure.
The waiting is the hardest part, especially week one when you’re still unsure if you’ve done it right. You have. Trust the ratios.
After the bag cure, rinse the meat, pat it dry, and hang it somewhere cool (55-60°F) with some airflow. Your regular fridge with the door cracked for a few hours, a cool garage in winter, or a wine cooler you’ve already started eyeing.
The meat surface will dry out and firm up. After two to three weeks hanging, you’ll have guanciale, genuine real guanciale you made with curing salt and patience.
Slice it thin. Render it in a pan. Put it on pasta or pizza or eat it on a cracker with something acidic to cut the fat. Then notice that the store-bought version tastes thin and oversalted by comparison.
This is the moment people get serious about the hobby.
Common Week 2 mistakes:
Hanging somewhere too warm (above 65°F) and the fat goes rancid before it can cure properly
Hanging without airflow; you need some air movement, even gentle, to prevent surface mold concentrations
Panicking about white mold; white surface mold (Penicillium) is normal and beneficial; wipe it down with a cloth dipped in white wine or wine vinegar if it bothers you
Week 3–4: Building the chamber
By now you’re either deeply interested or mildly interested. If you’re deeply interested, start planning your curing chamber.
The most common beginner setup is an 18-bottle compressor wine cooler with an Inkbird ITC-308 WiFi temperature controller and a separate IHC-200 humidity controller. Total cost: around $250-300 for cooler plus controllers.
The build, simplified:
Get your wine cooler and both Inkbird controllers
Wire the cooler into the ITC-308’s cooling outlet; add a seedling heat mat into the heating outlet
Plug a USB ultrasonic humidifier into the IHC-200’s humidifying outlet; plug a small USB fan into the dehumidifying outlet
Mount a hook bar (a wooden dowel or aluminum rail) across the interior for hanging
Set ITC-308 to 52°F with ±2°F differential; set IHC-200 to 78% RH with ±3% differential
Plug everything in, let it run empty for 24 hours, and check that it holds. If temperature is swinging more than ±4°F, check your heating/cooling differential settings. If humidity is off, adjust the humidifier intensity.
Once the chamber is stable, roll and tie a pancetta. This is the ideal first chamber project: similar process to guanciale, but with a longer drying phase that teaches you to read how meat is progressing.
The pancetta process:
Bag-cure the pork belly for 7-10 days in the fridge (equilibrium cure)
Rinse, pat dry, season the meat side with black pepper and optional aromatics
Roll tightly, tie with butcher’s twine at 1-inch intervals
Hang in the chamber at 52°F and 78% RH
Drying takes 3-5 weeks depending on diameter. You’re targeting a 30% weight loss from the original post-cure weight. Weigh it weekly. When you hit 30% loss, it’s done.
Checking progress:
Press the pancetta; it should feel firm but with a little give, like a stress ball
Look for even color throughout the exterior with no soft spots
A small amount of white mold on the surface is fine and indicates good humidity management
Week 6–8: First salami
By week six you’ve made two whole-muscle cures and understand the fundamentals. This is when most people start thinking about salami.
Fermented salami is the most technically demanding product in home charcuterie; it adds a fermentation phase, a starter culture, and a pH drop requirement (target pH 4.9-5.1 within 48 hours of stuffing). You’ll need Prague Powder #2, a meat grinder, a sausage stuffer, and natural hog casings.
The broad process:
Grind cold, nearly-frozen pork and back fat through a coarse plate
Mix with salt, Prague Powder #2, a dry red wine, spices, and starter culture
Stuff into natural hog casings and poke out air pockets with a pin
Ferment at 75-80°F and 95% RH for 48-72 hours (a seedling heat mat and plastic tent works)
Cold-smoke if desired (optional but traditional for some salami types)
Hang in chamber at 55°F and 78% RH for 6-8 weeks until 30-35% weight loss
Your first salami will be imperfect. The casing may wrinkle unevenly, the slice may not hold together perfectly, the flavor will be milder than a commercial salami. It will still be the best salami you’ve ever tasted.
Things beginners consistently get wrong
They don’t weigh precisely. Every veteran charcutier has a horror story about eyeballing curing salt. Buy the milligram scale before the first project, not after.
They open the chamber constantly. Every time you open the chamber, the temperature and humidity spike and then crash. Pick a time to check daily (or use the Inkbird app to monitor without opening the door) and otherwise leave it alone.
They try to rush the hang. A pancetta at 25% weight loss isn’t done. A salami at four weeks isn’t done. The only way to know if it’s ready is to weigh it, not to taste it early. Respect the timeline.
They panic about mold. White mold (Penicillium) is your friend. Green or black mold with unusual textures is cause for concern. When in doubt, post a photo to r/charcuterie; the community knows mold.
What changes at week nine
After two whole-muscle cures and your first salami attempt, you’re no longer a beginner. You’re a home charcutier with an established setup, working through the judgment calls that make the hobby endlessly interesting.
The questions you’ll be asking: is this mold good or bad? Why did the casing slip? Is a 28% weight loss enough on a large-diameter salami? When should I move to a smaller-diameter salami to speed drying?
The answers are in Ruhlman & Polcyn, in Marianski’s fermented sausage book, and in r/charcuterie’s archives. The hobby rewards people who read and people who observe, the two skills that turn a beginner into someone whose friends start asking them for cured meat as gifts.
Save your money
What you don't need yet
Beginners get pressured to buy a lot of stuff that doesn't help them play
better. Here's what we'd skip on day one.
A pH meter — Not needed until you're making fermented sausages and want to verify the acidification drop (target pH 4.9-5.1). Whole-muscle cures don't need this.
Smoking equipment — Cold smoking and hot smoking are their own rabbit holes. Get curing down before adding smoke to the equation.
A vacuum sealer — Useful for equilibrium curing and long-term storage, but a zip-lock bag or food wrap works fine for your first ten batches.
A dedicated meat slicer — Impressive for service, but a sharp slicing knife and steady hand gets you proper slices. Buy one after you've made enough salami to justify it.
Bactoferm starter cultures — For whole-muscle cures (guanciale, pancetta, bresaola), you don't need cultures at all. Hold off until you're making fermented salami.
First week
Your first seven days
A short, real plan to get from gear-on-doorstep to actually playing.
Make a simple guanciale or pancetta. No chamber needed, just curing salt, a zip-lock bag, and your fridge for the initial cure phase. · Action
Order your precision scale. The Gemini-20 is under $25 and is the community's standard for measuring curing salts safely. · Buy
Plan your curing chamber. Measure the space where the wine cooler or mini fridge will live. Decide between wine cooler and mini fridge conversion before ordering controllers. · Action
FAQ
Common questions
Is home curing safe?
Yes, if you follow established recipes and weigh your curing salts precisely. The risks are real but well-understood: use the correct Prague Powder (#1 for short cures, #2 for long fermented), measure to 0.01g accuracy, and maintain proper temperature and humidity. Millions of people cure meat at home safely every year. Do not freestyle on ratios until you understand the chemistry.
What is the difference between Prague Powder #1 and Prague Powder #2?
No. 1 contains sodium nitrite only and is for short cures under 30 days: bacon, pancetta, guanciale, corned beef. No. 2 contains both sodium nitrite and sodium nitrate, and is for long fermented and dried products like salami and coppa. The nitrate in No. 2 converts slowly to nitrite over weeks, sustaining protection throughout the long cure. They are not interchangeable.
Do I need a curing chamber for everything?
No. Whole-muscle cures like guanciale, pancetta, and bresaola can be done entirely in your regular refrigerator. Initial cure in a bag, then hung to dry in the fridge with a small fan. A dedicated chamber is required only for fermented and dried sausages (salami, coppa), which need precise humidity control during the drying phase.
How long does it take to make salami from scratch?
A typical home salami takes 6-10 weeks from grinding to ready-to-eat. The fermentation phase takes 2-4 days (where the starter culture drops pH for safety), followed by 4-8 weeks of slow drying in the curing chamber at 55°F and 75-80% RH. Smaller diameter salamis dry faster. Bresaola takes 4-6 weeks. Guanciale can be done in 3-4 weeks.
What is equilibrium curing?
Equilibrium curing is the modern approach where you apply curing salts and salt as a precise percentage of meat weight rather than burying the meat in a fixed amount. Typical ratio: 2.75% kosher salt and 0.25% Prague Powder by meat weight. You seal it in a bag and let time do the work; the cure distributes evenly regardless of meat size. It replaced the older 'excess cure' method for most home charcutiers.
Can I start without a meat grinder?
Yes. Most beginners should start with whole-muscle cures (guanciale, pancetta, bresaola), which require no grinding at all. A grinder only becomes necessary when you want to make salami, 'nduja, or other stuffed fermented products. Get comfortable with whole-muscle curing first, then invest in a grinder once you know the hobby has stuck.
Charcuterie by Ruhlman & Polcyn — The essential reference for home curing. Covers whole-muscle cures, sausages, pâtés, and the underlying chemistry. Read this before you buy anything else.
r/charcuterie — Active community of home curers. Excellent wiki with equilibrium curing ratios, troubleshooting guides, and equipment recommendations. Every beginner question has been answered.
The Sausage Maker — The most trusted US supplier of curing salts, casings, starter cultures, and equipment. Their blog and recipe library is a reliable reference for both beginner and intermediate projects.
The Art of Making Fermented Sausages by Marianski — The technical deep-dive for fermented products: pH, water activity, starter cultures, smoke. Read Ruhlman first; return to Marianski when you're ready for salami.
As an Amazon Associate, JustBeginning earns from qualifying purchases.
We may also earn commission from other affiliate programs linked on this
page. Editorial recommendations are independent; we don't choose
products based on commission rates.
Product prices and availability are accurate as of the date and time
indicated and are subject to change. Any price and availability
information shown on Amazon at the time of purchase will apply.
Our top pickInkbird ITC-308 WiFi Dual Stage Temperature Controller

 Best starter