Home canning is one of the most satisfying things you can do in a kitchen, and one of the more misunderstood. The gear list is short, the learning curve is real but manageable, and there's nothing quite like pulling a jar of August tomatoes off the shelf in January. Here's exactly what you need to start safely.
By Colin B. · Published May 23, 2026 · Last reviewed June 3, 2026
A basic water-bath setup (canner, a case of jars, and a tool kit) runs $50-80. Add the Ball book and a kitchen scale and you're at $120, fully equipped for your first two seasons.
We earn commission on qualifying Amazon purchases — see our
affiliate disclosure.
Price tiers and budget totals shown above are editorial estimates;
actual Amazon prices vary.
At a glance
Our top pick in each category
The fastest path through this guide — each best-starter pick by category.
Scroll for the budget and upgrade alternatives.
There are two types of canning: water-bath (for high-acid foods: jams, pickles, most tomatoes, fruits) and pressure canning (for everything else: green beans, corn, meats, soups). Water-bath is where everyone starts. It's simpler, cheaper, and covers 80% of what beginners want to preserve.
New lids every batch, every time. The flat lid is a single-use item: the sealing compound grips exactly once. The rings are reusable; the lids are not. Ball and Kerr are the two brands worth using. Off-brand lids fail more often.
Follow tested recipes exactly. Canning is the one context in the kitchen where improvising can genuinely make people sick. Botulism is rare, but it's serious and almost entirely preventable by using USDA-tested recipes and correct technique. The Ball Blue Book and the NCHFP website exist for this reason, so use them.
The gear
What you actually need
Water-Bath Canner
Your biggest gear decision: water-bath canner or pressure canner? Water-bath handles high-acid foods: jams, pickles, tomatoes, and most fruits. Pressure canning handles everything else: vegetables, beans, meat, soups. Start with water-bath. It's cheaper, safer to learn on, and covers 80% of what beginners want to make. Upgrade to a pressure canner when you want to preserve green beans or chicken stock. The rack that comes with the canner is not optional; it holds jars off the bottom for even heat and prevents thermal shock breakage.
Water-Bath Canner — what's the difference?
A few common shapes, each making a different trade.
Water-Bath Canner
For high-acid foods. The beginner-friendly method.
Safe for
Jams, pickles, tomatoes, fruits
Temperature
212°F (boiling)
Cost
$25–$50
Best for Beginners, jams and preserves, most pickles
Tradeoff Cannot safely process low-acid vegetables or meats
The kit most canning classes hand to a beginner. Comes with a 33-quart porcelain-on-steel pot and a canning rack (the rack is not optional; it holds jars off the bottom and lets you lower them safely). The 33-qt size fits seven quart jars per batch, the standard load. Porcelain-on-steel distributes heat evenly and lasts decades. At around $35, it's the right entry point.
What we like
~$35 is the right entry price; don't spend more until you know you'll stick with it
33-qt fits seven quart jars, the standard batch size for most tested recipes
Porcelain-on-steel handles heat evenly and cleans easily
What to know
Not compatible with induction or smooth glass cooktops
Rack can be tricky to lower when fully loaded; go slow with the jar lifter
When you're ready to preserve low-acid foods (green beans, corn, chicken stock, soups), you need a pressure canner, not a water-bath pot. The Presto 23-qt is the most popular entry-level model. USDA-tested, affordable, and it doubles as a large-batch stockpot. Wait until you've run a season of water-bath canning before adding this.
What we like
Only safe method for low-acid vegetables, beans, and meat
USDA-approved for home pressure canning, not just a pressure cooker
Doubles as a large stockpot for batch cooking
What to know
Steeper learning curve than water-bath; read the full manual before starting
Rubber gasket needs annual inspection and eventual replacement (~$8)
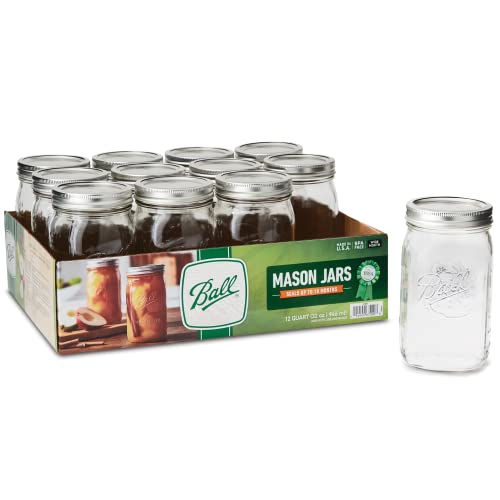
Ball and Kerr are the two brands worth using; their rims are made to exact spec, which matters for a reliable seal. Wide-mouth jars are more versatile than regular-mouth, especially for chunky vegetables and anything you'll be spooning out later. Always use new flat lids each batch; rings are reusable but lids are not. Start with quarts for vegetables and pints for jams and pickles.
Best starter
Ball
Canning Wide Mouth Quart with Lid - Case of 1-12 Count
$40.99 as of Jun 22, 2026
★★★★★Our rating· In Stock
The default jar for savory canning: tomatoes, salsa, pickles, and most vegetables. Wide-mouth opening fits a standard canning funnel and makes spooning out contents easy. The 12-pack (one case) is the standard batch unit; most tested recipes yield 7-9 jars and you always want spares. Includes lids and rings.
What we like
Rims made to exact spec, the foundation of a reliable seal
Wide-mouth opening fits a canning funnel perfectly
Jars reuse for years; only flat lids need replacing each batch
What to know
Heavier than pint jars; a full case of quarts takes serious counter space
Pricing fluctuates; check local hardware stores for better deals at harvest
The right jar for jams, jellies, and gift-sized preserves. Half-pint is the perfect portion, a jar of strawberry jam that gets used in a month before it oxidizes. Regular-mouth is fine for anything that pours; for chunky preserves, stick with wide-mouth.
What we like
Half-pint is the perfect jam size; gets used before it oxidizes
Great for gifting, and small jars are far better received than quarts
What to know
Regular-mouth opening makes filling chunky preserves messier
Takes more batches to build a meaningful pantry supply
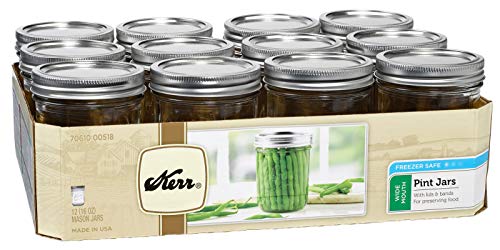
Kerr is Ball's sister brand: same company, same manufacturing quality, often $3-5 cheaper per case. Pint size is the most versatile jar: fits one serving of salsa, two of most jams, and works for pickles of any size. If you're buying jars in bulk, Kerr pints are the smart value play.
What we like
Same Ball-quality manufacturing, often $3-5 cheaper per case
Pint is the most versatile size for salsa, pickles, and small-batch jams
What to know
Not always in stock year-round; buy extra during harvest season
Stock varies by region; Ball is easier to find in some markets
Five tools that separate a smooth canning session from a burned hand and a botched seal. You need: a jar lifter (handles 212°F jars without slipping), a canning funnel (fills jars without contaminating the rim), a headspace measuring tool (correct headspace is required for the vacuum seal to form), a lid wand or magnetic stick (picks up flat lids without touching the sealing compound), and a bubble remover (releases trapped air before sealing). Buy all five as a kit for under $20; don't piece them together.
Best starter
Ball
Canning Utensil Set for Preserving
$
★★★★★Our rating
Everything in one kit: jar lifter, canning funnel, lid wand, headspace measuring tool, and bubble remover. Sturdy, well-made, and the exact tools the Ball Blue Book is written around. Under $20 and the right place to start; don't buy tools piecemeal when this covers everything.
What we like
All five essential tools in one kit: lifter, funnel, wand, measurer, debubbler
Ball-branded to match Ball Blue Book recipes and jar specs
Under $20, the best value purchase in home canning
What to know
Jar lifter grip is stiff at first; work it before your first hot batch
Funnel is plastic; high-volume canners eventually prefer stainless
If you're canning more than a few batches a season, a better jar lifter pays off quickly. Norpro's version has a spring-loaded grip that locks automatically, so no sustained squeezing. When you're lifting seven hot quart jars over a 212°F pot, auto-grip is not a luxury.
What we like
Spring-loaded grip locks automatically, no hand fatigue on long batches
Stainless steel construction outlasts plastic lifters by years
What to know
Less secure on half-pint jars than standard pint and quart sizes
Sold as lifter only; still need the rest of the discovery kit
Canning recipes are developed and tested by weight, not just volume, especially for tomatoes and anything where the acid ratio affects both safety and flavor. A $15 digital scale is cheap insurance that you're following the tested formula. Optional for simple jams and pickles, more important for tomatoes and fermented vegetables where the salt or acid percentage matters.
Best starter
OXO
Good Grips 11-Pound Stainless Steel Kitchen Scale
$54.92 as of Jun 22, 2026
★★★★★Our rating· In Stock
The most-recommended kitchen scale among food writers, bakers, and canners. Accurate to 1 gram, reads up to 11 lbs, and the platform fits a pot. The pull-out display slides out past the bowl's edge, a small detail that becomes indispensable when you're weighing tomatoes into a stockpot.
What we like
Pull-out display clears the bowl so you can read it with a large pot on top
1-gram precision, accurate enough for any canning or baking recipe
Stainless platform wipes clean in seconds
What to know
11 lb limit; weigh ingredients into the pot, not the full pot
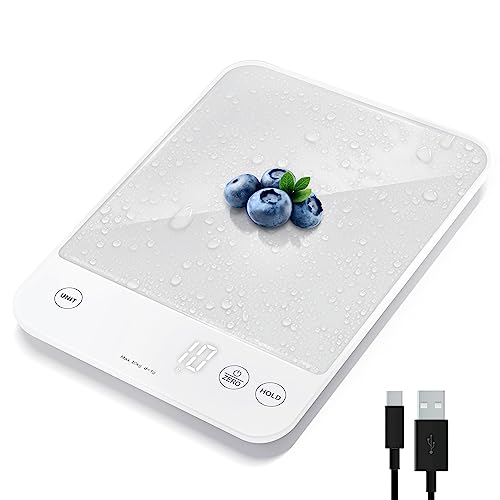
Under $15 and accurate enough for home canning. Does the math right. If you're not sure how often you'll use a scale, this is the no-regret entry point; no features you'll miss at this stage, nothing complicated to learn.
What we like
Under $15, essentially free for the precision it adds
Tare function zeros out a container's weight instantly
What to know
Display is small and harder to read through a bowl
Platform on the small side: fine for ingredients, awkward for wide pots
Canning is the one kitchen skill where a reference book isn't optional; it's infrastructure. The recipes in USDA-tested books are written to a specific acidity and processing time that prevents botulism. Using a recipe from a random food blog, or halving an ingredient to taste, can put people at risk. Own one authoritative reference before your first batch.
Best starter
Ball
Complete Book of Home Preserving
$13.93 as of Jun 22, 2026
★★★★★Our rating· Only 15 left in stock (more on the way).
The reference used in university extension service canning classes nationwide. Over 400 tested recipes covering jams, jellies, pickles, tomatoes, and more. The first two chapters on equipment and safety are worth the full price. Read those before your first batch. The rest is a recipe library you'll use for years.
What we like
The reference used in extension service canning classes nationwide
400+ tested recipes: jams, jellies, pickles, tomatoes, and more
Safety chapters alone are worth the price; read before batch one
What to know
Some recipes predate recent NCHFP updates; cross-check online for safety questions
Limited pressure-canning coverage; supplement with the USDA guide for that
If pickles are your main focus (cucumbers, kimchi, brine-fermented vegetables), this is the deepest, most trusted resource in that lane. Covers both water-bath pickles and lacto-fermentation. Linda Ziedrich is the authority on the subject; this book has been revised three times because it keeps being right.
What we like
The definitive pickle book: 300+ recipes covering vinegar and fermented styles
Covers lacto-fermentation (sauerkraut, kimchi) alongside traditional canning
What to know
Pickle-focused, not a general canning reference for jams or tomatoes
Fermented recipes require patience, not equipment; plan for weeks not hours
Home canning is slower than most kitchen projects, more methodical than most hobbies, and more satisfying than almost anything. Here's what your first season actually looks like, from your first nervous batch of jam to stacking your own jars for winter.
The first thing people say when they learn you can is some version of: “Isn’t that really complicated?” The second thing they say, when you hand them a jar of your strawberry jam in February, is: “Okay, how do I start?”
Home canning is not complicated. It is methodical. There’s a meaningful difference. Complicated means hard to understand. Methodical means there are steps, the steps matter, and you follow them in order. That’s canning.
Here’s what your first season actually looks like.
Start with jam (everyone does, for good reason)
Strawberry jam is the universal beginner project. Not because it’s the easiest recipe (peach jam is slightly more forgiving), but because it’s the one that hooks people. You make it once, you give a jar to a friend, and you’re committed.
The reason to start with jam, technically, is that it’s high-acid. High-acid foods are safe to process in a water-bath canner (a large pot of boiling water that you lower jars into for a specific number of minutes). The boiling water reaches 212°F, which kills everything dangerous in high-acid food and creates a vacuum seal as the jars cool.
Low-acid foods (vegetables, beans, meats, soups) require a pressure canner, which reaches 240°F. You don’t need one yet. Start with jam, pickles, and tomatoes. Get comfortable with the water-bath method first.
For your first jam, you need four things: fresh fruit, sugar, commercial pectin (it makes the gel reliable), and lemon juice (it adjusts the acidity). The Ball Complete Book has a tested strawberry jam recipe on page one. Follow it exactly. Don’t reduce the sugar, don’t substitute the pectin, don’t add extras. Tested recipes are written to a specific formula for a reason.
The safety rules, in plain language
People treat canning safety like a mystery. It isn’t. Here’s the actual logic:
Botulism is caused by a bacterium (Clostridium botulinum) that produces a toxin in low-oxygen, low-acid environments. It’s odorless, colorless, and invisible. A sealed jar of improperly canned green beans is exactly the environment it thrives in.
The way you prevent it:
High-acid foods (jams, pickles, most tomatoes, most fruits) are safe for water-bath canning because the acidity prevents C. botulinum from surviving, even without the higher temperature.
Low-acid foods require pressure canning to reach 240°F, the temperature at which botulism spores are destroyed.
Use tested recipes. A USDA-tested recipe has been lab-verified to the specific acidity and processing time needed for safety. A recipe you found on a food blog has not. This is the one context where “I’ll adapt it” can hurt someone.
That’s the entire safety framework. You don’t need to understand food science to can safely; you just need to match your food to the right method and follow a tested recipe.
Checking your seal: After processing, set the jars on a clean towel and leave them undisturbed for 12-24 hours. You’ll hear a series of soft “pings” as the jars cool and the lids are pulled down into a vacuum seal. Once cool, press the center of each lid; a properly sealed lid is rigid and doesn’t flex. A lid that flexes has not sealed. Refrigerate those jars and use them within two weeks.
What a canning session actually looks like
The rhythm of canning is consistent enough that you’ll have it memorized by batch three. Here’s the sequence:
Prep (30 minutes before): Wash your jars in hot soapy water and inspect the rims for chips or cracks. Fill your canning pot halfway with water and put it on the stove. Put the rack in. Start heating; it takes longer than you think. Keep your flat lids warm (not boiling, just hot) in a small saucepan of simmering water.
Make your recipe: Follow the tested recipe. For jam, you’re cooking fruit, sugar, and pectin to a specific gel point. Use a candy thermometer if you’re uncertain (jam gels at 220°F at sea level (adjust 2°F per 1,000 feet of elevation).
Fill the jars: Set a jar on the counter and fit your canning funnel in the mouth. Ladle hot jam in, leaving headspace (the gap between the food and the lid). The tested recipe will specify headspace (usually ¼ inch for jam, ½ inch for most other foods). Headspace matters because the food expands during processing; too little and the seal fails, too much and you get oxidation.
Run a bubble remover or thin spatula around the inside of the jar to release trapped air bubbles. Wipe the rim with a clean damp cloth; any residue on the rim will prevent a good seal. Place a new flat lid on the jar. Screw the ring on fingertip-tight (snug but not cranked down, since the lid needs to vent during processing).
Process: Lower the filled jars into the boiling water using your jar lifter. The water should cover the lids by at least an inch; add boiling water if needed. Put the lid on the pot. When the water returns to a full rolling boil, start your timer. The tested recipe specifies minutes; follow it.
Cool: When time is up, turn off the heat, remove the pot lid, and let the jars sit in the water for 5 minutes (this reduces siphoning). Lift jars out with the jar lifter and set them upright on a clean towel with an inch of space between each jar. Don’t tilt them, don’t touch the lids, don’t put them on a cold surface. Wait for the pings.
The progression through your first season
Early summer (June-July): Jams and jellies. Strawberry, blueberry, peach, cherry. These are fast batches; most take under two hours from start to shelved. You’ll do three or four before harvest season and have the rhythm completely internalized.
Midsummer (July-August): Pickles. Cucumbers are the standard entry, but this is also when dilly beans, pickled peppers, and bread-and-butter pickles happen. Pickles are slightly more exacting than jam (the brine ratio matters for both safety and flavor), but the process is identical.
Late summer (August-September): Tomatoes. This is the big project that most canners work toward. A bushel of tomatoes from the garden or the farmers’ market becomes 14-18 quarts of crushed tomatoes or sauce. You’ll need to add lemon juice or citric acid to every jar (tested recipe requirement; it standardizes acidity across tomato varieties). It’s a full-day project. It is deeply satisfying.
The progression isn’t mandatory (you can start with tomatoes if that’s what you have), but most people naturally flow through jam → pickles → tomatoes because each one introduces new technique on top of a familiar foundation.
What goes wrong (and how to fix it)
Failed seals: A lid that doesn’t ping or flexes when pressed after 24 hours didn’t seal. The most common cause is residue on the rim, a nick in the lid’s sealing compound, or old (pre-softened) lids. Refrigerate and use within two weeks. Don’t reprocess; the quality won’t survive a second run.
Siphoning: Liquid seeps out of the jar during processing, leaving less headspace than you started with. Caused by filling too close to the boiling point, fluctuating water temperature, or removing jars too quickly after processing. The seal may still be good; check it after 24 hours as usual. Siphoned jars often look ugly but seal fine.
Cloudy brine: Normal for garlic, sometimes normal for pickles. If the brine is cloudy and the jar sealed, you’re probably fine. If the jar is bulging, the seal has failed, or it smells wrong, discard it without tasting.
Color change: Jams and some fruits darken slightly after canning. Normal. Exposure to light accelerates it; store jars in a cool, dark place.
There’s a specific moment that happens to most canners somewhere in their first season: you open a cabinet and see a dozen jars of something you made yourself, and the scale of it registers. A summer’s worth of strawberries. A bushel of tomatoes. Cucumbers from the garden.
Home canning is one of the few hobbies where the output is immediately useful and genuinely valuable. The jam you make in June is better than what you’d buy in February. The tomatoes you put up in August are better than the canned tomatoes on the grocery shelf. You know exactly what’s in them, and you made them.
Start with one batch. The progression takes care of itself.
Save your money
What you don't need yet
Beginners get pressured to buy a lot of stuff that doesn't help them play
better. Here's what we'd skip on day one.
A pressure canner (right away) — Start with water-bath canning and high-acid foods. Get comfortable with the process before adding the complexity and higher stakes of pressure canning.
A vacuum sealer — Not the same as canning. Vacuum sealing won't prevent botulism in low-acid foods and gives a dangerous false sense of security for anything that needs real heat processing.
A pH meter — Use tested recipes and you won't need to verify acidity. If you're improvising recipes enough to need a pH meter, you're not ready to improvise them.
Fancy jar labels (year one) — Masking tape and a marker is all you need for a home pantry. Go decorative once you know what you're making enough of to label consistently.
An All American pressure canner — The gold standard at $300-500 and worth every penny, eventually. Not before you know pressure canning will become a regular part of your food life.
First week
Your first seven days
A short, real plan to get from gear-on-doorstep to actually playing.
Order the Granite Ware canning kit (the pot and rack are both essential). · Buy
NCHFP Getting Started · National Center for Home Food Preservation, the gold standard free resource
Pick strawberry jam as your first recipe. It's the universal canning starter: forgiving, fast, and immediately delicious. · Action
Gather ingredients and new supplies: pectin, sugar, fresh strawberries, and a box of new lids. · Action
Run your first batch. Lay a clean kitchen towel on the counter for the hot jars. Wait for the 'ping', the sound of a successful vacuum seal. · Action
FAQ
Common questions
Is home canning safe for beginners?
Yes, with tested recipes and correct technique. Botulism is the main risk, and it's nearly 100% preventable: use USDA-tested recipes, the correct method for your food's acidity, and new flat lids each batch. Don't improvise recipes until you've done several batches by the book.
What's the difference between water-bath and pressure canning?
Water-bath canning reaches 212°F and is safe for high-acid foods: jams, pickles, most tomatoes, and fruits. Pressure canning reaches 240°F and is required for low-acid foods: vegetables, beans, meats, and soups. Using water-bath for low-acid foods is not safe; you must match the method to the food's acidity.
Can I reuse old jars and lids?
Jars: yes, if they're free of chips, cracks, or rim damage (inspect carefully before each use). Flat lids: no. Each lid is designed to seal exactly once; the sealing compound is single-use. Rings (screw bands) are reusable as long as they aren't bent or rusty.
How long does home-canned food last?
Properly sealed, home-canned food is safe indefinitely, but quality degrades after 1-2 years. The USDA recommends using it within one year for best flavor and nutrition. Always check the seal before opening; if the lid flexes, the jar smells off, or you hear no 'pop' when you open it, discard it.
What should I can first?
Strawberry jam. It's the universal beginner project: high-acid, forgiving on timing, fast (under 2 hours start to finish), and immediately delicious. It teaches you every step of water-bath canning without the precision demands of pickling or tomatoes. Do jam first, then pickles, then tomatoes.
Do I need a pressure canner to preserve vegetables?
Yes. Green beans, corn, carrots, and most vegetables are low-acid, which means water-bath canning can't reach the temperature needed to kill botulism spores. You must use a pressure canner for those. The one safe exception: pickled vegetables, where added vinegar raises acidity enough for water-bath.
USDA Complete Guide to Home Canning — Free, comprehensive, and authoritative. Available as a PDF from the USDA. The most current safety guidelines available anywhere.
Ball Fresh Preserving — Ball's official recipe and technique site. Tested recipes, technique videos, and a jar-size calculator. Bookmark it for your first season.
r/Canning — Active community with a well-maintained wiki. Read the wiki first; avoid threads asking whether it's safe to modify a recipe (the answer is always to use a tested one).
Local Cooperative Extension Service — Your state's land-grant university runs local extension offices that offer free or low-cost canning classes and free pressure-gauge testing. The best beginner resource most people never find.
As an Amazon Associate, JustBeginning earns from qualifying purchases.
We may also earn commission from other affiliate programs linked on this
page. Editorial recommendations are independent; we don't choose
products based on commission rates.
Product prices and availability are accurate as of the date and time
indicated and are subject to change. Any price and availability
information shown on Amazon at the time of purchase will apply.
Our top pickGranite Ware Water Bath Canner with Rack, 33 Quarts

 Best starter