Craft chocolate is one of the most surprising food hobbies — you start with raw cacao nibs and end up with better chocolate than most store shelves carry. The barrier to entry is one specialized machine. Once you have a melanger, everything else is ingredients, temperature control, and patience.
By Colin B. · Published May 28, 2026 · Last reviewed July 12, 2026
The melanger ($300–$450) is the bulk of your spend. Ingredients and tools for your first few batches run another $80–$120. Expect $400–$650 before your first finished bar.
We earn commission on qualifying Amazon purchases — see our
affiliate disclosure.
Price tiers and budget totals shown above are editorial estimates;
actual Amazon prices vary.
At a glance
Our top pick in each category
The fastest path through this guide — each best-starter pick by category.
Scroll for the budget and upgrade alternatives.
The melanger is the make-or-break purchase, and there is no real budget version that works. Spend $320 on a Premier Wonder 10B and you are in. Spend $80 on a cheap tabletop grinder and you will get grainy, unusable paste. The machine is the investment.
Start with pre-roasted cacao nibs, not raw beans. Roasting whole beans requires a separate drum roaster, adds an hour to every session, and is an entirely separate skill. Nibs let you skip straight to grinding and learn one skill at a time.
Your first batch will not be your best batch. Tempering — cycling chocolate through precise temperatures to get snap and gloss — takes three to five tries before it feels comfortable. Order enough ingredients for two batches on your first supply run so a failed temper doesn't stall your momentum.
The gear
What you actually need
Melanger
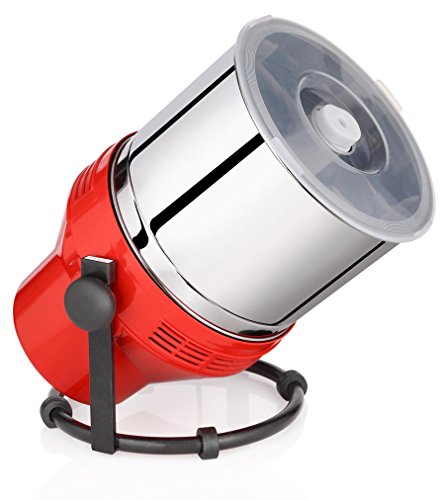
The melanger — a rotating drum fitted with granite roller-wheels — is the single tool that makes home bean-to-bar chocolate possible. It grinds cacao nibs and sugar to a particle size below your palate's detection threshold, running continuously for 12 to 24 hours. The difference between a properly run batch and an under-processed one is whether your chocolate feels silky or gritty. There is no real budget melanger that works well. The Premier Wonder 10B is the standard beginner machine — well-supported, repairable, and the starting point for virtually every home chocolatier.
Melanger — what's the difference?
A few common shapes, each making a different trade.
10B — 1 to 2 lb batches
Best starter size. Lower commitment, easier to clean.
Drum size
10 lbs capacity
Batch size
1–2 lbs
Run time
12–24 hours
Best for Home experimenters, single-origin tasting batches
Tradeoff Can't scale up without buying a larger machine later
The Premier Wonder 10B is the machine the craft chocolate community converges on: it works, the company answers emails, and replacement parts are cheap when something breaks. Granite rollers and a stainless steel bowl. Makes 1–2 lb batches — the right size for testing single-origin recipes without wasting expensive cacao nibs.
What we like
Community-standard pick; Premier's support actually responds fast
Granite rollers last years; contact brush is the only wear part
1–2 lb batch size is perfect for recipe experimentation
What to know
Loud — unsuitable for shared living unless you grind during daytime
Drum cleanup between different recipes takes 20–30 minutes
Same granite-roller design as the 10B, scaled up to 4–5 lb batches. Buy this when you're making bars to gift or want to run fewer batches per month. Minimum batch size also increases — you'll need at least 2 lbs of cacao to run it efficiently — so it rewards commitment.
What we like
4–5 lb batches mean fewer runs when supplying gifts or markets
Same parts, same support, same quality as the trusted 10B
What to know
Requires at least 2 lbs of cacao to run the drum efficiently
Higher price without meaningful quality improvement over the 10B
★★★★☆Our rating· Only 15 left in stock (more on the way).
The Ultra Chocogrind uses gear-driven rollers, which some makers prefer for consistent particle reduction compared to the gravity-driven Premier design. The drum handles roughly 2–3 lb batches. Worth considering if the Premier is backordered or you want to try an alternative machine style; otherwise the Premier line has more community documentation.
What we like
Gear-driven mechanism preferred by some makers for consistency
Good alternative when Premier is backordered or out of stock
What to know
Less community documentation and fewer tutorials than Premier
Parts availability less reliable than the Wonder line
Bean-to-bar chocolate needs just three core ingredients: cacao nibs, a sweetener, and — for creamier bars — cocoa butter. The nibs you choose drive most of the flavor; single-origin nibs from Ecuador, Madagascar, and Peru taste noticeably different. Start with a high-quality pre-roasted nib and plain cane sugar. Don't use grocery-store cacao powder — it is a defatted product that won't behave like whole nibs in a melanger recipe.
Best starter
Navitas Organics
Cacao Nibs
$12.37 as of Jun 22, 2026
★★★★★Our rating· In Stock
Navitas is the most widely available quality cacao nib brand — stocked at Whole Foods and on Amazon. Pre-roasted, organic, Peru-origin, with enough cocoa butter content to grind smoothly without supplementing. A 1 lb bag gives you enough for two experimental 70% dark bar batches, which is exactly right while you are still dialing in your recipe.
What we like
Widely available — Whole Foods, Sprouts, Amazon, and natural grocers
Consistent pre-roast level removes a variable from early batches
Organic and fair-trade certified — easy to feel good about gifting
What to know
Peru origin is pleasant but not the most distinctive single-origin
More expensive per oz than buying from a specialty cacao supplier
Adding cocoa butter to your recipe softens mouthfeel and lowers viscosity in the melanger — essential for milk chocolate and helpful for silkier dark bars. Navitas's food-grade wafers are unrefined, organic, and melt cleanly with a mild chocolate aroma. Add 5–10% by weight to your cacao for a creamier texture. Same brand as the cacao nibs above — one supplier for your core ingredients.
What we like
Wafer format melts evenly — no chopping a block of solid butter
Organic, fair-trade, and stocked at Whole Foods alongside their nibs
What to know
Not needed for a plain 70% dark bar — skip until recipe three or four
Smaller 8 oz bag means reordering frequently once you're adding to batches
Cane sugar is the standard sweetener for dark chocolate and grinds down smoothly in a melanger without any pre-processing — granulated crystals break to powder over the 12-hour run. Anthony's ships in 5 lb bags on Amazon at a fair price, and you won't run out anytime soon at the typical 30g sugar per 100g batch.
What we like
Melanger grinds granulated sugar fine — no pre-processing needed
5 lb bag lasts through many batches at standard recipe ratios
What to know
No flavor character of its own — try coconut sugar if you want complexity
Bulk bags require airtight storage to prevent moisture clumping
Molds determine whether your bars look handmade or professional. Polycarbonate molds produce a mirror-smooth surface when chocolate is properly tempered — they are what commercial chocolatiers use, and the gloss is satisfying proof that your tempering worked. Silicone molds are forgiving and easier to demold but produce a matte finish. Start with one polycarbonate bar mold. Add silicone when you want more shapes without the stakes of a polycarbonate release.
Best starter
CandyMake
Polycarbonate Chocolate Bar Mold
$9.49 as of Jun 22, 2026
★★★★★Our rating· In Stock
Polycarbonate is the professional standard — chocolate releases cleanly from PC molds and picks up a mirror gloss that shows off good tempering. The rigid structure holds its shape after years of use. Start with a simple bar shape: it is the easiest to fill and demold, and lets you focus on tempering technique rather than complicated release.
What we like
Mirror-gloss finish that shows when your tempering worked
Rigid structure won't warp or flex under years of use
Same style of mold used by professional chocolatiers
What to know
Requires polishing before use and careful scratch-free storage
Mistempered chocolate sticks and won't release cleanly
Silicone is forgiving — even imperfectly tempered chocolate releases without a fight. For your first few batches while you are still learning temperature control, silicone means fewer stuck bars and less wasted chocolate. The matte finish won't show off perfect tempering, but it also won't punish you while you are practicing.
What we like
Flexible release means imperfect tempering won't ruin your batch
Dishwasher-safe and easy to clean
What to know
Matte finish only — silicone cannot produce a glossy bar
Flexes when filling; set on a baking sheet to carry to the fridge
Once you have mastered flat bars, shell molds let you make filled bonbons — hollow shells piped with ganache, caramel, or nut butter and sealed with a chocolate backing. The technique is harder than bars (you temper a thin shell, let it set, fill it, then cap and demold), but the result is what people eat at artisan chocolate shops.
What we like
Opens the door to filled bonbons, ganache centers, and caramels
Polycarbonate construction delivers the same gloss as shop-bought
What to know
More technique than bar molds — practice bars before attempting shells
Requires a separate ganache or filling recipe to use properly
Tempering is the process of cycling melted chocolate through a precise temperature sequence — down to around 82°F, back up to 88–90°F for dark chocolate — to stabilize the cocoa butter crystals into the right form. Properly tempered chocolate has a clean snap, glossy surface, and releases from molds without sticking. Improperly tempered chocolate is gray, streaky, and soft. The core tool is a fast, accurate thermometer. Everything else — marble slabs, electric machines — is a method choice.
Best starter
ThermoWorks
Thermapen ONE
$$$
★★★★★Our rating
Tempering is a precision game — the window between in-temper and out-of-temper is roughly 2–3°F. A slow thermometer makes it guesswork; the Thermapen ONE reads in one second and is accurate to ±0.5°F. Chocolatiers, bakers, and pastry cooks all converge on this tool. You will use it for caramel, sugar work, and dairy thermometry long after your chocolate batches are dialed in.
What we like
One-second read, ±0.5°F accuracy — the margin tempering lives in
Backlit foldaway probe, comfortable for long tempering sessions
Multi-use: candy, caramel, dairy, and meat thermometry all covered
What to know
Over $100 — a genuine investment for a thermometer
Overkill if you eventually buy an electric tempering machine
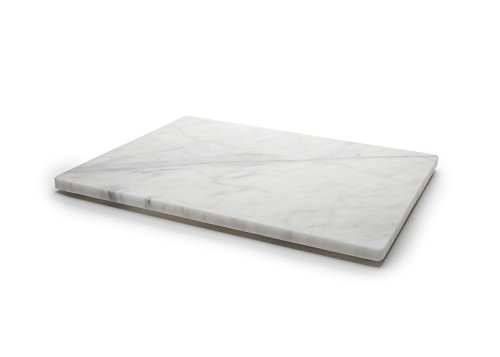
Marble stays cool and conducts heat evenly — ideal for the tabling method of tempering. Pour two-thirds of your melted chocolate onto the stone, work it with a bench scraper until it cools to around 82°F, then fold it back into the remaining third. The method gives you tactile feedback that a machine cannot: you feel and see the chocolate thickening as it moves toward temper.
What we like
Stays cold; conducts heat perfectly for the classic tabling method
No electricity needed — teaches you to read chocolate by feel
What to know
Heavy and needs dedicated counter space during use
Tabling technique takes practice; expect 2–3 sessions before it clicks
★★★★☆Our rating· Only 8 left in stock - order soon.
Electric tempering machines automate the hard part — you load chopped chocolate, select dark, milk, or white, and it cycles through the temperature curve for you. The Revolation Delta handles 1.5–6 lb batches and is what small chocolate shops and serious home makers use. Buy this after you have hand-tempered a few batches and understand what properly set chocolate looks and feels like.
What we like
Automates the temperature curve so you can focus on molds and filling
1.5–6 lb capacity is right for serious home production
What to know
Expensive ($350–$450); only worth it once you make regular batches
Takes up counter space and is loud — not for occasional makers
Chocolate-making is fundamentally about ratios — 70 grams of cacao to 30 grams of sugar for a classic dark bar. A gram-accurate scale is the one non-negotiable in this category. The bench scraper and dipping forks are quality-of-life tools: the scraper moves chocolate off the marble efficiently during tabling, and the dipping forks let you coat truffle centers evenly. Nothing here is exotic, but having a rigid stainless scraper makes the tempering process noticeably cleaner.
Best starter
OXO
Good Grips 11 lb Food Scale
$54.92 as of Jun 22, 2026
★★★★★Our rating· In Stock
OXO's 11 lb food scale is accurate to 1 gram and has a pull-out display that stays readable under wide mixing bowls. For chocolate, you are often weighing 200–500g batches, and even a 5g error in your cacao-to-sugar ratio shifts the flavor noticeably. The removable platform wipes clean after chocolate drips, which will definitely happen.
What we like
Pull-out display stays readable under large mixing bowls
Accurate to 1g — sufficient for every home chocolate recipe
Removable platform wipes clean after chocolate drips
What to know
1g resolution isn't fine enough for micro-batch recipes under 50g
Max 11 lbs — not an issue for home batches but worth knowing
★★★★☆Our rating· Only 19 left in stock - order soon.
The bench scraper is your most-used tool when tempering on marble — you use it continuously to fold and work chocolate as it cools on the stone. Ateco's is stainless steel, stiff enough to scrape cleanly without flexing, and the right size for a standard pastry board. Also essential for transferring ganache from cutting board to piping bag.
What we like
Rigid stainless edge essential for marble tabling — no flex
Once you are making ganache truffles, dipping forks let you coat centers in tempered chocolate without using your fingers. The set includes a two-tine fork, a spiral, and a ring tool — each shaped for different truffle geometries. Trying to improvise with a kitchen fork results in thick, uneven coatings; these thin tines let excess chocolate drain cleanly.
What we like
Thin tines let excess chocolate drain for cleaner coating
Different fork shapes handle spheres, squares, and irregular centers
What to know
Requires well-tempered chocolate and firm centers to work cleanly
Step up in technique — master bar molding before moving to dipping
The melanger runs itself. The hard part is learning to read chocolate — and that only happens by making batches, ruining a few, and tasting what went wrong.
Home craft chocolate has a reputation for being intimidating, and the intimidation is mostly unearned. The melanger does the hard work while you sleep. The cacao does most of the flavor work before you touch it. What you actually have to learn is one thing: how to temper. And tempering is learnable — but only by doing it, not by reading about it.
Here is what your first five batches actually look like.
Batch 1: The first grind
Your first batch exists to calibrate the melanger and get a sense of what the process feels like. Don’t put pressure on it.
Weigh out 300g of cacao nibs and 100g of cane sugar. This is a 75/25 ratio, slightly darker than a standard 70% bar, but the extra cacao helps the machine get started. Load the nibs first, run for 20 minutes until they break down into a rough paste, then add the sugar.
Set a timer for 12 hours and walk away. Seriously — there is nothing to do. The granite rollers will turn continuously, reducing particle size over time. Check at 12 hours: rub a small amount between your fingers. If you feel grit, keep going. At 18–20 hours, most batches reach a silky, grit-free texture.
Before you pour into molds, taste the chocolate in its liquid form. You will notice the flavor is more intense than finished bars — that is normal, the flavor rounds out after tempering and resting.
Tempering is the process of cycling melted chocolate through a precise temperature sequence to stabilize cocoa butter into a crystal form (Form V) that gives chocolate its snap, gloss, and clean release from molds. Without it, your bars will be soft, gray, and streaky.
For Batch 2, use the seed method — the simplest tempering technique for beginners:
Melt your chocolate to 120°F to ensure all crystals are dissolved
Cool the mass while stirring to 82°F (the tricky part — use your Thermapen constantly)
Add 10–15% by weight of finely grated commercial dark chocolate (Valrhona, Guittard, or similar) as seed
Stir until the seed fully melts and temperature rises back to 88–90°F
Test: dip the tip of a spoon, let it set for 2 minutes at room temperature. It should release cleanly with a slight gloss.
Your first attempt will likely fail. That is normal. If the chocolate sets soft and gray, re-melt it to 120°F and try again. Tempering gets easier once you have failed at it twice — you start to feel the viscosity shift as the chocolate approaches working temperature.
Batch 3: Your first mold pour
Pour tempered chocolate into your polycarbonate bar mold. Tap the mold firmly on the counter 10–15 times to release air bubbles. Run a bench scraper across the top to level and remove excess.
Refrigerate at 50–55°F for 20–30 minutes. The chocolate should contract slightly from the mold walls — a sign of proper tempering. When you flip the mold over a clean surface, the bars should release with a clean snap and a glossy top surface.
If they stick, the tempering was off. Re-melt, try again. If they release but look dull and soft, check your working temperature — you likely poured at 86°F instead of 88–90°F.
Taste your first bar 24 hours after demolding, not immediately. Chocolate continues to develop flavor as it crystallizes fully — the difference between a fresh-demolded bar and one that has rested overnight is noticeable.
Batch 4: Playing with origin
Buy a second bag of cacao nibs from a different origin — Madagascar, Ecuador, or Dominican Republic. Make the exact same recipe: same ratio, same grind time, same temperature sequence.
Taste them side by side.
The flavor difference between origins can be startling — Madagascar nibs are often fruity and bright, Peru nibs earthy and rounded, Ecuador (specifically Arriba Nacional) floral and complex. This is why single-origin labeling matters: the origin IS the flavor, in a way that doesn’t have a parallel in most food hobbies.
You will also notice that different origins behave slightly differently in the melanger — some grind to silky texture faster than others, depending on their cocoa butter content. Start taking notes.
Batch 5: Your first ganache experiment
Once you can reliably make a tempered bar, it is time to fill one. A simple dark chocolate ganache:
Heat 100ml of heavy cream to just below a simmer
Pour over 100g of finely chopped dark chocolate
Stir until smooth, add a pinch of flake salt
Cool to room temperature, then refrigerate until firm (2–3 hours)
Pipe or scoop small balls of ganache onto parchment. Refrigerate until very firm. Dip in tempered chocolate using your dipping forks. Let set on parchment at room temperature.
The technique here — centering a soft ganache in your fork, keeping the coating thin, letting it drain before setting — takes practice. Your first truffles will look handmade. That is fine. They will taste exceptional.
By the end of your fifth batch, you should be able to consistently make a tempered bar that releases cleanly from a mold. That is the core skill. Everything else — origin exploration, filling types, decorating with transfer sheets, adjusting sweetness ratios — builds on that foundation.
Two things to do next:
Find your supplier. The nibs you can find on Amazon are a starting point, not an endpoint. Specialty cacao suppliers like Meridian Cacao and Uncommon Cacao offer a wider range of single-origin nibs at better prices per pound, with harvest year and fermentation notes included. Once you are going through 2–3 lbs of nibs per month, buying direct makes sense.
Join The Chocolate Life community. Post your batch photos, troubleshoot your tempering failures, and start following the discussions about origin. It is the only active forum specifically for craft chocolate makers, and the quality of conversation is high.
Save your money
What you don't need yet
Beginners get pressured to buy a lot of stuff that doesn't help them play
better. Here's what we'd skip on day one.
An electric tempering machine — Hand-temper your first 5–10 batches. You need to know what tempered chocolate looks and feels like before a machine abstracts it away.
A cacao roaster for raw beans — Roasting whole beans is a separate skill that adds an hour of process and gear. Start with pre-roasted nibs — the flavor range is still enormous.
A chocolate enrober — The machine that waterfalls chocolate over a conveyor of truffles. Strictly professional scale. Dipping forks do the same job at home volume.
Cocoa butter transfer sheets — Decorative printed patterns that transfer onto glossy bar surfaces. Worth exploring later, but only meaningful once your tempering is consistent.
A dedicated chocolate fridge — Standard refrigerator at 55–60°F works fine. A dedicated unit with humidity control only matters once you are storing inventory for sale.
First week
Your first seven days
A short, real plan to get from gear-on-doorstep to actually playing.
Order the Premier Wonder 10B — it ships from India, so allow 10–14 days. Don't skip the lead time. · Buy
Order 1 lb of cacao nibs and pick up a reference bar — a Valrhona or Dandelion single-origin — to taste before you grind. The flavor you taste in the bar is what you are aiming for. · Buy
Read the Chocolate Alchemy basic 70% dark chocolate recipe. It is just nibs and sugar, and the ratios and process are explained better there than anywhere else. · Learn
When the melanger arrives, do a 30-minute break-in grind with inexpensive nibs and water before your first real batch. This conditions the granite rollers and removes any stone dust. · Action
Make your first batch: 300g nibs + 100g cane sugar (70% dark). Load the melanger and run 18 hours. Taste at 12 hours and again at 18 to feel the texture improving. · Action
Temper your first batch using the seed method: melt your chocolate, cool to 82°F, add 10% already-tempered commercial chocolate, and stir. Simpler than tabling and still teaches you the temperature curve. · Action
Join The Chocolate Life community and post your first batch results. The community is genuinely helpful for troubleshooting early texture and tempering questions. · Action
The Chocolate Life · Clay Gordon's forum — the most active craft chocolate community online
FAQ
Common questions
How much does it cost to start making craft chocolate?
Plan on $400–$650 to start. The melanger is the biggest cost at $320–$450. Ingredients and basic tools for your first few batches add another $80–$120. You can lower costs slightly by buying cacao nibs in bulk, but the machine price is fixed.
Do I need to roast cacao beans, or can I just use pre-roasted nibs?
Start with pre-roasted nibs. Roasting raw cacao beans requires a drum roaster or repurposed coffee roaster, adds an hour of process, and is a separate skill with a steep learning curve. Nibs from quality suppliers are already roasted to a good baseline. Once you've made a dozen batches, roasting your own becomes a meaningful upgrade.
What is tempering and why does it matter?
Tempering is the process of cycling melted chocolate through a precise temperature sequence to stabilize cocoa butter into Form V crystals — the structure that gives chocolate its snap, gloss, and clean mold release. Untempered chocolate is soft, gray, streaky, and sticks to molds. It tastes the same, but the texture and appearance are noticeably worse.
How long does each batch take, start to finish?
Plan on 20–30 hours for a full batch from loading the melanger to finished bars. The melanger runs 12–18 hours unattended. Tempering and molding take about an hour. Bars need 20–30 minutes in the fridge to set, then another 24 hours to bloom properly before tasting. Most of the time is hands-off.
Can I make milk chocolate at home?
Yes, though it is harder than dark chocolate. Milk chocolate requires adding dry milk powder to your melanger recipe, which changes the particle dynamics and can make the grind stickier. Start with a solid 70% dark bar first, then experiment with milk powder additions once you understand how the melanger behaves. Tempering temperatures for milk chocolate are also slightly different (84–86°F) than for dark.
My chocolate came out gray and streaky — what went wrong?
Almost certainly a tempering issue. Gray or streaky chocolate (called 'bloom') means the cocoa butter separated into large crystals instead of the small Form V structure you want. The fix is re-melting and tempering again correctly. Fat bloom from tempering errors and sugar bloom from condensation look similar but have different causes — fat bloom is a surface sheen or gray streaks, sugar bloom is a grainy white dusting.
What is the difference between craft chocolate and commercial chocolate chips?
Commercial chocolate chips are formulated to hold their shape when baked, which means they contain less cocoa butter and more stabilizers than pure chocolate. Bean-to-bar chocolate is made only from cacao and sugar — no emulsifiers, no additives — and is designed to be eaten and properly tempered. Don't use chocolate chips in your melanger or as tempering seed; use a quality eating chocolate like Valrhona or Guittard as your tempering reference.
Chocolate Alchemy — John Nanci's site — the original home chocolate-making resource and still the most thorough. Recipes, technique guides, and equipment reviews written by the person who essentially created the home chocolate-making movement.
The Chocolate Life — Clay Gordon's community forum — the most active online space for craft chocolate discussion. Excellent for troubleshooting early batches and finding single-origin cacao suppliers.
Fine Chocolate Industry Association — Trade organization for the craft chocolate industry. Their sourcing and quality standards are useful context for understanding what separates fine cacao from commodity cacao.
Dandelion Chocolate Stories — San Francisco's most prominent bean-to-bar maker publishes detailed posts on sourcing, fermentation, and technique. Higher-level reading once you have a few batches made.
r/chocolate — Active subreddit mixing tasting notes, batch photos, and sourcing discussion. The troubleshooting threads are worth searching when your first batch comes out wrong.
As an Amazon Associate, JustBeginning earns from qualifying purchases.
We may also earn commission from other affiliate programs linked on this
page. Editorial recommendations are independent; we don't choose
products based on commission rates.
Product prices and availability are accurate as of the date and time
indicated and are subject to change. Any price and availability
information shown on Amazon at the time of purchase will apply.

 Best starter