Few hobbies pay you back as visibly as detailing. An afternoon in the driveway and your car looks better than it has in years. The catch: it's easy to buy the wrong things in the wrong order. Here's the right order, and the gear that actually moves the needle.
By Colin B. · Published May 24, 2026 · Last reviewed June 9, 2026
A basic wash + wax setup runs about $80. Add a DA polisher and you're at $250–350. Ceramic coating kits push past $400, but you don't need one yet.
We earn commission on qualifying Amazon purchases — see our
affiliate disclosure.
Price tiers and budget totals shown above are editorial estimates;
actual Amazon prices vary.
At a glance
Our top pick in each category
The fastest path through this guide — each best-starter pick by category.
Scroll for the budget and upgrade alternatives.
Always wash and decontaminate before you polish or protect. Waxing over dirt or iron deposits (the #1 beginner mistake) that seals the contamination in and makes paint feel rough even after a 'detail.' Clay bar first, then wax. It takes an extra 45 minutes and the results are not comparable.
A dual-action (DA) polisher is the only machine a beginner should touch. Rotary polishers remove paint defects faster, but they also remove paint if you hold them in one spot a half-second too long. Wait until you've done 15–20 details before you even look at a rotary.
Two buckets (one soapy, one clean rinse water) are not optional if you care about your paint. One-bucket washing drags grit from the bottom back onto your paint and creates the swirl marks that cost hundreds of dollars to remove later.
The polisher is the most consequential purchase in detailing: it does in 15 minutes what hand-polishing takes 3 hours to accomplish. A dual-action random orbital is the only type you should buy first. It throws the pad in a non-repeating pattern that distributes heat so evenly you'd have to try to burn paint. Start here, use it for at least 20 details, and then decide if you want a rotary.
Polisher — what's the difference?
A few common shapes, each making a different trade.
Dual-Action / Random Orbital
Safe, forgiving orbit. The only type for beginners.
Orbit throw
8–21mm
Paint safety
Very high
Correction speed
Moderate
Best for Beginners, weekend detailers, swirl removal, applying protection
Tradeoff Slower at removing deep scratches than a rotary polisher
Fast scratch removal, high burn risk. Skip for now.
Orbit throw
0mm (true rotation)
Paint safety
Low, burns fast
Correction speed
Very high
Best for Experienced detailers, heavy oxidation, professional paint correction
Tradeoff Concentrates heat on one spot; burns clear coat in seconds if you stop
Best starter
Griot's Garage
6" Random Orbital Polisher with BOSS Foam Pads
$$$
★★★★★Our rating
Griot's is one of the most trusted names in enthusiast detailing, and this kit includes the machine, backing plate, and foam pads: everything to start your first correction session. The 6-inch platform is the sweet spot for beginners: versatile for panels and tight curves, powerful enough to work compounds, safe enough that you won't burn paint on your first pass.
What we like
Trusted enthusiast brand, not a rebadged no-name machine
Kit includes pads and backing plate, ready to use day one
6-inch platform handles panels and tight curves equally well
What to know
Pricier than budget polishers; you're paying for build quality
Kit pads are a starting point; serious correction needs upgrades
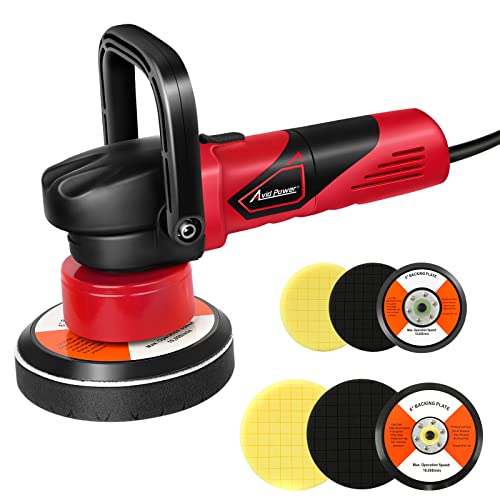
If you want to try machine polishing before committing $200+, Avid Power's DA buffer is the budget entry point. Variable speed, 6-inch backing plate, and actual random orbital motion, not a gear-driven rotary disguised as an orbital. Results are real; just not as refined as Griot's, and you'll feel the difference in how it tracks on paint.
What we like
True random orbital motion, not a disguised gear-driven rotary
Variable speed to match pad and compound correctly
Budget-friendly way to try machine polishing before committing
What to know
Backing plate wobbles at max speed; stay at 4–5 for most work
Build quality noticeably lower than Griot's or RUPES
RUPES is the brand professional detailers use when clients leave their Ferraris behind. The 15mm throw is longer than most DA polishers, which means it cuts through light scratches and swirls faster while remaining safe on paint. When you're ready to step up (after 20 or 30 details): this is the machine you'll use for the next decade.
What we like
15mm throw removes defects faster than standard DA orbitals
What professional detailers actually use on client cars
RUPES build quality lasts a decade of regular use
What to know
Requires 5-inch pads; your 6-inch collection won't transfer
Premium price ($450+), only justified once you're truly committed
The two-bucket method (one bucket of soapy water, one bucket of clean rinse water) is the single most effective swirl-prevention technique in detailing. It costs nothing extra beyond a second bucket. Use a proper wash mitt, not a sponge, and the dirt you pick up gets rinsed into the clean bucket before it goes back on the paint. Grit guards at the bottom of each bucket trap particles below your mitt.
Best starter
Chemical Guys
HOL203 Wash & Wax Detail Kit
$109.99 as of Jun 22, 2026
★★★★★Our rating· In Stock
This kit gives you everything to set up a proper two-bucket wash in one box: car wash soap, a chenille microfiber mitt, two buckets with grit guards, and a quick detail spray for between washes. Chemical Guys makes good products, and the kit price beats buying each piece separately. Grit guards at the bucket base keep dislodged grit from cycling back onto your mitt.
What we like
Complete two-bucket setup in one buy: buckets, guards, mitt, soap
Grit guards at bucket base are the key swirl-prevention ingredient
Chemical Guys soap is pH-neutral and safe over wax and sealant
What to know
Wash-and-wax soap is a compromise; dedicated wax application does more
Included mitt is decent but worth replacing after 6 months
Gold Class Car Wash Liquid Shampoo & Conditioners, 64 oz (2 Pack)
$
★★★★☆Our rating
The car wash soap people have used for decades. Rich foam, pH-balanced, safe on any protection layer. A 64-ounce bottle gets you through 20+ washes. If you already have buckets and a mitt, this is all the soap you need: straightforward, proven, and available at any auto parts store when you run out.
What we like
Proven formula used by beginners and enthusiasts for decades
pH-neutral and safe over wax, sealant, and ceramic coatings
64 oz bottle gets through 20+ wash sessions
What to know
Soap only; you still need mitt, buckets, and grit guards separately
Less lubrication than premium washes; rinse mitt frequently
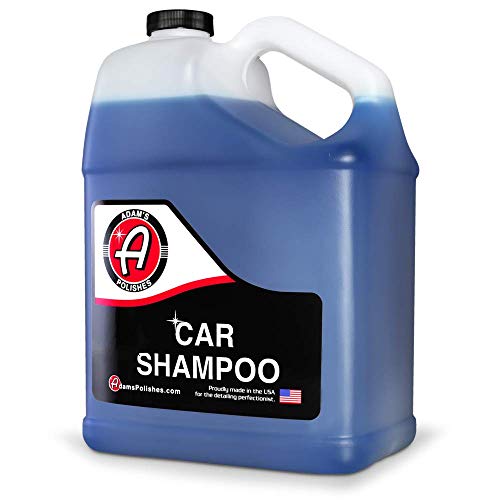
Adam's flagship soap is slicker than Meguiar's, which means the mitt glides more easily and carries less grit on each pass. The soap to graduate to once you care about marginal improvements. Formulated to be safe over ceramic coatings without stripping them, useful once you've moved up to a ceramic-coated car.
What we like
Exceptional lubrication: mitt glides without dragging grit
Safe over ceramic coatings without stripping the protection layer
Concentrate formula goes further per wash than most soaps
What to know
Costs more per wash than Meguiar's, noticeable over a full season
Low-foam formula looks underwhelming even when it's working well
Car paint accumulates two kinds of contamination a wash mitt can't remove: iron particles (brake dust and rail dust that embed in clear coat and oxidize) and bonded surface contamination (tar, sap, overspray, industrial fallout). You need to remove both before polishing or applying any protection; polishing over contamination grinds it deeper. Use iron remover first, clay bar second, then proceed.
Best starter
Chemical Guys
CLY_KIT_1 Clay Bar System
$21.99 as of Jun 22, 2026
★★★★★Our rating· In Stock
Clay bar removes bonded surface contamination (tar, overspray, industrial fallout) that car wash alone can't touch. This kit includes two clay bars (medium grade for most cars, fine grade for newer paint) and lubrication spray. After claying, paint feels like glass. It's the step most beginners skip, and the one that makes the biggest tactile difference.
What we like
Removes bonded contamination a wash mitt can never touch
Two clay bars included; backup when one inevitably drops
Clay lubricant included, nothing extra needed to start
What to know
Drop the bar and it's trash; work small sections to avoid this
Iron X removes embedded iron particles that make paint rough and dull, deposited by brake dust and rail dust. Spray on, watch it turn purple as it dissolves iron bonds, rinse off. Used before the clay bar, it handles a contamination layer clay alone misses. Most cars haven't been iron-treated in years. The first application's results are noticeably cleaner.
Paint protection seals the surface against UV, bird droppings, and water spots after decontamination. The ladder goes from wax (easiest, 2–4 months durability) to sealant (6–12 months) to ceramic coating (hardest to apply, lasts years). Start with wax or a spray sealant. Learn the process. Ceramic coating is genuinely harder to apply correctly than polishing, and a botched application is worse than no protection at all.
Best starter
Meguiar's
G18216 Ultimate Liquid Wax
$35.00 as of Jun 22, 2026
★★★★★Our rating
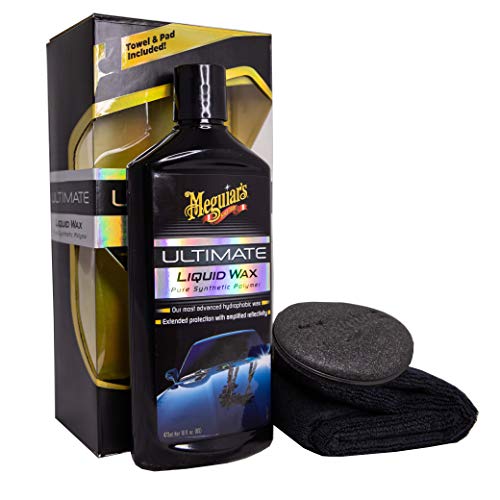
The standard recommendation for first-time waxers, and deservedly so. Easy to apply, forgiving of thin or thick coats, and buffs off cleanly without streaks. Lasts about six months on a garage-kept car. If you've never applied wax before, this is the one: it's nearly impossible to mess up, and the results are genuinely good.
What we like
Thin or thick coats both buff cleanly, beginners' forgiveness built in
Deep wet-look gloss without heavy compounding prep
Six-month protection on garaged cars is real-world accurate
What to know
Flashes fast in direct sun; work in shade or early morning
Needs reapplication every 4–6 months, unlike sealants or ceramics
The fastest protection step in detailing: spray on a damp car after washing, spread with a microfiber, rinse off. It bonds to paint and lasts far longer than spray wax. The ceramic component is real; contact angle tests confirm it beads water. At $15 it's the best bang-for-buck protection product on the market, and it works on top of existing wax.
What we like
Spray-and-rinse application: fastest protection step available
Real ceramic component confirmed by independent contact angle testing
Under $15 and outlasts traditional spray waxes by months
What to know
Must apply to a cold wet car; hot panels streak badly
Thinner protection than dedicated liquid wax or paint sealant
When you're ready for a multi-year coating (after you've done several details and know your paint prep process): Adam's graphene ceramic is the enthusiast sweet spot. More UV protection than standard SiO2 ceramics, easier to level than professional coatings, and Adam's backs it with solid tutorials. Expect a full weekend to do the car correctly.
What we like
Graphene adds UV protection beyond standard SiO2 ceramic coatings
Adam's tutorials and support are among the best in enthusiast detailing
Multi-year durability that justifies the prep time investment
What to know
Locks in paint defects; full correction is mandatory beforehand
Full-car application is a full weekend project, not an afternoon
Interior detailing has two jobs: clean (vacuum, wipe, deodorize) and protect (UV protection on dash and leather, fabric guard on seats). Most beginners nail the vacuum step and miss the protectant; UV-cracked dashboards and faded trim are entirely preventable. A good interior kit covers plastics, leather, fabric, and glass in one purchase.
Best starter
Chemical Guys
HOL124 Complete Starter Car Care Kit
$69.99 as of Jun 22, 2026
★★★★★Our rating· In Stock
A 7-piece starter kit covering wash, wax, and interior cleaning in one purchase: car wash soap, quick detail spray, interior cleaner, and microfiber applicators. Chemical Guys products are well-formulated and the kit saves money over buying items separately. The interior cleaner and protectant are the same products detailers use standalone.
What we like
Full kit: cleaner, conditioner, protectant, and applicators included
Leather conditioner noticeably softens cracked or dried leather seats
Better value than buying each interior product separately
What to know
APC needs dilution to 10:1 or leaves sticky residue on trim
No fabric protectant included; buy separately for cloth seats
Meguiar's APC is the industry workhorse: diluted 10:1 for plastic and vinyl, 4:1 for floor mats, full-strength for engine bays. One gallon jug makes dozens of spray bottles at different concentrations. If you already have microfiber towels and applicators, this one product covers 80% of interior cleaning tasks.
What we like
One product diluted to different ratios covers most interior surfaces
Gallon jug at budget price lasts a year of regular detailing
Meguiar's professional formula trusted in shops for decades
What to know
Gallon size is overkill if you're only doing your own car
Cleaner only; you'll need a separate protectant and conditioner
You cannot detail a car without a proper supply of microfiber towels: one set for paint, another for interior, another for glass, another for wheels. Mixing uses causes cross-contamination and scratched paint. Buy at least 20 towels and color-code them by task before you start. The edgeless variety (no woven border) is safer on paint than bordered towels, which can leave fine scratches.
Best starter
The Rag Company
Edgeless 365 Microfiber Towels
$25.95 as of Jun 22, 2026
★★★★★Our rating· In Stock
The Rag Company is the brand professional detailers trust for paint-safe microfibers. The Edgeless 365 is their workhorse: thick enough to absorb product and residue, soft enough for paint, and edgeless so there's no border to scratch clear coat. Buy a pack of 10 for paint-contact work and another 10 for interiors and dirtier tasks.
What we like
Professional-grade microfibers trusted by detailers, not just hobbyists
Edgeless design eliminates border scratch risk on clear coat
365 GSM weight balances absorption and lint-free buffing
What to know
Costs more than bulk budget packs, justified by durability and quality
Requires a separate wash cycle from regular laundry to stay effective
MIC_507_06 Professional Grade Microfiber Towels (6-pack)
$24.99 as of Jun 22, 2026
★★★★☆Our rating· In Stock
A 6-pack of Chemical Guys' professional-grade microfibers: each towel is a 24x16-inch ultra-soft gold cloth that handles wax removal, quick detailing, and interior wiping. Not as plush as The Rag Company's Edgeless for paint contact, but excellent for non-paint tasks: interior wipe-down, wheel cleaning, and applying protectants. Use these for the dirty tasks, reserve the premium towels for paint.
What we like
24x16-inch size handles more surface area per pass than standard towels
Good for interior, wheels, and applying protectants you'd ruin premium towels on
Chemical Guys quality at a price that lets you stock up without guilt
What to know
6-pack only; buy 2 packs to have enough towels for a full detail session
Shorter pile than Rag Company; keep off freshly polished paint contact
A first detail teaches you more in one Saturday than a month of YouTube. Here's what to do, in order, so your first attempt ends in a car that looks genuinely different.
Car detailing has a reputation for complexity: dozens of products, seventeen-step processes, arguments about which pad compound goes with which paint type. Most of that is enthusiast rabbit-holing. Your first weekend doesn’t need any of it.
What it needs: the right order of operations, two buckets, and the discipline not to skip decontamination. Everything else is optional.
Saturday morning: The wash
Start clean. You cannot detail a dirty car; any polish, wax, or sealant applied over surface dirt grinds particles into paint instead of protecting it.
Set up a proper two-bucket wash. Fill one bucket with soapy water (car-specific soap, not dish soap, since dish soap strips any existing protection). Fill a second bucket with plain water. This is your rinse bucket. After each pass of the wash mitt, dunk it in the rinse bucket to knock loose dirt off the mitt before you go back to the soap bucket. Sounds simple because it is. This one step is what separates a swirl-creating wash from a safe one.
Wash roof first, work downward. Rinse the car top to bottom once you’re done. The lower panels collect the most dirt, so saving them for last keeps clean water cleaner longer.
After the car is dry, run the back of your clean hand over the paint. If it feels rough or grabby (even after washing): that’s bonded contamination. Wax won’t fix it. You need to clay bar it off.
Saturday afternoon: Decontamination
This is the step most beginners skip, and it’s the most important one.
Iron remover first. Spray CarPro Iron X or equivalent over a panel. Watch it turn purple: that’s the chemical reaction dissolving iron particles that have embedded themselves in your clear coat from brake dust and road debris. Let it dwell for 4–5 minutes, then rinse fully. Work panel by panel and don’t let it dry.
Clay bar second. Spray clay lubricant over a 12x12-inch section and glide the clay bar back and forth with light pressure. You’ll feel and hear contamination being lifted off the paint, a slightly rough, grabby sensation at first that gets smoother as you go. When it glides silently, move to the next section. After the full car, wash and dry again.
Feel the paint now. It should feel like glass. If you’ve never done this before, the difference between pre- and post-clay is one of the more satisfying experiences the hobby offers.
The drop rule. If you drop the clay bar, throw it out immediately. Clay picks up every particle on the floor and becomes an abrasive tool that scratches paint. This is why kits come with two bars.
If your paint has swirl marks, light scratches, or oxidation, this is when you address them. If your paint is in decent shape, you can skip polishing and go straight to protection.
Machine polishing with a DA polisher. Work one panel at a time. Apply a few pea-sized drops of compound or polish to your foam pad, spread it on the panel at low speed (speed 2) to prevent splattering, then increase to speed 4–5 and work in overlapping passes. The product should become transparent and slightly dry-looking before you buff it off: that’s how you know it’s broken down correctly. Buff off with a clean microfiber towel.
The dual-action orbital motion is forgiving; you cannot burn paint through a DA polisher the way you can through a rotary. Don’t worry about lingering too long on a single spot. Stay moving, work methodically, and trust the process.
Protection. Once paint is corrected and clean, apply your protection layer. For liquid wax: apply with a foam applicator pad in thin, overlapping coats. Let it haze to a slightly cloudy look (about 2–5 minutes depending on temperature). Buff off with a clean microfiber towel using light pressure. Work one panel at a time and don’t let it dry in direct sunlight; it flashes too fast and leaves a haze that takes effort to remove.
What to do with the interior
Interior detailing gets its own session; trying to do exterior and interior in a single day is how you run out of energy and make shortcuts.
The sequence: vacuum first (seats, carpets, floor mats, vents), then wipe all hard surfaces with diluted APC (10:1 for plastic and vinyl), then apply leather conditioner to leather seats if applicable, then clean the glass last (glass cleaner streaks if it lands on other surfaces while they’re wet).
The UV protectant step (Chemical Guys VRP or similar) is the one most people skip. It takes five minutes and prevents the dashboard cracking and trim fading that looks terrible on a 5-year-old car. Spray on a microfiber applicator, wipe onto dash and trim, buff off excess. Done.
What you’ll notice on Monday
After your first real detail, you’ll see the car differently. You’ll notice water beading into tight droplets when it rains. You’ll run your hand over the paint in parking lots and feel the difference between your car and an undetailed one. You’ll see swirl marks on every car you walk past and know what caused them.
That’s when detailing gets addictive. Your second detail will be faster and better. Your third one reveals the patterns: which steps matter most, where your technique needs work, which products are worth the money and which ones you can simplify.
Most enthusiasts end up at a monthly maintenance wash, a quarterly polish and wax, and a yearly full decontamination. That’s a manageable cadence once the process is muscle memory.
Save your money
What you don't need yet
Beginners get pressured to buy a lot of stuff that doesn't help them play
better. Here's what we'd skip on day one.
A rotary polisher — Removes defects fast but burns paint in seconds if you stop moving. Wait until you've done 15–20 details with a DA polisher first.
A pressure washer — Nice-to-have for pre-rinse and wheel blasting, but a garden hose and two-bucket wash get the same result for a beginner.
A paint thickness gauge — Only matters before heavy correction on a car with an unknown paint history. Not relevant for your first year.
A steam cleaner — Excellent for interior deep-cleaning but redundant next to a good APC. Buy one after you've maxed out what chemistry can do.
A full ceramic coating kit — Harder to apply correctly than polishing, and botched applications are permanent. Learn paint prep for at least a year first.
Paint inspection lighting — Critical for professional-level paint correction, but you won't be doing that in your first six months.
First week
Your first seven days
A short, real plan to get from gear-on-doorstep to actually playing.
Do a two-bucket wash. Set up one soapy bucket and one rinse bucket, and wash from the roof down to the rocker panels. Feel the paint afterward: that rough texture is contamination. · Action
Order your clay bar kit and liquid wax to arrive before the weekend. · Buy
Clay bar a small section (the hood works well) using clay lubricant. Feel the paint before and after. The before/after difference is why people get obsessed with this hobby. · Action
Apply liquid wax to one panel by hand before committing to the whole car. Learn the application and removal feel on a low-stakes section first. · Action
Order microfiber towels and color-code them by task (paint, interior, glass, wheels) before you start mixing. · Buy
Watch a full detail walkthrough on YouTube. Seeing the iron remover turn purple and the clay glide across paint makes the chemistry click faster than any written guide. · Learn
AMMO NYC YouTube · Larry Kosilla's channel, the most educational detailing content on YouTube
DetailingWiki · Open reference for detailing chemistry, products, and techniques
Touch and smell the difference between a freshly waxed panel and an unprotected one. That's the result you're chasing: tactile, not just visual. · Action
FAQ
Common questions
What's the difference between a DA polisher and a rotary?
A dual-action (DA or random orbital) polisher throws the pad in a non-repeating elliptical pattern that distributes heat; it's very hard to burn paint with one. A rotary spins the pad in a fixed circle, which cuts paint defects faster but concentrates heat in one spot. Hold a rotary in place for a second too long and you'll burn through clear coat. Start with a DA. Always.
Do I need to clay bar before waxing?
Yes, and most beginners skip this step. Clay bar removes bonded surface contamination (tar, iron, overspray) that a wash mitt can't touch. Wax applied over contamination seals the contamination in and produces a rough, uneven finish that feels wrong under your hand. Clay bar first, every time.
Is ceramic coating worth it for beginners?
Not yet. Ceramic coating is harder to apply correctly than paint correction, and imperfections in the paint underneath get permanently sealed in. Most beginners don't have the prep experience to know when paint is truly ready for coating. Start with wax for a year, then a paint sealant, then revisit the ceramic decision.
Can I use dish soap to wash my car?
No. Dish soap is formulated to cut grease and will strip any wax, sealant, or ceramic coating off your paint. It also dries out rubber trim and door seals. Car-specific wash soaps are pH-neutral and safe on any protection layer. A 64-oz jug of proper car wash soap costs $12 and lasts months.
How long does a full detail take?
A proper wash, clay bar, and wax takes 3–5 hours for your first car. With practice that drops to 2–3 hours. Adding machine polishing or a full interior detail extends the day. Plan a full Saturday the first time. You'll speed up as the steps become muscle memory.
How often should I wax my car?
Every 3–6 months for a liquid wax, every 6–12 months for a paint sealant. The water bead test tells you when it's time: if water doesn't bead into tight round droplets on your paint, the protection has broken down. Ceramic coatings go 2–5 years between applications, which is the main reason enthusiasts upgrade to them.
AMMO NYC (YouTube) — Larry Kosilla's channel. The most methodical detailing content on YouTube, technique-first and product-agnostic. Start with his full detail series and work backward.
Pan The Organizer (YouTube) — Beginner-friendly walkthroughs with excellent chemistry explanations. Better starting point than AMMO NYC if you're new to the terminology.
DetailingWiki — Open reference encyclopedia for detailing chemistry, products, and technique. The most complete free resource for understanding what products actually do and why.
r/AutoDetailing — Active community with a solid wiki. Search the wiki before posting; most beginner questions have detailed existing threads.
Chemical Guys Detailing 101 — Vendor-produced but genuinely useful step-by-step tutorials. Bias toward their products, but the technique content is sound for beginners.
As an Amazon Associate, JustBeginning earns from qualifying purchases.
We may also earn commission from other affiliate programs linked on this
page. Editorial recommendations are independent; we don't choose
products based on commission rates.
Product prices and availability are accurate as of the date and time
indicated and are subject to change. Any price and availability
information shown on Amazon at the time of purchase will apply.
Our top pickGriot's Garage 6" Random Orbital Polisher with BOSS Foam Pads


 Best starter