Bookbinding is one of the most satisfying crafts you can start with almost nothing. A bone folder, a needle, some waxed thread, and a few hours, and you'll hold something you made with your own hands. Here's what to buy first and what you can safely skip.
By Colin B. · Published May 23, 2026 · Last reviewed June 7, 2026
A pamphlet stitch journal takes about $35 in tools and materials. A proper kit with enough supplies for 6–8 books runs around $85.
We earn commission on qualifying Amazon purchases — see our
affiliate disclosure.
Price tiers and budget totals shown above are editorial estimates;
actual Amazon prices vary.
At a glance
Our top pick in each category
The fastest path through this guide — each best-starter pick by category.
Scroll for the budget and upgrade alternatives.
Start with a pamphlet stitch or Japanese stab binding before buying anything for case binding. The tools are simpler, the learning curve is a weekend, and you'll know if you love the craft before spending $150 on a book press and Davey boards.
Bone folders look optional but aren't. Every crease, fold, and scored line you do without one will show. It's a $10 tool that makes every other step cleaner, buy it first.
Don't buy expensive paper to start. The binding is what you're learning, not the paper. Cheap copy paper folded into signatures is fine for your first ten books.
Every bookbinding project needs three tools: a bone folder (for creasing), an awl or punch (for piercing signature holes), and a bookbinding needle. You can buy these individually or get a kit that bundles them. For absolute beginners, a kit is the right call, it ensures you have the right size needles and a punch that won't slip. Once you know what you like, you can upgrade individual pieces.
Starter Tool Sets — what's the difference?
A few common shapes, each making a different trade.
Pamphlet / Stab Binding
1–3 holes, sew through the spine. The simplest start.
Holes needed
3–5
Pages
Up to ~100
Glue required
No
Best for First-timers, journals, zines, folded signatures
Tradeoff Soft cover only, no hardcover option at this level
Coptic Stitch
Exposed spine, opens completely flat. Beautiful and functional.
Holes needed
Many (8–20+)
Pages
Unlimited signatures
Glue required
No
Best for Sketchbooks, journals, artists' books
Tradeoff More holes to punch, a screw punch speeds this up significantly
Case Binding
Traditional hardcover. Signatures sewn then glued into a case.
Holes needed
Kettle stitches + sewing stations
Pages
Up to ~400
Glue required
Yes, PVA + book cloth
Best for Proper hardcover books, heirloom journals
Tradeoff Needs more tools (book press or weights) and more practice
Bookbinding Tool Kit. Comes with Awls, Bone Folder, Bristle Brish, Needles, Linen Thread, and Beeswax.
$27.53 as of Jun 22, 2026
★★★★★Our rating· Only 19 left in stock - order soon.
Lineco's beginner kit includes a bone folder, bookbinding awl, bristle brush, two needles, waxed linen thread, and beeswax. It's everything you need for pamphlet stitch and basic sewing structures, in one box, priced under $30. The tools aren't heirloom quality, but they're solid enough to finish a dozen books before you want something better.
What we like
Everything for your first book in one package under $25
Bone folder, awl, needles, and thread, the full essentials
Good enough to complete a dozen books before you outgrow it
What to know
Thread included is only enough for 3–4 small books
Awl handle is plastic, not as comfortable on long punching sessions
If you already have a needle and thread, just buy a bone folder, it's the one tool you can't improvise. Lineco's is the conservation-grade standard: smooth enough not to burnish a sheen into delicate paper, stiff enough to score chipboard. Under $10.
What we like
Conservation-grade standard, the one bookbinders actually recommend
Won't burnish a sheen into uncoated paper like cheap substitutes
Under $10, no reason to cheap out further
What to know
Leaves a shine on coated/glossy surfaces, use copy paper as buffer
Sold alone, still need a needle and awl to actually sew
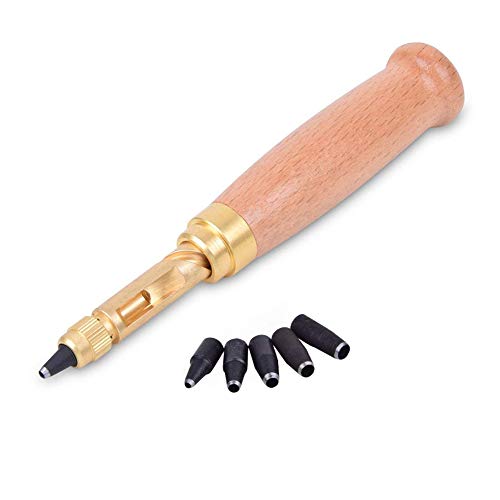
A screw punch replaces the awl for piercing signature holes. You twist it in and it cuts a clean, consistent hole without tearing fibers. Essential for Coptic binding where you need 20+ holes per board, and far more pleasant than hammering an awl through a stack. This set comes with six interchangeable bit sizes covering every bookbinding hole diameter you'll need.
What we like
Clean punched holes with no tearing, far better than an awl on boards
Four bit sizes cover every bookbinding hole diameter you'll need
Makes Coptic binding's 20+ holes per signature actually pleasant
What to know
Overkill for simple pamphlet stitch, start with the awl first
Won't punch through thick Davey board without pre-drilling
Bookbinding adhesives are specific. Regular Elmer's glue wrinkles paper, dries brittle, and won't hold a spine together long-term. You want PVA (polyvinyl acetate), acid-free, flexible when dry, and the conservation standard for everything from spine gluing to covering boards. Some binders mix PVA with methylcellulose paste to slow the open time. Start with straight PVA.
Best starter
Lineco
Neutral pH PVA Adhesive (8 oz)
$
★★★★★Our rating
Lineco's PVA is acid-free, archival, and the adhesive the bookbinding and library conservation world has landed on for decades. Flexible when dry, strong bond, and doesn't wrinkle paper the way white glue does. The 8 oz bottle is enough for 20+ books, buy this once and you're set for months.
What we like
Acid-free, archival, won't yellow or degrade the paper over time
Flexible when dry, spines won't crack after repeated opening
8 oz bottle covers 20+ books; no reason to buy larger first
What to know
Skins over quickly, keep a damp rag nearby and cap between uses
Won't rinse from a brush after it dries, rinse immediately every time
Methylcellulose is a slower-drying, water-soluble paste that gives you more working time than straight PVA. Mix it 50/50 with PVA for covering boards with book cloth, you'll need the extra seconds to position the cloth before it grabs. Also useful for pasting endpapers and any application where repositioning matters.
What we like
Slower open time than PVA, extra seconds to position book cloth
Mixes well with PVA for an ideal covering paste
Fully reversible with water, archival bookbinding standard
What to know
Not strong enough on its own for spine work, must mix with PVA
Skip this until you're covering boards; straight PVA handles everything else
★★★★☆Our rating· Only 16 left in stock - order soon.
A proper hake brush spreads PVA evenly without leaving bristle marks. The wide flat shape covers a board in two passes. Any wide, soft-bristled brush works, this set is inexpensive, washes easily, and the two sizes cover every bookbinding gluing step.
What we like
Wide flat shape covers boards evenly in two passes
Soft natural bristles don't leave marks in wet adhesive
Rinses clean easily, brush maintenance is simple
What to know
Bristles splay with heavy use, replace annually if bookbinding regularly
Not useful for spine gluing, use a narrower artist's brush there
Bookbinding thread is heavier and stronger than sewing thread, you need it to hold multiple folded signatures together without tearing through the paper. Waxed linen is the traditional choice: strong, doesn't stretch, and the wax reduces friction as you sew. Irish linen in 18/3 or 25/3 weight covers almost every structure. Needles should be blunt-tipped (tapestry or bookbinding style) so they pass through punched holes without splitting fibers.
Best starter
Fil au Chinois
Waxed Linen Thread 18/3
$
★★★★★Our rating
The bookbinding thread recommendation you'll see everywhere. Made in France, pre-waxed, and the 18/3 weight works for pamphlet stitch, Coptic, and basic case binding. The wax is baked in, no dragging through a beeswax cake. It's the thread you'll still be using in five years.
What we like
Pre-waxed and made in France, the industry recommendation worldwide
18/3 weight works for pamphlet stitch, Coptic, and case binding
Doesn't stretch or fray, stays tight in the signature holes
What to know
More expensive per spool than craft store thread, worth it
18/3 is thick for very fine text pages; 25/3 better there
If you just want to try bookbinding before committing to specialty thread, Dritz's waxed upholstery thread is available at most fabric stores and holds up fine for your first few pamphlet stitch projects. It's slightly thicker and less refined than Fil au Chinois, but it's honest practice thread.
What we like
Available at most fabric stores, no specialty order needed
Holds pamphlet and simple stab structures reliably
Cheap enough to practice knots and tension without worry
What to know
Thicker and rougher than linen, upgrade once you love the craft
Wax coating is inconsistent; drag through a beeswax cake if it skips
★★★★☆Our rating· Only 2 left in stock - order soon.
Bookbinding needles need to be blunt, not sharp, so they slide through punched holes without splitting paper fibers. Tapestry needles fill this role perfectly. John James No. 18 is the right size for 18/3 linen thread and is stiff enough to push through boards without bending.
What we like
Blunt tip slides through punched holes without tearing paper fibers
Stiff enough to push through boards without bending mid-stitch
25-pack, you'll lose a few; nice to have spares
What to know
No. 18 is slightly tight for 25/3 fine thread, go No. 20 if using that weight
Blunt tip makes them useless for piercing, punch holes with the awl first
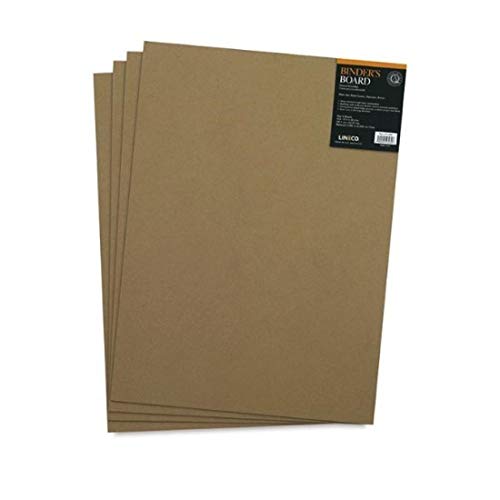
Hard covers need a stiff substrate (binder's board or chipboard) wrapped in something, book cloth, leather, or decorative paper. Book cloth is the easiest to work with: it's fabric backed with paper so PVA doesn't bleed through. Chipboard is available at any art store and is perfect for learning; Davey board is the archival upgrade. For your first case-bound book, start with chipboard and a yard of book cloth.
Best starter
Lineco
Neutral pH Binder Board 14.5x20.5" (4-pack)
$29.48 as of Jun 22, 2026
★★★★★Our rating· In Stock
Lineco's binder's board is acid-free, consistent thickness, and won't warp as readily when you glue damp book cloth to it. The 14.5×20.5 sheets cut down to cover boards for most journal sizes, one sheet covers four A5 hardcovers. A pack of four gets you through multiple books before you need to reorder.
What we like
Acid-free, won't yellow or off-gas and damage sewn pages
More warp-resistant than chipboard when wet adhesive is applied
8.5×11 sheets cut cleanly with a metal ruler and craft knife
What to know
Still warps if only one side is glued, always cover both faces
10-pack goes fast if you're making books bigger than A5
★★★★☆Our rating· Only 18 left in stock - order soon.
Book cloth is PVA-compatible, non-fraying fabric with a paper backing that stops adhesive bleed-through. Books by Hand makes it in a natural linen color that's archival and acid-free, the look of real fabric, without the technical headaches of covering with raw cloth. One 17×19 sheet covers the front and back of two to three A5 hardcovers.
What we like
Paper backing prevents PVA bleed-through, clean finish guaranteed
Doesn't fray when cut, no hemming or sealing needed
Natural linen color looks handsome and professional out of the box
What to know
More expensive than craft paper, save it for books you want to keep
Wrinkles if you press unevenly; burnish from center out with bone folder
The pages inside your book matter too. Strathmore 400 Series in 80 lb weight folds cleanly into signatures without cracking, takes pencil, ink, and watercolor, and is acid-free. Tear out sheets, fold in groups of 4–5, and you have signatures ready to sew. Good paper is what turns a bound notebook into something you'll actually use.
What we like
80 lb is thick enough to fold without cracking, ideal for signatures
Acid-free and takes most media, ink, pencil, light watercolor
Versatile enough to use as text pages, endpapers, or both
What to know
9×12 pads are slightly large for pocket-sized books, trim as needed
More expensive than copy paper; use copy paper to learn, then upgrade
Clean cuts and flat boards separate a professional-looking book from a wobbly one. You need a self-healing cutting mat to protect your table, a metal ruler (plastic warps under a blade), and something to press the glued-up book flat while it dries. A book press is the traditional tool; stacked heavy books work fine while you're learning.
Best starter
Fiskars
12x18 Self-Healing Cutting Mat
$
★★★★★Our rating
A cutting mat is non-negotiable, without one, your craft knife will score your table and the blade will catch on the uneven surface. Fiskars 12×18 is big enough for most journal-sized cuts and small enough to store flat in a drawer. The grid lines help you cut square without measuring every time.
What we like
Grid lines let you cut square on the first pass without a separate ruler
Self-healing surface holds up to years of repeated cuts
12×18 size works for all journal-scale bookbinding cuts
What to know
Too small for large format (8.5×11+) covers, get an 18×24 then
Grid lines fade near the center over time with heavy use
A rotary trimmer gives you perfectly square cuts on paper stacks without the drag and wobble of a craft knife. Bookbinding is all about right angles, a trimmer that squares your pages, cover boards, and endpapers in one pass saves hours of corrective fussing. The Dahle 508 is accurate to a millimeter and is what library conservators reach for.
What we like
Accurate to 1mm, every page stack and cover comes out square
Rotary blade lasts far longer than craft knife blades in regular use
Used by library conservators, serious upgrade for serious binders
What to know
Paper only, won't cut boards; keep your craft knife for those
Expensive investment that pays off only if you bind regularly
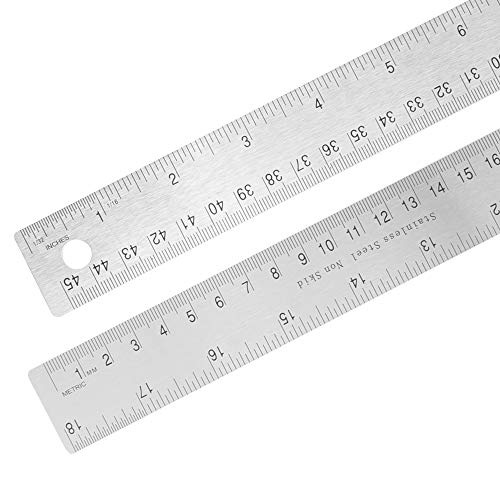
A metal ruler with a cork back is the cheapest upgrade in bookbinding, cork keeps it from slipping when you're running a craft knife along it. Plastic rulers will eventually catch a blade and get nicked; metal ones last forever. Eighteen inches handles most cover and board cuts without repositioning.
What we like
Cork backing grips the cutting mat so the ruler doesn't drift mid-cut
Steel edge will never be nicked by a craft knife like plastic would
18 inches handles most bookbinding cuts without repositioning
What to know
Heavier than a plastic ruler, minor fatigue on long scoring sessions
Cork backing absorbs glue if wet, keep it away from the paste table
You don't need a workshop or years of practice. By Sunday afternoon you can hold a book you made yourself, here's how your first two days actually go.
Bookbinding has a reputation for being a complicated craft, miter joints, book presses, archival adhesives, sewing frames. All of that exists. None of it applies to your first weekend.
Your first project will be a pamphlet stitch journal. It takes five sheets of paper, a needle, and some thread. You’ll be holding a finished book within the hour. The craft scales up from there at exactly the pace you want to take it.
Day 1: Make your first book
Before you touch a single tool, fold five sheets of copy paper in half together. That stack is called a signature, the building block of every sewn book structure you’ll ever make.
Run your thumbnail firmly down the folded edge. You’ll see immediately that a rough crease looks bad. A bone folder pressed flat against the fold makes a crisp, flat line. This is the first real skill of bookbinding: crease like you mean it.
Now punch three holes through the spine of the folded signature with your awl: one in the center, one about ¾ inch from each end. Hold the signature up to the light, the holes should be clean, round, and consistent. If they’re ragged, you’re tearing instead of piercing. Use a pushing motion, not a stabbing one, and let the awl rotate slightly as it enters.
Cut about 18 inches of waxed linen thread and thread your needle. The pamphlet stitch goes:
Enter the center hole from the outside
Exit the top hole from inside the spine
Re-enter the center hole
Exit the bottom hole from inside the spine
Re-enter the center hole
Tie off both thread ends inside the spine
The thread should cross the center hole twice and leave a visible stitch along the outside spine. Pull it snug but not tight enough to tear, you want tension, not drama. Tie a square knot (right over left, left over right), clip the tails to about a centimeter, and you’re done.
You made a book.
It’s a humble one. But the structure is real, the same sewing logic scales to 50-signature case-bound volumes. Everything else is just more of this.
Day 2: Japanese stab binding
On Day 2, you try something with a harder cover and a more graphic look. Japanese stab binding doesn’t fold the pages at all, you stack loose sheets, add a front and back cover of cardstock or thin chipboard, punch holes along the spine edge, and sew through the stack in a decorative pattern.
The four-hole binding is the simplest. Measure ½ inch from the top and bottom edges, and divide the remaining spine into three equal sections. That gives you four evenly spaced holes. Punch them all at once with an awl through the whole stack clamped firmly together, use a binder clip on each end to keep everything from shifting.
Wrap around the spine to hole 1 again from the back
Move to hole 2, sew through front to back
Wrap around the top edge and sew through hole 1 again
Continue across to hole 4, wrapping the bottom edge before returning
End at hole 1, tie off
You’ll find free pattern diagrams by searching “Japanese stab binding four-hole diagram”, the hemp leaf and tortoiseshell patterns take only slightly more time and look dramatically better.
What you’ll notice compared to the pamphlet stitch: the exposed thread pattern on the spine is the decorative element. This is functional as art. Most bookbinders end up using Japanese stab for gifts.
What you actually learned in two days
After your first weekend, you understand three things that unlock everything else in bookbinding:
Grain direction matters. All paper and board have a grain, fibers that run one way. Fold with the grain and the fold is clean; fold against it and the paper buckles and resists. Hold a sheet loosely and it will droop more easily in one direction, that’s the grain direction. Always fold parallel to it.
Punching holes cleanly is half the work. Ragged holes tear as you sew. Clean holes let thread pass without resistance. Take your time with the awl, use a firm backing board, and punch from the inside out if working on a folded signature.
Thread tension is a feel, not a number. Snug enough that the sewing won’t shift; not so tight that the paper warps or puckers. You’ll calibrate this over a few projects until it’s automatic.
Where to go from here
The next structure worth learning is Coptic stitch, multiple signatures sewn together with the spine exposed, opening completely flat. It’s the structure most people recognize as “that beautiful hand-bound book.” It takes a lazy afternoon once you can do a pamphlet stitch in your sleep.
After Coptic comes case binding: sewing signatures onto tapes or cords, then gluing the sewn text block into a separate hard case. That’s the traditional hardcover book you see at a bindery. It takes more tools (a press or heavy weights, binder’s board, book cloth) but the principles are the same ones you learned in your first weekend.
The real thing bookbinding teaches is patience with materials. Paper moves when it gets wet. Glue skins over. Thread tangles. Slow down, work clean, and the book will hold.
Save your money
What you don't need yet
Beginners get pressured to buy a lot of stuff that doesn't help them play
better. Here's what we'd skip on day one.
A book press — Heavy books and a flat table work for your first dozen projects. Buy a press after you're binding regularly.
Davey board — The archival-grade board conservation binders use. Lineco binder's board is fine for your first year.
A lying press or finishing press — Traditional shop tools for finishing spines. Nice if you get deep into the craft, but not for beginners.
A guillotine cutter — A $300–$1,000 tool for trimming after binding. Totally unnecessary until you're selling books.
Leather — Harder to cover with than book cloth, leather needs different adhesive, different technique. Learn cloth first.
Gold foil and stamping equipment — Decorative tooling is its own sub-skill. Wonderful eventually, but learn to close the book first.
First week
Your first seven days
A short, real plan to get from gear-on-doorstep to actually playing.
Buy the Lineco bookbinding kit (or at minimum a bone folder, a needle, and waxed thread). · Buy
Watch one pamphlet stitch tutorial, this is your Day 1 project. · Learn
Browse r/bookbinding for project photos. The skill ceiling is inspiring; you're already on the ladder. · Learn
r/bookbinding · Active community; search the wiki for technique breakdowns
Make one more pamphlet stitch book, this time with better paper. Notice how much easier it already feels. · Action
FAQ
Common questions
How much does bookbinding cost to start?
You can make your first pamphlet stitch journal for around $35: a bone folder ($8), a bookbinding kit with needles and thread ($20), and a few sheets of paper you probably already have. A proper setup with PVA, binder's boards, and book cloth runs about $85 total.
What's the easiest bookbinding style for beginners?
Pamphlet stitch, three holes, a needle, and some thread. You fold a stack of paper into a signature, punch three holes along the spine, and sew through them in a figure-eight pattern. You can finish your first book in under 30 minutes on day one.
Do I need a book press?
No. For learning, stack heavy books on top of your freshly glued work and let it dry for an hour. A press is a nice upgrade after you've done ten or fifteen books and want more consistent results.
Can I use regular white glue instead of PVA?
Technically yes, but it's worse in every way, it wrinkles paper, dries brittle, yellows over time, and doesn't hold as well. Lineco PVA costs $8 for a bottle that lasts months. Just get the right glue.
What paper should I use inside the book?
Start with whatever copy paper you have, 20 lb or 24 lb is fine for learning. When you want books worth keeping, step up to 80 lb text weight acid-free paper. Avoid paper over 100 lb; it won't fold cleanly into signatures.
Is bookbinding hard to learn?
The entry structures (pamphlet stitch, Japanese stab binding) are genuinely easy, you can make something in an afternoon with no experience. Case binding (hardcover with a sewn text block) takes a few weekends to get clean results. The tools are simple; the skill is in your hands.
r/bookbinding — The best English-language community for beginners. The wiki has technique breakdowns, supply sourcing guides, and project help.
DAS Bookbinding (YouTube) — Clear, well-filmed tutorials covering pamphlet stitch through case binding. Start here before any other YouTube channel.
Sea Lemon (YouTube) — Long-running channel with step-by-step tutorials for most common structures. Good beginner-to-intermediate coverage.
Bookbinding.com — Supplier and educational resource. Their tutorials section covers structures and materials selection.
Book Arts Web — Extensive historical and technical reference. More academic than YouTube, useful once you want to understand why, not just how.
Esther K. Smith, How to Make Books — The clearest beginner book on the subject. Paper models you can make without glue, graduated into full binding structures.
As an Amazon Associate, JustBeginning earns from qualifying purchases.
We may also earn commission from other affiliate programs linked on this
page. Editorial recommendations are independent; we don't choose
products based on commission rates.
Product prices and availability are accurate as of the date and time
indicated and are subject to change. Any price and availability
information shown on Amazon at the time of purchase will apply.
Our top pickLineco Bookbinding Tool Kit. Comes with Awls, Bone Folder, Bristle Brish, Needles, Linen Thread, and Beeswax.


 Best starter