Candle making is one of those hobbies that looks harder than it is. Your first pour takes about two hours and produces six candles people will actually want as gifts. Here's what to buy, what the marketing overcomplicates, and where most first-timers go wrong.
By Colin B. · Published May 22, 2026 · Last reviewed June 3, 2026
Etekcity Digital Kitchen Scale
— A digital scale matters more than any other tool — everything else is optional to a point; this isn't.
Budget total
$40
Typical total
$70
A first batch of 6-8 candles runs $40-70 in supplies. Once you own the tools, subsequent batches cost $15-25 depending on fragrance.
We earn commission on qualifying Amazon purchases — see our
affiliate disclosure.
Price tiers and budget totals shown above are editorial estimates;
actual Amazon prices vary.
At a glance
Our top pick in each category
The fastest path through this guide — each best-starter pick by category.
Scroll for the budget and upgrade alternatives.
Size your wicks before you buy them, not after your first bad burn. A too-small wick tunnels — the flame burns down the center and leaves a ring of unmelted wax around the edge. A too-large wick mushrooms, smokes, and smells acrid. For a standard 8 oz mason jar with 464 soy wax, a CD-18 or ECO-6 wick is the community consensus. Look up the wick sizing guide on your wax supplier's site before ordering.
Weigh everything. Volume measurements don't work for candles because wax density shifts with temperature. A kitchen scale that reads in grams is the most important tool you own. Standard fragrance load for soy wax is 6-10% by weight — so for 250g of wax, add 15-25g of fragrance oil. Any kitchen scale with a tare function works.
Soy candles cure for 48-72 hours before you test them. Freshly poured soy looks and smells underwhelming — the fragrance binds as it cures. Most first-timers pour, sniff 20 minutes later, decide something went wrong, and start troubleshooting a candle that just needs time. Wait two full days before evaluating scent throw.
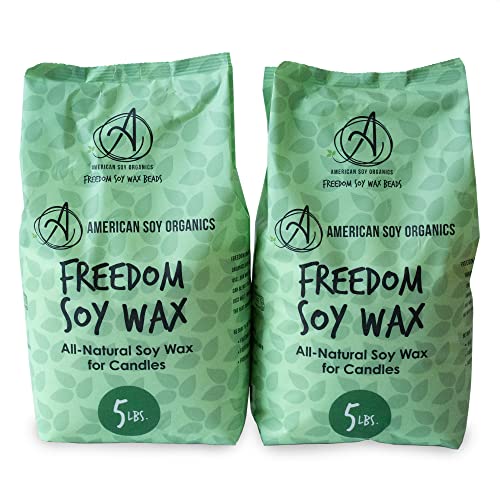
Soy wax is the default for beginners for good reason: it burns cleanly, handles fragrance well, and is forgiving of small pour-temp mistakes. Golden Brands 464 is the soy wax that comes up in every beginner thread — the community has worked out the exact wick sizes and fragrance loads, so you're not starting from scratch. The only real decision is whether to go straight soy or a coconut-soy blend. Start with 464. Upgrade later if you want a creamier finish.
Wax — what's the difference?
A few common shapes, each making a different trade.
Container Soy
The beginner default. Clean burn, great cold throw, well-documented wick sizes.
Fragrance load
6–10%
Pour temp
140–150°F
Cure time
48–72 hrs
Best for First batches, mason jars, gifting — the right choice for most beginners
Tradeoff Frosting is common; tops can be rough or sinked on the first pour
The community standard. More tutorials, wick-sizing charts, and troubleshooting threads exist for 464 than any other soy wax. Excellent adhesion to jar walls, strong cold throw, clean burn. Start here and you're working with the same wax every candle-making tutorial assumes.
What we like
More wick-sizing charts and troubleshooting guides exist for this wax than any other
Burns cleanly with strong cold and hot throw
Excellent adhesion to jar walls — walls stay clean through the whole burn
What to know
Frosting is common and largely unavoidable — doesn't affect burn, but looks rough
A solid, less expensive soy wax that performs well in container candles. Less documented than 464, so you'll do a bit more wick-testing, but it burns cleanly and holds fragrance well. Good for high-volume batches once you've got the basics down.
What we like
Lower price per pound than 464 — good once you're making batches in bulk
Burns cleanly and holds fragrance well in container candles
What to know
Less documented than 464, so expect more trial-and-error on wick sizing
Coconut-soy blends give a creamier, smoother finish than straight soy and excellent scent throw. The low pour temp (125-135°F) reduces fragrance fade from overheating. A clear step up once you're making candles you want to sell or give seriously.
What we like
Creamier, smoother finish than straight soy — better looking candles
Low pour temp protects fragrance from heat damage, improving scent throw
What to know
Softer than paraffin — dents and scratches easily without careful storage
Almost any heat-resistant glass or metal container works for candle-making, but 8 oz wide-mouth mason jars are the beginner sweet spot: cheap enough that a cracked jar doesn't sting, and the wide mouth makes pouring and wick-centering easy. Avoid narrow-neck bottles and anything with a decorative coating that might melt or discolor. Once you're comfortable, try tins — easier to transport and gift without worrying about breakage.
Best starter
Ball
Regular Mouth Mason Jars, 8 oz (12-pack)
$
★★★★★Our rating
The universal beginner container. Wide mouth for easy pouring, heat-resistant glass, and cheap enough that a bad batch doesn't hurt. A 12-pack gets you through multiple test batches. The 8 oz size maps cleanly to the most-documented wick sizes for soy wax.
What we like
Wide mouth makes pouring and wick centering easy — the beginner-friendly shape
Cheap enough that a cracked jar or bad batch won't sting
12-pack gets you through multiple test batches in one order
Tins travel better than glass, which makes them ideal for gifts and craft markets. A 4 oz tin burns for about 15-20 hours — enough to impress. Lids keep dust out between uses and make the finished candle look polished with zero extra effort.
What we like
Travel and ship far better than glass — ideal for gifts and craft markets
Lids keep dust off and make finished candles look polished with no extra effort
What to know
Smaller 4 oz size means shorter burn time — about 15–20 hours per candle
Wick sizing is where most beginner frustration lives. Too small and you get tunneling — the wick burns down the center while the edges stay solid. Too large and you get a mushrooming carbon deposit, black smoke, and a candle that smells like burning. For 464 soy in an 8 oz mason jar, a CD-18 or ECO-6 is the well-tested starting point. Buy two sizes and do a burn test before making a full batch — a proper burn test means four continuous hours, then check for a full melt pool that reaches the edges.
Best starter
Direct Candle Supply
CD-18 Pre-Tabbed Wicks (100-pack)
$11.99 as of Jun 22, 2026
★★★★★Our rating· In Stock
Pre-tabbed means the metal sustainer is already crimped on — no extra tooling needed. CD-18 is the right starting point for 8 oz jars with 464 soy wax. Buy this plus a CD-20 for side-by-side testing before you commit to a full batch.
What we like
Pre-tabbed — metal sustainer already crimped, no extra tools required
CD-18 is community-validated for 464 soy wax in 8 oz jars
What to know
100-pack is overkill for a first batch — order alongside a CD-20 for side-by-side testing
Wood wicks crackle when they burn — the sound of a fireplace in a jar. They're not easier than cotton wicks (they need specific fragrance loads to avoid drowning), but they're a genuine differentiator for candles you're making to give or sell.
What we like
Crackling fireplace sound makes these candles memorable gifts or craft market sellers
Real differentiation over cotton wicks without changing wax or fragrance
What to know
More finicky than cotton — must trim to 3/16" and need the right fragrance load
Fragrance oil quality matters more than most beginners expect. Cheap oils from random sellers often have no flashpoint data — the temperature at which they ignite, which is real safety information — and a lower fragrance concentration that makes candles smell weak even at a high load. Stick with CandleScience, Brambleberry, or The Flaming Candle for your first batches. One more thing: don't substitute essential oils for fragrance oils in candles. Most essential oils have low flashpoints, burn off before the wax does, and some off-gas compounds you don't want near an open flame.
Best starter
CandleScience
Classics Fragrance Sampler (4 Bottles)
$$
★★★★★Our rating
Four 1 oz bottles of CandleScience's best-selling classic scents — enough to test 2-3 candles per scent at standard load. CandleScience publishes flashpoint and usage rates for every oil, so you know exactly how much to add per pound of wax.
What we like
CandleScience publishes flashpoint and usage rates for every oil — no guesswork on safety
Four classic scents let you test different directions before committing to a large bottle
What to know
One-ounce bottles run out fast — fine for testing, not for ongoing production batches
Fraser Fir Fragrance Oil - 4 oz. - For Candle & Soap Making by Virginia Candle Supply
$$
★★★★☆Our rating
Once you've settled on a scent, a 4 oz bottle from a reputable US supplier drops the per-candle cost significantly vs. sampler pricing. Virginia Candle Supply publishes flashpoint data and their oils are well-rated by candle makers. Pick a scent you'd actually burn.
What we like
4 oz bottle drops the per-candle fragrance cost significantly vs. sampler pricing
Reputable US supplier with published flashpoint data on every product
What to know
Fraser Fir is a winter scent — a year-round pick may have broader appeal
You need three things: a scale, a heat-resistant pouring pitcher, and a thermometer. The scale is the most important — everything in candle making is measured by weight. The pouring pitcher is the quality-of-life purchase — trying to pour 185°F liquid from a wide pot into a narrow jar opening is how you burn yourself and make a mess. A stainless steel pitcher with a handle and spout makes the whole process clean and controlled.
Best starter
Etekcity
Digital Kitchen Scale
$9.99 as of Jun 22, 2026
★★★★★Our rating· In Stock
Reads in 1g increments, has a tare function, handles up to 11 lb. This is the candle-maker's most critical tool — fragrance loads, wax pours, everything runs on weight. Any kitchen scale that reads in grams and has a tare function works; this one is the consistent value pick.
What we like
Reads in 1g increments — precise enough for fragrance loads and wax pours
Tare function lets you add directly to the pitcher without extra math
What to know
Display dims quickly when idle — minor annoyance mid-pour
Seems optional until you've tried pouring from a regular pot — then it's the first thing you'd recommend. The 60 oz size handles a full 10-lb wax bag; the heat-resistant handle and dripless spout give you actual control over a narrow jar opening.
What we like
Dripless spout gives real control when pouring into narrow jar openings
60 oz capacity handles a full 10-lb wax bag in a single melt
What to know
Larger than needed for first few batches — sized more for production quantities
Pour temp affects adhesion, scent throw, and top finish. Too hot and fragrance evaporates; too cool and the wax starts setting mid-pour. A candy thermometer reads fast and accurate. You don't need a candle-specific model — this works identically.
What we like
Pour temp directly affects surface finish and fragrance retention — this earns its place
Works identically to candle-specific thermometers for a fraction of the cost
What to know
Probe needs wiping between uses to avoid wax residue buildup
Most first-time candle makers pour their first batch and immediately wonder what went wrong — the top is rough, the scent is faint, there's a crater in the middle. None of that means you failed. Here's what's actually happening in the pot, and how to make your second batch deliberately better.
Candle making has a short learning curve and a long refinement curve. Your first pour will produce a functional candle — something that burns and smells good — even if the top looks rough and the scent throw isn’t what you expected. The second batch is where you stop guessing and start adjusting. This guide covers what happens in that first weekend: the pour, the common surprises, and the variables that actually matter.
Setting up your workspace
Cover your workspace completely before you open anything. Wax is easy to wipe off a silicone mat or newspaper; it’s very annoying to get out of wood grain or fabric. Have paper towels within reach. Keep a pot of simmering water on the stove for your double-boiler setup — or use a dedicated wax melter if you have one.
You need:
A heat-resistant pouring pitcher (a stainless steel one with a spout makes a real difference)
A kitchen scale that reads in grams
A digital thermometer
Your wax, wicks, jars, and fragrance oil
Wick holders (two chopsticks taped across the jar mouth work)
Before you start, center a wick in each jar and hold it upright. You can use a wick setter, clothespins across the mouth of the jar, or just two pencils taped together. Whatever keeps the wick centered and vertical while the wax sets.
Your first pour, step by step
Melt the wax. Add wax to your pouring pitcher in a pot of simmering water. Stir occasionally. Most soy waxes melt fully around 170-180°F — watch your thermometer.
Add fragrance at the right temp. For 464 soy wax, the sweet spot is adding fragrance between 180-185°F — hot enough that the oil binds to the wax evenly, not so hot that fragrance flashes off. Measure your fragrance oil by weight, not volume. Standard load for soy is 8% by weight: 250g of wax gets 20g of fragrance oil. Stir slowly for 2 full minutes to incorporate it evenly.
Pour at the right temp. Let the wax cool while stirring occasionally. Pour at around 140-150°F for 464 soy. Pouring too hot causes air bubbles and can separate the wax from the jar wall. Pouring too cool produces visible pour lines. The window is forgiving — anywhere from 135-155°F usually works.
Don’t touch it for 24 hours. Seriously. Moving or jostling a cooling candle creates air pockets. The cooling process is slow and important.
Expect an imperfect top. Soy wax shrinks slightly as it cools, often leaving a crater or rough surface around the wick. This is normal. It is not a defect. It doesn’t affect how the candle burns or smells. Fix it with a thin top coat — melt a small amount of wax, let it cool to around 130°F, and pour a thin layer over the top. Or just accept it.
The cure
This is the step most first-timers skip, and it’s why their first candle smells disappointing.
Soy wax needs 48-72 hours after pouring before the fragrance fully binds to the wax molecules. A candle that smells faint at hour 2 will smell significantly stronger at hour 72. This is chemistry, not error. The fragrance is there — it just hasn’t integrated yet.
Do not test your candle until it has cured for at least two days. Do not adjust your fragrance load based on a freshly poured candle.
After curing, light your candle and let it burn for 4 continuous hours. This is the minimum time to evaluate wick performance.
What you’re looking for:
Full melt pool. After 4 hours, the melted wax should reach all the way to the edge of the jar. If it doesn’t — if there’s a ring of unmelted wax around the perimeter — your wick is too small. This is called tunneling, and it will get worse with every burn as wax walls build up around the flame.
Flame height. A healthy flame is 1/2 to 1 inch tall. A flame over 1.5 inches means your wick is too large — it’ll produce soot, mushroom carbon buildup, and burn too hot. Trim to 1/4 inch before every burn.
Mushrooming. If the wick tip forms a carbon mushroom after burning, your wick is slightly too large or your fragrance load is high. A small mushroom is normal with some fragrances. A large one means you need a smaller wick.
Document what you see: wick size, jar size, wax type, fragrance load, burn behavior. This is your batch log, and it’s the only way to improve systematically.
The three variables that actually matter
Wick size. The most important variable. Changes wick from tunneling to perfect melt pool. Test two sizes side by side on your first batch.
Fragrance load. Start at 8% and adjust. Too low and the throw is faint; too high and you get fragrance pooling on the surface or seeping through the wax. Never exceed your fragrance oil’s published maximum usage rate.
Pour temperature. Affects adhesion to the jar, surface finish, and how evenly fragrance distributes. Most soy wax pours best between 135-155°F. A thermometer is not optional here.
Everything else — wax brands, fragrance brands, container styles — matters less than getting these three right for your specific combination.
What a good second batch looks like
Your second batch shouldn’t be a repeat of the first. Pick one variable to change based on what you observed:
Tunneling? Go up one wick size.
Scent too faint after curing? Increase fragrance load by 1-2%.
Rough top you want to fix? Try a lower pour temp (130-135°F) or a small top coat.
Good burn but sinking center? Perfectly normal with soy — top coat or accept it.
Don’t change multiple variables at once. Candle making is surprisingly forgiving of beginner errors, but troubleshooting is impossible when you’ve changed five things between batches.
Most people hit a consistent result by their third or fourth batch — a combination of wax, wick, and fragrance load that they know works. That’s when the hobby opens up: experimenting with new fragrances, trying tins instead of jars, blending scents, or making larger batches to give as gifts.
The giftability of candle making is real and not something you have to wait long for. A 4 oz tin with a clean label and a scent someone picks themselves is a genuinely good gift, and you can make six of them in an evening for about $15 in supplies once you have the tools.
Save your money
What you don't need yet
Beginners get pressured to buy a lot of stuff that doesn't help them play
better. Here's what we'd skip on day one.
A dedicated wax melter — A heat-resistant pouring pitcher in a pot of simmering water works perfectly. Wax melters are a convenience upgrade for high-volume production, not a beginner necessity.
Candle dye — Uncolored soy candles look great in the right container. Adding dye introduces another variable before you've nailed scent throw and burn quality — skip it until batch two or three.
A heat gun — Useful for smoothing rough soy tops, but rough tops are a soy-wax trait rather than a beginner error. A thin second top-coat pour fixes the same problem.
Fragrance from random Etsy sellers — No flashpoint data, unknown concentration, unpredictable behavior in wax. Pay the extra $3 per ounce for a supplier that publishes usage rates.
Specialty molds for pillars or shapes — Jar candles are genuinely easier — no demolding, no leaking wax, no shrinkage surprises. Stay in jars for your first ten-plus batches.
First week
Your first seven days
A short, real plan to get from gear-on-doorstep to actually playing.
Order your supplies: wax, wicks (two sizes), jars, fragrance oil, and a scale. Most things arrive within a few days from Amazon or CandleScience. · Buy
Set up your workspace with newspaper or a silicone mat. Wax spills are easy to clean off a protected surface; they're a project off bare wood or fabric. · Action
Make your first pour. Keep it simple: one wax, one fragrance, one jar size, two wick sizes side by side for a burn test. · Action
Wait 48-72 hours before testing scent throw. Seriously — fresh soy candles always smell faint. Curing is not optional. · Action
Run a 4-hour burn test: light both wick sizes, check after 4 hours for a full melt pool reaching the jar edges. The wick that achieves a clean full melt pool without mushrooming is your wick. · Action
Write down your batch notes: wax type, fragrance brand and load %, pour temp, wick size, jar size. You will not remember this without notes, and it's how you improve. · Action
FAQ
Common questions
Should I start with soy, paraffin, or coconut wax?
Start with soy — specifically Golden Brands 464. More tutorials, troubleshooting resources, and wick-sizing guides exist for 464 than any other wax. Once you've made a few successful batches, you'll have the intuition to experiment with other wax types.
Why does my soy candle have a rough or bumpy top?
This is normal for soy wax. It's caused by the wax re-crystallizing unevenly as it cools. It doesn't affect burn quality or scent throw. You can fix it with a thin second pour after the candle fully cools, or just accept it — most experienced candle makers do.
How much fragrance oil should I add?
For soy wax, 6-10% by weight is the standard range. Start at 8% and adjust based on your results. Always check the maximum usage rate published by your fragrance supplier — going over doesn't make a stronger candle, it causes fragrance pooling, seeping, and fire risk.
My candle smells faint — what went wrong?
Three most common causes: (1) you tested too soon — soy needs 48-72 hours to cure before scent throw develops; (2) your fragrance load was too low; (3) your wick is too small, giving a shallow melt pool that doesn't release fragrance into the air. Check the burn first, then adjust load.
Can I use essential oils instead of fragrance oils?
Not as a direct substitute. Most essential oils have low flashpoints — they burn off or go rancid before the wax does, and some produce compounds at candle temperatures that you don't want to inhale. Fragrance oils are formulated specifically for wax and candle burn temps. Use fragrance oils.
How long does it take to make a batch of candles?
About 2 hours of active work for a 6-8 candle batch: melt time, fragrance-adding, pouring, cleanup. Then 4+ hours of hands-off cooling and 48-72 hours of curing. Most people pour in an evening and test two days later.
CandleScience Learning Center — The best beginner resource for wick sizing, fragrance loads, and troubleshooting. Educational content is genuinely useful and not just a sales funnel.
National Candle Association — Industry group. The safety guidelines on container clearance, wick trimming, and burn times are worth reading once — they're conservative but grounded.
r/candlemaking — Active, helpful community. The wiki has wick sizing guides and common troubleshooting answers. First stop for 'why did my candle do this' questions.
The Flaming Candle — Reliable fragrance oil and supply source with flashpoint data on every product. A good second source when CandleScience doesn't carry the scent you want.
As an Amazon Associate, JustBeginning earns from qualifying purchases.
We may also earn commission from other affiliate programs linked on this
page. Editorial recommendations are independent; we don't choose
products based on commission rates.
Product prices and availability are accurate as of the date and time
indicated and are subject to change. Any price and availability
information shown on Amazon at the time of purchase will apply.