A home gym is the best fitness investment most people never make, until they do, and wonder why they waited. The upfront cost feels steep, but the math flips fast. Here's what actually matters when you're setting up the room, and what you can skip for now.
By Colin B. · Published May 24, 2026 · Last reviewed June 8, 2026
A barbell, plates, a squat stand, and rubber mats run ~$500 on the low end. Add a decent power rack and cardio machine and you're at $1,200–1,500.
We earn commission on qualifying Amazon purchases — see our
affiliate disclosure.
Price tiers and budget totals shown above are editorial estimates;
actual Amazon prices vary.
At a glance
Our top pick in each category
The fastest path through this guide — each best-starter pick by category.
Scroll for the budget and upgrade alternatives.
Measure your space before buying anything. A full power rack needs at minimum 7 feet of ceiling height and an 8×8-foot footprint with room to bail safely. Garage gyms are forgiving; spare bedrooms are not.
Buy the rack first. The rack defines the rest of the gym. Once you have a rack, the barbell and plates, cardio machine, and flooring slot in around it. Buy them in that order.
Bumper plates vs. iron: bumpers bounce (protecting concrete floors) and are quieter. Iron plates are cheaper for heavier loads. If you're lifting in a garage on concrete, bumpers are worth the premium at the lower weights.
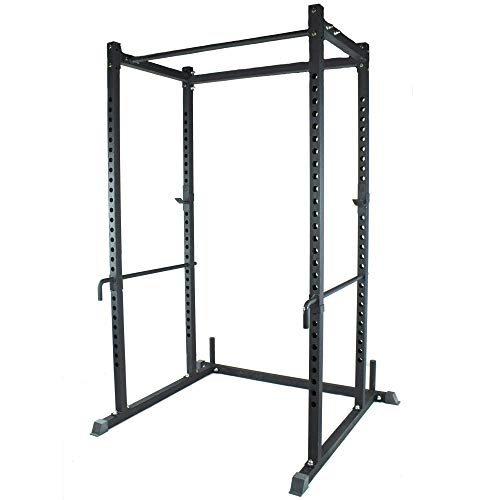
The rack is the most important purchase in a home gym. It determines what lifts you can do safely, how much room you'll use, and whether the space feels like a gym or an obstacle course. Most beginners start with a squat stand (two uprights, cheap, minimal footprint) and upgrade within a year. If you have the ceiling height and budget, skip the squat stand and go straight to a power rack, the safeties alone make it worth it.
Power Racks & Squat Stands — what's the difference?
A few common shapes, each making a different trade.
Squat Stand
Two uprights only. Budget, compact, no cage.
Footprint
~4×4 ft
Safeties
None
Price range
$100–$250
Best for Tight spaces, lighter lifters, gym with a spotter
Tradeoff No safety arms, solo max lifting is genuinely dangerous
Half Rack
Two uprights with rear-facing safeties and a pull-up bar.
Footprint
~4×6 ft
Safeties
Spotter arms
Price range
$250–$600
Best for Moderate spaces, solo training at moderate weights
Tradeoff Open back, less stable than a full cage for heavy lifts
Full Power Rack
Four-post cage with full safety bars. The gold standard.
Footprint
~4×4 ft + clearance
Safeties
Full spotter arms or straps
Price range
$350–$1,500+
Best for Serious home gym, solo heavy training, long-term build
Tradeoff Needs ceiling clearance (7 ft+) and a dedicated footprint
The PR-1100 is the power rack we'd put in a first home gym without a second thought. Four uprights, full cage safety, J-cups that don't chew up a barbell, and a 1,000-lb weight capacity. REP Fitness competes directly with Rogue at a fraction of the price, and the quality gap is smaller than the price gap. If you have 7-foot ceilings and a garage or basement, this is your rack.
What we like
Full four-post cage with safeties, you can train alone safely
1,000-lb capacity handles any load a home gym will ever see
REP quality rivals Rogue at a significantly lower price point
What to know
Heavy freight item, delivery takes longer than Prime shipping
Needs 7-ft clearance minimum, measure twice before ordering
The T-2 is Titan's entry into the power rack world, four posts, safety bars, and enough capacity for any home gym lifter at a price well under the REP. Build quality is a step down (heavier bolt action, fewer accessories), but it does the job. A solid first rack if budget is the primary constraint.
What we like
Budget entry into a full four-post cage, safeties included
Titan's build reputation is strong for the price category
700-lb capacity is more than enough for any beginner setup
What to know
J-cup action is slower and less refined than REP or Rogue
Fewer accessories, limited expansion options vs. REP or Rogue
The R-3 is the serious home gym rack. Thicker steel, tighter tolerances, and virtually unlimited Rogue accessories to expand it over time, lat pulldown, dip attachment, cable system. If you're building a gym you'll keep for a decade and money isn't the constraint, Rogue is the name that holds its value.
What we like
Rogue steel quality, built to outlast the house it's bolted to
Massive accessory ecosystem to expand without replacing the rack
Resale value is exceptional, Rogue gear holds value like cast iron
What to know
Costs 2–3x the REP equivalent for similar base functionality
One barbell handles squats, deadlifts, bench press, overhead press, and rows, every foundational movement. You don't need multiple barbells to start. Buy one good 20kg (44 lb) Olympic bar with a 2-inch sleeve diameter and you're set for years. Cheap bars wobble, bend, and have rough knurling that tears your hands. You don't need to spend $400 on a bar, but $80 is too little.
Best starter
CAP Barbell
Olympic Chrome Bar (2-inch)
$$
★★★★★Our rating
CAP's Olympic bar punches well above its price point. Consistent knurling, straight sleeves, and it tolerates real weight without bending. It's the bar that shows up in garages and church gyms and YMCA storage rooms, ubiquitous because it works.
What we like
Straight, true sleeves, no wobble loading or unloading plates
Medium knurling grip is comfortable for all pulling and pressing
Tolerates daily home gym use without bowing, tested by many owners
What to know
Chrome shows rust without regular wipe-downs in humid garages
Spin on the sleeves is mediocre, not ideal for Olympic lifting
XMark has been building gym equipment for 25 years and the Lumberjack is their most-used bar. Manganese phosphate shaft (resists corrosion and sweat), chrome sleeves with good spin, and brass bushings, noticeably better feel than the CAP. If you're going to train consistently, this is the bar you won't want to replace.
What we like
Manganese phosphate shaft resists rust better than chrome in humid garages
Brass bushings give noticeably better sleeve spin than budget bars
XMark's 25-year reputation, not a fly-by-night Amazon brand
What to know
Heavier than the CAP bar, less ideal if you're sharing with smaller lifters
Pricier than entry-level bars, only worth it once you're lifting consistently
A 300-lb barbell set (barbell + plates) is the standard starting point, enough for most beginners for the first year. The bumper vs. iron debate is real: bumpers are rubber-coated, bounce safely on concrete, and deaden impact noise. Iron plates are cheaper per pound at heavier weights but crack concrete if dropped without flooring. In a home gym on concrete, start with bumpers for the lighter weights and fill in with iron as you add load.
Best starter
Iron Crush
Olympic Bumper Plates (pair)
$$$
★★★★★Our rating
Iron Crush bumpers are the Amazon-accessible bumper plate we recommend to most home gym builders, virgin rubber construction, standard 450mm diameter, and low dead bounce. Buy pairs: 10s, 25s, and 45s to build out a working set. If you're lifting on concrete, these protect your floor without destroying your wallet.
What we like
True 450mm diameter, standard sizing that fits every rack and platform
Rubber construction won't crack concrete or shatter on drops
Low bounce height, they don't roll to the other side of the garage
What to know
More expensive per pound than iron plates at heavier weights
If you have rubber flooring and don't plan to drop the bar from overhead, iron plates are the budget move, and CAP's 300-lb set includes a bar. Cast iron, standard Olympic bore, and everything you need to start lifting for well under bumper plate prices.
What we like
Cheaper per pound than bumpers, saves real money at heavier weights
Thinner profile fits more weight on a standard barbell sleeve
What to know
Cannot be dropped without flooring protection, will crack concrete
Rust in humid garages without occasional oiling or coating
Fractional plates are what you buy when the 5-lb jump between sets is too much, usually happens in shoulder press and bench press first. A pair of 1.25-lb plates lets you add 2.5 lbs to the bar instead of 10 lbs, extending your linear progression by months.
What we like
2.5-lb total jump instead of 10 lbs, extends beginner linear progress
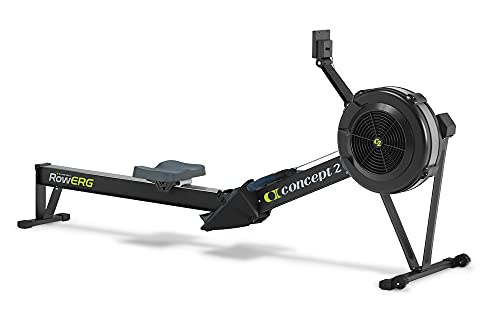
Most home gym builders skip cardio equipment at first, then regret it. You don't need a treadmill, they're big, loud, and often get turned into expensive clothing racks. The rowing machine is the underrated workhorse: full-body, low-impact, space-efficient when stored vertically, and genuinely hard. The assault bike (fan bike) is the brutal short-session option. If you need low-impact steady cardio, a stationary bike is quieter and cheaper.
Best starter
Concept2
RowErg Rowing Machine
$$$$
★★★★★Our rating
The RowErg is the gold standard of rowing machines and the only one worth recommending. Every rowing race in the world uses Concept2 for indoor qualification times. It stores vertically (4 sq ft footprint), the PM5 monitor is actually useful, and it will last longer than you will. The price is high but there's no equivalent.
What we like
The global standard for indoor rowing, used in every serious facility
Stores vertically on wheels, takes just 4 sq ft against a wall
PM5 monitor tracks pace, splits, and calories with real accuracy
What to know
Flywheel is loud, problematic in apartments or above sleeping areas
Premium price (~$900) compared to budget competitors
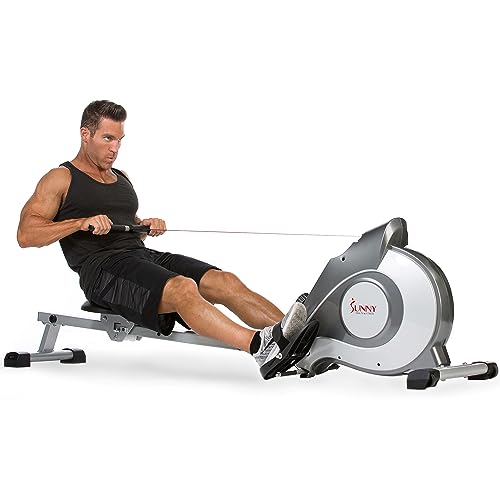
If you want a rowing machine at half the Concept2 price and can live with a less accurate monitor and a slightly different feel, Sunny's magnetic rower is the budget entry point most recommend. Quieter than the Concept2 (magnetic resistance), and folds flat.
What we like
Folds flat for storage, easier in small spaces than the Concept2
Magnetic resistance is quieter than air or water rowers
What to know
Monitor lacks workout tracking depth of the Concept2 PM5
Resistance curve doesn't match real rowing, limits skill transfer
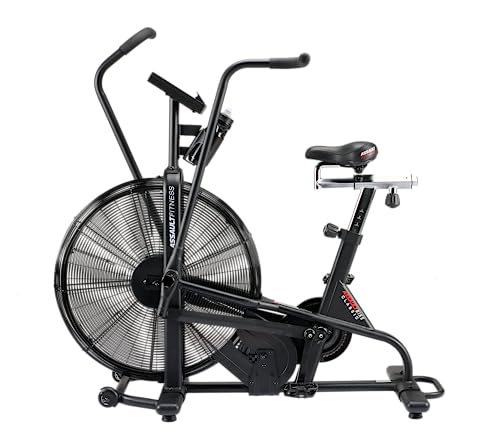
The fan bike is the most brutal cardio tool in a home gym, the faster you go, the harder it gets, with no cap. Twenty seconds of max effort on an Assault Bike is genuinely harder than anything a treadmill offers. It's also extremely low-impact and easy on the knees. If you want short, intense cardio sessions, this is it.
What we like
Self-regulating resistance, harder the faster you go, no settings needed
Total body effort (arms AND legs) burns more than a stationary bike
What to know
Fan noise is significant, not apartment-friendly at all
The brutality of all-out efforts makes it easy to overdo
Flooring is the unsexy purchase that every home gym builder wishes they'd done first. Bare concrete transmits impact to the structure, cracks under dropped iron, and destroys knee joints during any standing movement. Rubber gym flooring, either interlocking tile mats or rolls, is the right answer. 3/8 inch tiles are fine for lifting; if you're dropping heavy barbells, go 3/4 inch under the bar.
Best starter
BalanceFrom
GoFit Puzzle Exercise Mat (3/8 inch, 6-pack)
$$
★★★★★Our rating
Interlocking tiles are the easiest home gym flooring solution, no adhesive, no subfloor prep, just lay them down. BalanceFrom's 3/8-inch tiles cover a 24-square-foot section and handle everyday lifting, jumping, and cardio. For a dedicated lifting platform, add a second layer under the bar.
What we like
Interlocking tiles install in minutes, no cutting, no adhesive
Covers concrete to protect both floor and knees during standing work
Inexpensive per square foot, scale up as gym grows
What to know
3/8-inch not thick enough for dropping heavy barbells on concrete
Tiles creep apart under repeated lateral movement, re-seat monthly
Rolled rubber is how commercial gyms floor their spaces, and for good reason, no seams, no shifting tiles, and 3/4-inch thickness handles dropped bumper plates on concrete without any structural damage. Covers an 8x10-ft lifting area in two rolls. Pricier upfront but you install it once.
What we like
No seams to shift, commercial-grade surface that stays in place
3/4-inch thickness handles dropped barbell loads on concrete
What to know
Heavy rolls require two people to unroll and position
Higher upfront cost than puzzle tiles, commit to the space first
A barbell handles the big lifts, but dumbbells fill the gaps, unilateral work, accessory exercises, anything that needs independent arm movement. For home gyms, adjustable dumbbells are the obvious answer: one pair replaces a 40-dumbbell rack. The good ones are expensive but take up a single square foot instead of a full wall.
Best starter
Bowflex
SelectTech 552 Adjustable Dumbbells
$$$
★★★★★Our rating
The SelectTech 552s adjust from 5 to 52.5 lbs in 2.5-lb increments with a dial turn. For most people's home gym needs, rows, curls, lateral raises, lunges, that range covers everything. They're not cheap, but one pair covers what 15 fixed dumbbells would and fits under a bench.
What we like
5–52.5 lbs in one pair, eliminates the need for a dumbbell rack
2.5-lb micro-increments let you progress on small isolation movements
Compact footprint fits under a bench or in a corner
What to know
Plastic selector mechanism cracks on hard drops, never drop these
Slower to adjust than fixed dumbbells during supersets
If you only need one or two weights for accessory work, say, a 20 lb and a 35 lb pair, fixed dumbbells are cheaper per pair than adjustables. Amazon Basics hex dumbbells are unremarkable and reliable. Buy the weights you'll actually use most and fill in the rest with the adjustable set later.
What we like
Fixed weight, no mechanism to break, nothing to adjust mid-set
Hex shape won't roll; rubber coating protects floor and finish
What to know
Each weight is a separate purchase, a full set costs more than adjustables
No micro-increments, 5-lb jumps can be too large on isolation lifts
REP Fitness makes the rubber hex dumbbell that most serious home gym builders end up landing on. Thicker rubber coating than the Amazon Basics, consistent cast weight (no variance between left and right), and the same REP quality you'd find in their barbells and racks. Buy a few key weights (25, 35, 50 lb) once you know what you'll actually use.
What we like
REP Fitness rubber coating is thicker and more durable than Amazon brands
Consistent accurate casting, no weight variance between left and right
What to know
Premium price per pair, buy specific weights you'll actually use
Sold on Amazon via REP or third-party, confirm you're buying REP branded
Most people spend weeks researching and buy in the wrong order. Here's the sequence that actually works, from empty room to first training session.
Building a home gym has a reputation for being complicated. There are endless Reddit debates about rack brands, flooring thickness, and whether to buy bumpers or iron. Most of it is noise. The actual process is simpler: buy five things in the right order, put them in a room, and start lifting.
Here’s how the first month goes, week by week, from the moment you decide to build a home gym to the morning you finish your first real session in it.
Week 1: Measure and plan before you buy anything
The most expensive mistake in home gym building is buying something that doesn’t fit. Rack too tall for your ceiling. Flooring that doesn’t cover your actual footprint. A rowing machine that makes the door impossible to open.
Before you spend a dollar, do this:
Measure your ceiling height. Most residential ceilings are 8 feet. Most power racks are 7 to 7.5 feet tall. That works, but you need 6–8 inches of clearance above the rack for overhead pressing, which means 8-foot ceilings are tight. If your space is in a basement, measure to the lowest point (ducts, beams, pipes). 7-foot ceilings with a 7-foot rack means no overhead pressing at all.
Map the footprint. A power rack is roughly 4×4 feet, but you need room around it. The barbell extends about 4 feet on each side when loaded. You need 2–3 feet behind and to the sides for safe bailing. A rough rule: plan for a 10×10-foot zone around the rack, minimum.
Decide on a surface. Concrete garage floors are fine but unforgiving on dropped iron. Basement carpet compresses under rack feet and destabilizes the rack. Rubber flooring goes down first, before the rack, so order it before you order anything else.
Write your measurements down. You’ll refer back to them when ordering.
The first real purchases happen in this order. Each one informs the next.
1. Flooring first. Rubber flooring takes the longest to arrive (it ships as freight) and needs to be down before anything else goes on top of it. Buy interlocking tiles or a 3/4-inch rubber roll for the primary lifting zone. You need at least 24 square feet to start, more if you’re also doing cardio.
2. The rack second. The rack is the anchor point everything else gets planned around. A power rack is the better investment over a squat stand for almost everyone who’s serious (the safety catches let you train alone without fear). Order from REP Fitness, Titan Fitness, or Rogue depending on your budget. Shipping takes 1–2 weeks.
3. Barbell and plates together. A 20kg Olympic barbell and a 300-lb plate set is the standard starter loadout. If you’re going bumper plates (recommended for concrete floors), REP Fitness and Rogue both make solid sets. If you’re going iron, CAP Barbell is the reliable budget choice.
While those ship, pick your program. You need to know your program before you train, not after you get in the gym. Starting Strength, StrongLifts 5x5, and GZCLP are the three programs that work well in a minimal home gym. Pick one, print it out or put it in a spreadsheet, and know it cold before the rack arrives.
Week 3: Assembly and setup
The rack arrives in a flat-pack box that weighs 200+ pounds. Clear the space before the delivery, not after.
Assembly takes 2–3 hours with two people. If you try to assemble a power rack alone, you will get frustrated on the uprights-to-crossmember step. A second set of hands makes it manageable. Lay all the hardware out before you start and read the instructions twice before picking up a single bolt.
Once the rack is assembled:
Set your J-cup height. Load the empty bar on the J-cups and stand under it in a squat position. The bar should sit at mid-chest height, high enough to unrack without tiptoeing, low enough to set up without hunching. Adjust before your first real session.
Set your safety heights. For squats, the safeties should be just below parallel depth when you’re at the bottom of your squat. Load the empty bar, squat to depth, and mark where the safeties should be. Test it by bailing: lower yourself down, roll the bar onto the safeties, stand up. If the safeties caught it safely and you didn’t have to dive forward, the height is right.
Put the flooring down. Interlocking tiles go under and around the rack before you start lifting. If you ordered rubber rolls, unroll them into the lifting zone. Trimming isn’t necessary for interlocking tiles; rolls may need to be cut to fit the rack feet.
Week 4: First sessions
Your first real session is not a test of strength. It’s a test of setup.
Use the empty bar for every movement. Go through the full squat, deadlift, bench press, and overhead press with just the 45-lb bar before adding weight. You’re checking:
The J-cups are at the right height and the bar lifts out cleanly
The safeties are positioned correctly (you can test this: just squat down to depth and let the bar rest on them once)
You have enough room on both sides to load plates
You know where you’ll put your training log, your water bottle, and your phone
Then add weight. If you’re running a novice program, you start lighter than you think you should and add weight every session. This is correct. The program is calibrated for it.
By the end of week four, the gym is live. You’ve got a working rack, a barbell, plates, and flooring. Every other purchase from here (dumbbells, cardio machine, additional equipment) slots in around a gym that already functions.
A few patterns show up in nearly every home gym build:
Buying a bench too late. A flat adjustable bench unlocks bench press, incline press, dumbbell rows, and seated overhead press. It’s not a big purchase but it’s a meaningful one. Add it in your second month if it’s not in the initial budget.
Underestimating the noise. Dropping a loaded barbell on rubber mats in a garage is loud, not just the impact but the echo in a hard-walled space. A rowing machine flywheel or an assault bike fan is also significantly louder than you expect. If you have neighbors below or children sleeping nearby, think about session timing.
Not having a program. The people who build a home gym and then use it inconsistently almost universally don’t have a program. They show up, do whatever they feel like, and stall out within two months. The program is the gym. Pick one.
Over-researching before buying. The difference between a $350 power rack and a $1,200 Rogue rack is real, but it doesn’t matter at all in your first year of training. The best rack is the one that’s in your garage next week, not the one you’re still deciding on in three months.
Save your money
What you don't need yet
Beginners get pressured to buy a lot of stuff that doesn't help them play
better. Here's what we'd skip on day one.
A cable machine — Cables are nice for isolation work, but barbells, dumbbells, and resistance bands cover everything a beginner needs. Cable machines are also expensive and take up a lot of floor space.
A dedicated bench press station — An adjustable bench and your power rack's safeties replicate a dedicated bench press station. A standalone bench press machine is redundant and wastes space.
Mirrors — Fun to have, but not worth installing early. Focus on movement quality by feel before you need visual feedback.
A commercial treadmill — Treadmills are expensive, enormous, loud, and become clothes racks. A rowing machine or assault bike gives a harder cardiovascular workout in far less space.
A squat rack mat (besides flooring) — Your rubber flooring is the mat. A second dedicated mat under the rack adds no real benefit unless you're on carpet.
Olympic lifting shoes — Useful eventually for squats and cleans, but barefoot or flat-soled shoes work fine while you're learning the movements.
First week
Your first seven days
A short, real plan to get from gear-on-doorstep to actually playing.
Measure your space and map out where the rack, cardio machine, and flooring will go before buying anything. · Action
Order your power rack or squat stand, shipping takes time and everything else gets planned around it. · Buy
Do your first session with just the empty bar. Learn where the rack safeties need to be. It saves injuries later. · Action
FAQ
Common questions
How much does a complete starter home gym cost?
A functional home gym (squat stand, barbell, 200 lbs of plates, and rubber mats) runs about $500 on the low end with budget picks. A proper power rack, quality bumper plates, and a cardio machine lands around $1,200–1,500. You recoup the cost versus a gym membership in 12–24 months.
Power rack or squat stand, which should I buy first?
If you have the ceiling height (7 ft+) and the budget, buy a power rack. The four-post cage lets you train alone safely, you can bail on a squat without a spotter. Squat stands are cheaper and fit tighter spaces, but you should not max out on them alone.
Bumper plates or iron plates?
If you're training on concrete and plan to do any Olympic lifting or drop the bar, buy bumpers. They bounce safely and won't crater the floor. Iron plates are cheaper per pound at heavier loads, many people start with bumpers for the lighter weights (10–45 lb) and add iron for the heavier pairs.
What's the minimum viable home gym?
Barbell + 160 lbs of plates + a squat stand + 24 sq ft of rubber mats. That's it. Everything else is a nice-to-have. You can do every foundational strength lift with those four things.
Do I need cardio equipment in my home gym?
Not on day one. The strength equipment is the core of the setup. Once you're training consistently, a rowing machine or assault bike is a better cardio investment than a treadmill, more intensity per square foot and lower impact on joints.
What barbell program should I run as a beginner?
Starting Strength, StrongLifts 5x5, or GZCLP are all proven three-day-a-week beginner programs. Pick one and run it for 6 months before changing anything. The program matters less than showing up consistently.
How much ceiling height do I need?
For a power rack, 7 ft is the practical minimum (the rack itself plus overhead press clearance). 8+ ft is comfortable. Measure your space before ordering, most racks are 7'6" or taller.
Starting Strength — Mark Rippetoe's foundational strength program and coaching resources. The squat and deadlift guides are reference-level technique reading.
r/homegym — Active community for home gym setups. The wiki and top posts cover equipment comparisons, space planning, and flooring in exhaustive detail.
r/Fitness wiki: Equipment — Unsupported buying advice organized by equipment category. Opinionated, community-vetted, useful for ranking brands.
Rogue Fitness — The brand benchmark for power racks, barbells, and bumper plates. Not always the best value, but the quality reference everything else is compared against.
Alan Thrall (YouTube) — The most watched beginner-friendly barbell technique channel. Clear, practical, and unapologetically opinionated on form details.
Barbell Medicine — Evidence-based strength training resources from MDs who lift. Best for understanding programming, injury prevention, and load management.
As an Amazon Associate, JustBeginning earns from qualifying purchases.
We may also earn commission from other affiliate programs linked on this
page. Editorial recommendations are independent; we don't choose
products based on commission rates.
Product prices and availability are accurate as of the date and time
indicated and are subject to change. Any price and availability
information shown on Amazon at the time of purchase will apply.


 Best starter