Gunpla is one of the most satisfying hobbies you can start with $50 and a kitchen table. The trick: knowing which grade to start with, and which three tools actually matter before you go deep on paint and custom work.
By Colin B. · Published May 24, 2026 · Last reviewed June 9, 2026
A solid HG kit ($25), good nippers ($23), panel liner ($12), and a can of top coat ($10) puts you at $70. Add a cutting mat and hobby knife and you're at $110 for a complete setup that'll last years.
We earn commission on qualifying Amazon purchases — see our
affiliate disclosure.
Price tiers and budget totals shown above are editorial estimates;
actual Amazon prices vary.
At a glance
Our top pick in each category
The fastest path through this guide — each best-starter pick by category.
Scroll for the budget and upgrade alternatives.
Start with HG (High Grade) only. Not MG. Not PG. Not RG. Every new builder who starts with a Master Grade because they like the design ends up frustrated by the part count and complexity. One or two HG kits first, then you'll know exactly what you're ready for.
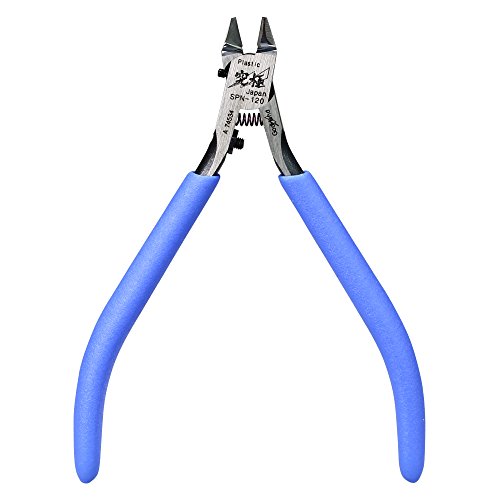
Nippers are non-negotiable. You can technically pop plastic off the runner with a craft knife, but you'll leave nub marks everywhere. The $23 Tamiya side cutter pays for itself on the first kit. Don't start without one.
You don't need to paint to make a great-looking kit. Panel lining (tracing the recessed grooves with a dark marker) plus a matte top coat adds 80% of the visual impact that painting achieves at 20% of the effort and cost. Start there and decide if you want to go deeper later.
The grade system is where beginners get tripped up. HG (High Grade, 1/144 scale) is where everyone should start: modern snap-fit engineering, realistic proportions, and none of the complexity that bogs down new builders. Entry Grade (EG) is even simpler if you want the absolute easiest first build. Real Grade (RG) is HG-size but with dramatically more detail and a fiddly inner frame (great second kit, not a first). Master Grade (MG, 1/100 scale) is the hobbyist sweet spot once you have a few builds under your belt. Perfect Grade (PG, 1/60 scale) is the pinnacle: 500+ parts, $250+, and genuinely requires experience to enjoy.
Model Kits — what's the difference?
A few common shapes, each making a different trade.
Entry Grade (EG)
No tools needed. Best proof-of-concept kit.
Scale
1/144
Parts
~50-80
Build time
1-2 hrs
Best for Absolute first-timers, kids, gift recipients who may not commit
Tradeoff Less detail than HG; you'll want to move up after one build
High Grade (HG)
The real start. Where most builders should begin.
Scale
1/144
Parts
~150-300
Build time
3-8 hrs
Best for All new builders who are ready to invest in tools
Tradeoff Smaller scale makes panel lining and stickers fiddlier than MG
Real Grade (RG)
HG-size with MG-level detail. Fiddly inner frame.
Scale
1/144
Parts
~300-500
Build time
8-15 hrs
Best for Builders who want HG shelf footprint but MG detail
Tradeoff Inner frame at 1/144 scale is very small; tweezers are required
Master Grade (MG)
The hobbyist sweet spot. Full inner frame, 1/100 scale.
Scale
1/100
Parts
~300-600
Build time
15-30 hrs
Best for Builders with 3+ HG builds who want a serious project
Tradeoff Complexity spike is real: finish HGs first
Best starter
Bandai Spirits
Bandai Hobby HGCE 1/144 Freedom Gundam
$28.80 as of Jun 22, 2026
★★★★★Our rating· Only 11 left in stock - order soon.
The HGCE Freedom is one of the cleanest, best-engineered HG kits in the lineup: dynamic wing silhouette, great articulation, and modern snap-fit that goes together without hassle. Freedom is an iconic Mobile Suit that looks great on a shelf. Perfect first or second HG build.
What we like
Iconic design that photographs and displays beautifully
Modern engineering: pieces fit cleanly, no warping or sink marks
No paint needed; color accuracy from molded plastic alone
What to know
Wing joints can be fragile with over-rotation, so be deliberate
Pre-applied stickers are an art form; take your time with them
The Entry Grade is the easiest, cheapest way to see if Gunpla clicks. Under $10, no nippers required (runners break cleanly by hand), and the original Gundam design is timeless. Not a long build, but a perfect proof of concept before you invest in tools.
What we like
Under $10: lowest-risk intro to the hobby
No nippers needed; designed to break from runner by hand cleanly
RX-78-2 is the original Gundam, the most recognized design
What to know
Noticeably simpler than HG or above, with limited panel line detail
You'll outgrow the challenge of it after one build
When you're ready for a real challenge, Master Grade Freedom 2.0 is where most builders land. 1/100 scale, detailed inner frame, and the same iconic design scaled up dramatically. Plan for 15-25 hours of build time and proper tools. The result belongs on a display case.
What we like
Dramatically more detail and presence than HG (a real showpiece)
Inner frame gives you panel-open display options
1/100 scale makes panel lining and painting much more forgiving
What to know
15-25 hour build: not a weekend project
Part count is overwhelming for beginners; finish 2-3 HGs first
This is not the category to skip. Nippers are how you cut plastic parts from the runner (the plastic tree they come attached to). Bad nippers stress-whiten the plastic at the cut and leave white nub marks that ruin the look. Good nippers cut clean in one pass. The difference between a $5 craft-store cutter and a proper Tamiya side cutter is immediately visible on your first kit. Once you've built a few HG kits and care about results, the God Hand single blade is the gold standard: it cuts so clean you almost need no sanding.
Best starter
Tamiya
Sharp Pointed Side Cutter for Plastic
$37.60 as of Jun 22, 2026
★★★★★Our rating· Only 4 left in stock - order soon.
The Tamiya 74035 is what every beginning builder should start with. Precise blades, comfortable grip, and clean enough cuts that you'll rarely see white stress marks on dark plastic. Lasts for years if you only use it on plastic runners. At $23 it's the single best investment you make in this hobby.
What we like
Clean cuts that minimize white stress marks on plastic
Precise tip reaches tight runner placements
Lasts years with plastic-only use (one-time purchase)
What to know
Pointy tips require care: don't drop on hard floors
Blades dull if used on anything other than plastic
The GodHand Ultimate Nipper 5.0 is the obsessive builder's tool. One ultra-sharp blade cuts from one side only, which prevents the stress-whitening that double-blade nippers cause on deep cuts. Cuts are so clean you can place parts right at the gate with almost no sanding. Japanese-made, $55, and absolutely worth it once you care about gate marks.
What we like
Single-blade design prevents stress-whitening on tricky cuts
Japanese-made precision (the tool serious builders use)
Eliminates nearly all gate mark sanding when used correctly
What to know
Fragile: one wrong cut voids the blade
Premium price is overkill until you've finished 5+ HG kits
Panel lining means tracing the recessed grooves in a kit with a dark color to give parts depth, shadow, and the look of real mechanical detail. It's the single best visual upgrade you can do without an airbrush. A plain HG kit panel-lined and top-coated looks 10x better than an unfinished one. Gundam Markers are the beginner-friendly approach: they flow into the grooves and wipe away from flat surfaces with a damp Q-tip. Tamiya Panel Accent Colors are enamel-based and require enamel thinner to clean up, but flow better on larger kits.
Best starter
Bandai Spirits
GSI Creos Gundam Marker Panel Line Set (GM01/GM02/GM03)
$9.99 as of Jun 22, 2026
★★★★★Our rating· In Stock
Gundam Markers are the foolproof way to panel line. Run the tip along a recessed groove, let it flow in, wipe the surface residue with a damp Q-tip or cotton swab. No thinner required, no fumes, no mess. The three-pack gives you black for dark parts, gray for medium parts, and brown for tan and sand-colored parts.
What we like
No thinner needed: clean up with a damp cotton swab
Three-color set handles every kit color scenario
Safe for apartment builds (no chemical fumes)
What to know
Tips dry out with heavy use; refresh by pumping on scrap plastic
Flow is thinner than enamel-based panel liners on wide grooves
★★★★☆Our rating· Only 2 left in stock - order soon.
Once you've done a few kits and want sharper results, Tamiya's enamel panel liner flows deeper and more consistently than markers. The black is the most useful: it self-levels into grooves beautifully. Clean excess with enamel thinner on a cotton swab. Requires ventilation but delivers noticeably crisper lines on MG-scale kits.
What we like
Self-leveling formula flows into grooves better than markers
Enamel base cleans with thinner for precise removal
Noticeable quality upgrade on MG-scale or repainted kits
What to know
Requires enamel thinner (extra supply to keep on hand)
Can craze plastic under heavy stress-point application
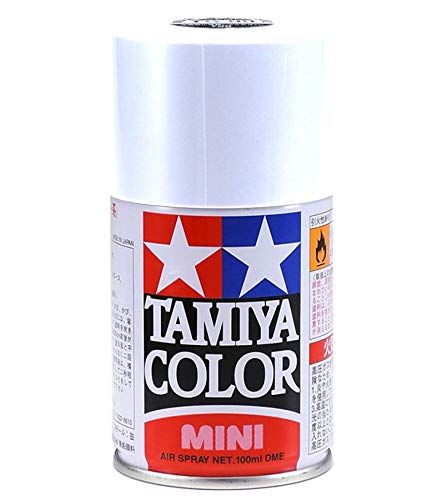
A matte top coat is the finish that ties everything together. It seals your panel lines so they don't smear, unifies the sheen across all the different plastic colors, and gives the kit a realistic flat look instead of a toy-like shine. This is the step that most new builders skip and then regret after seeing a finished, top-coated kit side by side with one that isn't. Spray it in a well-ventilated area from about 12 inches away in light, sweeping coats. Never soak the surface.
Best starter
Tamiya
TS-80 Flat Clear Spray
$13.19 as of Jun 22, 2026
★★★★★Our rating· In stock
Tamiya's TS-80 is the easiest top coat for a beginner to use well. Lacquer-based, dries fast, and gives a consistent flat finish that significantly elevates any kit. Available at most hobby shops and ships on Amazon. One can covers 2-3 HG kits if you apply light coats.
What we like
Fast dry time: parts handled within 30 minutes
Consistent flat finish that unifies all plastic sheen variations
Widely available in hobby shops, easy to restock
What to know
Lacquer fumes need real ventilation (not suitable for all spaces)
White frosting on humid or cold days; check conditions first
Mr. Super Clear is what most intermediate builders move to once they start panel lining or using water-slide decals. UV protection slows color fade over time, and the flat finish is exceptionally even. The 170ml bottle is more economical than rattle cans for heavy builders. Requires a spray can adapter or separate can.
What we like
UV protection slows yellowing (important for display kits)
More economical per coat than individual rattle cans
Exceptionally even flat finish favored by competition builders
What to know
Still lacquer: same ventilation requirements apply
Requires a separate spray can propellant (more gear to buy)
Beyond nippers, you need three things: a self-healing cutting mat to protect your table, a hobby knife to clean up gate marks and trim excess plastic, and tweezers for tiny stickers and decals. You can buy each separately, but Tamiya's basic tool set bundles what you need at a fair price. The cutting mat is the thing people skip and then regret. An OLFA or Tamiya mat lasts a decade and keeps your work surface clean and your blades sharper.
Best starter
Tamiya
74016 Basic Tool Set for Plastic Models
$29.99 as of Jun 22, 2026
★★★★★Our rating· Only 5 left in stock - order soon.
Tamiya's basic tool set includes a hobby knife, sanding sponge, and tweezers: the three tools you reach for constantly. Each piece is Tamiya quality: sharp out of the box, comfortable to use, and sized right for 1/144 and 1/100 scale work. Buying them together saves money versus individual purchases.
What we like
Knife, tweezers, and sanding sponge in one quality-checked bundle
Tamiya hobby knife is noticeably sharper than generic craft knives
Sized for 1/144 and 1/100 scale precision work
What to know
Blade replacement is a recurring cost: buy extras at purchase
An OLFA cutting mat is the quiet hero of a Gunpla workspace. Protects your table, keeps blades sharper (soft mat surface vs. hard wood), and gives you a clean grid reference. The A4 size fits on most desks without dominating the space. Buy it once and it lasts for years.
What we like
Self-healing surface extends knife blade life significantly
Printed grid helps with straight cuts and part alignment
Protects tables from hobby knife and loose nippers
Every Gunpla builder remembers their first kit. Here's what actually happens, and what makes the difference between a satisfying build and a frustrating one.
There’s a specific kind of satisfaction in Gunpla that almost nothing else delivers: you open a box full of plastic trees, follow instructions that require no words, and two to eight hours later you have a robot on your desk that looks like it belongs in an anime. No glue, no paints required, no prior experience needed.
But first builds can go wrong in predictable ways (all of them avoidable). This is what your first Gundam kit actually looks like, from choosing the right grade to the finishing steps that separate a great build from a mediocre one.
Choosing your first kit
The most important decision you make in Gunpla isn’t which Mobile Suit you like best. It’s which grade to buy.
The grade is Bandai’s complexity tier system. It determines part count, build time, and how much the hobby asks of you in that first session.
HG (High Grade, 1/144 scale) is where you should start. Modern HG kits have 150-300 parts, snap together without glue, and take 3-8 hours to complete. The color accuracy from molded plastic is excellent: you don’t need to paint anything. They’re $20-35 and available everywhere.
Entry Grade (EG) is one level simpler: under $10, 50-80 parts, no nippers needed (parts break cleanly from the runner by hand). If you’re genuinely unsure whether the hobby will stick, buy an EG first. The RX-78-2 is the obvious choice (it’s the original Gundam).
Avoid MG, RG, or PG for your first kit. Every builder who starts with a Master Grade because they love the design ends up frustrated. 400+ parts and an inner frame assembly sequence are skills you earn, not start with. One or two HG kits first, then upgrade.
For design, the Freedom Gundam is one of the most popular entry HG kits: dramatic wing silhouette, great articulation, modern snap-fit engineering. The Zaku II is another classic. Choose the Mobile Suit that appeals to you; you’ll be spending hours with it.
Before you open the box: tools
You need two things before your first cut. Everything else is optional for the first build.
Nippers. These are specialized scissors that cut plastic from the runner (the plastic tree each part is attached to). Don’t use regular scissors or craft knife alone: they stress-whiten the plastic at the cut and leave white nub marks on every part. The Tamiya Sharp Pointed Side Cutter ($23) is the universal beginner recommendation. It cuts clean in one pass.
A cutting mat. An OLFA self-healing mat protects your table and keeps your blades sharper. A piece of cardboard works as an emergency substitute, but a proper mat is worth buying once.
Optional but useful on the first kit: tweezers for sticker placement, and a hobby knife for trimming any remaining gate marks after the second cut.
That’s it. Don’t buy panel liners, top coat, or anything else before you’ve built your first HG. Do the build first; then decide what finishing level you want.
The build: what to actually do
Open the instruction manual and read through it before you start. Bandai manuals are wordless and entirely visual; one look-through takes ten minutes and prevents most first-build mistakes. Note the step that introduces the inner frame or torso assembly; that’s usually where timing matters.
The two-pass cut rule is the single most important technique:
Cut the part from the runner about 2-3mm away from the part itself (leave a small stub).
Then trim the stub flush to the part on a second cut.
Never try to cut right at the gate in one pass. The compression of a single cut causes stress whitening: that telltale white ghost mark on the plastic. Two passes eliminates it.
As you work, sort parts into the category shown in the manual before assembly. The instruction sequence exists for a reason: the torso needs to be partially built before the arms go on, the hip ball joints before the leg armor. Following the order prevents backtracking.
Don’t force anything. Bandai engineering is precise. If a piece isn’t clicking, you’re either pushing at the wrong angle or it’s the wrong step. Check the manual, rotate the part, try again. Nothing should require significant force.
A freshly assembled HG kit looks good. A panel-lined one looks dramatically better.
Panel lining means tracing the recessed grooves on each part (the ones that simulate the seams, vents, and mechanical joints of a real mecha) with a dark ink. The ink flows into the grooves by capillary action, giving the kit depth and shadow that plastic alone can’t provide.
Gundam Markers are the beginner-friendly method. Run the felt tip along a recessed groove, let the ink settle, then wipe the surface residue off with a damp cotton swab. No chemicals needed. Use gray for light-colored parts, black for dark armor, brown for tan or sand parts.
Technique notes:
Work section by section: don’t panel line the whole kit and then try to wipe.
Wipe while the ink is still slightly wet. Dried marker on flat plastic is harder to remove without scratching.
You’ll miss grooves. Go back over the assembled kit a second time; the ones you missed become obvious after the first pass.
Tamiya Panel Line Accent Color is the enamel-based alternative; it flows more consistently on larger parts and produces slightly crisper lines, but requires enamel thinner to clean up and demands ventilation. Save it for MG builds or after you’ve done a few kits.
Top coat: the final step everyone skips (and shouldn’t)
After panel lining, seal the kit with a matte top coat.
A top coat does three things: seals the panel lines so they don’t smear, unifies the surface sheen across all the different plastic colors, and gives the kit the flat, realistic look of something real rather than something toy-like. The before/after difference is striking. A panel-lined and top-coated HG kit looks significantly more finished than many beginner painters’ results.
Tamiya TS-80 Flat Clear is the standard beginner can. Apply outside or near an open window: lacquer fumes are real and not subtle. Spray from about 12 inches in light, sweeping passes. Let the first coat dry 20 minutes before adding a second. Don’t try to get full coverage in one coat; multiple light coats produce a better result than one heavy one.
Two weather cautions: don’t spray on humid days (causes “frosting,” a white haze on the surface) or in direct sunlight (solvent flashes before it levels). On a dry, moderate-temperature day, the results are excellent.
Not doing the two-pass cut. One-pass cuts leave white nub marks that are very visible on colored plastic. Do two passes or sand the gate mark with 400-grit then 1000-grit.
Forcing ball joints. The hip, shoulder, and ankle joints on most kits are polycap ball joints. They click into socket, they don’t jam in. If it’s not going, stop: you’re at the wrong angle.
Skipping the instruction manual preview. The sequence matters, especially on the torso and inner frame. Three minutes of preview prevents 30 minutes of disassembly.
Over-applying stickers. Pre-cut stickers look best when applied with tweezers, not fingers. Finger placement leaves smudges and the sticker rarely aligns on the first try. Tweezers let you position and adjust before pressing down.
Not top-coating. The panel lines look great when wet. They get smeared off in the first week of handling without top coat. This step is not optional if you want the kit to stay looking finished.
What comes after your first build
The HG you just finished is the start of a real skill progression.
Second kit: another HG or a Real Grade. The Real Grade Unicorn Gundam is one of the most satisfying second builds: same HG footprint, dramatically more detail, and the challenge of an inner frame at 1/144 scale. Requires tweezers. Very rewarding.
Third kit onward: consider MG. Once you’ve done two to three HG builds, a Master Grade will feel like a completely different hobby rather than overwhelming. The Freedom Gundam Ver.2.0 is the most popular gateway MG: same iconic design, 1/100 scale, inner frame, 15-25 hours.
Deeper finishing: Water-slide decals (applied after top coat with a setting solution) add markings and insignia that look photo-realistic. Painters layer flat base coats and panel shading. Scratch-builders modify the kit’s shapes with putty and scribers. The hobby has as much depth as you want to find.
Save your money
What you don't need yet
Beginners get pressured to buy a lot of stuff that doesn't help them play
better. Here's what we'd skip on day one.
An airbrush — Amazing results are possible with top coat and markers alone. Get 5+ kits built before you invest in an airbrush, compressor, and the learning curve that comes with them.
Perfect Grade (PG) kits — 500+ parts, $250+, and they punish any bad habits from beginner builds. PG is a reward for a builder, not a starting point.
Scribing tools — Used to add panel lines that don't exist on the kit. Total overkill until you can build and finish a kit cleanly from what's already there.
Resin garage kits — Resin is a totally different skill set: cleanup, priming, sanding casting defects. Start with injection-plastic Bandai kits. Resin is a post-graduation project.
Water-slide decal set — Decals elevate a finished kit, but the application requires a sealed surface and patience. Learn on dry-transfer stickers from the kit itself first.
First week
Your first seven days
A short, real plan to get from gear-on-doorstep to actually playing.
Order your first HG kit before the week is over; the physical object in your hands is what makes the hobby click. · Buy
Read the instruction manual front to back before you start building. Bandai manuals are visual and intuitive; this preview run prevents the most common assembly mistakes. · Action
Cut parts from the runner in two steps: cut a few millimeters from the part first, then trim flush on the second pass. This is called 'two-pass cutting' and it eliminates most gate marks. · Learn
Panel line your first kit after full assembly, before top coat. Practice the Gundam Marker technique on the inside of a part first to get the flow and wipe timing right. · Action
Top coat outside or near an open window in light sweeping passes. Let it dry 20-30 minutes before handling. This step is what takes a kit from 'plastic toy' to 'finished model.' · Action
FAQ
Common questions
What grade should a complete beginner start with?
HG (High Grade, 1/144 scale) is the right answer for nearly every new builder. The kits are $20-35, snap-fit cleanly, look great without painting, and give you real experience with tools and technique without overwhelming you. Entry Grade works if you want the simplest possible first build. Avoid MG, RG, and PG until you've finished at least two or three HG kits.
Do I need to paint my Gunpla?
No. Modern Bandai kits are color-accurate straight from the box: the molded plastic colors match the mobile suit design. Panel lining the recessed grooves with a Gundam Marker and sealing with a matte top coat is 80% of the visual impact that painting achieves at 20% of the effort. Most builders go paint-free for years and are happy with the results.
What are nub marks and how do I avoid them?
Nub marks are the small white stress marks left where you cut a part from the runner. They happen when the plastic is compressed during cutting. The fix: use sharp nippers (Tamiya or God Hand) and cut in two passes: first a few millimeters from the part, then trim flush on the second cut. Sanding with 400-grit and then 1000-grit sandpaper removes any remaining marks.
How long does a typical HG kit take to build?
Most HG kits take 3-8 hours to assemble fully, depending on complexity and your pace. First kits always take longer while you learn the two-pass cutting technique and reading Bandai's instruction style. An MG kit runs 15-30 hours. Don't rush: the process is the hobby.
Is Gunpla a good hobby for apartments?
Yes, with a caveat: the building process is entirely apartment-friendly (no fumes, no mess beyond plastic shavings). The one exception is top coating: lacquer sprays need ventilation. Spray outside, near an open window, or on a balcony. Many builders do this in the hallway or on a fire escape with no issues.
What's the difference between HG, RG, MG, and PG?
HG (High Grade) is 1/144 scale, 150-300 parts, 3-8 hours. RG (Real Grade) is also 1/144 but with a complex inner frame and 300-500 parts. MG (Master Grade) is 1/100 scale with a full inner frame, 300-600 parts, 15-30 hours. PG (Perfect Grade) is 1/60 scale, 500+ parts, and can take 40+ hours. Start with HG.
r/Gunpla — The largest Western Gunpla community. Beginner megathread is pinned and comprehensive. Post your WIP photos; the community is welcoming and technically helpful.
Bandai Hobby Site — The official source for all kit grades, release announcements, and build instructions. Check here when you're unsure about a kit's grade or complexity.
GundamInfo — Official anime streaming site for Gundam series. Understanding which timeline your kit comes from makes the build feel more meaningful.
Gunpla Tutorial Series (YouTube) — Search for HG beginner build tutorials; multiple creators run excellent step-by-step series. Watching one build-through before your first kit prevents most beginner mistakes.
Hobby Link Japan — The most reliable source for kits not available on Amazon, especially older HGUC and rare releases. Ships internationally.
Dalong.net — Unofficial review database with runner shots, part counts, and build photos for nearly every kit ever released. Check here before buying an unfamiliar kit.
As an Amazon Associate, JustBeginning earns from qualifying purchases.
We may also earn commission from other affiliate programs linked on this
page. Editorial recommendations are independent; we don't choose
products based on commission rates.
Product prices and availability are accurate as of the date and time
indicated and are subject to change. Any price and availability
information shown on Amazon at the time of purchase will apply.
Our top pickBandai Hobby HGCE 1/144 Freedom Gundam


 Best starter