Lapidary (cutting, grinding, and polishing rough stones into polished gems) is one of the most satisfying hobbies you can do at home. A rock tumbler turns rough pebbles into glossy stones while you sleep. A flat-lap opens the door to real cabochon work. Here's what to buy first.
By Colin B. · Published May 24, 2026 · Last reviewed June 21, 2026
A Lortone 3A tumbler + grit kit + rough stones + safety glasses runs about $140-180 to start. A more complete setup with a larger tumbler and more material lands around $250. The flat-lap machine ($400+) is firmly in the 'after you're hooked' category.
We earn commission on qualifying Amazon purchases — see our
affiliate disclosure.
Price tiers and budget totals shown above are editorial estimates;
actual Amazon prices vary.
At a glance
Our top pick in each category
The fastest path through this guide — each best-starter pick by category.
Scroll for the budget and upgrade alternatives.
Start with a rotary tumbler, not a flat-lap machine. Flat-laps are incredible tools, but they require technique you'll build from tumbling first. A $100 rotary tumbler produces beautiful polished stones and teaches you how stone hardness, grit stages, and polishing compounds actually work. Most serious lapidaries still use both.
Tumbling takes weeks, not hours. A standard rotary cycle is three to four weeks, a week per grit stage plus a final polish stage. Set up your tumbler over a weekend, check in weekly, then admire the results at the end. The patience is part of the hobby.
Stone hardness matters. Mohs 6-8 stones (agate, jasper, petrified wood, quartz) tumble beautifully together. Don't mix hard and soft stones in the same batch or the soft ones get ground to dust. Your first kit should stick to similar hardness groups.
The gear
What you actually need
Tumblers
The tumbler is your entry point into lapidary. Rotary tumblers use a barrel of abrasive grit and water to slowly wear stones smooth over three to four weeks, the classic beginner setup. Vibratory tumblers are faster, quieter, and preserve stone shape better, but cost more. You do not need a flat-lap machine to start, but it is where the hobby goes once you are genuinely hooked.
Tumblers — what's the difference?
A few common shapes, each making a different trade.
Rotary Tumbler
Classic beginner choice, rounds stones glossy over 3-4 weeks.
Cycle time
3–4 weeks
Noise
Moderate
Result
Rounded, smooth
Best for Beginners, mixed stone kits, classic tumbled-stone look
Tradeoff Slow cycle; softens stone shapes more than vibratory
Faster and quieter, preserves shape, produces better surface.
Cycle time
1–2 weeks
Noise
Low hum
Result
Flatter faces preserved
Best for Delicate material, crystal faces, faster results
Tradeoff Costs 2x more; doesn't round stones as aggressively
Flat-Lap Machine
Grinds flat cab surfaces, real lapidary cutting, not tumbling.
Cycle time
Minutes per stone
Skill needed
Moderate
Result
Custom cab shapes
Best for Cutting cabochons, slabs, and precision gem work
Tradeoff Steep learning curve; $400+ investment; needs practice stones
Best starter
Lortone
3A Single Barrel Rock Tumbler
$$
★★★★★Our rating
Lortone has been making lapidary equipment since the 1950s and the 3A is their classic beginner tumbler. The rubber barrel holds 3 lbs of stones, the motor is quiet enough for a garage, and the machine lasts for decades with basic maintenance. This is what most lapidary beginners start with, and what most keep using years later.
What we like
Lortone is the oldest lapidary brand in the US, parts always available
Quiet enough for a garage or basement without complaints
3-lb capacity fills perfectly with a beginner rough stone kit
What to know
Ships without grit, budget an extra $20-30 for a grit kit
3-lb barrel is smaller than 6-lb models for high-volume tumbling
Includes rough stones, four-stage grit, a jewelry pouch, and a learning guide, everything for your first batch without a separate trip anywhere. The barrel is smaller (about 1 lb capacity) and the motor is louder than the Lortone, but it is a complete ready-to-go package under $60 that produces real polished stones.
What we like
Comes with rough stones, grit, and guide, truly plug-and-play
Complete first setup under $60 including everything you need
Learning guide explains the four grit stages clearly for beginners
What to know
Louder than the Lortone, less suitable for apartments or shared homes
Included rough stone quantity covers one batch only
When you are ready to run larger batches or process harder material consistently, Thumler's is the next step. American-made, heavy-duty motor, used by lapidary clubs nationwide. Takes the same grit as smaller machines. Built for years of heavy weekly use, the machine serious hobbyists eventually end up on.
What we like
American-made with an industrial motor built for heavy weekly use
Used by lapidary clubs, the proven workhorse of serious hobbyists
Heavy rubber drum reduces vibration and noise vs. budget tumblers
What to know
Overkill for occasional tumbling, Lortone 3A is plenty for most
Louder than vibratory alternatives at the same price point
Your tumbler output is only as good as your input material. The best beginner stones are agate, jasper, petrified wood, obsidian, and quartz, all Mohs 6-7, which means they tumble together without one type grinding down another. Start with a curated mixed kit to see what different stones look like polished before investing in larger lots of a single material.
Best starter
National Geographic
Rock Tumbler Refill Kit
$16.99 as of Jun 22, 2026
★★★★★Our rating· In Stock
Nine gemstone varieties (Tiger's Eye, Amethyst, Quartz, and more) plus 4 grades of grit and jewelry fastenings, all in one box. Drop it into your Lortone 3A and run a complete cycle without sourcing anything else separately. A great second kit if you bought a tumbler-only setup first.
What we like
Nine stone varieties in one kit, see the range before committing to one species
Includes 4-grade grit, no extra grit purchase needed for this batch
Jewelry fastenings included, turn your finished stones into pendants immediately
What to know
Includes grit, redundant if you already bought a separate grit kit
Stone quantity covers one batch only, buy bulk lots for ongoing tumbling
Amethyst rough is some of the most satisfying material to polish, the purple deepens dramatically once the surface is smooth. A 1-lb lot gives you enough to partially fill a barrel alongside quartz filler. A crowd-pleaser for first results and a good introduction to polishing quartz-family material.
What we like
Purple deepens dramatically with polishing, striking first results
Quartz hardness (7) tumbles reliably without over-erosion
What to know
Natural points are fragile and may chip in a rotary tumbler
1 lb doesn't fill a barrel alone, mix with compatible quartz filler
Once you know you're hooked, buying in bulk is the move. Agate and jasper are the workhorses of lapidary, hard enough to take a brilliant polish, available in a dozen color patterns, and endlessly varied. A 3-lb lot keeps your tumbler running for two or three batches at a price that makes sense once you know what you like.
What we like
Best cost per pound once you are running regular batches
Agate and jasper take a brilliant high gloss, consistently impressive
What to know
Requires sorting by size before loading, more prep than starter kits
More material than you need if still on your first tumbler batch
Tumbling works in four stages: coarse grit (80 mesh) shapes and rounds the stones, medium grit (220 mesh) smooths scratches, fine grit (500 mesh) pre-polishes, and a final polish compound produces the high gloss. Each stage takes about a week. You also need plastic pellets as filler, they cushion stones and carry grit into crevices when you don't have enough material to fill the barrel. Most beginners under-buy grit; get a 4-stage kit from the start.
Best starter
Polly Plastics
Rock Tumbler Media Grit Kit - 4 Stage
$35.49 as of Jun 22, 2026
★★★★★Our rating· In Stock
The most complete 4-stage kit for beginner tumblers. Includes coarse, medium, and fine silicon carbide grit plus aluminum oxide polish, enough for two to three full Lortone 3A batches. The included instructions match standard cycle timings. This is what most lapidary forums recommend as the first grit purchase.
What we like
Complete 4-stage system in one purchase, no hunting separate grit grades
Covers 2-3 full batches for a Lortone 3A, community-recommended quantity
Instructions match standard lapidary cycle timings for most beginner tumblers
What to know
Polish stage runs out fastest, order a backup before batch three
Silicon carbide grit works best up to Mohs 8; diamonds needed above that
Tin oxide produces a noticeably higher gloss than aluminum oxide on quartz-family stones, many lapidaries switch to it for the final polish stage after a few batches. A 4-oz jar lasts a long time because you use it in small quantities wet. The difference on agate and jasper is real and visible once you've done a side-by-side comparison.
What we like
Noticeably higher gloss on agate and jasper than standard aluminum oxide
4-oz jar lasts many batches, used in tiny quantities per cycle
What to know
Won't fix a bad pre-polish stage, thorough grit prep still required
More expensive per ounce than standard aluminum oxide polish
Plastic pellets are the unsung hero of rock tumbling. When you don't have enough stones to fill the barrel to the ideal 3/4-full level, pellets take up space and cushion smaller stones from banging into each other too hard. They also carry grit into crevices on textured stones. Every lapidary with a rotary tumbler keeps a bag on hand.
What we like
Fills barrel to the ideal 3/4-full level with small or partial stone batches
Cushions fragile stones from direct stone-on-stone impact in the barrel
What to know
Degrade over time, replace when pellets start crumbling or shedding
Easy to forget to buy until you run out mid-cycle and have to stop
Rock dust is silica, and silica exposure causes silicosis, a serious lung disease. Wet tumbling suppresses almost all dust, making it low-risk. But the moment you move to a flat-lap, trim saw, or any dry grinding, respiratory protection becomes non-negotiable. Build the habit early: safety glasses and a respirator on whenever stone is moving fast. Both items are cheap; the disease is not.
Best starter
3M
Virtua Safety Glasses - Clear Anti-Fog Lens
$
★★★★★Our rating
Stone fragments move fast and go everywhere. 3M's safety glasses are comfortable, anti-fog, and rated for impact protection, the kind you'll actually keep wearing because they don't dig into your temples. A 3-pack means one at the bench, one in your kit bag, and one as a spare.
What we like
Anti-fog coating stays clear through long grinding or tumbler-check sessions
Comfortable wraparound fit that doesn't dig into temples during extended wear
3-pack ensures one is always at the bench and one is a spare
What to know
Not a full face shield, upgrade to a shield when using a trim saw
Lenses scratch if stored loose, keep each pair in the sleeve
Silica dust is the real health hazard in lapidary work, especially when dry-cutting or grinding. The P100 filter stops 99.97% of airborne particles, including fine rock dust that a basic surgical mask or N95 won't reliably catch. The mask body is reusable; replacement filter cartridges are inexpensive. Wear it any time stone is moving fast and dry.
What we like
P100 filter stops 99.97% of particles, real silica dust protection
Reusable mask body with affordable replacement filter cartridges
More comfortable than disposable N95s for extended grinding sessions
What to know
Requires tight face seal, facial hair breaks protection entirely
Unnecessary for wet tumbling; mainly needed for dry cutting and grinding
Once tumbling isn't enough, cabochon cutting is the natural next step. A cab is a polished stone with a flat bottom and a domed top, the shape most commonly set into jewelry. You grind and polish cabs on a flat-lap machine using diamond-impregnated wheels. Dop sticks let you hold the rough stone securely while you work. You won't need this gear on day one, but you will want it by month three.
Best starter
Lapmart
Dopping Kit - Dop Sticks and Epoxy Wax (40 pc)
$68.00 as of Jun 22, 2026
★★★★★Our rating· In Stock
Dop sticks are the handles you attach to rough stones before grinding on a flat-lap. Wax bonds the stone to the stick at the right temperature, and you need several diameters to match different stone sizes. This complete kit covers the full beginner range. Low-cost and the missing link that makes flat-lap work possible, buy it when you're ready to move beyond tumbling.
What we like
Complete range of diameters to fit different stone sizes
Low-cost entry into flat-lap and cabochon work
Wax bond is strong during grinding but releases cleanly with gentle heat
What to know
Wax temperature is a skill, expect a few failed bonds before it clicks
Requires an alcohol lamp or wax pot as a heat source, not included
This is the machine most serious amateur lapidaries move to after six months of tumbling. The 8-inch spinning disk takes interchangeable diamond-grit laps from coarse through fine and polish, and you hold the doped stone against it to shape and smooth the cab surface. More precise, more satisfying, and it produces professional-grade results impossible in a tumbler.
What we like
Produces precise cab shapes a tumbler can never achieve
Interchangeable diamond laps take you from coarse to polish in one machine
Standard 8-inch size is compatible with most aftermarket diamond laps
What to know
Real learning curve, budget 20+ practice stones before a keeper
Expensive ($400-600), only worth it once you are sure about the hobby
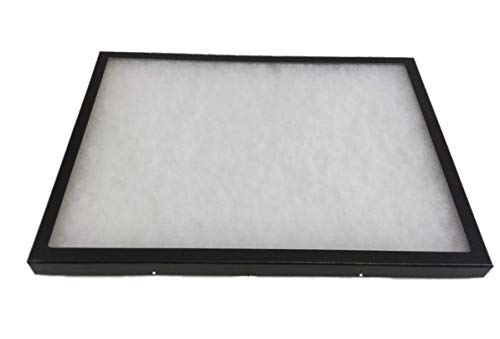
Polished stones deserve better than a shoebox. A proper display case lets you see your work, organize by species, and actually appreciate the variation between batches. Gem vials are for rough material and small cabs you haven't placed yet. Neither is expensive, and both make the hobby more satisfying, especially once you have two or three batches to compare.
Best starter
Southern Star Displays
Riker Display Case 12 x 16 x 3/4" for Collectibles Jewelry Arrowheads Relics & More
$29.89 as of Jun 22, 2026
★★★★★Our rating· Only 10 left in stock - order soon.
Riker mounts are the display standard for gemstone and mineral collectors. The glass-topped shadowbox with cotton padding inside looks professional, keeps dust off your specimens, and makes a striking display on a shelf. A 16x12 holds a full year of polished stones arranged by species. Every lapidary eventually owns several.
What we like
Glass top and cotton padding look professional on any bookshelf
16x12 size holds a full year of polished output organized by species
The recognized display format at lapidary clubs and gem shows
What to know
Cotton padding is not removable or washable, keep away from moisture
Glass lid can crack if dropped, handle carefully when moving
Gem vials are how lapidaries store loose rough material and unplaced cabs. A 100-pack of small plastic vials with caps costs almost nothing and imposes an instant organizational system, one species per vial, labeled with masking tape. Unpolished and polished versions of the same rough look completely different, and vials make the comparison easy.
What we like
Cheap enough to use freely, one vial per species without rationing
Clear plastic lets you see contents without opening every vial
Standard format at lapidary clubs and gem shows for trading rough
What to know
Caps loosen over time, rubber-band important specimens as a backup
UV can yellow the plastic after a few years in a sunny window
Rock tumbling takes weeks, not hours, and that's actually the point. Here's what happens in your first month, stage by stage, and what you'll be able to do with the results.
Lapidary is unusual among hobbies because the waiting is built in. You load your tumbler, add water and grit, seal the barrel, and then you wait a week before you even check in. There is nothing to practice in the meantime. The machine does the work.
This is not a flaw. It is the rhythm. After a month, you open the barrel to a pile of polished stones that look nothing like what you put in, and the satisfaction is entirely disproportionate to the effort. This guide covers what actually happens in that first month, week by week, so you know what to expect and what you’re looking at.
Week one: Loading your first batch
The hardest part of lapidary is getting started correctly. A badly loaded barrel produces bad results no matter what happens after it.
Here is the checklist for loading a rotary tumbler:
Fill level: The barrel should be 3/4 full of stone. Not half. Not packed to the brim. 3/4. If you don’t have enough stone, add plastic tumbling pellets to make up the difference. An under-full barrel tumbles air gaps that crash your stones together too hard; an overfull barrel doesn’t let the stones move enough for the grit to work.
Grit amount: Follow the instructions on your grit package. For a 3-lb barrel, this is typically 2-3 tablespoons of coarse silicon carbide (80 or 100 mesh). The grit goes in with enough water to cover the stones, you want a slurry, not a soup.
Stone selection: Only mix stones of similar hardness. Agate, jasper, petrified wood, and quartz are all Mohs 6-7 and tumble well together. If you mix soft limestone (Mohs 3) with hard agate (Mohs 7), the limestone turns to powder and contaminates your grit.
After loading, run the tumbler for 24 hours and check the seal. If the barrel is leaking or the stones sound like they’re smashing rather than rolling, drain and reload with more pellets or stone.
Weeks two and three: The grit stages
Each grit stage removes the scratches left by the previous, coarser stage. Skipping a stage doesn’t save time, it just guarantees a cloudy, scratched final surface.
Week 1 (Coarse grit (80-100 mesh): Shapes and rounds the stones. You will see obvious rounding and a matte, pitted surface. This is correct. The stones should look worse, not better, after week one) the coarse grit is doing heavy material removal.
Week 2 (Medium grit (220 mesh): Smooths the coarse scratches. After this stage, stones should feel slightly silky and have a finer matte texture. Hold one up to a bright light) you should see a uniform fine scratch pattern, not the deep pitting from coarse stage.
Week 3, Fine grit (500 mesh): Pre-polishes. The stones will start to show some translucency and a slight sheen. Not polished yet, but you can start to imagine what the final result will look like.
Between every stage, the barrel and all stones must be rinsed thoroughly. Any coarse grit carried into the next stage acts as a contaminant and puts coarse scratches back into work you’ve already smoothed. Rinse until the water runs clear.
The final stage uses a polish compound (typically aluminum oxide or tin oxide) rather than abrasive grit. Where grit scratches the stone surface into a finer and finer texture, polish works by a different mechanism: it burnishes the surface at a microscopic level, filling in remaining microscratches and creating the mirror-like reflectance you see in finished gems.
Polish stage typically runs 5-7 days. You want the surface of your stones dry enough to feel when you pull one out and wipe it. If you see water-clear clarity and a glossy reflection, you’re done. If you see a faint haze, run another day or two.
At the end of four weeks, drain the barrel, rinse the stones, and spread them on a clean towel. The moment the water dries off and the gloss appears is genuinely exciting, even after you’ve done it dozens of times.
What to expect: Not every stone in the batch will be perfect. Some will have fractures or inclusions that caught grit and created pits. Some will be more interesting than you expected, the translucent red jasper that looked like a brown pebble going in, for example. Pick through the batch and save the best twenty for a display case.
What to do with your first polished batch
Lapidaries do several things with their finished stones:
Display them. A Riker mount display case with cotton padding is the standard, one section per species, arranged by color or pattern. It looks professional immediately and helps you track your progress across batches.
Trade them. Gem and mineral clubs run swap meets where members trade rough material and polished stones. Your polished agate is worth something to the person who has rough amethyst to unload.
Set them. Wire-wrapping and simple bezel settings are the next step for many lapidaries. A polished cab you cut yourself looks completely different from a purchased stone, there’s a satisfaction to wearing something you made from raw material.
Plan batch two differently. Which stones surprised you? Which ones disappointed? Batch two is where you start getting selective, running a single species, or experimenting with a longer coarse stage on harder material.
What comes next
After two or three tumbler batches, most lapidaries hit the same fork in the road.
One path is deeper tumbling, sourcing more interesting rough material, experimenting with vibratory tumbling, and getting very good at reading what a stone will look like polished from what it looks like raw. This is the collecting side of the hobby, and it feeds directly into gem shows and rock hounding trips.
The other path is cabochon cutting, moving to a flat-lap machine and cutting custom-shaped stones from rough slabs. This is the making side of the hobby, and it takes you toward jewelry settings, wire wrapping, and eventually working directly with a jeweler to have your cabs set professionally. The flat-lap is a real investment (expect $400-600 for a decent beginner machine), but the results are in a completely different category from tumbled stones.
Most serious lapidaries do both. The tumbler runs in the background while you work at the flat-lap.
The only wrong move is stopping after batch one and forgetting the machine in a closet. The hobby has a real learning curve, but all of it arrives gradually, week by week, in a machine you barely have to touch.
Save your money
What you don't need yet
Beginners get pressured to buy a lot of stuff that doesn't help them play
better. Here's what we'd skip on day one.
Faceting machine — Faceting cuts precision angles on transparent gems, an entirely different discipline from tumbling or cabbing. Budget $1,500+ and years of practice. Not day-one material.
Diamond trim saw — Useful for slabbing large rough pieces into workable sizes, but irrelevant until you're past tumbling. Rock shops can slab material for you cheaply.
Ultrasonic cleaner — Handy for cleaning finished cabs and jewelry, but warm soapy water and a soft brush does the same job at the beginner level.
Cabochon templates — The oval and round copper templates on lapidary videos are for flat-lap cab cutting, you don't need them until you have a machine to use them with.
Foredom flex-shaft grinder — A serious tool for carving and engraving gem material. Impressive, expensive, and completely unnecessary for a beginner tumbler setup.
First week
Your first seven days
A short, real plan to get from gear-on-doorstep to actually playing.
Order a rock tumbler, grit kit, and rough stone starter kit, all at once so your first batch can start this weekend. · Buy
Set up your tumbler in a garage, laundry room, or basement. It runs for weeks, the motor hum is low but constant. · Action
Load your first batch: fill the barrel 3/4 full of stones, add water and coarse grit, seal the barrel. You're done with setup for a week. · Action
Join r/lapidary and post what rough stones you started with. Learn the vocabulary, Mohs scale, cab grade vs. tumbler grade, grit mesh numbers. · Action
r/lapidary · Friendly community, welcoming to beginners asking first-batch questions
While stones tumble, browse the International Gem Society's free lapidary guides. Their articles on stone hardness and grit selection are worth reading before batch two. · Learn
After one week: drain and rinse the barrel thoroughly, inspect your stones, load medium grit, restart. They should already look noticeably smoother. · Action
Find your nearest lapidary club or gem and mineral society. Many run beginner workshops and have flat-lap machines you can try before buying. · Action
AFMS Club Finder · American Federation of Mineralogical Societies, nationwide club directory
FAQ
Common questions
How long does rock tumbling actually take?
A standard four-stage cycle takes three to four weeks: roughly one week per grit stage (coarse, medium, fine) plus one week for final polish. Vibratory tumblers run faster (one to two weeks total. There is no real shortcut) rushing stages produces dull, scratched stones that look worse than what you started with.
What's the difference between a rotary and vibratory tumbler?
Rotary tumblers roll stones in a barrel, rounding them aggressively over 3-4 weeks. Vibratory tumblers vibrate a bowl, polishing without changing the stone's shape much, preserving crystal faces and natural features. Rotary is the standard beginner choice; vibratory is better for delicate material or when you want less rounding.
Do I need a flat-lap to be a 'real' lapidary?
No. Rock tumbling is real lapidary work, it just produces a different result than cutting. Most people start with a tumbler, produce beautiful polished stones, and don't pick up a flat-lap for months or years. The flat-lap opens up cabochon cutting, which is a genuinely different discipline worth pursuing once you're hooked.
Where do I find rough gemstone material?
Amazon has beginner starter kits for a first batch. After that: gem and mineral shows (most cities have several per year), local rock shops, and eBay or Etsy rough stone sellers. Local gem clubs often sell and trade material at meetings. Collecting your own from roadcuts, creek beds, and public rockhound sites is part of the hobby once you go deeper.
Is lapidary dusty or dangerous?
Wet tumbling produces almost no hazardous dust, the water suppresses it. Dry cutting and grinding with a flat-lap or trim saw produces silica dust, which causes silicosis with chronic exposure. Build the habit early: safety glasses and a P100 respirator any time stone is moving fast or dry. The habit is cheap; the disease is serious.
How much does a beginner lapidary setup cost?
A Lortone 3A tumbler ($90-110), a 4-stage grit kit ($20-25), a rough stone starter kit ($20-30), and safety glasses ($15) runs about $145-180 total. A vibratory tumbler and more material pushes you to $250-350. The flat-lap machine ($400+) is firmly in the 'after you're sure you love it' category.
International Gem Society — The most comprehensive free lapidary reference library online. Covers tumbling, cabbing, faceting, and stone identification. Start here.
Lapidary Journal Jewelry Artist — The flagship lapidary magazine. Long-form technique articles, project tutorials, and gem show coverage. Worth a subscription once you're past the basics.
r/lapidary — Friendly, active community. Post pictures of your first polished batch and ask questions, the regulars are welcoming to beginners.
Stonecutterz (YouTube) — Down-to-earth lapidary tutorials. Good for seeing what each grit stage looks like and how to diagnose common tumbling problems.
Colorado Lapidary (YouTube) — Practical flat-lap and cabochon tutorials. Watch after your first tumbler batch when you're starting to think about cutting.
American Federation of Mineralogical Societies — The national umbrella org for gem and mineral clubs. Use their club finder to locate a local lapidary society, most run beginner workshops and member swap meets.
As an Amazon Associate, JustBeginning earns from qualifying purchases.
We may also earn commission from other affiliate programs linked on this
page. Editorial recommendations are independent; we don't choose
products based on commission rates.
Product prices and availability are accurate as of the date and time
indicated and are subject to change. Any price and availability
information shown on Amazon at the time of purchase will apply.

 Best starter