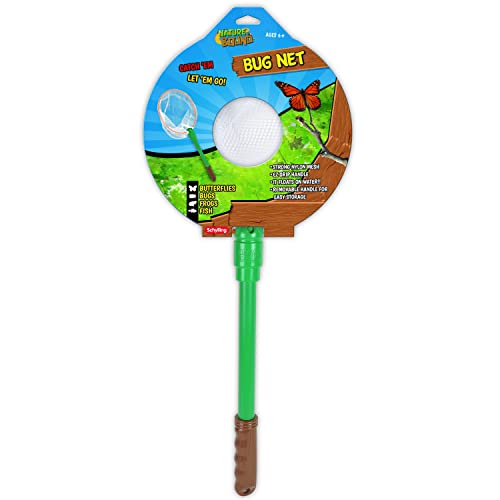
Entomology is one of the few hobbies where a $40 net and a weekend afternoon can put ten new species in your collection. The learning curve is real (spreading and pinning correctly takes practice), but the gear is simple, the science is legitimate, and the world is literally swarming with subjects. Here's exactly what you need to start.
By Colin B. · Published June 18, 2026 · Last reviewed June 18, 2026
A net, pins, and a killing jar runs $50-80 to start. Add a spreading board and a quality display case and you're at $150. One of the cheapest legitimate science hobbies out there.
We earn commission on qualifying Amazon purchases — see our
affiliate disclosure.
Price tiers and budget totals shown above are editorial estimates;
actual Amazon prices vary.
At a glance
Our top pick in each category
The fastest path through this guide — each best-starter pick by category.
Scroll for the budget and upgrade alternatives.
Check collecting rules before you go anywhere. National parks and many state parks prohibit or restrict insect collecting. Your own backyard, roadside rights-of-way, and managed nature areas with an open-collecting policy are all fine. When in doubt, photograph and release with iNaturalist instead. Your photos still count as verified science observations.
Start with what is abundant, not what is impressive. Backyard moths, garden beetles, and roadside butterflies give you the reps you need at netting and mounting before you risk wasting a rare find. Rare species can wait until your technique is solid.
Do not buy a complete beginner kit from a random Amazon listing. The nets are undersized, the pins corrode, and the spreading boards warp. Buy components separately: a proper net, genuine stainless pins, and a real foam spreading board. It costs about the same and lasts decades.
The gear
What you actually need
Aerial Nets
An aerial net is how you catch flying insects: butterflies, moths, beetles, and hundreds of species that live above waist height. For beginners, three specs matter: mesh fineness (coarser mesh tears butterfly wings), frame diameter (12-inch frames are fine for children; adults want 15-18 inches), and handle construction (collapsible handles travel better; fixed handles give more control). The fine-mesh butterfly net is the right starting point for almost everyone. Sweep nets use heavier canvas and are swept through low vegetation to dislodge beetles, weevils, and true bugs; that is a separate tool you will want after your first season.
Aerial Nets — what's the difference?
A few common shapes, each making a different trade.
Fine Mesh / Butterfly Net
The default choice: lightweight mesh that protects delicate wings.
Mesh
Fine nylon
Frame
15-18 in
Best for
Butterflies, moths, flies
Best for Beginners, butterfly and moth collectors, anyone starting out
Tradeoff Too delicate for sweeping dense vegetation
D-frame net for water beetles and aquatic insect larvae.
Frame
D-shaped
Mesh
Heavy mesh
Best for
Water beetles, dragonfly larvae
Best for Aquatic entomologists, freshwater insect collectors
Tradeoff Only useful near water; a specialized purchase for year two
Best starter
BioQuip
Professional 15-Inch Fine Mesh Aerial Insect Net
$$
★★★★★Our rating
This is the 15-inch aerial net that university entomology labs stock: fine-mesh polyester that won't tear butterfly wings, a rigid aluminum hoop, and a handle that collapses for transport. No frills, just the standard tool that working entomologists have used for decades.
What we like
University-grade construction; this net lasts for decades
Fine nylon mesh protects butterfly and moth wings from tearing
Collapsible handle packs down to 18 inches for day hike transport
What to know
Pricier than Amazon generics; the quality difference is real though
Collapsible joint can loosen over time; check before field trips
If you are not sure the hobby will stick, a $20-25 net from a reputable outdoor brand is a reasonable way in. The mesh is finer than the cheapest Amazon kits, the frame holds its shape reasonably well, and you are not out much if it turns out insect collecting is not for you.
What we like
Under $25 and fine enough mesh for butterflies and moths
Widely available and ships quickly for last-minute trips
What to know
Frame bends under repeated stress from sweep-style use
Slightly coarser mesh than BioQuip; not ideal for fragile wings
Sweeping low vegetation is one of the most productive collection methods for beetles, true bugs, and weevils. The heavy sailcloth bag survives the abuse that would destroy a fine-mesh net in a single session. After your first season collecting flying insects, this is the tool you'll add for meadow and hedgerow work.
What we like
Heavy canvas survives aggressive sweeping through dense vegetation
Turns up beetles and bugs that a butterfly net would miss entirely
What to know
Destroys butterfly wings; strictly a sweep-only tool
Heavier than fine-mesh nets; your arm will notice on long days
Preserving insects well is what separates a real collection from a pile of damaged specimens. Killing jars with ethyl acetate are the standard method: vapors work fast, the technique is humane, and specimens come out relaxed and easy to spread. For soft-bodied insects like flies, gnats, and spiders, isopropyl alcohol vials are better: they preserve tissue and prevent the bloating that ruins specimen appearance. A freezer works as a stopgap for a single catch, but it degrades wing color and tissue over time, so use it only when you are caught without a killing jar in the field.
Best starter
Carolina Biological
Insect Killing Jar, 8 oz Glass
$12.42 as of Jun 22, 2026
★★★★★Our rating· In Stock
The standard glass killing jar with an airtight cap: add a few drops of ethyl acetate to the plaster base and it's charged for a day's collecting. Carolina Biological is the same supplier universities use for entomology lab courses. Glass is essential here; ethyl acetate dissolves plastic lids over time.
What we like
Glass construction resists ethyl acetate degradation over years
Kills quickly and humanely with wings and colors intact
Plaster base recharges with just a few drops of ethyl acetate
What to know
Glass breaks in the field; keep it padded in a hard case
Ethyl acetate is a separate purchase; stock a few small bottles
Plastic Insect Specimen Storage Vials with Screw Caps (30-pack)
$9.19 as of Jun 22, 2026
★★★★☆Our rating· In Stock
For flies, gnats, midges, and any soft-bodied insect worth preserving for DNA work, isopropyl alcohol vials are the right tool. Drop the insect in, cap it, label with the collection date and location, and the specimen is preserved indefinitely. Far more practical than a killing jar when you are sorting a mixed sweep-net catch in the field.
What we like
Preserves soft-bodied insects and spiders indefinitely in alcohol
Labeled vials build a data record alongside the specimen
What to know
Not suitable for dry-mounted display; use only for soft-bodied insects
Need to supply your own isopropyl; the vials ship empty
Mounting converts a freshly killed insect into a permanent, study-quality specimen. The process needs three things: pins to hold the insect in position, a spreading board to hold wings and legs while the specimen dries, and fine forceps to handle the insect without oiling it with your fingers. Pin size matters: size 2 or 3 stainless pins work for most adult insects; anything under 5mm needs micro-pins. Specimens take 1-3 weeks to fully dry before moving to a display case. Rushing this step is the most common beginner mistake, and you cannot undo a cracked wing.
Best starter
Phusis
Stainless Steel Insect Pins Size 2 (100-count)
$
★★★★★Our rating
Size 2 stainless pins are the de facto standard for most adult insects, from medium-to-large beetles to butterflies and moths. Stainless steel is non-negotiable: nickel-plated or plain steel pins rust in humid storage and stain specimens irreversibly within a year. University labs use BioQuip; these will outlast your collection by decades.
What we like
Stainless steel will not rust or stain specimens over decades
Size 2 works for the vast majority of adult insects
100-count lasts a full season of moderate collecting
What to know
Too large for tiny insects under 5mm; need micro-pins for those
No storage case included; keep in the supplied paper sleeve
A foam spreading board holds insects in the correct position while their exoskeleton hardens over 1-3 weeks. The adjustable EVA foam format works for a range of insect sizes, from small moths to large beetles. The central groove accommodates the body; wings are spread across the foam with tracing paper strips and extra pins.
What we like
Central groove keeps the insect body aligned while drying
Foam surface holds pins firmly without splitting
What to know
One board is never enough once you are actively collecting
Foam crumbles and degrades after 3-5 years of heavy use
Handling insects with your fingers oils the cuticle and breaks off fragile antennae and legs. Fine-point stainless forceps are the right tool for every step: moving a freshly killed insect from the jar, positioning it on a pin, adjusting wings on a spreading board. They are cheap and you will use them constantly.
What we like
Fine point positions legs and antennae without breaking them
Stainless steel cleans with alcohol between specimens
What to know
Tip can pierce soft abdomens; use the flat-nose end for delicate work
Sharp points need a cap for safe transport in the field
A good display case protects your collection from UV light (which bleaches wing color within months of window exposure) and dermestid beetles (a tiny pest that can destroy an unprotected collection overnight). Museum-quality entomology boxes have UV-blocking glass and a tight-fitting lid that excludes pests. Riker mounts are a simpler option for smaller or casual displays: cotton-filled frames where insects rest against the glass without pinning, ideal for a wall but not for a working scientific collection. Choose based on whether you want a display or a study collection.
Best starter
Southern Star
Classic Riker Mount Display Frames for Insects
$
★★★★★Our rating
Riker mounts are the best beginner display option: cotton-filled frames where insects rest against glass without pinning. They look great on a wall, require no spreading expertise, and cost a fraction of a museum box. The limitation is that insects are not accessible once sealed, so they are ideal for display but not for a working scientific collection.
What we like
No spreading or pinning required; press specimens into cotton and seal
Wall-displayable and professional-looking at a low entry cost
What to know
Specimens not accessible once sealed; swapping is difficult
No UV blocking; noticeable fade after a year in direct light
★★★★☆Our rating· Only 9 left in stock - order soon.
A real entomology box with a polished wood frame, glass top, foam pinning floor, and tight-fitting lid. EISCO's version is the kind of box university labs use: sturdy enough to protect your collection for decades, with a foam floor that holds pins cleanly. Buy one for your first serious pinned display and add boxes as your collection grows.
What we like
Foam floor holds insect pins cleanly at the correct height
Tight-fitting lid keeps dermestid beetles and humidity out
What to know
Significant upfront cost; justify once your pinned collection grows
Heavier than wall frames; needs shelf or cabinet storage
Identification is the payoff of the whole hobby: matching a specimen to a species name and placing it in its ecological context. For North America, two field guides cover most of what you will encounter. The Peterson guide is the most comprehensive, with detailed drawings of over 700 families. The Kaufman guide uses photographs, which some beginners find easier to match against real specimens. Neither will get you to species level without a microscope for many groups, but both will get you to family or genus, which is genuinely satisfying and useful for submitting records to citizen-science platforms like iNaturalist.
Best starter
Houghton Mifflin
A Field Guide to Insects: America North of Mexico (Peterson Field Guides)
$30.72 as of Jun 22, 2026
★★★★★Our rating· In stock
The gold-standard insect reference for North American collectors: 1,500 illustrations covering more than 700 families across all orders. The drawings are detailed enough to distinguish similar-looking species, and the family-level keys teach you to think like an entomologist. Written by Borror and White, it has been in print for 50 years for a reason.
What we like
1,500 illustrations covering 700+ North American families
Family-level keys teach entomological thinking, not just photo-matching
50 years in print; the standard reference for North American collectors
What to know
Illustrations only, no photographs; takes a session or two to adjust
Not detailed enough for species-level ID in many insect groups
The Kaufman guide uses enhanced photographs instead of drawings, making it faster for beginners to match a fresh specimen to a page. Covers 2,350 species with distribution maps and natural history notes. Not as comprehensive as the Peterson for key work, but more approachable as a first guide.
What we like
Photographs make matching a real specimen faster for new collectors
2,350 species with range maps and natural history notes
What to know
Photos show one angle; real specimens often need multiple views
Less diagnostic than Peterson for distinguishing similar families
Tracks and Signs of Insects and Other Invertebrates
$37.50 as of Jun 22, 2026
★★★★☆Our rating· In stock
Most field guides identify the insect itself. This book identifies what insects leave behind: leaf mines, galls, egg masses, frass patterns, and wood galleries. If you want to find and understand insects in the field rather than only collect them, this book changes how you see every plant you walk past. Nothing else comes close.
What we like
Completely unique: identifies leaf mines, galls, and insect signs
Doubles your field awareness; changes how you see every plant
What to know
Not a specimen ID guide; use alongside Peterson or Kaufman
Covers all invertebrates; some sections less relevant for beginners
Most insect collectors started by looking down in the grass and wondering what they just found. Here is the month that turns that curiosity into a real collection and a real skill.
Entomology has a different learning curve than most hobbies. The first two weeks are mostly outside and mostly free: you are learning to see, learning to net, and learning where insects actually live. The second two weeks are mostly at a desk, and mostly humbling: pinning and spreading are real manual skills that take repetition to get right. The good news is that both halves are genuinely absorbing, and by the end of the month you will have actual specimens to show for it.
Here is what that first month actually looks like.
Week 1: Learn to see before you collect
The most useful thing you can do before buying a single piece of gear is to download iNaturalist and photograph insects for a week. Walk a meadow, a hedgerow, a weedy vacant lot, or your own backyard with your phone and submit every insect you can photograph. The AI identification and community expert review will start to build your mental map of what lives where.
This week answers a question you cannot answer from the internet: what is actually in your local area? The insects around a suburban lawn in Ohio are different from those around a rural property in Texas, and knowing your local fauna before you start collecting tells you what to expect and what to target.
You will also notice something quickly: insects are much more abundant than you thought. Once you start looking, you stop being able to stop. Every plant is a microhabitat. Every flower has regulars. Every patch of bare soil has its own residents.
By the end of the week, you will have a reasonable sense of what common butterflies, beetles, and flies look like in your area, and you will be ready to actually catch something.
Week 2: Your first net and your first catch
Order a 15-inch fine-mesh aerial net and a killing jar kit this week. While you are waiting for them, pick up a Peterson or Kaufman field guide and read the introductory sections on insect orders. You do not need to memorize them; you just need enough context to know that a beetle is different from a fly is different from a wasp, and what the basic structural differences look like.
When the gear arrives, go somewhere with open, sunny habitat: a meadow, a field edge, a garden in full bloom. Insects are ectothermic, meaning they are most active when warm, so the best collecting time is late morning through early afternoon on a clear day.
The netting technique takes a few sessions to feel natural. The basic swing is a figure-eight motion: sweep the net through the air where the insect is flying, then flip the net bag over the ring to trap the insect inside. The harder part is getting close enough without spooking the insect, and that improves with experience rather than instruction.
Your first week of collecting, aim for abundance rather than diversity. Target the common butterflies and larger beetles you identified during week one on iNaturalist. Catch, kill in the jar (takes 5-15 minutes), and keep in a small labeled envelope with the collection date and location until you are ready to mount.
A note on collecting ethics: catch only what you will mount. Killing insects for no reason serves no one. A well-maintained collection of 50 specimens you have identified and labeled is more meaningful than a jar of 200 random dead insects.
Week 3: Spreading and pinning
Spreading and pinning is the skill that actually takes practice, and the first few attempts will be humbling. Watch at least one 10-minute tutorial on YouTube before you start. The technique matters: push the pin through the correct location on the thorax, set the wings correctly on the spreading board, use strips of tracing paper to hold the wings flat, and leave the specimen to dry for 1-3 weeks without touching it.
The most common beginner mistakes:
Rushing the drying time. A wing that curls while still pliable cannot be straightened without a relaxing box. Wait the full time, even when you are impatient to see the finished specimen.
Using the wrong pin size. Size 2 pins work for most adult insects, but size 2 is too large for anything under about 5mm. Tiny insects need size 0 or 1 pins.
Handling specimens without forceps. Your fingers oil the cuticle and break fragile antennae. Use fine-point forceps for every step.
Your first few spreads will not be perfect and that is fine. The skill improves fast with repetition. By the end of the week you will have 3-5 specimens in process and a clear sense of where the technique is clicking and where it needs work.
With dried specimens in hand, open the field guide and start identifying. The Peterson guide uses a family-level key that walks you through the structural features that define each group: wing venation, leg structure, antenna shape. Work through it methodically. You will not always get to species, but getting to family or genus is genuinely satisfying and is the same level of resolution that most citizen-science platforms work at anyway.
Label each specimen with at minimum: collection date, location (GPS coordinates or town and state), and your own name or initials. These data are what make a specimen scientifically useful rather than just decorative. A specimen without locality data has essentially no scientific value.
Set up your first Riker mount or entomology display box. Arrange specimens by order or by family, label them neatly, and seal the case. Put a small naphthalene mothball inside any closed case to deter dermestid beetles, which are tiny carpet-beetle relatives that can silently destroy an unprotected collection.
What happens at month two
By the end of your first month you have the fundamentals: you can net, kill, spread, pin, and make a basic identification. Month two is when the collecting starts to become genuinely systematic. A few things that will meaningfully improve your skills from here:
Vary your habitat. If you have been collecting open meadow, try a woodlot edge, a stream margin, or a wet area. The species change dramatically with habitat, and variety is how you build a diverse collection.
Join a regional entomological society. Most states have one. Their field trips introduce you to habitats and species you would not find on your own, and the experts at these events are almost universally glad to help beginners ID specimens.
Submit to BugGuide.net. Upload photos of your best-looking mounted specimens for expert community ID. Many species require a specialist to get to the correct name, and BugGuide connects you with exactly those people.
The hobby rewards patience and curiosity in roughly equal measure. By month four or five, you will start to develop genuine taxonomic preferences: the group or the habitat that pulls you back every weekend. That specialization is when the hobby shifts from interesting to genuinely gripping.
Save your money
What you don't need yet
Beginners get pressured to buy a lot of stuff that doesn't help them play
better. Here's what we'd skip on day one.
UV blacklight moth trap — Moth trapping at night is one of the best collection methods, but it requires a power source, significant time commitment, and sorting hundreds of moths. Save it for year two once you are comfortable with the basics.
Cyanide killing jar — Some serious collectors still use potassium cyanide for instant kills, but it is genuinely dangerous, regulated in most states, and completely unnecessary for beginners. Ethyl acetate works for 99% of fieldwork.
Stereo microscope — A 10x hand loupe is all you need for the first year. A stereo microscope becomes useful for tiny insects and species-level ID in groups like flies and wasps, but that is a second-year purchase once you know you want that depth.
DNA barcoding supplies — DNA barcoding via iNaturalist partner labs is genuinely useful for citizen science, but you need a solid morphological foundation first. Do not jump to DNA before you can ID an insect to order by eye.
Rearing cages for larvae — Rearing insects from eggs or larvae to adults is fascinating but demanding. Get comfortable collecting and mounting adults before taking on live specimens.
First week
Your first seven days
A short, real plan to get from gear-on-doorstep to actually playing.
Download iNaturalist and spend an hour photographing insects in your yard or a nearby park before buying any equipment. You will learn what is in your area and build an ID baseline. · Action
iNaturalist · Global biodiversity platform. Your photos become verified scientific records.
Order a 15-inch fine-mesh aerial net so it arrives before the weekend. · Buy
Check collecting rules for your target area. National park? Off limits. Your backyard? Go for it. State park? Read the specific regulations; they vary by state. · Action
Make your first sweep through a sunny meadow, hedgerow, or garden. Swing through vegetation, invert the net quickly, and see what you catch. Release everything your first day; just observe what is there. · Action
Watch one short tutorial on basic insect spreading and pinning before you try it. Getting the first spread right saves a lot of frustration. · Learn
For common insects on private land (with permission) or public roadsides, yes, in most places. National parks and many nature reserves prohibit collecting entirely. Some species are federally protected and require a permit. Always check local rules before collecting on managed land. iNaturalist is a legal alternative everywhere: photograph and release, and your observation counts as verified citizen-science data.
Do I have to kill the insects? Can I do photography-only entomology?
Absolutely. Many enthusiast entomologists photograph and release everything. iNaturalist has over 50 million observations and uses AI plus expert review to identify species from photos. You can build a life list of hundreds of species without ever pinning an insect.
What insects should I target first as a beginner?
Common butterflies and larger beetles are the best starters. They are easy to catch, easy to identify to species, and straightforward to spread and pin. Avoid small flies and tiny beetles at first; they require micro-pins and microscopy that add complexity you don't need on day one.
How long does a pinned insect collection last?
Indefinitely, if stored correctly. Museum specimens over 150 years old remain in excellent condition in the right environment. The main threats are UV light (bleaches wing color within months in a sunny room), high humidity (promotes mold), and dermestid beetles (a tiny pest that eats dried insect tissue). A UV-glass display box with a tight-fitting lid and a mothball inside solves all three.
How much does it cost to get started?
Under $80 for the essentials: a $25-40 aerial net, a $15-20 killing jar kit, a $10-15 box of insect pins, and a foam spreading board. A display case adds $20-60 depending on quality. The field guide is $25-35. Total entry cost is well under $150.
Do I need a microscope?
Not to start. A 10x hand loupe is all you need for the first year. A stereo microscope becomes useful for tiny insects and species-level ID in groups like flies and wasps, but that is a second-year purchase once you know you want that level of detail.
iNaturalist — The largest community science biodiversity platform. Submit photos for expert and AI identification. Your observations become part of the scientific record.
BugGuide.net — Expert-curated insect identification database for North America. Submit photos for species-level ID assistance from a community of specialists.
Entomological Society of America — The professional society for entomologists. Their magazine American Entomologist has accessible content for enthusiasts, and they maintain a directory of regional entomological societies.
North American Butterfly Association — Butterfly-specific organization with counts, garden resources, and a beginner ID course. Good starting point if Lepidoptera is your primary interest.
Xerces Society — Invertebrate conservation organization. Valuable for understanding which species are imperiled and what collecting protocols to follow in sensitive areas.
As an Amazon Associate, JustBeginning earns from qualifying purchases.
We may also earn commission from other affiliate programs linked on this
page. Editorial recommendations are independent; we don't choose
products based on commission rates.
Product prices and availability are accurate as of the date and time
indicated and are subject to change. Any price and availability
information shown on Amazon at the time of purchase will apply.
Our top pickProfessional 15-Inch Fine Mesh Aerial Insect Net