You've seen the videos: someone sweeps a coil over a field and pulls a century-old coin out of the dirt. The hobby is exactly that satisfying in real life — and more accessible than it looks. One solid detector, a few simple tools, and you're ready to hunt.
By Colin B. · Published May 23, 2026 · Last reviewed June 5, 2026
Garrett Ace 300 Metal Detector
— The Garrett Ace 300 — the most recommended starter detector for good reason, with real discrimination at a fair price.
Garrett Pro-Pointer AT
— The Garrett Pro-Pointer AT: the pinpointer every serious detectorist eventually buys anyway.
A Garrett Ace 300, pinpointer, headphones, and hand digger runs about $340. You can start for under $150 with the budget detector, but the Ace 300 is worth the extra $100.
We earn commission on qualifying Amazon purchases — see our
affiliate disclosure.
Price tiers and budget totals shown above are editorial estimates;
actual Amazon prices vary.
At a glance
Our top pick in each category
The fastest path through this guide — each best-starter pick by category.
Scroll for the budget and upgrade alternatives.
Research where you can legally detect before you spend a dime. In the US there's no federal detecting license, but many city parks restrict or ban it, and federal land (national parks, monuments) is off-limits entirely. Private farmland is where most people find the best stuff — and permission is usually easier to get than you'd think. Call the owner, explain the hobby, offer to share photos of finds.
Don't buy a detector under $75. Budget units under $75 give you almost no control over discrimination — you'll dig every iron nail and bottle cap in a three-foot radius. An afternoon of constant false signals is the fastest way to hate a hobby you'd otherwise love. The Garrett Ace 300 is the sweet spot: real discrimination, real depth, no learning curve.
Your first hundred finds will be trash. That's not discouraging — that's how you learn to read signals. A pull tab and a gold ring ring up at almost identical frequencies on most detectors. The skill is in the subtle variations: the sharp chirp vs. the mushy smear, the solid repeatable tone vs. the flicker. You only develop that ear by digging everything for a while.
The gear
What you actually need
Metal Detectors
The detector is the entire hobby. Every other piece of gear is optional; the detector is not. For a first machine, you want adjustable discrimination (to filter iron), adjustable sensitivity, and a target ID display so you can learn to read signals. The Garrett Ace 300 nails all three at around $200. Multi-frequency detectors handle beach sand and mineralized soil better than single-frequency models, but they're not where you start.
Metal Detectors — what's the difference?
A few common shapes, each making a different trade.
Single-Frequency VLF
Simple, affordable, and works well in most parks and fields.
Tech
VLF, fixed frequency
Best terrain
Parks, fields, dry farmland
Starting price
~$75–$220
Best for Most beginners, park hunting, coin shooting
Tradeoff Struggles in heavily mineralized soil and wet salt sand
The Ace 300 has been the go-to beginner recommendation for years — and it still is. Eight sensitivity levels, adjustable iron discrimination, a numeric target-ID display, and a 7×10" coil that covers good ground. Garrett's build quality is solid, the manual is clear, and the forums are full of Ace 300 users who can answer every question you'll have. It's the right machine to learn on.
What we like
Real iron discrimination at $200, rare at this price in beginner detectors
Numeric target ID teaches signal reading faster than tone-only machines
Giant community of Ace 300 users on forums; every question has an answer
What to know
Control box is not waterproof, avoid surf and heavy rain
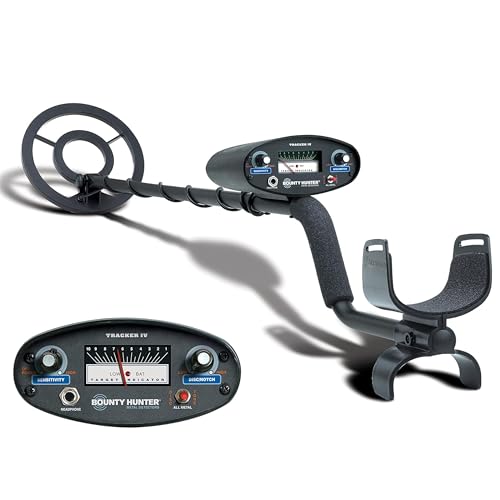
The only sub-$75 detector we'd recommend to anyone. Three modes (All-Metal, Discriminate, Tone Disc), ground balance preset for most soil types, and a 8" coil. Won't match the Ace 300's depth or display, but it functions — good for testing whether the hobby clicks before spending more.
What we like
Cheapest entry point that actually functions, good for testing the hobby
Three tone modes and a preset ground balance that works in most soil types
What to know
No numeric target ID makes learning to read signals significantly slower
Noticeably less depth than the Ace 300 for only $100 in savings
★★★★☆Our rating· Only 5 left in stock - order soon.
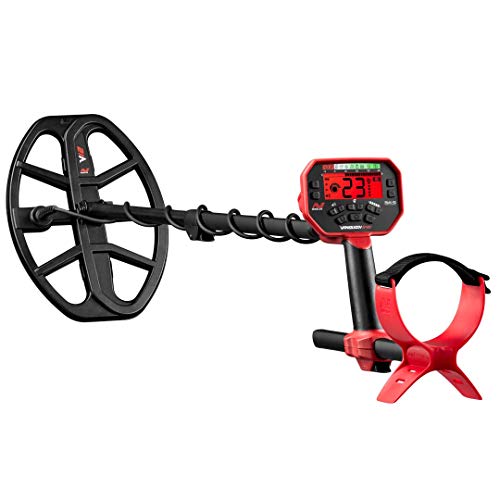
The Vanquish 540 runs Minelab's Multi-IQ multi-frequency technology — meaning it simultaneously broadcasts multiple frequencies and reads responses across all of them. This gives it a real edge in mineralized soil, wet grass, and light beach use where single-frequency machines get noisy. If you know you'll be hunting varied terrain or saltwater beaches, this is worth $80 more than the Ace 300.
What we like
Multi-IQ multi-frequency handles mineralized soil and beach sand cleanly
Folds flat for transport, easy to pack in a bag or car
What to know
Folding mechanism adds a weak point; store it carefully between hunts
The multi-frequency advantage only matters once you can read basic signals
Headphones matter more than most beginners expect. The subtle difference between a solid coin tone and a sloppy trash tone is easier to hear through headphones than through a speaker in an open field. Most detectors use a 1/4-inch (6.35mm) mono jack — the same as a guitar amp. Get headphones made for detecting; standard earbuds won't plug in.
Best starter
Garrett
MS-2 Metal Detector Headphones
$
★★★★★Our rating
The classic choice. Standard 1/4-inch plug, padded over-ear cups, volume control on the cord, and a folding design that fits in any bag. Not glamorous, but they work on every detecting session in every condition for years. The sound isolation is good enough to pick up faint signals even in noisy parks.
What we like
Standard 1/4-inch plug fits nearly every detector on the market
Faint coin signals are easier to distinguish than through a speaker outdoors
What to know
Wired cord can catch on brush and get in the way while digging
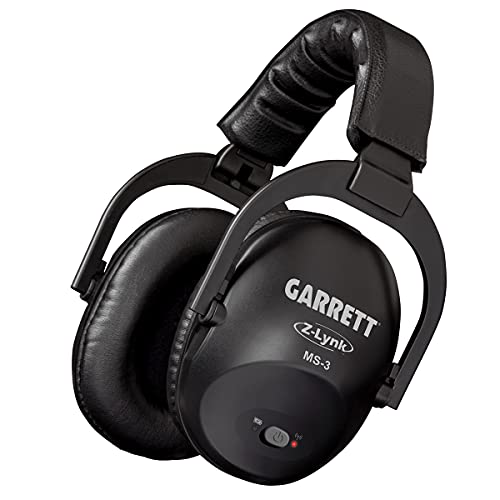
The MS-3 Z-Lynk uses Garrett's low-latency wireless system — the audio lag is short enough that you won't lose signal-to-swing timing. No cord dangling in your face, compatible with most modern Garrett detectors and several other brands via the included wireless module. A meaningful quality-of-life upgrade once you're detecting regularly.
What we like
Low-latency wireless keeps swing timing accurate, unlike standard Bluetooth
No cord to snag on brush or tangle while kneeling to dig
What to know
Z-Lynk module plugs into headphone jack; verify detector compatibility first
A pinpointer is a handheld probe you stick into the hole after you've located a target. It narrows the target from 'somewhere in this 12-inch hole' to 'right here.' Without one, recovery takes three times as long and you risk scratching good finds with your digger while probing blind. This isn't optional once you're hunting seriously.
Best starter
Garrett
Pro-Pointer AT
$109.99 as of Jun 22, 2026
★★★★★Our rating· In Stock
The Pro-Pointer AT is the standard recommendation — has been for a decade. It's fully waterproof to 10 feet, has three sensitivity modes, audio and vibration alerts, and a lost-alarm that beeps if you set it down and forget it. The orange color helps too. Almost every experienced detectorist either owns one now or owned one before upgrading to something more expensive.
What we like
Fully waterproof to 10 feet, works in rain, saturated soil, and stream beds
Lost-alarm beeps if you set it down and forget it in the field
Three sensitivity modes adapt to high-trash or mineralized ground
What to know
$135 feels steep until you've recovered your first deep target cleanly
★★★★☆Our rating· Only 1 left in stock - order soon.
If $135 is too much to spend on a probe right now, this is the backup. Basic audio alert, single sensitivity mode, no waterproofing. It works well enough in dry conditions and will save you time compared to fingertip searching. Not a long-term tool, but fine for a first season.
What we like
Cuts recovery time versus fingertip searching in dry conditions
About half the price of the Garrett Pro-Pointer AT
What to know
No waterproofing; do not use in wet sand or saturated soil
Single sensitivity setting can false-alarm in mineralized ground
You need two things: a hand digger for plugging turf (cutting a clean plug you can replace perfectly), and ideally a small probe for sandy or loose soil. The quality of your digging matters to landowners — a clean plug that you press back down is how you get invited back. Don't use a cheap garden trowel; it won't cut turf cleanly.
Best starter
Lesche
T-Handle Serrated Digger
$145.25 as of Jun 22, 2026
★★★★★Our rating· In Stock
Half the blade is serrated, which lets you slice turf roots instead of tearing them. The T-handle gives you downward force without having to kneel and lean. Stainless steel, full-tang construction, lasts literally forever. This is the digger almost every forum veteran recommends and the one you'll still be using ten years from now.
What we like
Serrated edge slices turf roots cleanly instead of tearing them
T-handle delivers downward force without excessive kneeling or leaning
Stainless steel full-tang construction that lasts decades of regular use
What to know
Heavier than a garden trowel; you'll notice the weight after a full-day hunt
A sturdy garden trowel isn't ideal for precision plug-cutting, but if you're on a tight budget this one at least has a serrated edge and is strong enough not to bend in firm soil. Acceptable for sandy fields; frustrating in dense clay.
What we like
Serrated edge handles firm soil without bending or flexing
Works adequately in sandy or loose fields on a tight budget
What to know
Wide blade makes cutting a narrow clean plug noticeably harder
Not a long-term tool; you'll want the Lesche once you're hooked
★★★★☆Our rating· Only 1 left in stock - order soon.
For beach detecting, a hand scoop replaces your digger entirely — you scoop wet or dry sand, shake it out through the holes, and check for the target in the residue. Much faster than digging individual holes in loose sand. Get this when you take your detector to the beach.
What we like
Sifting sand is far faster than digging individual holes on a beach
Works in both wet and dry sand; built-in probe narrows the target quickly
What to know
Useless in turf or firm soil, a beach-only specialized tool
You still need a separate digger for any non-beach hunting
Two small items meaningfully change the experience: a finds apron (two pouches — one for keepers, one for trash you're packing out) and knee pads for the inevitable prolonged kneeling over a stubborn target. Total cost under $40.
Best starter
Garrett
Camo Digger's Pouch
$
★★★★★Our rating
Two-pocket canvas apron that ties around your waist. One pocket for real finds (keep them separate immediately — you don't want a silver coin rattling against a screw), one for the trash you're packing out. Sounds trivial until you've tried hunting without one and ended up with finds loose in your jeans pocket.
What we like
Two separate pockets keep finds away from trash from the very first dig
Ties around any waist and stays put hands-free while you work
What to know
Small pouches fill up fast on productive sites; plan to empty often
When you find a deep target and spend ten minutes kneeling in wet grass, cheap or no knee pads become painful fast. NoCry's foam-core pads strap on over any pants, stay in place during movement, and don't slip. Detecting without them is fine for an hour; for a full day hunt they're the most comfortable small investment you'll make.
What we like
Foam-core pads stay comfortable through a full day of hunting
Strap over any pants and stay in place during field movement
What to know
Adds bulk to your knees, feels unnecessary for sessions under two hours
Most first-time detectorists dig thirty pull tabs before finding anything interesting. That's not a bug — it's how you build an ear for a real signal. Here's what the first few months actually look like.
Metal detecting has a specific learning curve that most guides don’t describe honestly: the first few hours are humbling, the first few weeks are educational, and somewhere in your first season you’ll dig something that stops your heart for a moment. That progression is predictable, and knowing what’s coming makes each phase easier to move through.
Your first hunt: expect trash
Set the detector to its recommended preset mode, put on the headphones, and go to a park where people have gathered for decades — old school grounds, fairgrounds, a park next to a church or ballfield. Swing the coil low and slow, about an inch above the ground, in overlapping sweeps like you’re mowing grass.
You’ll dig a lot of pull tabs. A lot of bottle caps. Some foil. The occasional modern penny. This is normal. This is the process.
Here’s the practical checklist for your first outing:
Dig everything. Don’t try to discriminate by signal yet — you don’t have the reference library to make that call. Every dig teaches you what a signal sounds like for a specific target in that specific soil.
Always replace your plug. Cut a clean flap, dig the target, close the plug, and tamp it down with your foot. No exceptions. This is how you get invited back.
Mark anything suspicious. Scratched ceramic, rusted iron, handmade nails — these are period markers that suggest older activity in the area. Old sites concentrate old finds.
The target-ID number on your display (or the tone, if you have a machine without a display) is not a verdict — it’s a suggestion. A pull tab and a gold ring read nearly identically on most VLF detectors. What distinguishes them is the signal’s character:
Solid vs. unstable. A good coin gives a consistent, repeatable tone as you swing across it from different angles. Trash often breaks up — it sounds solid from one direction and fuzzy from another. This happens because elongated targets (nails, foil strips) are directionally inconsistent.
Sharp vs. smeary. Coins sound tight and defined at their edges. Iron junk often smears — the audio doesn’t cut off cleanly as the coil passes the target’s edge.
High-low falsing. A signal that alternates between a high tone and a low tone as you sweep over it is almost always iron — nails, bolt heads, wire fragments. True non-ferrous targets (coins, brass, gold) don’t do this.
You’ll get this wrong constantly at first. That’s the calibration. After a few dozen digs, the patterns start to match what your ear is hearing, and you’ll find yourself correctly calling targets before you dig them more and more often. It takes about a full season to get reliably good at it.
Where to hunt and how to find sites
The hardest thing about metal detecting isn’t the equipment — it’s finding places where people lost things.
Start with public parks. Old parks that predate World War II often have coins from the 1920s–1940s hiding in them. Check your local parks department regulations before you go; most allow detecting, some require a permit.
Research historical sites. The USGS Historical Topographic Maps archive is free and covers nearly every part of the US back to the 1880s. Overlay old maps with current satellite imagery and look for roads, settlements, schools, and churches that no longer exist — abandoned gathering places concentrate old finds.
Ask for private permission. Old farmland is some of the most productive ground for detecting. Most farmers have never been asked, they’ll think it’s interesting, and the answer is yes more often than you’d expect. Bring them a photo of any significant finds. This is how you build a network of good sites.
Etiquette and the code of the hobby
Metal detecting has a genuine etiquette — the hobby’s reputation in communities and with landowners depends on it.
Fill every hole, always. An unfilled hole in a park or farmer’s field is the fastest way to get detecting banned from that property. Cut a clean plug, recover the target, replace the plug precisely, tamp it down.
Pack out more trash than you dug up. Most experienced detectorists pick up surface litter as they work. It’s a genuine goodwill gesture and it’s just the right thing to do.
Never detect without permission. On private land, always have verbal permission at minimum. On public land, know the rules. Federal land — national parks, monuments, battlefields — is off-limits, and violations carry serious fines.
Report significant historical finds. If you dig something that appears to be of genuine historical significance (a Revolutionary War artifact, a Civil War relic), research your state’s laws and consider consulting an archaeologist. The hobby’s relationship with the archaeological community is contentious; responsible detecting helps.
When it starts getting good
Somewhere in your first season — after you’ve dug a hundred targets and learned the sound of your local soil — you’ll have the session that changes everything. It might be a silver Roosevelt dime from the 1940s. It might be a wheat cent from 1918. It might be an old button with a decorative design.
What changes isn’t the find itself. It’s that your brain has finally built enough reference that you knew it was good before you dug it. The signal sounded right. You positioned your pinpointer correctly, recovered it cleanly, and held up something that’s been in the ground for eighty years.
That feeling is why people do this for decades.
The rest of your progression follows a familiar path: learning to research better sites, learning to read more subtle signals, eventually hunting more specialized locations (cellar holes, old orchards, beach wrack lines). The gear gets incrementally better. The knowledge compounds. The finds get older and more interesting.
A few things accelerate the curve in your second and third months:
Find your local club. Every region has metal detecting clubs, and they run group hunts on permitted land you couldn’t access solo. The FMDAC directory links to clubs by state. This is the single fastest way to access better sites.
Go deeper on site research. Old newspaper archives (many available free through your public library), county deed records, fire insurance maps, and local history societies all point to old activity. The people who find the best stuff do serious desk research.
Learn your soil. If your area has heavily mineralized red clay, your detector’s ground balance and sensitivity settings matter a lot more than in neutral sandy soil. Ask in r/metaldetecting what settings work in your specific region.
Save your money
What you don't need yet
Beginners get pressured to buy a lot of stuff that doesn't help them play
better. Here's what we'd skip on day one.
A high-end multi-frequency detector ($600+) — The Minelab Equinox 800 or XP Deus II are excellent machines — after you've learned to read signals on a simpler detector. Jumping straight to advanced tech means you won't know whether a missed signal was user error or machine limitation.
Extra search coils — A larger coil covers more ground but loses depth on small targets; a smaller coil gives better separation in trash-heavy areas. Both are legitimate reasons to swap coils — eventually. For your first season, the stock coil is the right coil.
Finds cleaning and display supplies — It's tempting to polish your first coins. Don't — cleaning a coin destroys its numismatic value and patina. Learn to identify what you've found first. Significant finds should be assessed by a numismatist before you touch them.
A GPS ground-mapping system — Useful for marking productive spots and tracking where you've already swept. Not useful until you have productive spots to mark. Wait until your second season.
Metal-detecting-specific software subscriptions — Apps for historical maps are genuinely useful research tools — but the free options (USGS historical topographic maps, old fire insurance maps at the library) are just as good for beginners.
First week
Your first seven days
A short, real plan to get from gear-on-doorstep to actually playing.
Research your local park regulations before you go anywhere. Call the parks department if the website is unclear. · Action
Order your starter detector so it arrives before the weekend. · Buy
Practice in your backyard. Bury a dime at 3", 6", and 8" and learn what each depth sounds like on your detector. This is the most useful 30 minutes you'll spend. · Action
Do your first real hunt in a park where people have gathered for decades — old school grounds, fairgrounds, parks near churches. Anywhere people dropped things for a long time. · Action
Join the community and post your first finds — even the trash. · Learn
r/metaldetecting · Active, friendly community. Good for ID help and site suggestions.
TreasureNet Forums · The oldest and largest metal detecting forum. Deep archives of site research advice.
FAQ
Common questions
Where can I legally metal detect?
In the US: private land (with the owner's permission, which is usually easy to get), most state and local parks (check regulations — many allow it), and some beaches. Off-limits: all national parks, national monuments, and archaeological sites. Always research before you go; rules vary dramatically by county and city.
What will I actually find?
Mostly modern coins, pull tabs, bottle caps, and foil. That's not a disappointment — that's the baseline. The ratio shifts as you develop signal-reading skills and find better research sites. Old coins, rings, and military buttons are real and findable, just not your first-hour experience.
Do I need a license to metal detect?
No federal license is required in the US. But local regulations matter. Some parks require a permit, some ban detecting entirely, and some have seasonal restrictions. Always check before you go.
What's a pinpointer and do I really need one?
A pinpointer is a handheld probe that narrows a target from 'somewhere in this hole' to 'right here.' It cuts recovery time dramatically and prevents you from scratching good finds by digging blind. You can technically detect without one, but most detectorists buy one quickly after their first frustrating recovery experience.
What is ground balance and do I need to adjust it?
Ground balance compensates for the mineral content in soil, which can create false signals. Most beginner detectors handle this automatically. If you're getting a lot of background noise in your area, manually ground-balancing the detector quiets it down significantly — your manual explains how.
How deep can a metal detector go?
A good beginner detector like the Ace 300 reliably finds coins at 6–8 inches and larger objects deeper. Depth depends on target size, soil conditions, and the detector. Depth claims in marketing are for ideal conditions — plan for 6 inches as your practical expectation for small targets.
r/metaldetecting — The most active beginner-friendly community. Post your finds for ID help, ask site research questions, read the wiki. Friendly and welcoming to newcomers.
TreasureNet — The oldest detecting forum on the internet. Massive archives of state-by-state site research advice, machine reviews, and ID help. Slower pace than Reddit but deeper knowledge.
Dankowski Detectors (YouTube) — One of the most respected channels for beginner tutorials and machine comparisons. Patient, well-organized, honest about expectations. Start here.
Aquachigger (YouTube) — Hunt videos in fields, parks, and old homesites. Great for calibrating what to expect — real hunts with mostly trash and occasional great finds. Good for learning how experienced hunters work a site.
USGS Historical Topographic Maps — Free archive of historical USGS topo maps going back to the 1880s. Overlay them with current maps to find old roads, settlements, and gathering spots that no longer exist. The single most useful free research tool available.
Successful Coin Hunting — Charles Garrett — The foundational text on coin shooting by the founder of Garrett Metal Detectors. Old but the advice is timeless. Covers site research, signal reading, and etiquette.
As an Amazon Associate, JustBeginning earns from qualifying purchases.
We may also earn commission from other affiliate programs linked on this
page. Editorial recommendations are independent; we don't choose
products based on commission rates.
Product prices and availability are accurate as of the date and time
indicated and are subject to change. Any price and availability
information shown on Amazon at the time of purchase will apply.

 Best starter