Growing plants without soil sounds like science fiction until you see a tomato plant with roots dangling in nutrient-rich water and zero pests in sight. Hydroponics is surprisingly beginner-friendly; once you pick the right system, Here's what you actually need to start, what to skip, and why that first decision matters more than anything you'll buy after it.
By Colin B. · Published May 23, 2026 · Last reviewed June 4, 2026
A Kratky jar setup costs almost nothing. A full DWC system with lights and nutrients runs $200–350. You can go bigger fast, but you don't need to on the first grow.
We earn commission on qualifying Amazon purchases — see our
affiliate disclosure.
Price tiers and budget totals shown above are editorial estimates;
actual Amazon prices vary.
At a glance
Our top pick in each category
The fastest path through this guide — each best-starter pick by category.
Scroll for the budget and upgrade alternatives.
Pick your system before anything else. Kratky, DWC, NFT, and ebb-and-flow all use different equipment and have very different learning curves. Most beginners should start with Kratky (for herbs and lettuce) or a single-site DWC bucket (for tomatoes and peppers). The variants chart below explains the tradeoffs. Don't buy lights and nutrients for a system you haven't chosen yet.
Start with easy crops. Lettuce, basil, and spinach are forgiving: they grow fast, forgive pH swings better than fruiting plants, and give you a harvest in 4-6 weeks. Tomatoes and cucumbers are for your second grow. Cannabis is for your third.
pH is the job. More hydroponic plants die from unmonitored pH drift than from anything else. Nutrient solution should stay between 5.5 and 6.5 for most crops. Buy a real pH meter before you buy anything else optional (not strips, not drops). Strips lie.
Your system is the decision that determines everything downstream: which nutrients apply, which grow medium works, how much maintenance you'll be doing. Kratky is passive (no pump, no electricity for water, perfect for herbs and lettuce on a windowsill). DWC is more active and handles any plant. NFT and ebb-and-flow are for growers who've already done one successful grow and want more control.
Growing System — what's the difference?
A few common shapes, each making a different trade.
Kratky (Passive)
No pump, no electricity, no moving parts. Roots hang in still nutrient solution that slowly depletes. Refill when low.
Setup time
< 30 min
Best crops
Lettuce, herbs, spinach
Maintenance
Check every 3–5 days
Best for Complete beginners, small spaces, windowsill growing
Tradeoff Not suitable for large fruiting plants; limited to calmer crops
A thin film of nutrient solution flows over bare roots in sloped channels. Highly efficient, no growing medium needed.
Setup time
2–4 hours
Best crops
Lettuce, herbs, strawberries
Maintenance
Daily monitoring; pump failure = dead plants fast
Best for Growers on their second or third system, high-volume lettuce
Tradeoff No root buffer. A pump failure kills plants within hours
Ebb & Flow (Flood & Drain)
A timer floods the grow tray on a schedule, then drains back to the reservoir. Most flexible but most complex setup.
Setup time
3–5 hours
Best crops
Almost anything including large fruiting plants
Maintenance
Multiple parts to monitor; most complex
Best for Experienced growers, large plant varieties, experimenting with media
Tradeoff Most moving parts; steepest learning curve of any home system
Best starter
General Hydroponics
WaterFarm Complete Kit
$$
★★★★★Our rating
The WaterFarm is a single-site DWC system that's been the standard beginner kit for over 20 years. It includes the bucket, drip ring, net cup, media, air pump, and tubing: everything you need minus nutrients and a light. There's no mystery about assembly, and GH's support materials are excellent. Handles tomatoes, peppers, and cucumbers without outgrowing it.
What we like
Single-site DWC with everything in one box: bucket, pump, tubing, media
Two decades of proven reliability with excellent documentation
Grows tomatoes and peppers, not just herbs and lettuce
An all-in-one countertop system with a built-in full-spectrum LED light and recirculating pump, all in one unit. Grow six sites of herbs or lettuce without buying a separate light, reservoir, or pump. Produces a real harvest in 4-6 weeks and is genuinely the lowest-barrier entry into hydroponics.
What we like
Built-in full-spectrum LED means no separate light purchase
Six growing sites for herbs and greens in one compact unit
Real harvests in 4-6 weeks with no prior experience needed
What to know
Integrated LED only handles greens and herbs. Fruiting plants underperform
If the built-in pump or light fails, the whole unit needs replacing
Eight net-cup sites sharing a central reservoir: the step up when one plant isn't enough. Each site runs off the same air pump and nutrient solution, so you're still only managing one pH reading. Runs tomatoes, peppers, and cucumber in the same system simultaneously.
What we like
Eight sites share one reservoir, so one pH check covers everything
Handles mixed crops at once: tomatoes, peppers, cucumbers
What to know
Larger reservoir means bigger nutrient costs and more volume to stabilize
Not for first-timers. Do at least one solo plant first
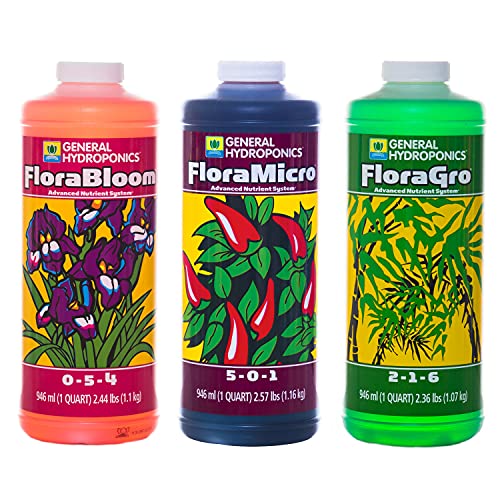
Hydroponic plants get everything from the water, so the nutrients you use are the soil substitute. You need nitrogen, phosphorus, potassium, calcium, magnesium, and trace elements in specific ratios that shift as the plant moves from vegetative growth into fruiting. A 3-part liquid system lets you tune that ratio precisely. A simpler 2-part or 1-part system makes fewer decisions for you. Either works for a first grow.
Best starter
General Hydroponics
Flora Series (3-part Liquid)
$39.75 as of Jun 22, 2026
★★★★★Our rating· In Stock
GH literally developed nutrients for NASA's plant growth experiments, and Flora has been the industry standard for 40+ years. Three bottles mixed in different ratios by growth stage. Exceptional documentation, a free mixing calculator online, and stocked at every garden center. Once you see how the ratios shift, nutrient chemistry stops being mysterious.
What we like
NASA-tested formula with 40-plus years of grower validation
Free online mixing calculator with guidance for every growth stage
Lucas Formula simplifies it to 2-part for beginners who want less math
What to know
Three-bottle system requires following a chart; not as grab-and-go as powder
Slightly more expensive per grow than single-component nutrients
One dry powder, one scoop per gallon for vegetative growth. Much simpler than a 3-part liquid: you lose some fine-tuning control, but you gain simplicity. Good for herbs and lettuce where you're mostly in veg the whole crop. Pair with MaxiBloom when you want to push fruiting plants.
What we like
Single dry powder: one scoop per gallon, no juggling multiple bottles
Lower cost per grow than liquid nutrient systems
Pairs with MaxiBloom for a complete veg-to-flower system
What to know
Dissolves poorly in cold water, leaving particles that skew EC readings
Less tunable by growth stage than a 3-part liquid system
The main selling point is 'pH Perfect' technology: the formula buffers your reservoir to the ideal pH range automatically, reducing how often you need to manually adjust. It's a real quality-of-life difference once you know what you're doing and want less babysitting. More expensive than GH, but the time savings add up across multiple plants.
What we like
pH buffering technology cuts daily pH correction to once or twice weekly
Real time savings once you are managing more than one plant
What to know
Only works with soft or RO water. Hard tap overpowers the buffer
pH tells you how acidic or alkaline your nutrient solution is. Most crops want 5.5-6.5. Outside that range, plants lock out specific nutrients even when those nutrients are present; they just can't absorb them. EC (electrical conductivity) tells you how concentrated your nutrient solution is. Too high and roots burn; too low and plants starve. You need both meters. This is non-negotiable.
Best starter
Apera Instruments
AI209 pH20 pH Meter
$$
★★★★★Our rating
The PH20 is the meter most experienced growers recommend for beginners on a budget. Two-point calibration, replaceable electrode (so it's not disposable when it drifts), and a waterproof housing that actually holds up to wet hands around a reservoir. More accurate and more durable than the cheap pens that flood Amazon.
What we like
Replaceable electrode makes it a real instrument, not a throwaway pen
Waterproof housing survives wet hands around a reservoir
More accurate and durable than the cheap pens flooding Amazon
What to know
Calibrate before first use and every 2-3 weeks; not fire-and-forget
Needs storage solution to keep the electrode alive between uses
A two-meter bundle under $30 gives you pH and EC (as TDS) readings at once, which is the practical minimum for running a hydroponic reservoir. Accuracy is adequate for beginners, not research-grade, but good enough to keep plants healthy if you calibrate it before use.
What we like
pH and EC together under $30: the practical minimum for any system
Accurate enough to catch a runaway pH drift before plants show symptoms
What to know
Budget pH meters lose accuracy fast. Plan to replace within 6-12 months
Recalibrate before every major reservoir change or readings drift
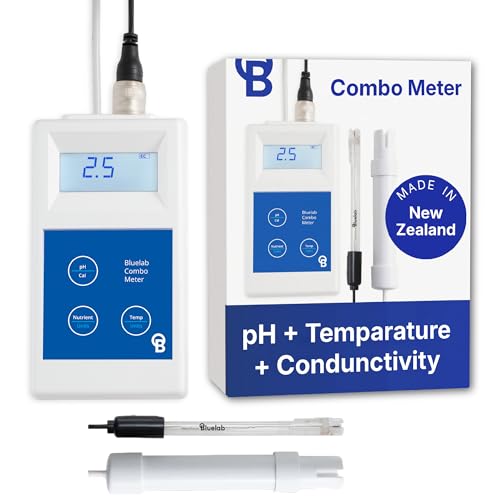
pH, EC, and temperature in one device with laboratory-grade accuracy. The Bluelab Combo is what you see at every serious hydroponic operation and commercial greenhouse. The probes are user-replaceable and last years with proper care. Once you've killed a reservoir trying to trust a cheap meter, this starts looking like a bargain.
What we like
pH, EC, and temperature in one device with commercial-grade accuracy
User-replaceable probes last years with proper care
What to know
Higher upfront cost than entry-level meters
More than a first-time herb grower needs on day one
If you're growing near a south-facing window with 6+ hours of direct sun, you can skip this category for herbs and lettuce. Almost everyone else needs a grow light. Modern LED panels are the clear answer: they've dropped dramatically in price and run cool enough to hang close to plants without burning them. Match your light to your footprint, not your ambitions: a 2×2 foot space needs a 100-200W LED.
Best starter
Spider Farmer
SF-1000 LED Grow Light
$69.99 as of Jun 22, 2026
★★★★★Our rating· In Stock
The SF-1000 covers a 2×2 foot vegetative footprint (3×3 for herbs and greens that don't need flowering intensity). Samsung LM301B diodes, dimmable driver, and a build quality that's lasted years in real-world grows. Spider Farmer has become the go-to recommendation on r/hydro for exactly this reason: it's not marketing hype, it's a light that works at a fair price.
What we like
Samsung LM301B diodes deliver real yields in a 2x2 foot footprint
Dimmable driver lets you match intensity to plant stage
Build quality that outlasts cheaper panels in multi-year grows
What to know
Hang 18-24 inches above seedlings early. Too close causes light stress
Overkill for a herb-only Kratky jar setup under a shelf
For a Kratky jar setup or a small herb rack, T8 LED strips mounted under a shelf beat most panel lights at a fraction of the cost. Full-spectrum, linkable, and they run cool. Not enough for tomatoes or fruiting plants, but for a 2–4 jar lettuce/herb setup they're excellent value.
What we like
Full-spectrum T8 strips at a fraction of panel cost for small setups
Linkable and cool-running with no heat management needed
What to know
Not enough intensity for fruiting plants. Tomatoes will stretch and underperform
★★★★☆Our rating· Only 10 left in stock - order soon.
Quantum board technology from the company that pioneered it. The HLG 100 produces more usable light per watt than almost anything else in the 100W class, and growers who've switched from blurple panels to HLG boards call it a revelation. Built in the USA, backed by an actual warranty, and the 4000K spectrum works from seed to harvest without swapping bulbs.
What we like
Quantum board efficiency measurably outperforms blurple panels per watt
Built in the USA with a real warranty and replaceable components
What to know
Higher upfront cost than most entry-level LED panels
Order direct from HLG or Amazon. Limited retail distribution
Hydroponic plants still need something to anchor their roots in the net cups. Clay pebbles (LECA/hydroton) are the default: inert, reusable, drain freely, and work in every system. Rockwool cubes are what you start seeds in before transferring to the main system. You need both on your first grow.
Best starter
Hydrofarm
Hydroton Original Clay Pebbles (10L)
$25.96 as of Jun 22, 2026
★★★★★Our rating· In Stock
Hydroton is the clay pebble brand most growers default to. Pre-rinsed, consistent size, and pH-neutral. Rinse them again before use anyway; it takes two minutes and removes any loose dust that would cloud your reservoir. A 10L bag handles 6-8 two-inch net cups with room left over for a second grow.
What we like
Pre-rinsed, consistent-size pebbles that stay pH-neutral
Reusable across multiple grows after sterilizing
What to know
Rinse again before use anyway to clear loose dust from the bag
Germinate seeds in these before they go into your net cups. Rockwool holds moisture at the root zone and drains enough to prevent damping off. Soak in pH 5.5 water before use (rockwool is naturally alkaline), place one seed per cube, keep under a humidity dome until sprouting. The established seedling transfers straight into the clay pebbles with zero root disturbance.
What we like
Retains moisture while draining enough to prevent damping off in seedlings
Seedling transfers straight into clay pebbles with zero root disturbance
What to know
Pre-soak in pH 5.5 water required. Fresh rockwool is alkaline enough to stall germination
Single-use only. Clay pebbles can be sterilized and reused; rockwool cannot
You don't need a greenhouse or an agriculture degree to grow food hydroponically. You need the right system, a basic grip on pH, and the patience to not over-tinker for the first few weeks. Everything else you'll figure out as you go.
Hydroponics has a reputation for being technical and demanding. It isn’t, not for the first grow, and not if you pick the right system. The first month is almost entirely about learning to read your nutrient solution: what the numbers mean, when to top off, when to change it out completely. The plants do the rest.
Here’s what that month actually looks like, week by week.
Week 1: Setup and germination
The biggest decision you’ve already made: which system you’re running. If you chose Kratky (the passive, no-pump method), your setup is a jar, some net cups, clay pebbles, and nutrient solution. If you chose DWC, add an air pump and airline. Either way, week one is mostly germination: getting seeds started before the main system matters at all.
Germinate in rockwool. Soak a rockwool starter cube in pH 5.5 water for 30 minutes. Place one seed per cube, about half a centimeter deep. Put the cubes in a humidity dome or cover with plastic wrap, and set them somewhere warm (70–78°F is ideal). Most lettuce and herb seeds sprout in 3–5 days. Tomatoes and peppers take 7–10.
Mix your first nutrient solution. While seeds are germinating, mix your reservoir. Follow the nutrient manufacturer’s chart for vegetative growth at half-strength. Then measure pH and adjust to 5.8–6.2. Write down what pH you started at, how much up/down solution you added, and the final reading. This log becomes useful fast.
Check EC. Electrical conductivity tells you how concentrated your solution is. For seedlings going into their first reservoir, 0.8–1.2 EC is a safe starting range. Higher is fine for established plants; lower is safer while roots are new.
Once your seedling has its first true leaves (the pair after the seed leaves), it’s ready to move into the main system. Place the rockwool cube into the net cup and fill around it with rinsed clay pebbles. The cube should sit about halfway submerged in the nutrient solution; roots need to reach the solution, but the crown of the plant needs air.
Check pH every day this week. pH drifts, especially in a new reservoir where the plants haven’t yet established a stable uptake rhythm. 5.8–6.2 is your target. If it drifts toward 7.0, a few drops of pH Down brings it back. Keep your adjustments small: overshooting in the other direction is easy.
Don’t change the nutrient solution yet. New growers often dump and refill too early. The first week’s solution is fine as long as pH and EC are in range. Top off with plain pH-adjusted water as the level drops (the plant is drinking and evaporation is taking the rest).
Look at the roots. By day 5–7, you should see white root tips poking out of the net cup into the solution. Healthy hydroponic roots are white and fuzzy. Brown, slimy, or matted roots are a problem, usually caused by light leaking into the reservoir and growing algae. Wrap any clear containers in foil or opaque tape.
Week 3: Vegetative growth kicks in
This is when the plant starts noticeably changing day to day, and where most first-time growers get excited enough to start over-tinkering. Don’t change anything that’s working. If your pH is stable and the plant looks healthy, your job is to check and log, not to adjust.
What “healthy” looks like:
Leaves are deep green (pale yellow means nitrogen deficiency; more likely it means pH is off)
Leaves have no spots, curling, or crispy edges (those mean calcium or magnesium issues; check pH first before adding anything)
The plant is visibly larger than it was two days ago
Your first full reservoir change. At day 14–21, dump the reservoir and mix fresh nutrient solution. This flushes any salt buildup and resets your ratios. The plant’s nutrient demands have grown since week one; mix your new batch at the full-strength recommendation on the label.
For lettuce and most herbs, week four is harvest week. Lettuce is ready when the outer leaves are the size you’d eat; you don’t have to pull the whole plant. Harvest outer leaves and let the center keep growing. A single lettuce plant can produce for 6–8 weeks this way.
For tomatoes and peppers, week four is when vegetative growth transitions toward flowering. You’ll see the first small flowers forming. This is when you switch your nutrient ratio toward the bloom/fruiting formula (more phosphorus, less nitrogen). The plant will tell you it’s ready: growth slows, flower sites appear, and the foliage looks slightly darker as the plant starts directing energy inward.
Take notes before starting a second grow. The most useful thing you can do at the end of month one is write down: what worked, what the most annoying part was, what you’d change about the system, and whether the crop matched your expectations. Your second grow will be dramatically smoother than the first, and it mostly comes from remembering what you actually did, not what you planned to do.
Almost every failed first hydroponic grow comes from one of four things:
pH out of range. The silent killer. Plants look fine for a few days while nutrients lock out, then start showing deficiency symptoms that look like totally different problems. If your plant looks sick, check pH before you do anything else.
Too much light too close. LEDs have come a long way, but “full power at 6 inches” will bleach and stress a seedling. Start with lights dimmed or raised high, then lower gradually as the plant hardens off.
Algae in the reservoir. Green water and slime on roots mean light is getting into your reservoir. Cover every light-transmitting surface. Algae competes for oxygen and nutrients, and the slime it creates coats roots enough to cause root rot.
Over-adjusting. Adding nutrients, pH up, pH down, and then more nutrients in the same day creates a chemical soup that’s impossible to diagnose. Make one change, wait 12 hours, check again. Patience is the skill hydroponics teaches.
What to grow on your second cycle
Once you’ve got one crop to harvest, the obvious next step is scaling slightly: either a second plant in the same system, or a second system alongside the first. The crops worth trying after lettuce:
Basil and mint (fast, fragrant, cut-and-come-again for months)
Cherry tomatoes (more demanding than lettuce but extremely productive once going)
Spinach and kale (similar to lettuce, slightly more bitter, require a bit more light)
Cucumber (wants a DWC setup and a trellis, but yields are extraordinary)
The technique stays the same. Only the nutrient ratios and light intensity shift.
Save your money
What you don't need yet
Beginners get pressured to buy a lot of stuff that doesn't help them play
better. Here's what we'd skip on day one.
CO2 supplementation — CO2 enrichment helps at high light intensities in sealed rooms. At home LED wattages, ambient air CO2 is the limiting factor only in expert-level sealed grows. Ignore this for at least two years.
A reservoir chiller — Chillers keep nutrient solution below 68°F to prevent root rot and algae. Necessary in hot climates with large reservoirs. Most beginners running a single WaterFarm in a conditioned room never need one.
Reverse osmosis filtration — RO water removes minerals that interfere with precise nutrient mixing. Useful if your tap water is above 200 PPM. Test your tap first; many city water supplies work fine as-is.
A grow tent — Useful for light control and humidity management. Not necessary if you have a dedicated indoor space with no light pollution. A spare closet or shelving unit works fine for a first grow.
Automated dosing systems — Auto-dosers continuously monitor and adjust pH and nutrients. They cost $300–1,000+ and solve a problem you should first learn to solve by hand. Manual management teaches you what the plants actually need.
First week
Your first seven days
A short, real plan to get from gear-on-doorstep to actually playing.
Choose your system and crop before buying anything. Kratky + lettuce is the lowest-risk start. DWC + tomatoes if you want something more ambitious. · Action
Order your system kit and nutrients together so they arrive at the same time. · Buy
Soak your rockwool starter plugs in pH 5.5 water, plant your seeds, and put them under a humidity dome or plastic wrap until they sprout (3–7 days for most crops). · Action
Mix your first batch of nutrient solution at half-strength. Check pH and adjust to 5.8–6.2. Measure EC and write it down. This becomes your baseline. · Action
Join r/hydro for real-time diagnosis help. Attach a photo when asking questions; most problems are visible before they're measurable. · Learn
r/hydro · Reddit · active community for all system types
Epic Gardening · Kevin Espiritu's site and YouTube: the most beginner-friendly hydroponic content available
FAQ
Common questions
Do I really need a pH meter, or can I use drops?
You need a real digital pH meter. pH drop kits are imprecise and hard to read in tinted nutrient solution. Plants lock out specific nutrients when pH drifts even slightly out of range, and a $30 meter will tell you what drops can't. It's the one piece of gear you shouldn't try to save money on.
What's the easiest crop to grow hydroponically?
Lettuce and basil, by a wide margin. They're fast (harvest in 4-6 weeks), tolerate small pH swings, and tell you quickly when something is wrong. Tomatoes and peppers are fantastic hydroponic crops, but they take longer and have more specific light and nutrient needs. Get one lettuce grow under your belt first.
What's the difference between Kratky and DWC?
Kratky is passive: you fill a reservoir with nutrient solution and let the roots drink it down without a pump. It's the easiest possible system and works beautifully for herbs and lettuce. DWC uses an air pump to oxygenate the solution continuously, which keeps roots from suffocating and lets you grow larger fruiting plants. DWC needs more monitoring; Kratky is almost set-and-forget.
Can I use regular fertilizer in a hydroponic system?
Not reliably. Soil fertilizers often contain slow-release coatings, organic matter, or compounds that cause issues in solution. They cloud the reservoir, clog pumps, or deliver nutrients in forms plants can't absorb without soil bacteria. Use hydroponic-specific nutrients formulated for solution culture.
How often do I need to change the nutrient solution?
Every 7–14 days for most systems. You top off with plain pH-adjusted water between changes as the plant drinks. A full reservoir change flushes any salt buildup and resets the nutrient ratio. The reservoir gets funky faster in warm conditions. More frequent changes prevent root problems.
How much does it cost to start hydroponics?
A Kratky herb setup costs under $50 (jars, nutrients, a pH pen, some net cups, and seeds). A single-plant DWC setup with an LED light runs $150–250 depending on the light you choose. A multi-plant DWC setup with quality lights and meters runs $300–500. The equipment pays for itself in produce after a few grows.
Epic Gardening — Kevin Espiritu's site: the best beginner-friendly hydroponic and gardening resource online. His system comparison guides are genuinely unbiased.
r/hydro — Active community for all hydroponic methods. Post a photo of any plant problem and get a diagnosis within hours. The wiki has solid starter guides for each system type.
General Hydroponics Nutrient Calculator — GH's free mixing charts and calculators. Even if you're not using their nutrients, their feeding schedule explanations teach you how to read any nutrient label.
Maximum Yield Magazine — Trade publication with deep technical articles on all system types, substrate science, and lighting. More detailed than most YouTube content. Worth reading once you have a grow or two under your belt.
Lettuce Grow (YouTube) — Focused on the Farmstand system but has excellent foundational content on Kratky and NFT growing. Their harvest-to-harvest videos show realistic timelines and yield expectations.
As an Amazon Associate, JustBeginning earns from qualifying purchases.
We may also earn commission from other affiliate programs linked on this
page. Editorial recommendations are independent; we don't choose
products based on commission rates.
Product prices and availability are accurate as of the date and time
indicated and are subject to change. Any price and availability
information shown on Amazon at the time of purchase will apply.
Our top pickGeneral Hydroponics WaterFarm Complete Kit


 Best starter