Sous vide turns a $12 strip steak into something restaurant-worthy, reliably, every time. The technique is simpler than it sounds: seal food in a bag, cook it at an exact temperature, then sear hard and fast. Here's exactly what you need to get started, and what you can safely skip.
By Colin B. · Published May 24, 2026 · Last reviewed June 12, 2026
A budget circulator + Ziploc bags + a pot you own gets you started for ~$100. Add a purpose-built container, vacuum sealer, and rack and you're at ~$260.
We earn commission on qualifying Amazon purchases — see our
affiliate disclosure.
Price tiers and budget totals shown above are editorial estimates;
actual Amazon prices vary.
At a glance
Our top pick in each category
The fastest path through this guide — each best-starter pick by category.
Scroll for the budget and upgrade alternatives.
Sous vide is not faster, it's better. A medium-rare steak takes 1–4 hours instead of 10 minutes. The tradeoff is total perfection and hands-off freedom while it cooks. You set the temperature, walk away, and come back to a uniformly cooked protein. Then you spend five minutes on the sear.
You don't need a vacuum sealer to start. The water displacement method (partially submerge a Ziploc freezer bag, let water pressure push the air out, then seal) works for steaks, chicken, fish, and vegetables. Buy a real sealer once you know sous vide is going to stick.
Start with steak or chicken breast. Steak at 131°F for 2 hours is the most convincing first cook, perfectly medium-rare from edge to edge, no resting, no guessing. Chicken at 140°F for 1.5 hours converts every skeptic in the house. Start with proteins, not eggs.
The gear
What you actually need
Immersion Circulators
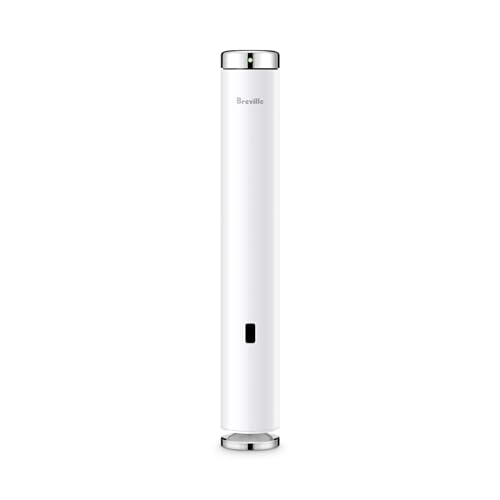
The circulator is the only truly specialized piece of equipment you need. It clips to a container, heats water to a precise temperature, and holds it there within 0.1°F. The three real contenders: Anova (the people's choice, excellent app, solid hardware, widest beginner support), Breville Joule (sleeker, more powerful, heavier app dependency), and Inkbird (budget pick that works, minus the polish). Any of the three will cook a perfect steak on day one.
Immersion Circulators — what's the difference?
A few common shapes, each making a different trade.
Budget / Manual
No Wi-Fi, manual dial. Heats fast, costs less.
Wattage
800–1000W
Connectivity
None
Price range
~$50–80
Best for Beginners who want to test sous vide before committing to a premium device
Tradeoff No guided recipes or remote monitoring; manual time/temp entry only
Anova's Nano is the most-recommended beginner circulator for good reason. Wi-Fi connected, 750W heating (adequate for 4–5 portions), whisper-quiet motor, and backed by the best beginner recipe library in the category. The Anova app has guided time/temp recommendations for every protein, useful when you don't yet have intuition for what 131°F steak actually means.
What we like
Wi-Fi connected, guided recipes in the Anova app for every protein
Most-recommended starter circulator on Reddit and Serious Eats
Clips to any container from a stockpot to a hotel pan
What to know
750W preheats slower than 1000W+ units, plan 20 min to temp
App is useful but required for guided features; not for offline cooks
If you're not sure sous vide will stick, the Inkbird is your proof-of-concept purchase. Manual LCD dial (no app required), 1000W heating, and a surprisingly solid build for the price. Lacks Wi-Fi, but that's the only real compromise, it cooks the same perfect water bath as a $200 Joule.
What we like
1000W heats water faster than the Anova Nano
No app dependency, just a manual dial and clear LCD display
Under $70, easy to commit before you know if sous vide will stick
What to know
No Wi-Fi or Bluetooth, you're tethered to the kitchen the whole cook
Less polished build and clip mechanism than Anova or Joule
The Joule Turbo is what experienced sous vide cooks upgrade to: 1100W heats water fast, the magnetic base sticks to steel pan bottoms so no clip is needed, and the Breville app has the deepest visual recipe library in the category. The Turbo adds a smart algorithm that reduces cook time by up to 30%, noticeable on long-cook proteins like short ribs or pork shoulder.
What we like
1100W and Turbo algorithm shortens cook times by up to 30%
Magnetic base sticks to steel containers, no clip to adjust
Breville app's visual doneness guides are the best in the category
What to know
Fully app-dependent, zero on-device manual controls
Premium price ($200+) is overkill until you're cooking sous vide weekly
Any large pot you own works fine for a first cook. But a purpose-built polycarbonate container is better in almost every way: you can see what's happening, the flat sides make a clip-on lid easier, and they don't conduct heat away from the water bath the way metal does. Start with a 12-quart, it handles four steaks or two thick-cut chops with room to circulate.
Best starter
Rubbermaid
Commercial 12-Qt Food Container
$
★★★★★Our rating
The go-to sous vide container for home cooks, food-grade commercial plastic, heat-tolerant to 212°F, and cheap enough to buy without deliberating. The slim shape fits most circulators without adapter issues. If you search 'sous vide container,' this is the vessel in almost every setup photo on Reddit and YouTube.
What we like
Crystal-clear walls, monitor bags and water level without lifting a lid
The community standard, compatible lids and racks are easy to find
Heat-tolerant polycarbonate handles boiling temps safely
What to know
No lid included, long cooks lose water to evaporation without one
Deep narrow shape crowds wide cuts like full racks of ribs
★★★★☆Our rating· Only 3 left in stock - order soon.
The LIPAVI is a complete system: polycarbonate container, a snug lid with a pre-cut hole for the major circulator models, and a collapsible stainless rack to keep bags separated. More expensive than the Rubbermaid, but if you'd rather buy once than piecemeal-upgrade, this is the assembled kit.
What we like
Lid with circulator hole prevents evaporation on all-day cooks
Built-in stainless rack keeps bags separated for even cooking
What to know
More expensive than buying container and lid separately
Lid hole is model-specific, check compatibility with your circulator
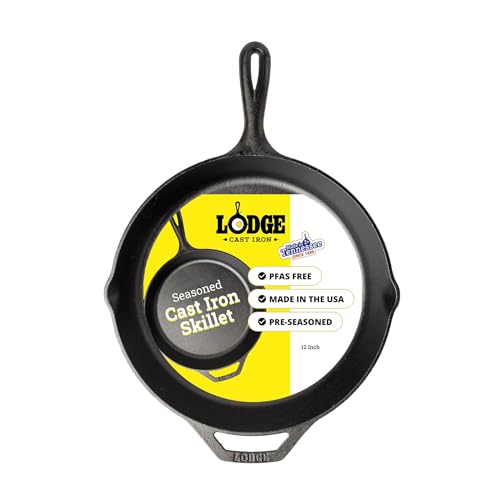
Sous vide delivers internal perfection; the crust is your job. Pat the protein completely dry (moisture is the enemy of a sear) then hit a ripping-hot cast iron pan with high-smoke-point oil for 60–90 seconds per side. Have your pan preheating before the bag opens. The sear window is narrow: too long and you cook past your target temperature, undoing the precision work.
Best starter
Lodge
12-Inch Cast Iron Skillet
$29.90 as of Jun 22, 2026
★★★★★Our rating· In Stock
Cast iron is the classic sous vide finishing tool for good reason: it holds heat like nothing else, delivers a crust from edge to edge, and costs $35. Preheat it for 5 minutes over high heat, add high-smoke-point oil, and you'll produce a better sear than most restaurant line cooks. It's also the best general-purpose skillet in your kitchen.
What we like
Holds heat like no stainless pan, guaranteed edge-to-edge sear
Works on all heat sources including induction
Doubles as the best all-around skillet in your kitchen
What to know
Heavy at 8 lbs, a workout after a long cook day
Requires seasoning maintenance to stay non-stick over time
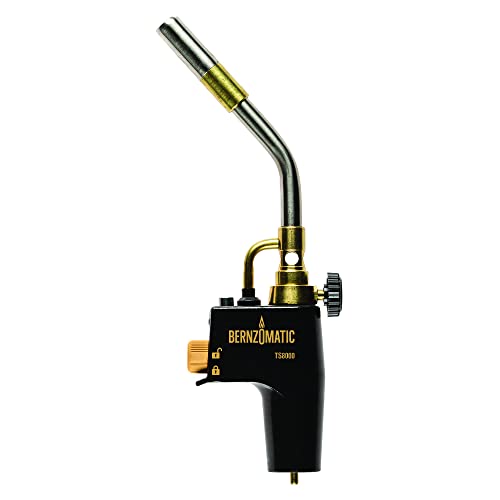
A culinary torch delivers direct flame searing without the pan radiating heat into your protein, useful for bone-in cuts, whole fish, and anything with crevices a flat pan misses. The Bernzomatic TS8000 burns hotter and faster than kitchen-specific torches. Most sous vide enthusiasts keep both a pan and a torch, the pan for steaks, the torch for everything else.
What we like
Reaches crevices and bone-in cuts a flat pan can't touch
Burns hotter than kitchen torches, faster sear, less carryover heat
What to know
Propane canisters sold separately, stock up before cooking day
Overkill for simple steaks; shines on shellfish and bone-in cuts
You don't need a vacuum sealer to start. The water displacement method (partially submerge a Ziploc freezer bag, let water pressure push the air out, then seal) works for 90% of sous vide cooking. Where it fails: liquid-heavy or fatty foods like short ribs or custards. A real sealer is worth buying once you're cooking sous vide weekly. The two types are edge sealers (affordable, standard) and chamber sealers (expensive, more powerful).
Best starter
FoodSaver
FM2000 Vacuum Sealing Machine
$172.14 as of Jun 22, 2026
★★★★★Our rating· In stock
The entry-level FoodSaver that most home cooks eventually land on. One-button operation, works with all FoodSaver bags and rolls, and handles everything a sous vide cook needs: steaks, chicken, fish, and vegetables. It's not the fastest or fanciest, but it's honest, dependable gear from the category-dominant brand.
What we like
One-button edge sealing, the simplest vacuum sealer workflow
Works with all FoodSaver bags and third-party compatible rolls
The most-recommended edge sealer in home sous vide communities
What to know
Can't seal bags with liquid inside, freeze marinades as ice cubes first
Louder during operation than chamber-style sealers
Chamber sealers evacuate the entire chamber rather than just the bag, which means they can seal liquid-filled bags without sucking the liquid into the machine. They also enable compression cooking, vacuum-infusing flavors into fruit and vegetables in seconds. The Anova Precision is the home-cook entry point for chamber sealers and the one most serious sous vide cooks eventually own.
What we like
Seals bags with liquid inside, no freeze-first workaround needed
Enables compression cooking: flavor-infuse fruit in under a minute
What to know
Large countertop footprint, not a store-away appliance
Overkill until you're cooking sous vide twice a week
Three cheap accessories meaningfully improve every cook: vacuum sealer bags (or quality freezer bags for the displacement method), a sous vide rack to keep bags separated and submerged, and a reliable instant-read thermometer to double-check doneness after the sear. None are strictly required, but all are under $40 and pay for themselves in consistent results.
Best starter
Wevac
Vacuum Sealer Bags 100-Count
$23.99 as of Jun 22, 2026
★★★★★Our rating· Only 4 left in stock - order soon.
Buying pre-cut bags in bulk is much cheaper than sticking with FoodSaver-branded bags. Wevac's are BPA-free, double-sealed, and compatible with all edge sealers. Stock the quart size for individual proteins and the gallon size for roasts and multi-serving cooks. At this price, you stop second-guessing whether a bag is worth using.
What we like
Significantly cheaper per bag than FoodSaver-branded alternatives
BPA-free and rated food-safe at the temperature range sous vide uses
Bags that float or bunch together cook unevenly, water can't circulate between them. A sous vide rack keeps everything submerged and separated. The LIPAVI L10 is designed to fit 12-quart polycarbonate containers, collapses flat for storage, and handles full-size short rib slabs without straining. Once you're cooking multiple bags at once, this becomes genuinely essential.
What we like
Keeps bags submerged and separated for even water circulation
Collapses flat, no dedicated storage space needed
What to know
Check container size compatibility before ordering, sizes vary
Unnecessary for single-bag cooks; a binder clip handles that
Sous vide has a reputation for being complicated, and that reputation is mostly wrong. The technique is: put food in a bag, heat water to a precise temperature, wait. The hard part (the part that gets beginners stuck) is trusting the numbers and then actually landing the finishing sear.
This is your roadmap through the first five cooks. Each one teaches you something different. Do them in order and you’ll have more fundamental cooking intuition at the end of week one than most people get in a year.
Cook 1: The steak that converts you
Your first sous vide cook should be steak. Not because it’s the most impressive thing you’ll eventually make, but because nothing else demonstrates the technique’s advantage as immediately and viscerally.
The setup: Fill your container with water and set your circulator to 131°F (55°C). This is the temperature for medium-rare, pink, warm, tender all the way through with no gray band around the edges. Season the steak aggressively with salt and pepper, seal it in a bag using the water displacement method (lower it into the bath with the top unsealed until water pressure pushes out the air, then seal), and lower it in. Set a timer for 2 hours.
While it cooks, do whatever you want. This is the other half of the sous vide pitch.
The finish: When the timer goes off, remove the steak from the bag and pat it absolutely dry with paper towels. Moisture is the enemy of a sear, any surface water steams instead of browns. Get your cast iron pan ripping hot (5 minutes over high heat, with a high-smoke-point oil). Lay the steak in. Don’t touch it. 60–90 seconds per side. Baste with butter and smashed garlic if you’re feeling it.
The result: medium-rare from edge to edge, no resting time needed, no guessing, no gray band. The first time you slice it open, you’ll understand why people get evangelical about this.
Cook 2: Chicken that finally works
Chicken breast is the food that makes sous vide believers out of skeptics. The conventional wisdom (cook chicken to 165°F or you’ll get sick) produces dry, cottony meat. Sous vide makes safe, juicy chicken possible at 140°F (60°C) because pasteurization is a function of both temperature and time, not temperature alone.
The setup: Season chicken breasts with salt, pepper, and whatever herbs you like. Seal them up and lower into water at 140°F for 1.5 hours. That’s it.
At 140°F held for 30 minutes (the water bath holds temperature while you bag the chicken, so by the time the cook completes you’ve far exceeded the pasteurization threshold), the bacteria are dead and the proteins haven’t over-tightened into dry rubber. The texture is closer to poached chicken at its best than to anything you’ve made in a pan.
The finish: Pat dry, quick sear in a hot pan for 30–45 seconds per side, just enough for a little color. Slice and serve immediately. You’ll want to make this every week.
Cook 3: The long-cook braised short ribs
Cook three is where sous vide’s patience dividend pays off. Short ribs in a conventional braise take 3–4 hours of active oven time. Sous vide short ribs cook at 175°F (79°C) for 24–48 hours, unattended, while you sleep.
Set it up before bed. Check it in the morning. The ribs will be pull-apart tender without being mushy, with a deep beefiness that a two-hour braise can’t touch. This is the cook that demonstrates that sous vide isn’t just a precision gadget, it’s a different way of thinking about time in the kitchen.
A vacuum sealer earns its place here. The water displacement method can fail when fat renders out during a 48-hour cook, the bag can unseal. Use a real vacuum sealer for anything over 4 hours.
The finish: Pat dry, sear all four sides in hot cast iron for 90 seconds each, then rest briefly. Reduce the bag juices in a saucepan for an instant pan sauce.
Cook 4: Salmon (the most convincing demo for guests)
Sous vide salmon at 122°F (50°C) for 45 minutes produces something that doesn’t taste like any salmon you’ve cooked before. It’s silky, barely-set, translucent-to-the-center, closer to perfectly seared sashimi in texture than to baked or pan-cooked fish.
This is the cook that guests ask about. “What did you do to this?” is the standard response.
Season the salmon fillet with salt, a little olive oil, and whatever aromatics you like (dill, lemon zest, thyme all work). Seal it up and drop it in. There’s no searing step, you can sear briefly in butter for a little color on one side, but many cooks skip it and serve straight from the bag. A squeeze of lemon and a handful of herbs is all it needs.
Sous vide eggs are the technique-mastery cook, not because they’re hard, but because the margin for excellence is measured in single degrees. At 167°F (75°C) for 13 minutes you get a set white and a just-barely-runny yolk. At 145°F for 45 minutes you get a custardy, jammy yolk that’s still flowing. Both are extraordinary on avocado toast or a grain bowl.
The egg cook teaches you two things: (1) that your circulator is telling the truth about temperature precision, and (2) that you have more fine-grained control over texture than any other cooking method gives you.
Cook a batch of six at once. Crack them into ramekins over toast, grain bowls, or whatever you’re eating that week. The whole batch takes 45 minutes and zero active attention.
What comes after week one
At five cooks in, you’ve hit the steeper part of the learning curve: experimenting with time/temperature variables. The Anova and Serious Eats guides will get you started, but the real learning comes from keeping notes, what temperature, how long, and what you thought of the result.
The moves that open up next: duck confit (48 hours at 155°F), a full pork shoulder for carnitas (24 hours at 165°F), crème brûlée custard, and compressed fruit for cocktails or desserts. None of them require new equipment. You just need the willingness to set it and walk away.
Save your money
What you don't need yet
Beginners get pressured to buy a lot of stuff that doesn't help them play
better. Here's what we'd skip on day one.
A chamber vacuum sealer ($300+) — The water displacement method with Ziploc bags handles 90% of sous vide cooking. Buy a chamber sealer when you're cooking short ribs or custards, not before.
Sous vide weights or sinkers — A binder clip attached to the bag and hooked over the container rim solves the floating-bag problem for free. A rack solves it better. Dedicated sinkers are solutions to a problem you've already solved.
A 22-quart hotel pan — The 12-quart container handles four steaks, two pork shoulders, or a full rack of ribs without straining. Upgrade the container size when you're regularly feeding more than six people.
Sous vide-specific cookbook before you start — The Anova and ChefSteps apps have free time/temperature guides for every major protein. A cookbook is useful after you've gotten bored with the basics, not before.
An instant-read thermometer just for sous vide — Your circulator IS the precision thermometer. A separate thermometer is only useful when you're double-checking the sear temperature, and you can eyeball that with a finger-poke test until then.
First week
Your first seven days
A short, real plan to get from gear-on-doorstep to actually playing.
Order your circulator so it arrives before the weekend. · Buy
Do I really need a vacuum sealer, or can I use Ziploc bags?
Ziploc freezer bags work well for most cooks using the water displacement method, submerge the bag almost entirely and let water pressure push air out, then seal. It fails on liquid-heavy foods like short ribs in marinade or custards. Start with Ziploc; buy a FoodSaver once you're cooking sous vide weekly.
What temperature and time for a perfect medium-rare steak?
131°F (55°C) for 1.5–3 hours is the benchmark medium-rare. Thinner cuts (under 1 inch) need only 1.5 hours; thick 2-inch cuts benefit from the full 3. After the bath, pat completely dry and sear in cast iron for 60–90 seconds per side. Don't skip the drying step, wet protein steams instead of sears.
Is cooking in plastic bags at high temperatures safe?
Yes, with the right bags. Use food-grade bags labeled safe for boiling (most vacuum sealer bags and quality freezer bags qualify). Avoid thin garbage bags or bags not labeled food-safe. The food-safety concern with sous vide is actually pasteurization time, proteins held at lower temperatures need longer cook times to be safe, which the Anova and ChefSteps guides account for.
What foods are actually worth cooking sous vide?
Best: steaks, chicken breasts, pork tenderloin, salmon, poached eggs, and tough braising cuts like short ribs and pork shoulder. Worst: delicate vegetables (faster and better in a pan), pasta, anything with a crust you want before the cook. Sous vide shines on proteins where overcooking is easy and temperature precision actually matters.
How much should I budget to start cooking sous vide?
Minimum: ~$70 for an Inkbird circulator + Ziploc bags + a pot you already own. Comfortable starter kit: ~$260 (Anova Nano + Rubbermaid container + FoodSaver FM2000 + Lodge cast iron). You don't need all of that on day one, the circulator and your existing cookware get you cooking.
Serious Eats Sous Vide Guides — J. Kenji López-Alt's science-backed guides are the most thorough beginner resource. Start with the steak and chicken guides before anything else.
Anova Time & Temperature Guide — Free reference chart for every major protein, organized by doneness level. Bookmark this, you'll use it every time you cook until it becomes second nature.
ChefSteps (now Breville) — The original sous vide recipe site, now owned by Breville. Video guides are excellent for technique, the steak and egg tutorials are worth watching even if you don't own a Joule.
Douglas Baldwin's Sous Vide for the Home Cook — The definitive safety and science reference, free online. If you want to understand pasteurization tables and food-safety math, this is the authoritative source. Not light reading, but worth bookmarking.
r/sousvide — Active community with weekly 'first cook' threads and a well-maintained wiki. Good for troubleshooting and recipe ideas. The weekly steak competition posts alone are motivating.
Sous Vide Everything (YouTube) — The most-watched sous vide YouTube channel. Guga Foods' format is enthusiasm-forward and beginner-accessible, a good complement to the more academic Serious Eats guides.
As an Amazon Associate, JustBeginning earns from qualifying purchases.
We may also earn commission from other affiliate programs linked on this
page. Editorial recommendations are independent; we don't choose
products based on commission rates.
Product prices and availability are accurate as of the date and time
indicated and are subject to change. Any price and availability
information shown on Amazon at the time of purchase will apply.

 Best starter