Food photography is the most accessible photo specialty — your subject holds still, your studio is your kitchen, and a serious upgrade costs less than you'd expect. Whether you're shooting for a blog, Instagram, or just because your cooking deserves better than a phone snap, here's what to buy first.
By Colin B. · Published May 28, 2026 · Last reviewed July 12, 2026
You can start for almost nothing with your current phone and a $15 reflector. The big jump is a mirrorless body + 50mm prime — budget $700-900 for that combination.
We earn commission on qualifying Amazon purchases — see our
affiliate disclosure.
Price tiers and budget totals shown above are editorial estimates;
actual Amazon prices vary.
At a glance
Our top pick in each category
The fastest path through this guide — each best-starter pick by category.
Scroll for the budget and upgrade alternatives.
Your phone camera is a legitimate starting point, not a consolation prize. Shoot your next ten meals with natural window light only — if you're consistently unhappy with the results, then buy a camera. A new body won't fix bad composition or bad light.
The 50mm prime lens is often a bigger upgrade than a new camera body. If you already own a mirrorless camera, a sharp f/1.8 prime in the $100-200 range will transform your food shots faster than swapping bodies. Buy glass before upgrading sensor.
Your shooting surface is half the photograph. A $30 vinyl backdrop and a north-facing window will produce better-looking food shots than expensive gear on a cluttered countertop. Nail the light and surface first; obsess about equipment second.
Your camera is the center of the system, but don't overthink the choice — food photography is forgiving of imperfect cameras and unforgiving of bad lighting and composition. A mirrorless camera is the modern starting point: live preview, a flip screen for overhead angles, and access to inexpensive manual-focus primes. Whatever you buy, you'll be shooting from a tripod with natural window light most of the time — the sensor rarely matters as much as your light control and props.
Camera — what's the difference?
A few common shapes, each making a different trade.
APS-C Mirrorless
Compact and future-proof. Best lens ecosystem for food photography.
Sensor
APS-C (1.5x crop)
Resolution
~26MP
Mount
Sony E / Canon RF-S / Nikon Z
Best for Food bloggers, beginners, anyone shooting at home
Tradeoff Smaller sensor than full-frame — fine for food, just not pro studio jobs
The ZV-E10 II is the best dedicated starting point for food photography. The 26.1MP APS-C sensor delivers more than enough resolution, the touchscreen tilts fully for overhead shots, and — crucially — the Sony E-mount system has dozens of sharp, affordable primes from Sony and Sigma. Your whole setup will be built around this body, so start here.
★★★★☆Our rating· Only 2 left in stock - order soon.
The smallest DSLR Canon ever made, and it still has a fully articulating touchscreen that's invaluable for overhead table shots. If you're already in the Canon ecosystem or find a good used deal under $450, it's a perfectly capable food photography camera. The EF lens mount is vast, used lenses are everywhere, and the JPEG colors are warm and food-friendly.
What we like
Smallest DSLR body ever — lighter and less imposing than most DSLRs
Fully articulating touchscreen makes overhead shots much easier
Large, deep EF lens ecosystem — affordable used glass everywhere
What to know
EF/EF-S mount is being discontinued — limited future lens options
Kit lens is slow (f/3.5-5.6) — upgrade to a fast prime quickly
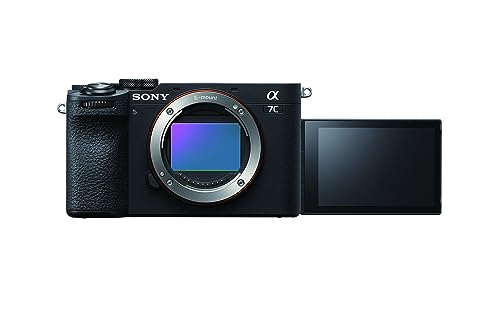
Full-frame sensors have real advantages in a food photography studio: richer dynamic range, better background separation, and lower noise in the mixed artificial/window light that plagues kitchen shoots. The a7C II is among the most compact full-frame options and shares the same E-mount as the ZV-E10 II. Get here after a year of serious work on the crop-sensor body.
What we like
Full-frame sensor delivers richer dynamic range than any crop body
Compact for a full-frame — fits on a kitchen counter without dominating
Same E-mount as ZV-E10 II — every lens you own already transfers
What to know
At $2,200 body-only, it's nearly 3x the cost of an entry mirrorless
Full-frame benefit is mostly wasted with a kit zoom — buy the body last
For food photography, focal length matters more than aperture. You want 50-100mm full-frame equivalent to avoid distortion and get that appetizing subject compression. On an APS-C camera like the ZV-E10 II, a 50mm lens delivers an effective ~75mm — the sweet spot for food. A fast aperture (f/1.8 or f/2.8) creates the shallow depth-of-field look that makes food pop. These are Sony E-mount recommendations. Canon RF users: check the Canon RF 50mm f/1.8 STM. Nikon Z users: the Nikon Z 50mm f/1.8 S.
Best starter
Sony
E 50mm f/1.8 OSS
$$
★★★★★Our rating
On the ZV-E10 II's APS-C sensor this 50mm gives you an effective 75mm — the sweet spot for food photography that compresses the scene without distortion. The f/1.8 aperture smoothly blurs backgrounds, and built-in optical stabilization helps you handhold textural close-ups of garnishes and ingredients. This is the first lens most food photographers would tell you to buy.
What we like
~75mm equivalent on APS-C — the sweet spot for food photography
f/1.8 maximum aperture creates the background blur food bloggers use
Manual focus only, but at under $60 it's the cheapest way to get a fast prime on your Sony body. Image quality is genuinely impressive for the price — more than good enough for social media and blogging. Manual focus slows you down in a productive way: you think about the shot before you take it, which is exactly the habit food photography rewards.
What we like
Under $60 and delivers impressive sharpness for food close-ups
★★★★☆Our rating· Only 5 left in stock - order soon.
True 1:1 macro reproduction opens up a whole world of food photography: cross-sections of figs, ice melting in a cocktail, sesame seeds on a bun. The 105mm focal length also works beautifully as a portrait-style lens for full hero dishes. This is a second-lens purchase, but one you'll use for the rest of your food photography career.
What we like
True 1:1 macro captures ingredient detail no standard prime can match
105mm focal length compresses the scene with zero distortion
What to know
At ~$480, this is firmly a second-lens purchase — not a starter
Heavier than a standard prime — noticeable on a small mirrorless body
The lighting secret of every great food photo is simple: one light source, diffused. For most beginners, that source is a north-facing window. A reflector disc bounces fill light back from the shadow side, eliminating harsh two-tone shadows for almost nothing. When window light isn't available or consistent, a small LED panel through a softbox gives you the same single-source result on demand. Start with the reflector — it costs $15 and immediately improves any window-light shot.
Best starter
Neewer
5-in-1 43" Photography Reflector Disc
$29.99 as of Jun 22, 2026
★★★★★Our rating· In Stock
The most fundamental and underrated tool in food photography. Hold this on the shadow side of your dish while window light hits the other side, and you eliminate the harsh two-tone shadows that make kitchen photos look amateur. The translucent diffuser panel — held between the window and the food — softens direct sun into even, neutral light. One disc, five surfaces, $15.
What we like
Five surfaces: white fill, silver, gold, translucent diffuser, black
Costs $15 and immediately improves every window-light food shot
Folds to one-third size — stores in a kitchen drawer between shoots
What to know
Needs a second hand or clamp to hold it steady while you compose
43" is smaller than a studio reflector — tight for large table setups
When window light isn't available or consistent, a single LED panel with a small diffuser gives you the same directional, single-source look as a window — on demand, any hour, any weather. The two-panel kit lets you set a key light and a fill, giving you full control of the food-photography lighting triangle your phone can never replicate.
What we like
Bi-color panels match window light or warm tungsten as needed
Consistent artificial light means shoot at any hour, any weather
What to know
Setup takes 10 minutes — more commitment than moving near a window
Small panels fall off quickly at distance; work best within 3 feet
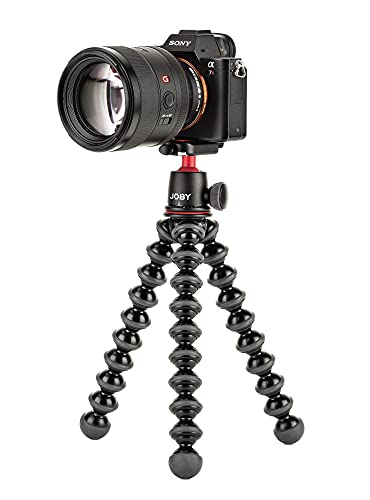
Food photography is slow and deliberate — you're adjusting props, swapping surfaces, and refining a single frame over ten minutes. A tripod locks your composition so you can step back, tweak the dish, and reshoot without recalibrating. The overhead flat-lay shot is nearly impossible handheld. Start with a flexible mini tripod: it's more useful on a kitchen counter than a full-size unit, and a GorillaPod's flexible legs can grip counter edges for overhead angles that a standard tripod can't.
Best starter
Joby
GorillaPod 3K Flexible Mini-Tripod with Ball Head Kit for DSLR and Mirrorless Cameras
$$
★★★★★Our rating
The GorillaPod's flexible legs grip counter edges and bend to position your camera for overhead flat-lay shots without needing a full tripod overhead arm. The included ball head repositions in seconds without re-leveling. It's lighter and more compact than a full-size tripod and dramatically more useful in a cramped kitchen — which is where 90% of your shoots will happen.
What we like
Flexible legs grip counter edges for overhead flat-lay angles
Ball head included — repositions in seconds without full re-leveling
Compact enough to keep permanently on the kitchen counter
What to know
3K payload limit — a heavier DSLR + zoom combo will flex the neck
Sits low on flat surfaces; prop it up for high overhead angles
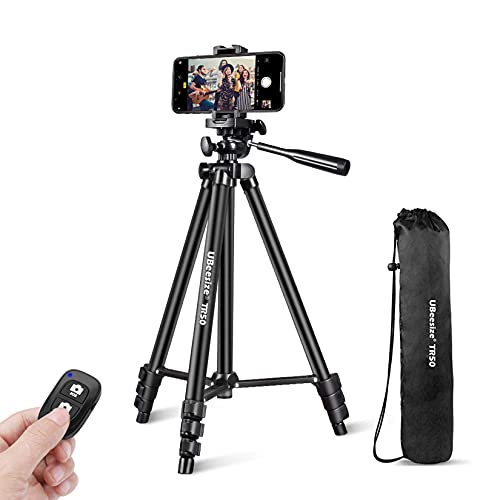
A basic extend-to-50" tripod that handles phones and lightweight mirrorless cameras equally well. Lightweight enough to carry to restaurant shoots or use in tight spaces. The phone mount is a nice bonus if you're still shooting on your phone while saving up for a camera.
What we like
Under $25 and holds most phone + lightweight mirrorless setups steady
Phone mount included — bridges your phone-to-camera transition period
What to know
Plastic joints loosen after a year of heavy use
Can't achieve true overhead angles on flat surfaces without a raised platform
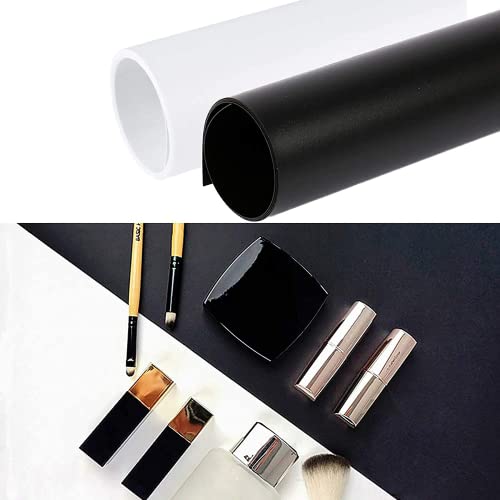
The surface under your food is half the photograph. A matte vinyl backdrop in gray, white, cream, or wood grain costs $30-40 for a two-pack and instantly elevates any setup. Beyond that, food-safe ceramic dishes, linen napkins, and simple wooden boards appear in 90% of professional food photos — not because they're special, but because they're neutral enough to let the food be the star. Start with a two-color vinyl set; add ceramics and textures once you know your personal style.
Best starter
Selens
Photography Backdrop Vinyl 2-Pack
$
★★★★★Our rating
A vinyl photography backdrop in two neutral tones — typically light marble and dark slate or wood grain — is the single fastest upgrade to kitchen food photos. Vinyl wipes clean between shoots, lies flat without wrinkles, and photographs crisper than fabric, which can look soft and distracting. Two tones gives you the flexibility to shoot bright or moody depending on the dish.
What we like
Two neutral tones (light + dark) covers most food styling scenarios
Wipes clean between shoots — handles oil, sauce, and crumbs easily
Lies flat without wrinkles; no ironing or steaming required
What to know
Vinyl can catch glare under direct light — shoot at a 45° angle
Feels plasticky in hand — not ideal for close-up surface texture shots
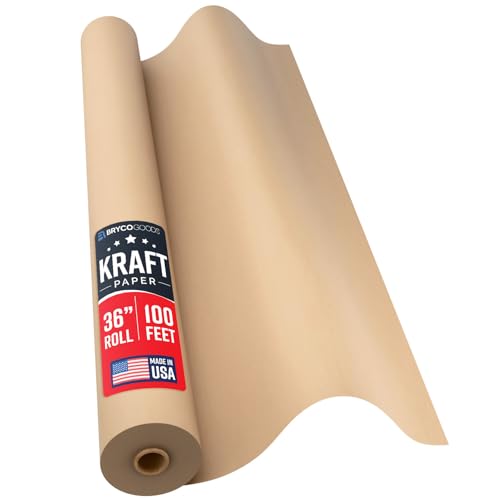
Before committing to vinyl, a kraft paper roll is the zero-cost way to experiment with backgrounds. Cut it, crumple it for texture, layer two sheets for a mottled look, or use it as a disposable surface on messy shoots. Under $15 for yards of shooting surface. Swap it for vinyl once you know what backgrounds you actually like.
What we like
Under $15 for 100 feet of shooting surface — basically disposable
Matte finish eliminates glare in any light direction
What to know
Absorbs food spills instantly — replace the section after messy dishes
Less crisp and polished-looking than vinyl for final editorial shots
You don't need a professional kitchen or expensive gear to take food photos you're proud of. You need window light, a few minutes of setup, and the willingness to reshoot the same dish three times.
Food photography looks like it requires a studio, a stylist, and a professional camera. It doesn’t. What it requires is understanding three variables you can control right now, with whatever camera is in your pocket: light direction, surface choice, and camera angle.
Master those three things in your first two weeks, and you’ll be producing food photos that look intentional. After that, gear starts to matter — and only after that.
Week 1: Learn to see the light
Almost every great food photo uses a single light source, positioned to the side of the dish. Not above it (that’s your kitchen overhead, which is the enemy), not in front of it (that’s a flash, which flattens everything). From the side.
Find the best window in your home — ideally north-facing, or any window that gets indirect light rather than direct sun. Set your food on a table or counter adjacent to that window. The light will hit one side of the dish and cast a soft shadow to the other side. That shadow is doing real work: it creates depth, volume, and the sense that the food is three-dimensional rather than a flat photograph.
What to do with your phone right now:
Turn off every artificial light in the room. Overhead fluorescents and LEDs mix with window light in ways the camera can’t fix.
Place your dish next to the window, parallel to the glass.
Take one photo. Look at the shadow. Is it too harsh and deep? Move the dish farther from the window, or hang a thin white curtain to diffuse the sun.
Take another photo from the same angle, but this time hold a white piece of paper or foam board on the shadow side of the dish. Watch what happens to the shadows.
That piece of paper is doing exactly what a $15 reflector does. The reflector is just a more convenient version of the same physics.
Every food photo falls into one of three categories, and knowing which one you’re shooting changes everything about how you set up.
Overhead (flat lay, 90°): Camera directly above the dish, looking straight down. Works beautifully for dishes with interesting top compositions: pizza, grain bowls, charcuterie boards, anything with arranged ingredients. Requires a stable overhead position — a flexible mini tripod gripping a counter edge, or a full overhead arm. The challenge is getting your camera directly above the subject without your arm or shadow appearing in the shot.
45° angle (the classic): Camera at roughly table height, tilted upward 15-30°, shooting across the scene. This is the most flattering angle for most food — it shows the dish in a context that looks like you’re about to eat it. Tall foods (burgers, layer cakes, stacked pancakes) look best here. Short, flat foods (flatbread, pasta, salad) can look thin and uninteresting from this angle.
Straight-on (0°): Camera at the same height as the food, shooting directly across. Works for glasses, cocktails, tiered cakes, anything with a layered cross-section. Hard to make most dishes look appetizing from this angle — reserve it for specific subjects that reveal something at eye level.
Spend your second week shooting the same dish from all three angles on the same day. You’ll have a strong preference within three sessions, and that preference is your starting point for a visual style.
The surface under your food is half the image. A beautiful dish on a busy, cluttered countertop looks like a snapshot. The same dish on a clean vinyl backdrop or a wooden cutting board looks like an editorial photo.
You don’t need expensive surfaces. What you need is contrast between the surface and the food, and a texture that doesn’t compete for visual attention.
The quick surface guide:
Light neutral (white, cream, light gray marble): makes colorful food pop; can feel sterile with pale or beige food
Dark neutral (dark slate, charcoal, dark wood): dramatic and moody; works well with coffee, dark chocolate, meat dishes
Natural wood: warm and approachable; backgrounds most dishes without feeling designed; the default choice when you’re unsure
Bright colors: only for specific aesthetics; a red background draws attention to itself, not the food
A two-color vinyl backdrop set (around $30-40 on Amazon) gives you one light and one dark option that wipes clean between shoots. It’s the single highest-impact gear purchase before a camera.
Background rule of thumb: if you’re noticing the surface before you notice the food, the surface is wrong.
Food photography has a handful of composition rules that are worth learning deliberately because they’re consistently violated by beginners.
The rule of thirds. Mentally divide your frame into a 3x3 grid. Place the main subject at an intersection of grid lines, not dead center. Dead center looks like a mugshot. Off-center looks like an art direction decision.
Negative space is a feature. Empty table or background around the dish makes the food feel considered and styled. Filling the frame edge-to-edge makes it feel claustrophobic. Leave room.
Shoot with context. A glass of wine next to a pasta dish tells a story. A cutting board with prep ingredients behind a finished dish says “someone cooked this.” Props add context without cluttering — a napkin, a fork, a small herb sprig, a half-cut lemon. Two or three context elements is usually enough.
The angle and the layering. At the 45° angle, stagger the elements of your scene so they overlap slightly — the fork overlaps the napkin which overlaps the board. Overlapping elements create depth. Elements that are all separated, floating in space, look like they were placed by someone who was afraid to touch them.
What changes when you buy a real camera
A dedicated camera changes two things meaningfully for food photography: background blur and low-light performance.
Background blur (bokeh) comes from a wide aperture and longer focal length. Your phone camera has a small sensor that makes everything sharp. A 50mm prime lens on a mirrorless camera at f/1.8 produces the creamy backgrounds you see in food blogs — the subject is sharp, the background melts away. This is the first thing most people notice when they switch from phone to camera.
Low-light performance matters in kitchens, which often have mixed, inadequate artificial lighting. A camera with a larger sensor can shoot at higher ISO without ugly noise — letting you shoot in real-world kitchen conditions without needing to drag your setup to the one good window.
Neither of these things is necessary to make good food photos. They’re upgrades to your existing skill, not replacements for it. The person who understood light and composition on a phone will take better photos with a camera than the person who bought a camera without learning either.
Save your money
What you don't need yet
Beginners get pressured to buy a lot of stuff that doesn't help them play
better. Here's what we'd skip on day one.
A full-frame camera body — APS-C serves food photography extremely well at a fraction of the cost. Upgrade only if you're shooting commercially in mixed lighting conditions.
A macro lens right away — A 50mm prime gets you 80% of food shots. Add a macro lens after six months when you know you want to shoot ingredient close-ups regularly.
A professional lighting kit — A $15 reflector and a window do more than most beginners expect. Invest in a dedicated LED setup only if natural light in your space is genuinely unusable.
Photography backdrop stands — A clamp to a wall or countertop holds vinyl backdrops fine. Stands are for studios; your kitchen isn't a studio yet.
Editing software subscriptions — The free version of Lightroom Mobile or Apple Photos does everything a beginner needs. Upgrade to full Lightroom once you're shooting RAW seriously.
A ring light — Ring lights create circular reflections in shiny surfaces — visibly wrong for food. They're for video and portrait work, not food styling.
First week
Your first seven days
A short, real plan to get from gear-on-doorstep to actually playing.
Shoot your next three meals using only available window light — phone camera, no flash. Review what you like and don't like about each shot. · Action
Order a vinyl backdrop 2-pack so it arrives before the weekend. · Buy
Study ten food photos that make you hungry. Identify: where is the light coming from? What's the surface material? Is the camera overhead, 45°, or straight-on? · Learn
Shoot the same dish from three angles: overhead flat-lay, 45° (the standard restaurant shot), and straight-on. Compare all three — you'll immediately have a preference. · Action
Watch a short tutorial on natural window light for food photography. · Learn
Do I need a dedicated camera, or is my phone good enough?
Your phone is a legitimate starting tool — modern phone cameras are genuinely capable when paired with good light and a clean background. Most people who buy a camera and are disappointed find the problem was actually in their lighting or composition, not their phone. Shoot on your phone for a month first. If you're consistently unhappy with the results, then buy a camera.
What's the single most important factor in food photography?
Light. By a wide margin. Soft, directional, natural window light on one side with a reflector bouncing fill from the other side will make a phone photo look better than a full-frame camera shot under harsh kitchen overhead lighting. Control the light before you upgrade anything else.
What focal length is best for food photography?
50-100mm full-frame equivalent is the sweet spot. Below 35mm you get barrel distortion that makes dishes look warped. Above 135mm the working distance gets impractical on a kitchen table. On an APS-C camera, the Sony 50mm f/1.8 gives you ~75mm equivalent — exactly right.
How do I get that blurry background (bokeh) look?
Three things create background blur: a wide aperture (f/1.8 or f/2.8), a longer focal length (50mm+ rather than a wide-angle), and distance between your subject and the background. The single fastest upgrade is a 50mm prime lens — your kit zoom at f/5.6 will never blur a background the same way.
Should I shoot in RAW or JPEG?
JPEG is fine to start. RAW files give you more latitude in editing — especially recovering blown highlights or lifting dark shadows — but they require a dedicated editing app and more time per shot. Start in JPEG, learn to get the exposure right in-camera, then switch to RAW once you're spending real time in post-processing.
What time of day gives the best natural light for food photography?
Avoid direct sunlight — it creates harsh shadows and blows out highlights. The best natural light is indirect: a north-facing window at any time of day, or any window during overcast weather. Early morning and late afternoon can work if you diffuse the direct sun with a thin white curtain or your reflector disc's translucent panel.
The Bite Shot (YouTube) — Joanie Simon's channel is the most practical free resource for food photography fundamentals. Start here before buying anything.
Pinch of Yum — Lindsay Ostrom's food blog documents her photography evolution over years in real posts. Searching the site for 'food photography tips' returns deeply practical tutorials.
r/foodphotography — Active community for sharing photos and getting feedback. The weekly critique threads are especially useful — submit your shots and ask for specific feedback.
Photography Life — The best technical reference for camera and lens fundamentals. When you have questions about depth of field, exposure, or sensor size, start here.
Tasty Food Photography (book) — Lindsay Ostrom's book — the standard beginner's guide to food photography. Buy the Kindle version if you want searchable reference; the print version has better visual examples.
As an Amazon Associate, JustBeginning earns from qualifying purchases.
We may also earn commission from other affiliate programs linked on this
page. Editorial recommendations are independent; we don't choose
products based on commission rates.
Product prices and availability are accurate as of the date and time
indicated and are subject to change. Any price and availability
information shown on Amazon at the time of purchase will apply.


 Best starter