Fly tying is half craft project, half meditative practice, and the reason fly fishers go missing for entire evenings. The good news: you can tie a fishable fly in your first session. Here's exactly what you need to start, and what to skip until you actually know what you're doing.
By Colin B. · Published May 24, 2026 · Last reviewed June 13, 2026
A real vise plus a basic materials kit runs $80–200. Add hooks, thread, and tools and you're at $120–250 total. The vise lasts decades; most materials cost $5–15 per packet.
We earn commission on qualifying Amazon purchases — see our
affiliate disclosure.
Price tiers and budget totals shown above are editorial estimates;
actual Amazon prices vary.
At a glance
Our top pick in each category
The fastest path through this guide — each best-starter pick by category.
Scroll for the budget and upgrade alternatives.
Don't buy a big-box all-in-one starter kit. They look attractive at $40, but they almost always include a low-quality vise that will slip on hooks and frustrate you for months. Spend the money on a real vise and buy materials separately, you'll save money in the long run and actually enjoy the process.
Pick three patterns and commit to them. Every beginner scatter-shops materials and never finishes a fly. Choose the Woolly Bugger, the Pheasant Tail Nymph, and the Elk Hair Caddis, that's 80% of trout fishing covered. Buy materials for those three patterns only, and tie a dozen of each before expanding your kit.
Visit a local fly shop if one is nearby. They'll let you handle vises, watch a demo tying session, and buy exactly what you need for local patterns. The experience is worth any slight price premium over online orders, especially on your first vise.
The gear
What you actually need
Vises
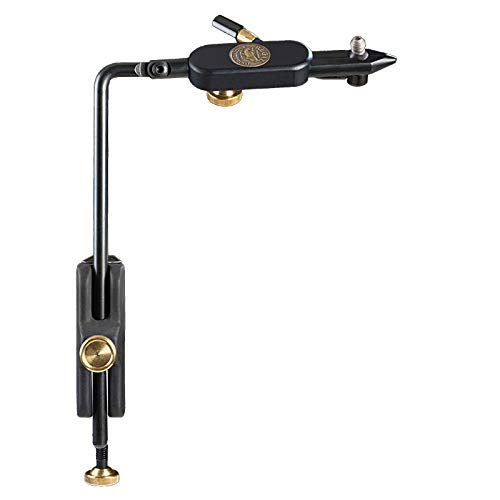
The vise is your most consequential purchase, it holds the hook while you wrap thread, and a loose or wobbly vise fights you on every single fly. Two things separate a good beginner vise from a bad one: jaw strength (it should grip hook sizes 8 through 22 without slipping) and a stable base. You don't need a $300 vise, but you very much need something better than a $20 import. A pedestal base (freestanding) is the beginner-friendly default; a C-clamp mount is more stable if you have a dedicated bench.
Vises — what's the difference?
A few common shapes, each making a different trade.
Pedestal Base
Free-standing, no clamp needed. Best for kitchen tables.
Setup
Weighted base
Portability
High
Stability
Good
Best for Beginners without a dedicated tying bench; dining room or kitchen table tyers
Tradeoff Slightly less rigid under heavy thread tension than a clamped mount
C-Clamp Mount
Clamps to desk edge. More stable, less portable.
Setup
Clamp to edge
Portability
Low
Stability
Excellent
Best for Anyone with a dedicated tying bench or workbench edge; most stable option
Tradeoff Can scratch furniture; requires a bench or table edge thick enough to grip
Best starter
Atlas
Rotary Fly Tying Vise
$$
★★★★★Our rating
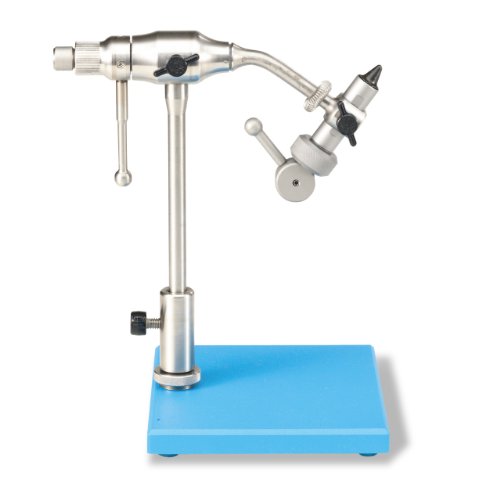
The Atlas Rotary is what most experienced fly tyers would buy if they were starting over. True rotary, the hook spins inline so you can inspect your fly from all sides without removing it, solid jaw that grips sizes 2 through 24, and a price under $130. Used as shop vises in fly shops nationwide. Comes with a C-clamp; add the pedestal base if you need to tie at a kitchen table.
What we like
True rotary jaw, spin the fly to inspect without removing the hook
Grips hook sizes 2 to 24 without slipping
Shop-vise standard at fly shops, well-tested in real use
What to know
C-clamp only out of the box, pedestal base is a separate purchase
Not as fast on jaw adjustments as cam-lock designs like Regal
The Thompson Pro is one of the oldest entry vises on the market, and that's a feature, not a bug. Fixed-jaw, dead simple, and available for well under $50. It won't hold the tiniest midge hooks reliably, but for sizes 12 and larger it does the job. The smart buy if you're not sure fly tying will stick, you lose almost nothing if you upgrade in six months.
What we like
Under $50, almost zero financial risk if the hobby doesn't stick
Dead simple setup with no rotary mechanism to learn
Fifty-year track record, plenty of community knowledge online
What to know
Fixed jaw only, no rotary, you must remove the hook to flip it
Regal's spring-tension cam jaw is legendary: drop the hook in, press the lever, and it's locked, no dial adjustment. Built in Massachusetts since the 1970s, this vise will outlive most equipment in your garage. When you're tying three times a week and want nothing between you and the fly, this is the answer.
What we like
Cam-lever jaw locks instantly, no dial, just drop and press
American-made since the 1970s; a lifetime purchase
Standard equipment for serious production tyers and guides
What to know
No rotary on the Medallion model, you pay a premium for Regal's Revolution
Heavy investment for a beginner, earn your way to this one
The bobbin holds your thread spool and creates consistent tension as you wrap. A ceramic-tipped bobbin is worth the small premium, metal tips fray and cut thread; ceramic doesn't. Thread weight is measured in denier (or aught sizes): 70 denier / 8/0 is the general-purpose starting weight for most trout patterns. Get a quality bobbin first; the specific thread brand matters far less when you're learning.
Best starter
Griffin
Ceramic Supreme Bobbin
$
★★★★★Our rating
Ceramic tube tip means your thread slides without fraying, even under high tension. Well-balanced, comfortable to hold for an hour of tying, and widely stocked at fly shops. The go-to recommendation from fly shop employees across the country for good reason, it simply works and never causes problems.
What we like
Ceramic tip won't fray or cut thread, the most common bobbin failure
Well-balanced; comfortable to hold through long tying sessions
Standard recommendation at fly shops nationwide
What to know
Ceramic tip can crack if dropped on hard floors
Fixed tension, no adjustable drag for heavy materials
Stonfo's spring-tension arm adjusts to different spool sizes automatically, which means it works with both the slim UNI-Thread spools and the chunkier UTC spools without adjustment. Under $10, and good enough to tie hundreds of flies. A smart backup bobbin to keep around.
What we like
Spring arm accommodates different spool widths automatically
Under $10, a guilt-free backup or second bobbin
What to know
Metal tube tip frays ultra-fine threads (10/0 and smaller)
★★★★☆Our rating· Only 9 left in stock - order soon.
UNI-Thread 8/0 is the most-used fly tying thread in North America. Pre-waxed for easy handling, fine enough for trout flies up to size 6, and available in every color you'll ever need. The starter 6-color pack covers black, olive, tan, red, brown, and gray, those six colors build most beginner patterns.
What we like
Pre-waxed, easier to handle, starts on bare hooks without slipping
Six starter colors cover 90% of beginner trout patterns
The industry standard; every tutorial video uses it
What to know
Too heavy for midge and tiny dry fly patterns (size 20+)
Individual spools run out faster than bulk options
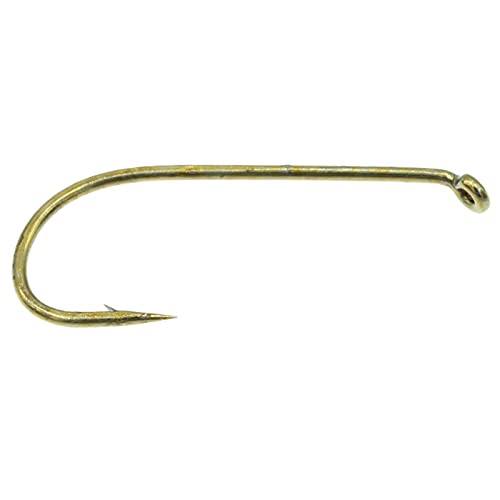
Hooks are consumables, plan to go through hundreds of them. The most versatile beginner hook is a standard dry fly hook (Tiemco 100 or equivalent), which works for the classic patterns most tutorials teach: Adams, Elk Hair Caddis, and basic nymphs. Buy 25-packs to start; you'll bend and lose some learning, and it's better to have variety than a warehouse of one style.
Best starter
Tiemco
100 Standard Dry Fly Hooks (25-pack)
$11.40 as of Jun 22, 2026
★★★★★Our rating· Only 4 left in stock - order soon.
The Tiemco 100 is the reference dry fly hook, every major pattern guide uses it, and the quality control is Japanese-precise. The fine wire and turned-down eye are exactly right for classic trout dry flies. Sizes 12 and 14 are your two workhorses; buy a pack of each.
What we like
Japanese quality control, points are consistently sharp out of the box
The reference hook for Adams, Caddis, and most beginner dry fly patterns
Fine wire floats flies higher; ideal for dry fly presentation
What to know
Fine wire bends under heavy pressure from large fish
Higher cost per hook than Mustad, you feel it in 100-packs
Mustad has made hooks since 1877 and the 94840 is one of the all-time patterns. Slightly heavier wire than Tiemco, very consistent sharpness, and priced a bit lower. Many experienced tyers use Mustad for practice flies. A reliable choice when you're learning thread control and don't want to waste premium hooks.
What we like
Heavier wire than Tiemco, slightly more forgiving of heavy-handed beginners
Classic pattern with over a century of trusted use
Lower per-hook cost, sensible for practice flies
What to know
Heavier wire sits lower in the water surface film than fine-wire hooks
Points not as consistently sharp as Japanese-made hooks
★★★★☆Our rating· Only 3 left in stock - order soon.
Once you're past the Woolly Bugger, you'll want to tie nymphs and caddis larvae, and they need a curved scud hook, not a straight dry fly hook. The TMC 2457 is the nymph specialist's standard. Grab a pack of size 14 and size 16 when you're ready to tie the Hare's Ear, scuds, and caddis pupae.
What we like
Curved profile mimics natural nymph and scud body shape
Standard hook for Hare's Ear, Copper John, and caddis larvae patterns
What to know
Single-purpose, only for curved-body subsurface patterns
Not a beginner's first hook buy; start with dry fly hooks
This is where fly tying's rabbit holes begin. Feathers, fur, dubbing, flash, wire ribbing, the materials list is genuinely endless. Start with the short list: dubbing for fly bodies, deer or elk hair for Caddis wings, and a basic hackle pack for dry fly legs. An assortment kit gets you variety before you know what you actually need.
Best starter
Hareline
Dubbing Assortment (24 colors)
$
★★★★★Our rating
Dubbing is the twisted fur or synthetic fiber you use to build a tapered fly body, it's in nearly every nymph and dry fly pattern. Hareline's 24-color assortment covers olive, tan, black, brown, hare's ear, and all the foundational colors without committing to full packets of each. The go-to starter kit for material variety.
What we like
24 colors covers almost every beginner trout pattern in one kit
Hareline is the leading US materials supplier, consistent quality
Packed loose in labeled bags, easy to use and organize
What to know
Loose dubbing is messy if bags aren't resealed carefully
Won't satisfy patterns that need specific materials like CDC or elk hair
★★★★☆Our rating· Only 9 left in stock - order soon.
Deer body hair spins, stacks, and flares, it's what you need for the Elk Hair Caddis (one of the three patterns we recommend every beginner learn), and it doubles for streamer wings and emerger bodies. A single patch lasts dozens of flies. Buy natural tan first; you can dye it later if you want specific colors.
What we like
One patch ties dozens of Elk Hair Caddis and similar patterns
Natural tan color works without any dyeing for most caddis imitations
What to know
Hollow hair behaves differently than dubbing, watch a tutorial first
Fibers flare and escape; messy at the bench until technique improves
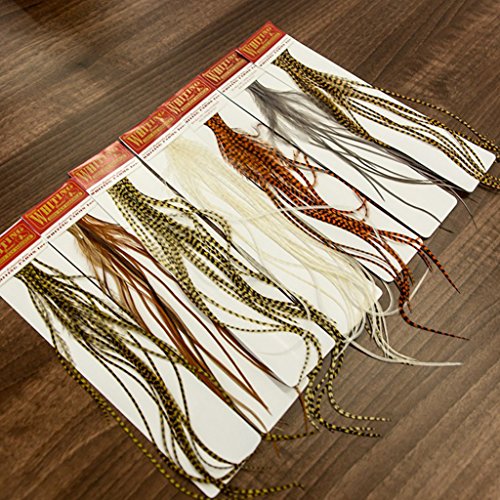
Whiting Farms is the definitive source for dry fly hackle, their roosters are bred specifically for long, stiff, fine-stemmed feathers that float flies. The 100 Pack gives you feathers for size 12–18 dry flies without buying a full cape. This is the one materials upgrade that genuinely affects fly performance rather than just aesthetics.
What we like
Whiting capes are the world standard for dry fly hackle quality
100-pack gives variety of sizes without committing to a full cape
Stiff, long-fibered feathers float flies better than generic hackle
What to know
More expensive than generic hackle, wait until you're tying dry flies to fish
Sold by color; buy natural grizzly or brown first for the most pattern versatility
You need exactly four tools to start: scissors (your most-used, splurge here), a bodkin (a sharp needle for picking out materials and clearing hook eyes), hackle pliers (to grip small feathers without crushing them), and a whip finisher (to lock off your thread head). Many starter kits bundle all four under $30. The scissors matter most, dull or imprecise scissors make every step harder.
Best starter
Dr. Slick
4" All Purpose Scissors
$20.00 as of Jun 22, 2026
★★★★★Our rating· Only 7 left in stock - order soon.
Dr. Slick scissors are the fly tying standard: razor sharp, precise tip for working in tight spaces around a hook, and built to stay sharp through years of cutting hair, dubbing, and thread. The 4-inch all-purpose model handles everything from coarse deer hair to fine thread. You'll use these every single session.
What we like
Razor-precise tips, essential for cutting close to the hook shank
Stays sharp through heavy use; the benchmark scissors every tutorial uses
Fine and coarse blades: one pair handles all materials
What to know
Dulls quickly if used on wire or heavy monofilament
Higher price than craft scissors, but worth every dollar
Loon's all-in-one kit includes scissors, a bodkin, hackle pliers, and a whip finisher, the four tools you'll use on every fly, bundled at a price that costs less than buying Dr. Slick scissors alone. The scissors aren't quite Dr. Slick quality, but everything else is good, and having all four tools in one kit means you can actually start tying immediately.
What we like
All four essential tools in one purchase, no hunting for extras
Cheaper than buying each tool separately by a wide margin
What to know
Bundled scissors are not as precise as Dr. Slick dedicated scissors
Lower-end whip finisher takes practice to get smooth
The whip finish locks your thread so the head doesn't unravel when you cut it. Most beginners learn the hand-tied whip finish first, but a rotary tool makes it mechanical and consistent, especially for small flies where finger space is limited. Add this once you're regularly tying size 16 and smaller.
What we like
Mechanical consistency on tiny flies, more reliable than finger method
Tight heads on size 18 and smaller are much easier with the tool
What to know
Learning curve on first use, awkward before it becomes automatic
Not necessary until you're tying small flies (size 16 and below)
Fly tying has a learning curve, but it's not the one you expect. Here's what the first month actually looks like, from threading a bobbin to landing your first fish on a fly you made.
Fly tying looks impossibly precise until you try it. Then it looks attainable but frustrating. Then, somewhere around your third or fourth session, something clicks, your thread tension becomes instinctive, your hands stop fighting the hook, and you finish a fly that looks like a fly.
That sequence is predictable. Here’s what each stage of your first month actually looks like, so you know you’re on track.
Week 1: The fundamentals aren’t glamorous
Your first job isn’t tying a fly. It’s getting comfortable with your tools.
Set up your vise, thread a bobbin with black 8/0 thread, and wrap thread up and down a bare hook for ten minutes. No materials. Just thread wraps, forward, back, forward, applying even tension without breaking the thread. This single drill teaches you more about fly tying than watching three YouTube tutorials.
When you can wrap thread for five minutes without snapping it or bunching it up unevenly, you’re ready to add materials. Not before.
The Woolly Bugger is the right first fly. It’s ugly, it’s forgiving, and it catches fish in almost any body of water. A Woolly Bugger requires: a streamer hook, black marabou for the tail, olive or black chenille for the body, and a soft rooster hackle palmered over the body. Four materials, one pattern, all the core skills.
Watch Tim Flagler’s Woolly Bugger tutorial on YouTube before you go shopping. His material list is your shopping list.
Tie five Woolly Buggers before you tie anything else. They’ll be ugly. That’s not a failure, it’s the curriculum. Your first fly is a thread control exercise. Your fifth fly should look like a fly.
The things beginners consistently struggle with:
Thread pile-up near the hook eye. You’re trying to cram too many materials too close to the eye. Leave at least 1/8 inch of bare hook shank behind the eye for your head. Set that boundary at the start and work back from it.
Tail too long, tail too short. The Woolly Bugger tail (marabou) should be about equal to the hook shank length. Longer than that and the fish short-strikes it without getting hooked. Shorter and it doesn’t move right. Get a feel for the proportion.
The hackle wrapping. Palmer wrapping (spiral wrapping hackle over the entire body) feels awkward at first. The hackle pliers slip, the feather tears, the wraps pile up. Slow down. Take two practice wraps, see where it lands, adjust your tension. Speed comes after accuracy.
By the end of your second week, you should have five Woolly Buggers you could fish without embarrassment, and you should understand thread tension well enough to break a thread deliberately at a predictable point (by applying steady increasing pressure) rather than accidentally snapping it.
Week 3: Add a nymph pattern
The Pheasant Tail Nymph is the second fly every beginner should learn. It’s the most-used nymph in North America, works across almost every trout stream, and introduces skills the Woolly Bugger didn’t require: ribbing wire, tying in a wing case, and tying off multiple materials in sequence.
Materials: pheasant tail fibers, fine copper wire, thread in brown or olive. A curved nymph hook (TMC 2457 or equivalent) gives the curved body shape.
The key technique is ribbing: after you build the body, you wrap a strand of fine copper wire in the opposite direction back over it. The counter-wrapping locks the materials in and creates realistic segmentation. It sounds fussy; after two or three tries, it becomes automatic.
Dry flies are harder than nymphs because proportions matter more, a dry fly needs to sit in the water surface film, which means the hackle needs to be the right stiffness, the right length, and evenly distributed around the hook. Loose hackle, bunched hackle, or hackle that’s too long will sink the fly.
The Elk Hair Caddis is the right first dry fly. It’s faster to tie than an Adams (no parachute post), more forgiving of proportion errors, and useful across a huge range of water types. Materials: a dry fly hook, tan dubbing for the body, deer body hair stacked for the wing, and brown hackle wrapped forward.
The new skill here is stacking deer hair: placing a bunch of hair in a stacking tool to align the tips, then tying it down as a tent-shaped wing over the hook. The first few tries, the hair flares and spins. Tying it in with firm initial wraps (not clamping tension) before locking it down is the technique. It takes about four attempts before it feels natural.
By the end of your first month, you have three patterns you can fish. That’s more than most beginners accomplish. You’re not a beginning fly tyer anymore, you’re an intermediate fly tyer with bad habits, which is a much more interesting thing to be.
Things you’ll fail at, that’s normal
Every beginner fails at the same handful of things:
Thread breaking. Happens to everyone. You’ll learn your thread’s breaking point through feel. When in doubt, less tension than you think.
Whip finishing. The thread head is the last thing you tie, and it’s easy to mess up. Use a whip finisher tool until the hand method feels natural (usually 3-4 weeks in).
Materials spinning around the hook. Happens when you first apply material and apply too-heavy tension. Pinch the material against the hook with your non-dominant hand while taking the first few wraps. Let go after the third wrap.
Forgetting where the hook eye is. You build up materials, run out of space, and realize there’s no room to finish the head. Always mark the tie-off zone in your mind before you start adding materials.
Nobody’s first flies are good. The point of the first month is to develop habits, not to produce fishable products.
What to do in month two
Once you can tie the three starter patterns without constantly consulting a tutorial:
Go to the water and fish a fly you tied. Even if it’s ugly. Even if the fish ignore it. The feedback loop of “I made this thing and put it in the water” is uniquely motivating.
Pick up The Fly Tying Bible by Peter Gathercole. It covers 100+ patterns with step-by-step photography, useful to have on the bench for reference when you don’t want to start a video.
Find a local fly shop and ask what’s hatching. Matching a real local hatch is the next skill level, and a good fly shop will tell you exactly which pattern you need right now.
You’ll be amazed what you can catch on something you made in your kitchen.
Save your money
What you don't need yet
Beginners get pressured to buy a lot of stuff that doesn't help them play
better. Here's what we'd skip on day one.
A UV resin and UV light — Useful for finishing fly heads once you're building precise patterns, but head cement works fine to start. Add UV tools after your first 100 flies.
Exotic or rare materials — CDC, rare game bird feathers, and specialty furs come later. Tie a few dozen flies with standard materials first, the exotic stuff will still be there.
A bobbin threader — Learning to thread your bobbin by hand teaches a useful skill. Skip the gadget.
A dedicated tying bench or lamp — A card table, good overhead light, and a small desk lamp work perfectly. Build out your workspace after six months if you're still tying regularly.
Pattern-specific full capes — A full rooster cape is a lifetime supply of hackle, wait until you know what sizes and colors you actually tie before investing $60-100 per cape.
Head cement applicator tools — A bodkin tip or a toothpick applies head cement just fine. The specialty applicator is a nice-to-have at best.
First week
Your first seven days
A short, real plan to get from gear-on-doorstep to actually playing.
Set up your vise, thread a bobbin with black 8/0 thread, and practice wrapping thread onto a bare hook. Do this on 10 hooks before adding any materials. · Action
Watch Tim Flagler's Woolly Bugger tutorial on YouTube before buying any materials, his materials list is the exact shopping list you need. · Learn
No, plenty of people tie flies as a craft without fishing them. But knowing what your fly needs to imitate (behavior, size, color stage) makes you a better tyer faster. Most fly tyers fish; most fly fishers eventually tie.
What's the best fly pattern for a complete beginner?
The Woolly Bugger. It's forgiving of imprecision, catches fish in almost any water, and teaches the core skills, tying in a tail, building a body, wrapping hackle, finishing the head. Tie two dozen before you move on to anything else.
How long does it take to tie a fly?
Your first flies will take 20–40 minutes each. After a few dozen, you're down to 5–10 minutes for a Woolly Bugger, 10–15 for a precise dry fly. Speed comes naturally, don't rush the early stages.
Is fly tying cheaper than buying flies?
Not immediately. Your per-fly cost drops below retail after you've used up the initial materials investment, usually after 100–200 flies. Better framed as a hobby within a hobby than a cost-cutting exercise.
What thread weight should I start with?
8/0 (also labeled 70 denier) is the all-purpose starter weight. It works for sizes 6 through 18, most trout patterns. Switch to 10/0 or 12/0 for midges (size 20 and smaller), and heavier thread like 3/0 for large streamers or saltwater flies.
Do I need a rotary vise?
Not to start, but it helps faster than most people expect. Rotary lets you spin the fly in the jaws to inspect it from all sides without removing the hook, useful for adding ribbing and checking proportions. Our starter pick, the Atlas Rotary, is a true rotary under $130.
Tim Flagler / Tightline Productions (YouTube) — The gold standard for beginner fly tying instruction. Crystal-clear macro close-ups, plain-language explanations, deep back catalog covering dozens of patterns.
Fly Fish Food (YouTube) — Well-produced tutorials with emphasis on realistic patterns. A step up from beginner content once you're comfortable with thread control.
MidCurrent — Reliable editorial site covering fly fishing and tying: gear reviews, technique, and pattern breakdowns. One of the few fly fishing sites with actual editorial standards.
r/flytying — Unusually encouraging community for beginners. Post your first flies, experienced tyers give specific, actionable feedback without being elitist about it.
The Fly Tying Bible by Peter Gathercole — Step-by-step patterns for 100+ flies with clear photography. Worth having on the bench alongside YouTube, great for reference without rewinding video.
As an Amazon Associate, JustBeginning earns from qualifying purchases.
We may also earn commission from other affiliate programs linked on this
page. Editorial recommendations are independent; we don't choose
products based on commission rates.
Product prices and availability are accurate as of the date and time
indicated and are subject to change. Any price and availability
information shown on Amazon at the time of purchase will apply.

 Best starter