There's a whole world smaller than your thumbnail that most people never see. Macro photography brings it into focus: dew drops on spiderwebs, the texture of a bee's wing, the geometry of a flower's center. The gear is specialized, the technique is patient, and the results are unlike anything else photography can produce.
By Colin B. · Published May 24, 2026 · Last reviewed June 17, 2026
Extension tubes + any kit lens = macro for $25. A real dedicated macro lens is $350–600. Budget $700+ for a proper all-in rig with lighting.
We earn commission on qualifying Amazon purchases — see our
affiliate disclosure.
Price tiers and budget totals shown above are editorial estimates;
actual Amazon prices vary.
At a glance
Our top pick in each category
The fastest path through this guide — each best-starter pick by category.
Scroll for the budget and upgrade alternatives.
The lens is the investment, not the camera. A consumer camera with a proper macro lens will dramatically outperform a high-end camera with a kit lens or close-up filter. If your budget is limited, spend it on the glass.
Not every lens labeled 'macro' achieves 1:1. Many only reach 1:2 (half life-size), which is fine for flowers but not enough for insect detail. Look for the 1:1 maximum magnification spec before buying.
At 1:1 magnification, depth of field is measured in millimeters. At f/8 on a 100mm macro, you have about 1.5mm of sharpness. Any movement (yours, the subject's, or a gust of wind) blows focus. Patience and stability are the skill you're really learning.
The gear
What you actually need
Macro Lenses
A true macro lens is the most important purchase in this hobby. It determines magnification, working distance (how close you physically need to get), and overall image quality. For beginners, a 90–105mm focal length is the sweet spot: enough working distance to not startle insects, but manageable to handhold. Plan to spend $350–600 for something that will genuinely teach you the craft without holding you back.
Macro Lenses — what's the difference?
A few common shapes, each making a different trade.
Short macro (50–65mm)
Small and light. Best for still subjects in a controlled environment.
Focal length
50–65mm
Working distance
4–6 inches
Best use
Products, flowers, studio
Best for Tabletop, studio, still subjects that don't startle
Tradeoff Too close for live insects: you'll startle them before shooting
Standard macro (90–105mm)
The beginner sweet spot: reach without bulk.
Focal length
90–105mm
Working distance
12–14 inches
Best use
Insects, flowers, all-purpose
Best for Most macro beginners; outdoor insects and garden subjects
Tradeoff Heavier than short macros; slightly harder to handhold all day
Telephoto macro (150–200mm)
Maximum working distance for skittish wild subjects.
Focal length
150–200mm
Working distance
18–24 inches
Best use
Dragonflies, butterflies, field insects
Best for Wildlife macro, skittish insects, outdoor nature work
Tradeoff Heavier, more expensive, harder to find affordable options
Best starter
Tamron
SP 90mm f/2.8 Di VC USD Macro
$799.00 as of Jun 22, 2026
★★★★★Our rating· Only 2 left in stock - order soon.
The Tamron 90mm has been the go-to beginner macro recommendation for years. True 1:1 magnification, built-in image stabilization, and available in Canon EF, Nikon F, and Sony A mounts. Sharp across the frame, autofocus that behaves for macro, and honest pricing for what you get. If you only buy one piece of macro gear, make it this.
What we like
True 1:1 magnification, the real tool for insect and flower work
Built-in image stabilization helps with handheld shots in the field
Available for Canon EF, Nikon F, and Sony A mounts
What to know
Mount-specific: double-check yours before ordering
AF hunts in low-contrast scenes; worth learning manual fine-tune
★★★★☆Our rating· Only 2 left in stock - order soon.
Extension tubes fit between your camera and any existing lens, letting it focus much closer than designed. No glass means no optical penalty: you're just extending the barrel. A three-tube set runs under $25 and can turn a 50mm kit lens into a capable macro starter. The smart way to test the hobby before committing to a dedicated lens.
What we like
Under $25, the cheapest path to true macro capability
No glass = no optical penalty; works with lenses you already own
Stack multiple tubes for greater magnification
What to know
Lose infinity focus entirely while attached (macro-only mode)
AF performance varies by body; manual focus often works better
★★★★☆Our rating· Only 2 left in stock - order soon.
Canon's latest L-series macro sets the benchmark: 1.4x magnification surpassing standard 1:1, optical IS rated at 8 stops combined with in-body IS, and sharpness you'd expect from their professional line. If you shoot Canon mirrorless and want a lens that genuinely won't hold you back at any stage, this is the one.
What we like
1.4x magnification, surpassing the standard 1:1 benchmark
8-stop optical IS combined with in-body stabilization
L-series optical quality: the sharpest macro Canon makes
What to know
RF mount only: requires a Canon mirrorless body
$1,100+ price tag; only justified once you know the hobby sticks
Almost any modern interchangeable-lens camera can do macro photography; the lens does the heavy lifting. That said, a few features help: in-body image stabilization (IBIS) assists with handheld stability, a high-resolution sensor lets you crop aggressively, and a fully articulating screen is invaluable for shooting at ground level. If you already own a camera, start there and invest in the lens.
Best starter
Canon
EOS Rebel SL3
$$$
★★★★★Our rating
The lightest DSLR Canon makes, with a fully articulating touchscreen that flips for ground-level macro shots. A great match for the Tamron 90mm EF lens, and together they're lighter than most mirrorless kits and need no adapters. If you're starting from scratch and want a known-reliable system at a fair price, start here.
What we like
Lightest DSLR Canon makes, easy to carry in the field for hours
Fully articulating touchscreen for low-angle macro shots
EF mount ecosystem has wide macro lens selection at every price
What to know
No in-body stabilization: lens IS or tripod required for sharpness
DSLR form factor is larger than mirrorless equivalents
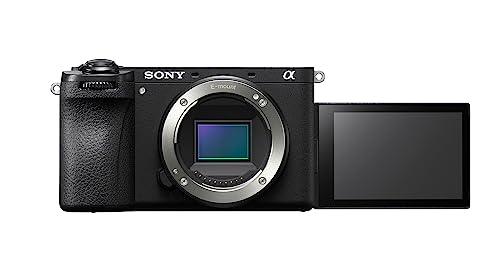
Sony's flagship APS-C mirrorless brings 5-axis in-body stabilization, AI subject-tracking that works on insects, and a 26MP sensor that crops well. It's overkill for your first session, but if you want a body that will never hold back your macro photography, this is it. Tamron makes a native E-mount 90mm that pairs perfectly.
What we like
5-axis IBIS adds real stability for handheld macro shots
AI insect-eye tracking; Sony's subject detection works on bugs
26MP APS-C sensor crops aggressively without major quality loss
What to know
Expensive body: $1,300+ before adding a macro lens
Lighting is the hardest problem in macro photography. At 1:1 magnification, you're 6–14 inches from the subject, too close for a popup flash and too tight for standard modifiers. The solutions are purpose-built: twin macro flash units that bracket your lens, ring flashes that mount to the front filter threads, and LED ring lights for continuous tabletop work. Without dedicated macro lighting, you're fighting ambient light that shifts, bounces badly, and forces high ISO that degrades your image.
Best starter
Godox
MF12 Macro Flash Kit (2-light)
$$$
★★★★★Our rating
The MF12 twin-flash kit mounts directly to your lens filter threads. Each head positions independently to eliminate the flat catchlight of a ring flash and give you directional light that reveals texture. Wireless TTL, high-speed sync, and compatible across Canon, Nikon, Sony, and Fuji systems. Strong value for genuinely specialized gear.
What we like
Twin-head design gives directional control ring flashes can't match
TTL across Canon, Nikon, Sony, Fuji: one kit for any system
High-speed sync freezes fast-moving subjects in bright daylight
What to know
Needs the Godox MF12 trigger (sold separately) for wireless TTL
Learning twin-flash ratios takes real experimentation (not plug-and-play)
Continuous LED ring lights require no trigger setup, work in live view so you see exactly what you're capturing, and cost under $40. Not ideal for field work: they need power and are too large to mount on a lens, but excellent for tabletop macro of flowers, textures, and products where you control the environment.
What we like
Continuous light: see exactly what you're capturing in live view
Under $40 and useful for tabletop, product, and flower macro
Bi-color (warm/cool) lets you match ambient light conditions
What to know
Too large to mount on a lens (tabletop and stand use only)
Cannot freeze motion; handheld macro on live subjects requires flash
Canon's professional macro flash: two dedicated heads that each pivot and rotate independently, wireless RT, field-rated durability. The MT-26EX is what working entomologists and botanical photographers use. Output range is enormous, color temperature is consistent, and the independent head control makes lighting look genuinely three-dimensional. Canon users ready to commit will not outgrow it.
At 1:1 magnification, your depth of field is 1–2mm and your hands are not steady enough. A solid tripod eliminates camera shake; a macro focusing rail lets you move the entire camera forward and back in tiny increments without touching the focus ring. Focus stacking (combining multiple images at slightly different focus points) requires both. Even if you mostly shoot handheld in the field, a rail-and-tripod setup at home will teach you how macro focus actually works.
Best starter
Joby
GorillaPod 3K Kit
$$
★★★★★Our rating
The GorillaPod's flexible legs wrap around branches, ground features, and rocks, perfect for low macro positions a standard tripod can't reach. The 3K version handles cameras up to 3kg with a lens attached. Not suited for precision focus stacking, but excellent for field work where you need to get into a strange position fast and quietly.
What we like
Flexible legs wrap around branches and ground features for low angles
Lightweight and portable, fits in a jacket pocket for field macro
3K version holds DSLR with macro lens without flexing under load
What to know
Too flexible for precision focus stacking (not a substitute for a rail)
Ball head lock can creep under heavy lens weight over long sessions
A 4-way focusing rail mounts between your tripod head and camera, giving precise X-Y movement in small increments. For focus stacking (advancing the camera exactly 0.5mm between shots), this is the tool. Neewer's isn't the most precise on the market, but dramatically better than hand-holding, at a price that lets you confirm stacking actually suits your workflow.
What we like
4-way X-Y adjustment enables precise focus stacking without refocusing
Arca-Swiss compatible, fits most quality ball heads and quick releases
Budget-friendly entry to stacking before committing to a premium rail
What to know
Knob precision drifts with heavier camera-lens combos
Takes a few minutes to set up (not a quick field-swap item)
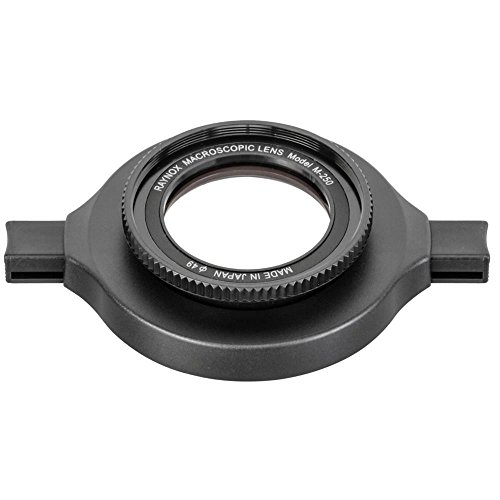
Two cheap tools with outsized impact. A remote shutter release prevents camera shake from your finger pressing the button. At 1:1 magnification, that vibration will blur a third of your shots. A close-up diopter filter (like the Raynox DCR-250) screws onto any lens to add extra magnification beyond what the lens achieves alone, making it the cheapest path to extreme macro without buying a new lens. Together, under $100.
Best starter
Canon
RS-60E3 Remote Switch
$24.95 as of Jun 22, 2026
★★★★★Our rating· In Stock
A wired remote shutter release for Canon DSLRs. Press the button, camera fires with zero body contact. The simplest, most reliable way to eliminate shutter-press blur at high magnifications. If you're on Nikon, use the MC-DC2; on Sony, the RM-VPR1. Every brand has their own: get the one for your body.
What we like
Eliminates shutter-press vibration, critical at 1:1 magnification
Under $20 with an outsized impact on sharpness
Wired reliability: no batteries, no pairing, no lag
What to know
Body-specific connector: order the correct model for your camera
Short cable; for remote setups with live bait, wireless is better
Screw-on close-up diopter filters increase any lens's magnification. The DCR-250 is the macro community's favorite: it snaps universally onto lenses with 52–67mm filter threads, adds 8 diopters of extra magnification, and doesn't degrade sharpness the way cheap close-up filters do. The fastest, cheapest path to extreme macro with lenses you already own.
What we like
Snap-on adapter works on most lenses without step-up rings
8 diopters of added magnification for extreme closeups
Raynox-quality glass, noticeably sharper than cheap close-up filters
What to know
Snap adapter fits 52–67mm threads only: larger lenses need alternatives
Significantly reduces working distance: lighting becomes even harder
Macro photography has a steeper learning curve than most hobbies — not because the gear is complicated, but because a millimeter of movement ruins the shot. Here's what your first twenty hours actually look like, and how to climb the curve faster.
Most people discover macro photography by accident — they zoom into a photo they took of a bee and notice the individual hairs on its thorax, and then they can’t stop thinking about that image. The whole world looks different once you know what’s hiding at 1:1 magnification.
The challenge is that macro photography punishes bad technique immediately and visibly. At life-size magnification, a millimeter of focus shift blurs the entire image. Wind that you can’t even feel will ruin a shot. Your heartbeat, at the right distance, can move the camera enough to matter.
This is what your first twenty hours actually look like — what goes wrong, what clicks, and when it starts becoming effortless.
Hours 1–4: Welcome to the wall of blur
Your first session will produce a lot of blurry images. This is not failure — it’s calibration.
The first thing most beginners discover: autofocus doesn’t work the way you expect at macro distances. Your camera’s AF system is used to finding contrast across a wide field. At 1:1, it’s hunting for contrast across a 1–2mm depth of field. It will miss constantly, cycle frantically, and sometimes lock on the wrong thing entirely. This is normal.
The fix, counterintuitively, is to mostly ignore autofocus:
Set autofocus to single-point or manual
Pre-set your focus ring to roughly the magnification you want
Rock your body forward and backward to find focus — not your focus ring
Fire when the subject snaps sharp in the viewfinder or on your screen
This feels wrong until it becomes automatic. Within a few hours it feels more natural than traditional AF hunting.
Set up your first session indoors with something that doesn’t move. A coin works perfectly — the texture of milled edges is extraordinary at 1:1, and it won’t fly away. Shoot at f/8 to start (narrow enough for some DOF, not so narrow that diffraction softens the image). Look at the result at 100% on your computer screen. You’ll probably see one edge sharp and the rest falling off. That’s your first real lesson in depth of field — and it’s more instructive than any video tutorial.
By hour five, you can get a sharp image when everything cooperates. Now the problem becomes lighting.
Natural light is harder to use in macro than it sounds. The subject is only 6–14 inches from the lens, which means your camera body itself creates shade. Thin overcast is the best natural macro light there is — soft, directionless, and consistent. Direct sunlight creates harsh shadows in every crevice and texture that look worse at 1:1 than they do to the naked eye.
If you’re shooting indoors, continuous LED light on a stand is the fastest way to learn to see how light direction changes a subject. Rotate the ring light around your subject — watch how a side-lit texture reveals depth that front-lit flatness hides. This is the skill that improves your images at every stage of this hobby.
Once you understand how light direction works:
Front light (ring flash on-axis): flat, even, good for colors but kills texture
Side light (45° or 90° off-axis): reveals surface detail, creates depth and shadow
Back light (behind translucent subjects): reveals internal structure in petals, wings, and leaves; requires fast shutter or flash to avoid motion blur
Most beginners want to add more light. The better instinct is to add better-directed light.
Take your setup outside for the first time, and pick a good morning for it.
Early morning is the macro photographer’s magic window. Before the sun has been up for an hour, insects are cold and sluggish, dew sits on surfaces it will evaporate off by 9am, and the light is soft and directional in a way it won’t be again until late afternoon. Set an alarm. It is worth it.
Start with flowers rather than insects. Flowers hold still. A dew-covered petal or the geometry of a flower’s center gives you all the challenge of outdoor macro — variable light, wind, handholding — without the subject fleeing.
When you’re ready to try insects, learn their behaviors:
Bees hover and land briefly — you’ll need good shutter speed (1/500s or faster) and burst shooting
Dragonflies return to the same perch repeatedly — set up near a perching spot and wait
Jumping spiders are curious and will turn to look at you — among the most cooperative macro subjects
Butterflies are large enough to catch wings-closed at rest — find where they land to warm in morning sun
The most common mistake in field macro is chasing subjects. Don’t. Instead: find a likely spot — a flower cluster, a damp leaf, a patch of sun-warmed rock — set up, and let subjects come to you. Your stillness matters more than your camera settings.
Hours 17–20: The first images you’re genuinely proud of
Somewhere in this window, the stars align. Subject holds still, light is right, you’re steady, your settings are dialed, and you get an image that makes you want to show people.
What separates these shots from the earlier chaos:
You stopped trying to get it sharp and started trying to get it interesting. Sharpness is necessary but not sufficient. The image that matters has a subject framed with intention — a bee entering a frame at the right angle, water droplets arranged in a line with the camera parallel to them, the eye of an insect in the center of the frame with the body falling off into soft bokeh. These choices are compositional, not technical.
At this stage, most people also discover focus stacking — the technique of shooting multiple frames at slightly different focus distances and combining them in software. A single macro frame often has less than 2mm of sharpness. A five-frame stack of a beetle can show the entire body in focus. Your camera likely has a built-in focus bracket mode — explore it once you’re comfortable with single-frame shooting.
The technical breakthrough comes when you realize how consistent the workflow has become: steady your position, rock to focus, fire on the breath hold, check at 100%, adjust. It stops feeling like fighting the camera. The camera becomes a tool you understand.
Things every macro beginner gets wrong
Shooting at f/22 “for more depth of field.” Diffraction softens macro images dramatically at very small apertures. Shoot between f/5.6 and f/16; use focus stacking for subjects that need more DOF than a single frame provides.
Moving the focus ring to focus. Rock your body instead. The focus ring is for setting magnification; body movement is for finding the exact focus plane within that magnification.
Using flash without understanding the color balance. Most macro flash is cool/blue compared to warm morning natural light. If you’re mixing flash with ambient, check the white balance after your first few shots.
Giving up after wind. Wind doesn’t ruin everything — it just forces you to shoot in bursts and keep the shots where the subject happened to be still. Shoot more. Cull aggressively.
What to do at hour 21
Pick a specific subject and get obsessive. Jumping spiders, hoverflies, water droplets — narrow focus accelerates your growth faster than sampling everything.
Learn to process one focus-stacked image end-to-end. Helicon Focus has a free trial; your camera may have built-in stacking. The process teaches you exactly why your single frames are falling short.
Find a macro community and post for critique. r/MacroPorn requires EXIF in posts — seeing what other photographers used to get a specific result is invaluable.
Buy a flash before buying a better lens. If your next upgrade dollar goes anywhere, it should go to better lighting, not more magnification. Lighting is what separates macro that looks clinical from macro that looks alive.
Save your money
What you don't need yet
Beginners get pressured to buy a lot of stuff that doesn't help them play
better. Here's what we'd skip on day one.
A motorized focus stacking rail — Manual rails work fine for learning. Motorized automated sliders are for precise stacking workflows, a step for hour 30+, not day one.
A reversing ring adapter — Reversing a normal lens gives extreme magnification, but you lose all AF and electronic communication. Extension tubes are a better bridge to extreme macro.
Helicon Focus or Zerene Stacker — Learn single-frame macro first. Your camera's built-in focus stacking (Canon and Nikon both have it) is plenty to start without a paid subscription.
A microscope objective adapter — Olympus microscope lenses adapted to mirrorless give 5:1 magnification. Impressive, but focus becomes nearly impossible without a motorized rail. Way down the road.
A diffusion field tent — Portable diffusion tents are for product photographers. Field insects need patience and a small flash diffuser, not a full tent setup.
First week
Your first seven days
A short, real plan to get from gear-on-doorstep to actually playing.
Order your macro lens or extension tube set first: this determines everything else. · Buy
Set up indoors and shoot something that doesn't move: a coin, a flower petal, a piece of fabric. Learn how depth of field changes as you get closer. · Action
Turn on Live View and use the maximum zoom level (10x) on screen to manually confirm focus. This is the only reliable way to focus at 1:1 magnification. · Learn
Find dew-covered leaves early in the morning or fresh flower heads before the wind picks up. Practice handheld stability on a still subject outdoors. · Action
Research focus stacking. You don't need to do it yet, but knowing why a single frame is often not enough will save you a lot of frustration. · Learn
Shoot the same subject five ways: different apertures, different distances, different light angles. Compare results. This accelerates learning faster than any tutorial. · Action
FAQ
Common questions
Do I need a full-frame camera for macro photography?
No. Crop-sensor cameras are actually advantageous for macro; the crop factor effectively increases working magnification, so a 100mm macro on an APS-C acts like a ~160mm equivalent and gives you more working distance from your subject. Professionals use both.
Can I do macro photography with my phone?
Modern phones with dedicated macro modes get interesting results, but they lack depth-of-field control, true lens magnification, and flash compatibility. Think of the phone as a way to decide if you enjoy the genre before spending on gear.
Why are my macro photos always blurry?
Almost always it's depth of field, camera shake, or both. At 1:1 magnification, DOF is 1–2mm and any vibration is amplified. Solutions: use a tripod and remote shutter release, shoot at f/8–f/16 for more DOF, and use flash to get a fast enough shutter speed regardless of ambient light.
What's focus stacking and do I need it?
Focus stacking combines multiple images taken at slightly different focus distances into one fully-sharp composite. It's not required for most macro work, but becomes essential for extremely magnified shots where DOF is under 1mm. Many cameras have a built-in stacking mode: explore it once you're comfortable with single-frame shooting.
How do I photograph live insects without them flying away?
Early morning is your best window; insects are sluggish before the sun warms them. Approach slowly from the side, not from above. Use a 90–100mm+ macro so you can stay 12+ inches away. And accept that patience beats technique: set up, wait, fire when they hold still.
Is a ring flash or twin flash better for macro?
Twin flash is generally better for most work: it gives directional light and shadows that reveal texture and form. Ring flash produces flat circular catchlights and looks clinical. That said, ring flash is simpler to learn, which is worth something when you're still figuring out the fundamentals.
Thomas Shahan on YouTube — One of the most celebrated macro photographers working today. His jumping-spider portraits are the reference for handheld macro. Watch his technique videos first.
r/MacroPorn — Active subreddit where most posts include EXIF data. Seeing other photographers' aperture, flash setup, and lens choice for a given shot is one of the fastest ways to develop an eye.
Macro Photography Forum — Dedicated community for macro and close-up photographers. Gallery critiques are particularly useful for improving your eye.
Laowa Macro YouTube Channel — Laowa makes some of the most interesting macro lenses available; their tutorial content is excellent for understanding how focal length choices affect working style.
Naturalist's Guide to Nature Photography — Strong field macro guide focused on invertebrate subjects. Reads more like a naturalist's handbook than a gear review, which is exactly why it's valuable.
As an Amazon Associate, JustBeginning earns from qualifying purchases.
We may also earn commission from other affiliate programs linked on this
page. Editorial recommendations are independent; we don't choose
products based on commission rates.
Product prices and availability are accurate as of the date and time
indicated and are subject to change. Any price and availability
information shown on Amazon at the time of purchase will apply.

 Best starter