Street photography rewards presence over gear. You don't need a $3,000 camera or a darkroom — one compact body, one prime lens, and the willingness to walk out the door will take you further than any upgrade ever will. The camera that's always with you beats the one you're babying at home. Here's what to bring, and what to leave behind.
By Colin B. · Published June 2, 2026 · Last reviewed June 2, 2026
Fujifilm X-T30 II Mirrorless Camera
— Fujifilm X-T30 II: compact APS-C with beloved film simulations — the street photographer's default starting camera.
Fujinon XF 23mm f/2 R WR Lens
— Fujinon XF 23mm f/2 WR: the 35mm-equivalent prime that street photographers reach for first.
Entry requires at least one camera body and one prime lens. The used gear market for street photography cameras is deep — an older Fujifilm body with a fast prime can be had for well under $700.
We earn commission on qualifying Amazon purchases — see our
affiliate disclosure.
Price tiers and budget totals shown above are editorial estimates;
actual Amazon prices vary.
At a glance
Our top pick in each category
The fastest path through this guide — each best-starter pick by category.
Scroll for the budget and upgrade alternatives.
Pick a system before you buy anything. Cameras and lenses are ecosystem purchases — Fujifilm lenses don't fit Sony bodies. Our recommendations are Fujifilm X-mount, which has the deepest street-photography culture, the best in-camera film simulations, and a used market that lets you start affordably. If you already own a Sony or Canon, stick with that system.
One focal length for the first three months, at minimum. Zoom lenses encourage you to stay far away and zoom in. A prime forces you to move, anticipate, and commit. Pick 35mm equivalent (23mm on APS-C) and shoot nothing else until you can feel the edges of the frame without raising the camera.
Buy used if you can. Cameras depreciate fast and street photography is hard on gear — bumps, light rain, crowd jostling. A used Fujifilm X-T30 I (first generation) or Sony a6400 bought refurbished will perform identically to a new body in actual shooting conditions. The savings can buy you a much better lens.
Street photography rewards discreet, compact cameras that disappear in a crowd. The ideal body is small enough to go unnoticed, has fast autofocus for split-second moments, and is quiet enough not to startle. APS-C mirrorless cameras hit this target for most beginners — you get 90% of full-frame image quality in a body that fits a jacket pocket. Fujifilm's X-series is the street photographer's default recommendation: physical dials for quick exposure changes without opening a menu, in-camera film simulations that make JPEGs look finished straight off the card, and a design philosophy built around discretion.
Camera Body — what's the difference?
A few common shapes, each making a different trade.
APS-C Mirrorless
Interchangeable lenses, compact body — the flexible default for beginners.
Sensor
APS-C (1.5× crop)
Lenses
Interchangeable
Price range
$700–$1,400
Best for Most beginners; those who want to build a lens system over time
Maximum low-light performance, maximum cost. Consider after a year.
Sensor
Full-frame (35mm)
Lenses
Interchangeable (larger, heavier)
Price range
$2,000+
Best for Experienced photographers upgrading, low-light night work
Tradeoff Heavier, more conspicuous, more expensive — the wrong starting point
Best starter
Fujifilm
X-T30 II Mirrorless Camera
$$$
★★★★★Our rating
The X-T30 II is what we'd buy to start street photography today. It's compact enough to disappear into a crowd, its physical exposure dials let you change aperture without opening a menu, and Fujifilm's film simulations give your JPEGs a finished look straight from camera. The APS-C sensor handles ISO 6400 cleanly — useful when you're shooting in a covered market or on an overcast day.
What we like
Physical dials for aperture, shutter, ISO — no menu-diving mid-scene
Film simulations (Provia, Classic Chrome, Eterna) that nail the street look
Compact enough to fit in a jacket pocket with a 23mm f/2
What to know
No weather sealing — buy a rain sleeve if you shoot in mixed weather
Battery life is modest: 300–350 shots per charge on a good day
If $900 is more than you want to commit up front, the ZV-E10 II gets you into Sony's enormous E-mount ecosystem for less. Image quality is genuinely competitive for street work, and the autofocus tracking is excellent — useful for capturing motion in a crowd. When you're ready for a prime upgrade, the Sony E-mount has options at every price point.
What we like
Access to Sony's extensive E-mount lens ecosystem from day one
Best-in-class subject tracking AF — catches motion most cameras miss
Compact body pairs well with Sigma or Tamron fast primes
What to know
Video-forward menus make photo workflows feel secondary
No electronic viewfinder — you're composing on the screen in bright sun
★★★★☆Our rating· Only 6 left in stock - order soon.
The camera every street photographer eventually wants. Fixed 35mm-equivalent f/2 lens, in-body image stabilization, and the most discreet form factor in digital photography. It does everything you'd use an X-T30 II with a 23mm lens for — in a smaller, quieter, more pocketable package. The premium is real, but so is the convenience of one camera that's always with you.
What we like
Fixed 35mm-equiv f/2 lens is optically superb and always ready
In-body stabilization opens up slower shutter speeds in low light
Retro styling that blends into street environments
What to know
High demand keeps it frequently out of stock at retail price
No lens swapping — if you want a 50mm, this isn't your camera
Commit to one focal length for your first six months, minimum. Zoom lenses encourage shooting from a comfortable distance; primes force you to move, anticipate, and get close. Street photographers work in 35mm or 50mm (full-frame equivalent) — on an APS-C Fujifilm body that's 23mm or 35mm respectively. Start with 23mm. It sees roughly what the human eye sees, which makes anticipating a moment feel intuitive rather than mechanical. These recommendations are for Fujifilm X-mount bodies. Sony E-mount shooters should look at the Sony 35mm f/1.8 OSS as their equivalent starter lens.
Best starter
Fujifilm
Fujinon XF 23mm f/2 R WR Lens
$$$
★★★★★Our rating
Fujifilm's own 23mm is the one we'd mount on the X-T30 II and leave there for the first year. The f/2 aperture handles indoor markets and overcast days without struggle. Weather sealing means light rain won't end your session. It's compact enough that camera plus this lens fits a jacket pocket — which is the whole point of a street kit.
What we like
Weather-sealed: shoot in light rain without worrying
Compact enough that camera + lens fits a jacket pocket
Fujifilm's own optics — renders beautifully with Fuji film simulations
What to know
Fujifilm X-mount only — incompatible with Sony or other systems
f/2 is fast but not f/1.4 — very dim indoor venues will challenge it
A full stop faster than the Fuji 23mm f/2 and about $150 cheaper. Viltrox has earned real credibility in the Fujifilm third-party market — autofocus is quick, build is solid, and the extra light-gathering lets you shoot in dim covered markets without bumping ISO into muddy territory. The trade-off is no weather sealing, which matters on rainy days.
What we like
f/1.4 is a full stop faster — handles genuinely dark indoor venues
Priced well below Fujifilm's own equivalent and optically competitive
What to know
No weather sealing — keep it indoors on rainy days
Third-party AF updates lag behind Fujifilm firmware — watch compatibility notes
Fujifilm's most beloved prime and exceptional by any measure. The 35mm (52.5mm equiv) compresses a scene slightly more than the 23mm and gives you beautiful subject isolation in a crowd at f/1.4. The rendering is distinctly painterly — Fuji shooters use that word a lot for this lens, and it earns it. Bigger than the 23mm f/2, but the output justifies the size.
What we like
f/1.4 with painterly out-of-focus rendering at wider apertures
52.5mm equivalent compresses a street scene in a flattering way
Fujifilm's legendary prime — optically superb and built to last
What to know
Loud AF motor — not ideal when discretion matters most on street
Larger and heavier than the 23mm f/2; the compact advantage shrinks
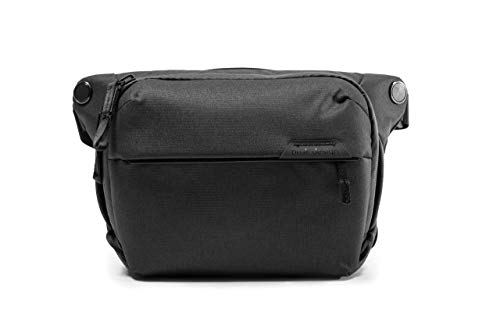
The bag is a tactical decision. A large logo'd camera backpack announces your equipment and makes strangers self-conscious. Street photographers gravitate toward two solutions: a slim sling that keeps the camera on your hip for instant access, or a small shoulder bag that reads as an everyday bag. Quick access beats capacity — if you're digging through a zipper, the moment has already passed.
Best starter
Peak Design
Everyday Sling 6L
$129.95 as of Jun 22, 2026
★★★★★Our rating
The sling photographers actually use. The magnetic capture system lets you swing the bag around and access your camera in under three seconds without removing it. It holds a mirrorless body, one or two lenses, a phone, and a water bottle. It reads as a tech bag rather than a camera bag — exactly what you want when you're trying to blend in on the street.
What we like
Camera access in under 3 seconds without removing the bag
Reads as tech bag, not camera bag — subjects don't get self-conscious
Built to last — Peak Design has a lifetime guarantee
What to know
Magnetic closure requires practice to reliably open one-handed
Expensive for a sling bag — comparable to a budget lens
A $30 shoulder bag that does the job: one camera body, two small lenses, a divider system to protect glass, and a front quick-access pocket. No logo, no branding — it reads as an everyday shoulder bag, not a camera announcement. The right choice if you're not yet sure you'll commit to the hobby.
What we like
Under $30 and completely anonymous — no photographer branding at all
Front quick-access pocket for one camera body without opening the main compartment
What to know
Zipper quality won't survive more than a year of regular use
Minimal padding — add your own foam if you're carrying expensive glass
★★★★☆Our rating· Only 2 left in stock - order soon.
Ona makes camera bags that look like upscale everyday messenger bags — because they are. The Bowery holds one mirrorless body, two or three compact lenses, and passes for a regular leather shoulder bag. Italian-tanned leather, padded foam interior, and elegant enough that you'll carry it everywhere, not just on shoots. Expensive, but it lasts a decade.
What we like
Looks like a regular bag — nobody knows you're carrying camera gear
Waxed canvas and leather construction that lasts for years of use
What to know
Slim internal padding — handle with care in tight spaces
Premium price reflects premium materials; this is not an impulse buy
A few small purchases make a real difference on a 3-hour shoot: a camera strap that keeps the body in your hand (not swinging at chest height), fast memory cards, and spare batteries. Most mirrorless cameras give 250-350 shots per charge — bring at least one spare on any serious session. For batteries, match your camera: Fujifilm X-series uses NP-W126S; Sony ZV-E10 II uses NP-FW50.
Best starter
Peak Design
Slide Lite Camera Strap
$69.95 as of Jun 22, 2026
★★★★★Our rating· In Stock
The Slide Lite is a slimmer version of Peak Design's flagship camera strap. Quick-length adjusters let you switch from crossbody to hip carry in seconds. The anchor links attach to your camera's strap lug and let you detach entirely in one click when you switch to a bag mount. It's disproportionately popular among working street photographers — there's a reason for that.
What we like
Quick-adjust sliders go from crossbody to hip carry in seconds
Anchor links let you detach the strap in one click — instant bag transition
Lifetime guarantee — the last strap you'll buy for this camera
What to know
Expensive for a strap — similar in cost to a budget lens filter
Anchor links require two small holes in your camera strap lug to install
A wrist strap keeps a compact mirrorless in your hand and ready instead of swinging at chest height. Under $15, attached in 60 seconds, and lets you lower the camera to your side between shots without holstering it. Not glamorous — but for a small camera on a long walk, a wrist strap is genuinely the better carry method.
What we like
Under $15 and keeps the camera in your hand — where it should be
Better for compact APS-C bodies than a full neck strap
What to know
No weight distribution — tiring on heavier bodies after an hour
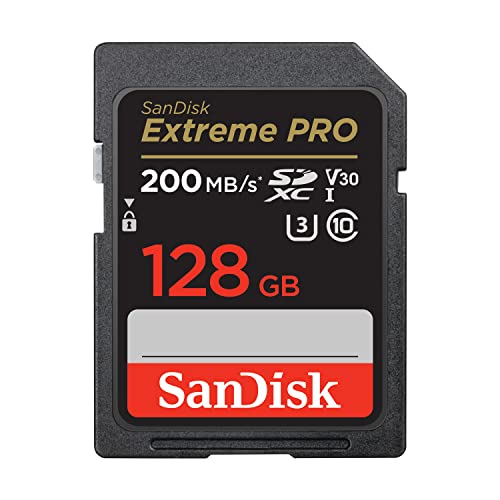
Street photography doesn't demand the fastest cards — you're not shooting 20fps sports bursts. But a V30 rating handles RAW files cleanly, 128GB gets you through a full day's shoot, and SanDisk Extreme Pro is what professional photographers default to because it has never let them down. Buy two: one in the camera, one as a backup.
What we like
V30 rating handles RAW files from any APS-C body without slowdown
SanDisk reliability — the default choice of working photographers worldwide
What to know
Price fluctuates significantly — worth shopping around before buying
Overkill speed for street photography, but there's no performance penalty
The edit is half the work. Fujifilm JPEGs look excellent straight from camera — many street photographers skip RAW entirely, apply a film simulation preset in-camera, and import straight to their phone. But when you want control over exposure, shadows, and grain, you need a real editor. Lightroom Classic is the industry standard. Luminar Neo is a capable one-time-purchase alternative if you dislike subscriptions. Darktable is free and handles RAW from any camera.
Best starter
Adobe
Lightroom Creative Cloud 1-Year Plan
$$$
★★★★★Our rating
Lightroom Classic is where street photographers spend their editing time. The library module lets you cull hundreds of shots fast; the develop module gives precise control over exposure, shadows, grain, and the film-look presets that define street photography aesthetics. The $120/year Photography Plan includes Photoshop. Almost every tutorial you'll find assumes Lightroom.
What we like
Industry standard — every tutorial and preset assumes you're in Lightroom
Photography Plan includes Photoshop for composite or cleanup work
Fast culling tools essential for sorting 200+ street shots per session
What to know
Subscription model — $120/year ongoing, no perpetual ownership
Overkill if you shoot Fujifilm JPEG-only and barely edit
A one-time purchase (no subscription) with AI-powered editing tools that make common adjustments significantly faster than Lightroom. Sky replacement, noise reduction, and portrait retouching are built in. The film look presets are excellent for street photography. Not as deep as Lightroom for bulk culling, but for solo editing sessions it's a capable, modern alternative.
What we like
One-time purchase — no ongoing subscription to budget for
AI noise reduction and sky tools that genuinely save editing time
What to know
Slower on large RAW files than Lightroom on the same hardware
Less suited to high-volume culling than Lightroom's library module
The RAW processor working photographers pay for when Lightroom's color science doesn't satisfy. Capture One's color profiles are widely considered more accurate, and its layer-based masking is faster for precision edits. The Fujifilm version has dedicated film simulation profiles that honor Fuji's in-camera color work. A meaningful upgrade once you're serious.
What we like
RAW color rendering widely considered superior to Lightroom's defaults
Fujifilm-specific profiles honor Provia, Classic Chrome, and other film sims
Layer-based editing is faster for precise local adjustments
What to know
Steep upfront cost for the perpetual license vs. Lightroom's subscription
Interface is unfamiliar to Lightroom users — expect a few weeks to adjust
The camera matters less than showing up. Street photography is a practice built one outing at a time — and the fastest way to develop an eye is to go out at the same hour, in the same neighborhood, for 30 straight days.
Street photography has a deserved reputation for being intimidating. That reputation is accurate — for about the first ten outings. After that, it fades into something closer to meditation: you and your camera and a city that keeps surprising you.
This is what your first month actually looks like, with the things that matter and the things you’ll be tempted to worry about but shouldn’t.
Week 1: Camera, one lens, and the f/8 mindset
Most beginners spend their first week reading about cameras and gear. This is completely understandable and mostly counterproductive. The only thing that builds the eye is going outside and making photographs.
Set your camera to Aperture Priority, f/8, Auto-ISO (capped at 6400). This is the street photographer’s starting mode — not because it’s sophisticated, but because it removes a variable. At f/8 on a 35mm-equivalent lens, everything from about 6 feet to infinity is in acceptable focus. You can stop thinking about exposure and start thinking about composition.
Your only job this week: go out for 90 minutes, three times. Find a location with foot traffic — a market, a transit hub, a busy main street. Walk slowly. Shoot anything that catches your eye. Aim for 100 frames per session. Don’t delete in-camera. Come home and back up.
A few things you’ll notice by day three:
You’re shooting too far away. Every beginner does. The safe distance creates safe, forgettable images. The pictures that work are the ones where you were close enough to feel slightly uncomfortable. Get 30% closer than feels natural.
Decisive moments are short. A pedestrian’s expression, a shaft of light crossing the sidewalk, two strangers accidentally mirroring each other’s poses — these windows last half a second. Start shooting before the moment peaks. The instinct to wait for the perfect frame usually means you miss it.
Bad light makes bad pictures. The first thing every photographer learns to see is quality of light — not its presence, but its angle, softness, and color. Overcast days produce flat, even light that’s fine for learning composition. Golden hour (an hour after sunrise, an hour before sunset) makes everything look intentional.
By week two you have enough reps to start seeing compositionally rather than reactively. This is when street photography starts to feel like a language you’re learning to speak.
The decisive moment is a concept from Henri Cartier-Bresson, the photographer who more or less invented modern street photography: there is a single instant in every evolving situation when all the elements — gesture, expression, light, geometry — align. Your job is to anticipate that instant and press the shutter slightly before it arrives.
This sounds like mysticism. It’s actually pattern recognition. By week two you have enough images to start analyzing what works. Spend one hour this week printing or studying your 10 best frames from week one. Ask: what made me press the shutter then, and not a half-second earlier or later? The answers are usually simpler than you expect — a head turn, a shadow, a moment of stillness in motion.
Things to look for actively this week:
Light and shadow geometry. A shaft of sunlight cutting across a dark doorway gives you a ready-made frame within the frame. Position yourself so subjects walk through it.
Layers. The best street images usually have foreground, middle ground, and background all doing something interesting simultaneously. Train your eye to see the whole depth of the scene, not just the main subject.
Repeating forms. A row of similar shapes or figures in different states creates natural humor and tension. Pigeons, phone-checkers, newspaper readers — repetition with variation is a formula that works.
On photographing people: You will feel self-conscious. This is normal and universal. The solution is not confidence — it’s volume. The more frames you make, the less charged each individual one feels. Start by photographing scenes and letting people walk into them. As you get comfortable, you’ll naturally move closer to subjects. A smaller camera helps enormously; so does moving quickly and not dwelling after you press the shutter.
Week 3: Getting close and working subjects
Week three is when most beginners hit their first real wall: they’ve built a rhythm of shooting, but their work feels generic. Competent, but not specific. The fix is almost always the same: get closer.
The 3-meter rule. For the next week, challenge yourself to make at least one third of your frames from within 3 meters of your subject. Not from across the street. Not with a long zoom. From close enough that you’d need to speak up to be heard. This feels aggressive until you realize that most people are too absorbed in their own world to register you.
Eye contact is not the enemy of street photography — in fact, a photograph where the subject has noticed the camera can be more powerful than a candid one. Some of the most iconic street images are portraits where the subject is looking directly at the lens. Nod. Smile. The camera is not a weapon.
Working a situation. When you find a good location — interesting light, regular foot traffic — don’t take one shot and move on. Stay for 20 minutes. The third pedestrian through will be better than the first. The light will shift. Someone will do something unexpected. Working a scene until you’ve exhausted its possibilities is how you graduate from snapshot-taker to photographer.
This week: try shooting in JPEG + Film Simulation. Set Classic Chrome on a Fujifilm body, or pull a Kodak Tri-X-inspired preset on Sony. Seeing the image in a film look rather than flat RAW gives you immediate feedback about the mood — does the frame feel right, or are you forcing a story that isn’t there?
Week 4: The edit and building a body of work
Photography is two practices: making photographs, and editing them. By week four you have 20-25 shooting hours and somewhere between 1,500 and 3,000 frames. Now the real work starts.
The edit ratio. Professional street photographers consider a 1-in-100 ratio good: one keeper per 100 frames made. For a developing photographer, expect 1-in-200 or 1-in-300 in your first month. This is not discouraging — it means you’re shooting the right way. The photographers who keep every frame aren’t making more pictures; they’re making fewer decisions.
Sit with your light table (Lightroom, Luminar Neo, or even just your phone camera roll) and work through every frame from the month in three passes:
First pass (fast): flag anything that isn’t technically ruined — blurry in the wrong place, missed exposure by more than 2 stops, nothing interesting in frame at all. This pass is ruthless. Delete or hide everything that doesn’t survive it.
Second pass (slow): from what survived, pick your 30 best. Print them or put them on a separate folder. Live with them for 24 hours.
Third pass: from your 30, pick 10. These are your first month’s work. They don’t need to be great photographs — they need to be your photographs, images that couldn’t have been made by anyone else standing anywhere else.
Show your work. Post your 10 best to r/streetphotography and ask for critique. The feedback from working photographers is the fastest path to the next level of improvement. The instinct to wait until your work is good enough to show is the instinct that keeps photographers stuck.
A few things change once you’ve built the month-one habit:
The fear almost disappears. Not entirely — the best street photographers say it never fully goes — but it becomes background noise rather than a wall.
You start seeing pictures before you raise the camera. The eye leads the body. When you find yourself stopping in the middle of the street because you saw something, you’re thinking like a photographer.
Equipment opinions will emerge. Maybe the 23mm feels too wide for the way you see. Maybe you want something quieter. These are valid opinions earned through reps. This is when you upgrade intentionally rather than speculatively.
The camera is a machine for making decisions visible. What makes street photography distinctive is that the decisions have to happen in under a second, in public, with strangers — and then you live with the result. That constraint is not a bug. It’s the whole point.
Save your money
What you don't need yet
Beginners get pressured to buy a lot of stuff that doesn't help them play
better. Here's what we'd skip on day one.
A full-frame camera — APS-C delivers 95% of the image quality in a body half the size. Street photography is about portability and discretion, not raw sensor resolution.
Multiple lenses — Commit to one focal length for your first three months. The limitation forces you to find images within a fixed frame of view, which is how the eye develops.
A tripod — Street photography is handheld by definition. A tripod slows you down, advertises your intentions, and is the wrong tool for spontaneous moments.
External flash — Flash changes the dynamic between you and strangers dramatically. Work ambient light first — it's almost always enough, and it teaches you to read light quickly.
A premium leather bag — Any small shoulder bag works fine for learning. A premium bag is a reward for committing to the hobby, not a prerequisite for starting it.
A second camera body — One camera, one lens. A second body is a distraction that delays developing your eye for a single frame of view. Serious street photographers routinely shoot one body all day.
First week
Your first seven days
A short, real plan to get from gear-on-doorstep to actually playing.
Set your camera to Aperture Priority, f/8, Auto-ISO (max 6400). This is the street photographer's starting mode — the hyperfocal distance at f/8 keeps almost everything in focus so you can concentrate on composition, not exposure. · Learn
Choose one focal length and do not change lenses for the entire week. · Action
Go to a busy public place — a market, a transit hub, a main street — and shoot for 90 minutes minimum. · Action
Shoot at least 100 frames per session. Quantity builds the eye before quality becomes possible. The edit is where you develop taste; the shooting is where you build instinct. · Action
Back up every shoot immediately — two copies in two different places. Street moments are irreplaceable. · Action
Edit your 5 best frames from each session and look at them a day later. The first cut and the second cut tell different stories. · Action
Read one chapter of The Americans by Robert Frank or look through a Vivian Maier or Henri Cartier-Bresson book. Developing a visual vocabulary means studying other people's eyes. · Learn
FAQ
Common questions
Is it legal to photograph people in public without asking permission?
In the United States and most Western countries, yes — photography in public spaces is legally protected. People in a public place have a reduced expectation of privacy. Some countries have stricter rules; if you're traveling, look up local laws. When in doubt, a smile and a genuine interest in your subject goes further than legal knowledge.
What focal length should I start with?
35mm equivalent (23mm on APS-C Fujifilm bodies). It sees roughly what the human eye sees, which makes anticipating a moment feel natural before you even raise the camera. Shoot nothing else for three months. Many street photographers never stray from 35mm for their entire careers.
Should I shoot RAW or JPEG for street photography?
JPEG with a film simulation preset is a legitimate choice — especially on Fujifilm, where the in-camera color science is excellent. RAW gives you more editing control but requires more time at the computer. Many serious street photographers shoot RAW + JPEG: the JPEG is usable immediately, the RAW is there if you need to rescue a shot.
How do I get over the fear of photographing strangers?
It's universal — every street photographer felt it. The first 10 times feel uncomfortable; by the 30th it fades to background noise. Start by photographing scenes and letting people walk into them rather than pointing the camera directly at a stranger. As you get comfortable, you'll naturally move closer. A smaller camera helps enormously.
Do I need a rangefinder-style camera for street photography?
No. A standard mirrorless camera works perfectly. Rangefinders (Fujifilm X-Pro series, Leica M) suit the genre's philosophy — quiet, discrete, zone-focus-capable — but they're an upgrade for when you've developed opinions about workflow, not a prerequisite for starting.
Full-frame versus APS-C for street photography?
APS-C is actually better for most street work: smaller bodies, smaller lenses, less intimidating to subjects, and less weight on a 3-hour walk. Full-frame has a low-light advantage that matters for night work, but the portability trade-off is significant. Most celebrated street photographers have done their best work on smaller-sensor cameras.
Magnum Photos — The legendary photographer cooperative. Browse the archive to study how the masters composed street work — this is your visual curriculum.
Eric Kim Photography Blog — The most prolific street photography blogger on the internet. Opinionated, practical, occasionally over-the-top — but his beginner guides and composition essays are genuinely useful.
Streethunters.net — Community site focused entirely on street photography. Articles, interviews with photographers, weekly photo challenges. Good for finding your footing in the community.
r/streetphotography — Active subreddit for posting work and getting feedback. Skip gear threads; focus on critique threads where real photographers dissect what's working and what isn't.
The Online Photographer — Mike Johnston's long-running blog. Slower pace, deeper essays, less gear obsession. Essential reading when you want to think about photography beyond the technical.
Sean Tucker (YouTube) — Thoughtful videos on photography philosophy and visual storytelling. His essays on 'why we make photographs' are more useful than most technique videos.
As an Amazon Associate, JustBeginning earns from qualifying purchases.
We may also earn commission from other affiliate programs linked on this
page. Editorial recommendations are independent; we don't choose
products based on commission rates.
Product prices and availability are accurate as of the date and time
indicated and are subject to change. Any price and availability
information shown on Amazon at the time of purchase will apply.


 Best starter