Ice fishing is a completely different sport from open-water fishing: you need an auger, a shelter, and a flasher just to get started. But the first time you pull a walleye or crappie up through a ten-inch hole in frozen lake ice, you'll understand why this hobby has a fanatical following across the north. Here's exactly what you need.
By Colin B. · Published May 24, 2026 · Last reviewed June 17, 2026
Vexilar FL-8SE Genz Pack Flasher
— Vexilar's FL-8SE flasher shows you exactly where your jig is relative to the fish. Worth every penny.
Budget total
$300
Typical total
$600
Budget mode: hand auger + pop-up shelter + a few tip-ups. Gets you on the ice for around $300. Add a flasher sonar and you're at $500–700 for a serious setup.
We earn commission on qualifying Amazon purchases — see our
affiliate disclosure.
Price tiers and budget totals shown above are editorial estimates;
actual Amazon prices vary.
At a glance
Our top pick in each category
The fastest path through this guide — each best-starter pick by category.
Scroll for the budget and upgrade alternatives.
Ice fishing isn't expensive to try before you buy. Most good bait shops and outfitters in ice-fishing country rent augers, shelters, and tip-ups by the day. Rent one full day before you spend $600 on gear: you'll know immediately whether this is your sport.
Check the ice thickness before anything else. Four inches is the minimum for a single person on foot. Five to seven inches for a snowmobile. Eight to twelve for a small vehicle. This is not optional caution: it's how ice fishing works. Your local outfitter or bait shop will know which lakes are safe and how thick the ice is right now.
Talk to locals. Ice fishing has a strong regional culture and the hotspots change week to week based on ice conditions, fish movement, and temperature. The guy at the bait shop on the lake is not a salesman trying to upsell you: he's a valuable resource. Ask him where the fish are.
The gear
What you actually need
Ice Augers
The auger is how you get through the ice: it's the most consequential gear decision you'll make. Hand augers are cheap and quiet but require real effort in thick ice. Electric augers cut fast and run on rechargeable batteries, making them the best fit for most beginners. Gas augers are the fastest but loud, heavy, and overkill for occasional fishing. Start with a 6-inch or 8-inch blade: 6 inches handles panfish and walleye; 8 inches is better for pike. Rent first if you're not sure which direction you're going.
Ice Augers — what's the difference?
A few common shapes, each making a different trade.
Hand Auger
Quiet, cheap, no maintenance: the right start for most beginners.
Cost
$50–100
Holes per trip
5–15
Max ice depth
24–30 in.
Best for Budget anglers, shallow lakes, casual fishing 1–2x per season
Tradeoff Arm-tiring in deep ice; slower on thick-freeze lakes
The Mora blade is the gold standard for hand augers, Swedish steel that stays sharp for years and cuts through ice surprisingly fast. StrikeMaster has been making these for decades and the design doesn't need to change. Under $80, no battery to charge, no fuel to mix, and it'll outlast three electric augers with basic care. The right tool for anyone fishing fewer than a dozen holes per trip.
What we like
Swedish Mora steel blade holds an edge through full seasons
No battery or fuel, nothing to charge, mix, or fail in the cold
Under $80 and genuinely better than most mid-range electrics cut
What to know
Tiring in ice thicker than 18 inches: arms will burn by hole 6
ION invented the electric ice auger category and the Alpha Plus Gen 3 is their best work. The 40V lithium battery drills 40-plus holes on a charge in typical conditions, cuts through 36 inches of ice without complaint, and reverses to extract the bit cleanly. If you're drilling more than ten holes per trip or fishing thick-ice lakes in the deep north, this is where you end up.
What we like
40+ holes per charge in average conditions: full day without worrying
Reverse mode pops the bit free from slush and ice chips cleanly
Quiet enough you won't spook fish: real advantage over gas
What to know
Battery performance drops sharply below -10°F
Heavy at 21 lbs: feels it after carrying across a large lake
When you're drilling 40 holes a morning on a scouting trip across thick ice, nothing touches a powered auger. Jiffy's Pro 4 runs on a 1-lb propane canister: cleaner than gas, no carb to rebuild, and it starts in the cold without the fight. It'll run all day, drill through any ice, and still be running in ten years. Overkill for casual fishing but indispensable for serious hardwater anglers.
What we like
Never runs out of power: drill all day without carrying a spare battery
10-inch blade handles trophy pike and big walleye slots easily
What to know
Loud, exhaust-smelly, and ruins the quiet of early-morning ice
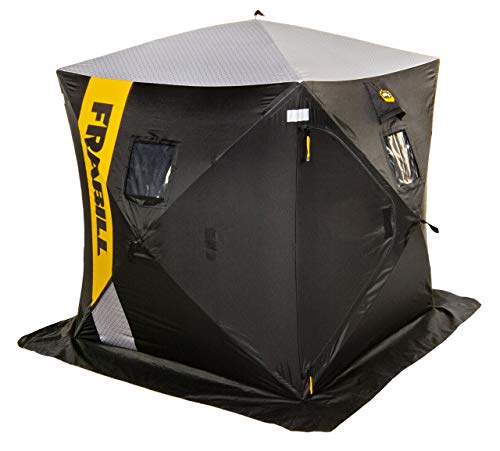
A shelter is not optional on most days: wind chill at 0°F is brutal and hypothermia risk is real. Pop-up hub shelters are the go-to for beginners: they set up in under a minute, fold into a bag you sling over your shoulder, and fit one to three anglers comfortably. Hard-sided flip-over shelters are warmer and more durable but run $600-1,000+ and are pulled behind a snowmobile. Start with a hub.
Best starter
Eskimo
Quickfish 3 Pop-Up Ice Shelter
$$$
★★★★★Our rating
Sets up in sixty seconds, fits three anglers and their gear, and Eskimo's hub design is the most copied in the category for good reason. The Oxford floor keeps wind out at ground level and the adjustable holes let you position rods right over your auger holes. Has held up for years with anglers who fish every weekend.
What we like
60-second setup: no poles, no guesswork, no frozen fingers
Adjustable floor holes position over any auger-hole spacing
Fits 3 anglers with gear comfortably: bring a friend
What to know
Vulnerable to winds above 30 mph: must stake down every time
Not as warm as hard-sided flip-overs in extreme cold
A solid one-person hub at a lower price point than the Eskimo. If you're not sure ice fishing will stick, this is the right way to find out without spending $250. The frame is lighter than Eskimo's, which means it's also a bit less rigid in wind: but for calm mornings on a sheltered lake, you won't notice.
What we like
Lower entry price for anglers testing whether ice fishing clicks
Lighter and easier to carry across long lake crossings
Clam's Thermal fabric is measurably warmer than standard hub shelters: the inner liner traps heat and makes a real difference on brutal days when you'd otherwise be packing up. The Nanook XL fits four anglers with space to move, and the Clam build quality is noticeably tighter than budget hubs. Worth the investment once you're fishing multiple times a month.
What we like
Thermal liner is measurably warmer on brutal sub-zero mornings
Four-person capacity: the group shelter that fits everyone comfortably
What to know
28 lbs is heavy for solo carry across long lake crossings
Premium price puts it above what most beginners should spend
Ice fishing uses two completely different tools: ice rods (short, sensitive, jigged by hand) and tip-ups (mechanical devices that sit over a hole and flag when a fish strikes). Beginners should own both. A 24-28 inch medium-light spinning combo covers most panfish and walleye jigging. Two or three tip-ups set in the background let you cover more water while you actively jig one hole.
Best starter
13 Fishing
The Snitch Spinning Ice Combo - 29" with Flex-Core Quick Action TIO - SNSC-29QT, Black
$$
★★★★★Our rating
13 Fishing makes the best beginner ice rods on the market and the Snitch combo comes with a matching reel already spooled. The rod is sensitive enough to detect the lightest panfish bite, light enough to jig for hours without tiring, and priced under $70. Buy two: one for jigging, one already tied for a different bait when you need to switch quickly.
What we like
Comes pre-spooled with reel attached: fish same day you open the box
Sensitive tip detects even the lightest crappie or perch bite
Under $70 for a combo that outperforms $40 alternatives
What to know
Included line is functional but worth upgrading before first trip
Light power rating: not ideal for large pike or big lake trout
★★★★☆Our rating· Only 8 left in stock - order soon.
The Polar is the tip-up that's been in fish houses across Minnesota and Wisconsin for forty years. Simple, reliable, and cheap: the spring-loaded flag pops up cleanly when a fish runs, the spool spins freely, and the whole thing breaks down flat for transport. Buy three and cover multiple holes while you actively jig elsewhere.
What we like
Flag pops cleanly and visibly: no ambiguous maybe-a-bite moments
Flat profile fits three in your tackle bag without bulk
Trusted design used by ice anglers for four decades
What to know
Freezes up in extreme cold if water splashes the trigger: wipe often
Manual reset only: run to the hole and re-set after every fish
A flasher (or sonar unit) is the single biggest edge a beginner can have on the ice. It shows you the depth of the water, where your jig is, and whether fish are present: in real time. Without one, you're dropping a jig into 30 feet of water and hoping. With one, you can watch a fish rise toward your bait and feel the tap before you even sense it in the rod. Flashers are faster to read than graph units in ice fishing; that's why the pros still use them.
Best starter
Vexilar
FL-8SE Genz Pack Flasher
$$$
★★★★★Our rating
Vexilar invented the portable ice fishing flasher and the FL-8SE is their most popular model for good reason. Three target separation bands, a surface clutter filter that reduces false signals, and the whole kit packs into a soft case that fits under the seat of your shelter. Ice anglers who've owned four flashers usually still have a Vexilar in the bag. Clear, fast, reliable.
What we like
Three target separation bands: tells fish from your jig from bottom
Surface clutter filter reduces false signal noise in shallow water
Trusted by serious ice anglers for 30+ years: holds resale value
What to know
SLA battery sulfates if stored dead: charge it monthly in the off-season
Display takes a few minutes to learn: not as instantly intuitive as graphs
The M3L gives you real-time sonar with the advantage of a lithium battery: which holds its charge in extreme cold far better than the sealed lead-acid batteries in older flashers. Resolution is slightly coarser than the Vexilar and target separation isn't quite as sharp, but for panfishing and learning how to read sonar, it more than does the job.
What we like
Lower price than Vexilar: real sonar without the premium commitment
Lithium battery handles cold better than sealed lead-acid units
What to know
Target separation less precise than Vexilar in busy columns
Fewer color bands makes distinguishing fish from debris harder to learn
When a flasher isn't enough and you want a full graph, mapping, and GPS, this is the answer. The ICE Helix 7 runs CHIRP sonar on a 7-inch screen, shows fish arches instead of blips, and maps the lake bottom so you can mark productive spots to return to. Serious hardwater anglers love it; beginners should start with a flasher first.
What we like
GPS maps productive spots so you return to the same hole next trip
7-inch screen shows fish arches clearly: easier to read than flasher blips
CHIRP sonar separates fish from structure at depths flashers struggle with
What to know
Steep learning curve: confusing for first-season anglers
Expensive and overkill until you understand what a flasher shows
Ice fishing kills people every year, mostly from falling through ice and occasionally from hypothermia. The gear in this category is not optional. Ice picks (worn around your neck) are a $15 item that could save your life if you fall through. Ice cleats prevent the slip that puts you in. A proper bib keeps you warm enough to think clearly. Get all three before your first trip.
Best starter
Clam
IceArmor Ascent Float Bibs
$229.99 as of Jun 22, 2026
★★★★★Our rating· Only 1 left in stock - order soon.
The Float Bib provides 50 lbs of floatation: meaning if you fall through, it buys you time and keeps your head above water long enough to self-rescue. This is not marketing; USCG certification is required for the rating. It's also warm, waterproof, and has pockets in exactly the right places. The safety argument alone justifies the price.
What we like
USCG-rated floatation: buys you time if you break through ice
Waterproof outer shell keeps you dry during setup and slush drills
Chest and thigh pockets right where you need them for jigs and licenses
What to know
Bulkier than standard bibs: size up one if you're between sizes
Warm enough to overheat if you're hiking far to the spot
Self-rescue spikes are worn around your neck and used to claw yourself out of the water if you break through. The spikes retract safely when not in use, the handles are bright orange for visibility in low-light conditions, and the spike tips are sharp enough to bite into ice on the first attempt. Fifteen dollars. There is no reason not to own these.
What we like
Retractable picks stay safely sheathed until you need them urgently
Bright orange: visible to other anglers in poor light or blowing snow
$15 and could save your life: no excuse not to own them
What to know
Picks dull over time: replace if tips feel rounded
Only useful if worn: leaving them in the tackle bag defeats the purpose
★★★★☆Our rating· Only 5 left in stock - order soon.
Slip on, slip off. Yaktrax Pro stretches over any boot and adds coiled steel traction across the sole: enough to keep you upright on glare ice carrying a fully loaded sled. They don't replace proper winter boots, but they're the difference between confident walking and shuffling with your arms out. Essential if your lake doesn't have early-season snow cover.
What we like
Slip on over any boot in 30 seconds: no tools, no fuss
Coiled steel bites glare ice reliably under load and while hauling gear
What to know
Slides off lugged hiking boot soles: sized for smooth winter boots
Wears out in 2–3 seasons of regular use on abrasive concrete approaches
Ice fishing has a steeper setup curve than open-water fishing, but once you're out there with a hole drilled and a line down, it's one of the most rewarding ways to spend a January morning.
Ice fishing is not complicated once you’re on the ice. The complications are all before you get there: checking conditions, hauling gear, drilling through 12 inches of frozen lake. But the actual fishing? You lower a jig, watch a flasher, and wait. It’s meditative in a way that open-water fishing often isn’t, because there’s nowhere to go and nothing to do except pay attention to the line.
This is what your first winter on the ice actually looks like: what you need to do before you go, what happens when you get there, and when things start to click.
Before you leave the house: ice safety first
The most important thing about ice fishing has nothing to do with fishing. It’s ice safety, and it’s not optional.
Call your local bait shop the morning you plan to go. They post daily ice reports and will tell you exactly which lake is safe, how thick the ice is, and where the pressure cracks are. Don’t skip this step. Four inches of clear, solid ice is the minimum for a single angler on foot: gray or milky ice is air-pocket ice and is structurally weak regardless of thickness.
Wear your ice picks around your neck on the way out. They live there: not in your pocket, not in your bag. If you break through, you have seconds to respond, and your arms may not work well in cold water. The picks let you claw yourself back onto the ice edge. Fifteen dollars. Non-negotiable.
Walk out in a straight line from shore, perpendicular to the ice edge. If you hear cracking or feel flex underfoot, back up immediately and take a different route. Sound familiar? It should: this is just knowing what you’re walking on, the same skill you use anywhere with terrain.
You’re looking for fish. Ice fishing is not “drill a hole anywhere and wait”: fish school in specific zones based on water temperature, oxygen levels, and forage. For beginners, a few reliable starting rules:
10–20 feet of water is where panfish (bluegill, crappie, perch) spend most of winter. They school near weed edges and drop-offs.
Walleye patrol rock piles, saddles between deep basins, and the edges of flats in low light: dawn and dusk are your best windows.
Ask the bait shop. They know the lake. A five-minute conversation is worth three hours of guessing.
Once you’ve picked your spot, drill your hole. A hand auger takes about 30 seconds per hole in 10 inches of ice. Use a skimmer (a slotted plastic ladle) to scoop the ice chips out of the hole. Chip the edges clean: a rough hole edge cuts line.
Set up your shelter over the hole. Eskimo-style pop-up hubs take about a minute and make an immediate difference in comfort. Close the floor flaps tight against the ice to block wind.
Reading your flasher
If you have a flasher, this is the most important skill to develop in your first season. The display shows a round dial with colored bands. Here’s what you’re seeing:
Red band at the bottom = the lake bottom. If this jumps around, you’re in a current, or your transducer is moving.
Your jig = a band that moves up and down as you work it. Usually shows as orange or green depending on your unit’s sensitivity setting.
Fish = bands that appear above the bottom and separate from your jig. They drift up or down as the fish moves.
The goal is to get your jig down to where the fish are showing. If fish appear at 18 feet and your jig is at 22, raise it until the two bands overlap. Then work the jig: small lifts and drops, a slow jigging cadence. Watch for the fish band to tighten on your jig band. That’s a bite coming.
This sounds abstract until you see it happen once. After that, it makes complete sense and you’ll never want to fish without electronics again.
Panfish (bluegill, crappie, yellow perch) are the forgiving starting target. They school in groups of 20 to 100, so once you find them, you can catch fish for an hour from the same hole. They’re not shy about biting in winter, they fight well for their size, and they’re excellent eating.
Bite detection is the main skill for a beginner. Ice fishing bites are subtle compared to open-water fishing. A walleye bite might be a slight tick or a momentary weight on the line. A crappie might just swim up toward the bait and make the line go slack: which can feel like nothing. Watch for:
A slight sideways twitch in your rod tip
The line going suddenly slack (fish swam up: set the hook)
The flasher band rising toward your jig band and then stopping
Set the hook with a firm upward lift: not a baseball swing. You’re pulling a small hook through a fish’s mouth, not sinking a 10/0 circle hook into a tuna. Quick and firm is the move.
Tip-up flags are unmistakable. When the flag pops up, walk (don’t run) to the hole, pick up the tip-up carefully, and start hand-lining the fish in. Feel for the fish’s resistance, let it run if it pulls hard, and bring it steadily to the hole. Most panfish can be lifted straight out. Pike and walleye may need a gaff or ice chisel to widen the hole.
The first full day
Expect to move. Ice fishing is not about sitting in one spot for hours. Fish move. If your flasher shows nothing after 20 minutes, drill another hole 30 feet away. The ideal first day pattern: drill 4-6 holes in a line, set tip-ups in two of them, and actively jig the others in rotation. When a tip-up flags, check it; when a hole shows fish on the flasher, stay there; when it goes quiet, move.
By the end of your first day you’ll have learned: how your flasher reads in the conditions of your specific lake, which depth the fish are holding at, and what a real bite feels like versus line movement from the jig. That’s a full day’s education. Most beginners come home cold, slightly tired, and already planning the next trip.
What to buy before you go again
A few things make the second trip dramatically better than the first:
Better line. Swap the factory line on your rod for 4 lb fluorocarbon. It’s nearly invisible in water, has less memory in cold conditions, and transfers bite sensation more clearly than mono.
Tungsten jigs in multiple sizes. Tungsten is denser than lead, so a smaller jig falls faster and stays vertical on the drop. Stock sizes 2, 4, and 6. Color matters less than jigging motion, but chartreuse and pink have track records.
A small tackle tray. After one trip you’ll want to organize your jigs by size instead of digging through a bag.
Anything beyond that (better rod, upgraded shelter, underwater camera), you’ll know you want it when you know what you’re missing. The first season is for learning. The second season is for optimizing.
Save your money
What you don't need yet
Beginners get pressured to buy a lot of stuff that doesn't help them play
better. Here's what we'd skip on day one.
A hard-sided flip-over shelter — Warmer than a hub shelter, but costs $600-1,000+ and needs a snowmobile to pull. Earn your way there after a few seasons.
An underwater camera — Fun, but a flasher tells you the same information faster. Master the flasher first: cameras are supplemental, not foundational.
A power sled — Hauling your gear on a plastic sled is free and works fine. Motorized sleds are for anglers who fish daily across giant lakes.
Jigging rods over $80 — Sensitivity differences between a $50 rod and a $150 rod are real but small for a beginner. Buy the $50 rod and learn the bite first.
Live bait setups — Tungsten jigs catch fish year-round and don't require a minnow bucket or aerator. Learn jigs first; add live bait when you want the edge.
First week
Your first seven days
A short, real plan to get from gear-on-doorstep to actually playing.
Check ice conditions on your local lake: call the bait shop or check their social media. They post daily reports during season. · Action
Order your hand auger and tip-ups so they arrive before the weekend. · Buy
Buy a fishing license for your state. Most states sell them online in minutes. Ice fishing typically requires the same license as open-water fishing. · Action
Visit the bait shop the morning of your first trip. Buy local jigs and ask where the fish have been. That 5-minute conversation is worth more than an hour of YouTube. · Action
Drill your first hole and drop your jig: the goal for day one is just to feel what it's like. Read the depth, watch for movement, let the experience teach you. · Action
FAQ
Common questions
How thick does ice need to be to fish safely?
Four inches of clear, solid ice is the minimum for a single angler on foot. Five to seven inches for a snowmobile. Eight to twelve for a small ATV. Never trust ice that looks gray or milky: that's air-pocket ice and it's weak. Check with your local bait shop or outfitter for current conditions before heading out.
Do I need a flasher sonar, or can I fish without one?
You can fish without one, and plenty of old-timers do. But a flasher turns a guessing game into a real-time conversation: you can see your jig's depth, watch fish rise toward it, and tell immediately if you're fishing the right zone. For a beginner, it's the fastest way to understand what's happening under the ice. Worth the investment by season two if not day one.
What fish can I catch ice fishing?
Depends heavily on where you live. Panfish (bluegill, crappie, perch) are the easiest and most abundant targets for beginners: they school tightly and bite aggressively in winter. Walleye are the prestige target in the upper Midwest. Pike are common and fight hard. Trout ice fishing is its own world with different regulations and technique.
Can I rent gear before buying?
Absolutely: and you should. Most bait shops and outfitters in ice-fishing country rent augers, shelters, tip-ups, and rods by the day for $20-40 total. One full rental day will tell you whether this is your hobby and which gear felt right to you. Don't buy $600 in gear before you've been on the ice once.
What's the best bait for ice fishing beginners?
Small tungsten jigs tipped with waxworms or spikes (maggots) catch panfish reliably. For walleye, a jigging spoon or live minnow on a tip-up is the standard. Buy locally: the bait shop on your lake will know what's working this week, which varies by species, lake, and conditions.
How cold is too cold to ice fish?
There's no universal cutoff, but below -20°F your auger may struggle and your shelter vents may freeze. Wind chill is the real enemy: a calm 0°F day in a shelter is comfortable. A -5°F day with 25 mph wind is miserable without proper gear. Check wind forecasts, not just temperature, before committing to a trip.
In-Fisherman — The longest-running freshwater fishing publication. Ice fishing coverage is deep: technique articles, seasonal strategies, and species-specific guides. Bookmark the ice fishing section.
Ice Fishing Community (Reddit) — Active subreddit with condition reports, gear discussions, and local intel. Search by your state or province for region-specific advice.
Vexilar Learning Center (YouTube) — Flasher tutorials from the manufacturer. The 'how to read a flasher' videos are essential viewing before your first trip with electronics.
Fishin' Frank's (YouTube) — Practical ice fishing tutorials with an approachable beginner angle. Good for technique walkthroughs and gear overviews.
As an Amazon Associate, JustBeginning earns from qualifying purchases.
We may also earn commission from other affiliate programs linked on this
page. Editorial recommendations are independent; we don't choose
products based on commission rates.
Product prices and availability are accurate as of the date and time
indicated and are subject to change. Any price and availability
information shown on Amazon at the time of purchase will apply.
Our top pickStrikeMaster Mora Hand Ice Auger 6-Inch

 Best starter