Hammock camping converts tent campers who try it once. The system is more modular than a tent, setup takes under 5 minutes when dialed, and sleeping in the trees is genuinely better than what it replaces. The catch: the insulation system is non-obvious. Here's exactly what you need.
By Colin B. · Published May 31, 2026 · Last reviewed August 7, 2026
ENO ProFly XL Rain Tarp
— Your first tarp, designed to pair with ENO hammocks and straightforward to pitch once you've done it twice.
Budget total
$150
Typical total
$450
A hammock and straps gets you started for $100–150 in summer. A full three-season system with tarp, underquilt, and top quilt runs $400–600.
We earn commission on qualifying Amazon purchases — see our
affiliate disclosure.
Price tiers and budget totals shown above are editorial estimates;
actual Amazon prices vary.
At a glance
Our top pick in each category
The fastest path through this guide — each best-starter pick by category.
Scroll for the budget and upgrade alternatives.
You need trees. Check that your campsites have hardwood trees 12–16 feet apart with trunks at least 8 inches in diameter. Hammock camping doesn't work above treeline, in most desert campgrounds, or in sites with only small saplings.
The underquilt is non-optional below 60°F. In a tent, your sleeping bag insulates underneath you. In a hammock, cold air circulates under your back and a sleeping bag compresses flat, losing its loft. An underquilt hangs below the hammock and solves this. Without one, you'll be cold.
Start with just a hammock and straps before buying the full system. One or two backyard hangs will tell you whether the diagonal lie works for your body before you spend $400 on insulation.
The hammock is the foundation of your system, and gathered-end nylon hammocks are the default for 90% of hammock campers. You want: enough width to sleep at a 30° diagonal (most double hammocks are 9–10 feet), durable ripstop nylon rated to at least 400 lbs, and a lifetime warranty from a real brand. Don't buy the cheapest thing on Amazon. The difference between $35 and $70 is a warranty that matters.
Hammocks — what's the difference?
A few common shapes, each making a different trade.
Gathered-end (standard)
The default. A 30° diagonal lie makes it flat and comfortable.
Learning curve
Low, one technique to master
Bug net
Separate purchase
Weight
1.0–1.5 lbs typical
Best for First-time hammock campers, most campground setups
Tradeoff Requires learning the diagonal lie; a few hangs to dial in
Flatter lay out of the box. Better for side sleepers.
Learning curve
None, flat from the start
Bug net
Usually integrated
Weight
1.5–2.5 lbs typical
Best for Side sleepers, bad backs, people who hate fiddling
Tradeoff Heavier and more expensive; requires spreader bars
Double-layer gathered-end
Two fabric layers create an insulation sleeve for underquilts.
Learning curve
Same as gathered-end
Bug net
Separate purchase
Weight
1.5–2.0 lbs typical
Best for Three-season campers building a full quilt system
Tradeoff Heavier than single-layer; less useful for summer-only use
Best starter
ENO
DoubleNest Hammock
$$
★★★★★Our rating
ENO is the brand that introduced most North Americans to hammock camping, and the DoubleNest is why. Wide enough to sleep diagonally without squirming, durable ripstop nylon with a track record for years of abuse, backed by a lifetime warranty. At 9.5 × 6 feet with a 400 lb rating, it accommodates nearly anyone. Buy this and Atlas straps before committing to anything else.
What we like
Lifetime warranty: ENO replaces defective gear no questions asked
9.5 × 6 ft gives real room to find your diagonal lie
Ripstop nylon survives years of use on rough bark and branches
What to know
1.5 lbs is heavier than ultralight options for backpackers
No integrated bug net; budget extra for buggy sites
Under $35 and the gathered-end experience is close enough to the ENO to matter. Same style, similar dimensions, rated to 400 lbs. If you're not sure hammock camping will stick, this is the sensible way to find out without spending $70 first.
What we like
Under $35, the lowest-risk way to try hammock camping
Same gathered-end style as premium hammocks; technique transfers
What to know
Thinner fabric shows wear faster at hang points
No lifetime warranty; likely replaced within two seasons of regular use
★★★★☆Our rating· Only 16 left in stock - order soon.
The Roo Double is what you buy when you know hammock camping is your thing. Integrated bug net that zips closed, a gear pocket for phone and keys, and Kammock's construction quality is noticeably above the entry-level field. The integrated net alone removes one more gear decision from your kit.
What we like
Integrated bug net zips closed, no separate net to rig
Gear pocket keeps phone, headlamp, and keys accessible at night
Kammock's build quality is noticeably above ENO tier
What to know
Heavier than bare hammocks due to the integrated net
A tarp is non-optional for any overnight hammock trip, even on forecast-clear nights. You rig it above the hammock, pitched low on the windward side for weather protection. Look for at least 11 × 9 feet of coverage and multiple attachment points for guy lines. The tarp is the piece most beginners under-buy.
Best starter
ENO
ProFly XL Rain Tarp
$$
★★★★★Our rating
Designed to work with ENO hammocks: the attachment points line up, the coverage is right, and the hex cut gives you headroom without extra fabric. At 11 × 8.5 feet, it handles serious rain. Ripstop nylon with taped seams, stakes and lines included. The sensible first tarp for ENO users.
What we like
Designed to pair with ENO hammocks, attachment points match up
Stakes, lines, and stuff sack included, ready to pitch out of the box
Hex cut gives headroom at center without excess flapping fabric
What to know
Heavier than silnylon tarps, noticeable on multi-day backpacking
No doors or end panels; pitch it low for wind protection
Under $50 and covers the basics for fair-weather camping. Multiple attachment loops, stakes included, pitches fast. Not what you want in a real downpour, but fine for three-season use when rain is possible but not guaranteed.
What we like
Under $50 with stakes and lines included
Multiple attachment loops let you configure the pitch angle
What to know
Coverage is smaller than ENO's ProFly, fine for calm rain
Seams are not taped; can seep in sustained heavy rain
When the weather is genuinely serious, the HouseFly's 11 × 9.5 ft coverage and 8 attachment points let you build a real shelter. Pitched low in driving rain with sides staked out, it keeps everything dry. Also doubles as a ground tarp. The one to buy if you camp in the Pacific Northwest or shoulder seasons.
What we like
11 × 9.5 ft creates serious weather protection in driving rain
8 attachment points work with nearly any tree spacing
Doubles as a ground tarp, useful beyond hammock camping
What to know
Heaviest tarp in the ENO lineup, a real weight penalty for backpacking
Overkill for summer camping where afternoon showers are the worst
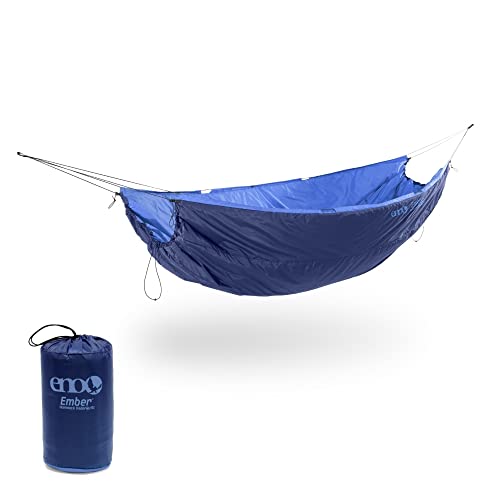
An underquilt hangs beneath your hammock and insulates the side your sleeping bag can't reach. Without one, you'll be cold below 60°F; the compressed sleeping bag underneath loses its loft in the hammock's curve. The underquilt is the most important and most misunderstood piece of hammock-specific gear. Buy one rated 10–15°F below your expected low temperature.
Best starter
ENO
Ember UnderQuilt
$119.95 as of Jun 22, 2026
★★★★★Our rating· In Stock
Designed to pair with ENO hammocks and covers three-season camping down to 40°F. Synthetic insulation keeps working even when damp, unlike down, which collapses when wet. Simple hang system clips to the hammock suspension. The right first underquilt for most campers who aren't planning winter trips.
What we like
40°F rating covers three-season camping in most US climates
Synthetic fill stays warm when damp, forgiving for beginners
Hang system clips directly to ENO hammock suspension
What to know
40°F rating means cold spring and fall nights need extra layers
Synthetic fill is heavier than down for the same warmth rating
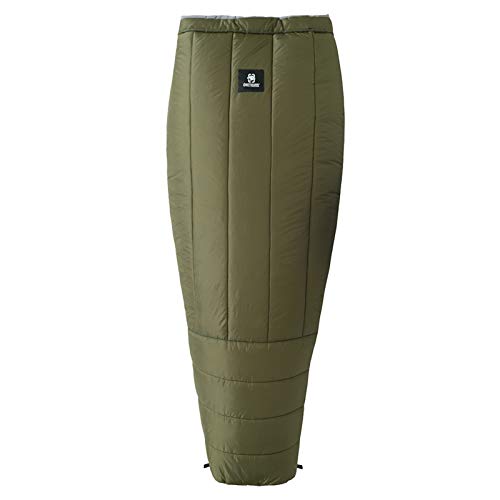
OneTigris punches above its price in the hammock accessory space. Their underquilt works with any gathered-end hammock, costs about half what the ENO does, and the universal hang system takes 10 minutes to dial in the first time, then works reliably. A smart choice if you're not sure about insulation yet.
What we like
Roughly half the price of brand-name underquilts
Universal hang system works with any gathered-end hammock
What to know
Warm-season rating only, limits you to summer camping
Hang system takes longer to dial in than brand-specific options
The Bobcat is where you go when you want down insulation instead of synthetic. Down packs smaller and lofts better than synthetic fill at the same weight, and Kammock's build quality shows: the hang system is more refined than budget options, the stitching holds up, and the stuff sack packs it tight. If you're serious about backpacking weight, this is the upgrade.
What we like
Down fill packs 30% smaller than synthetic at the same warmth rating
Kammock's hang system is more refined than budget options
45°F rating covers three-season camping in most US climates
What to know
Down loses loft when wet; protect from rain more carefully than synthetic
Premium price; hard to justify over synthetic until weight matters
A top quilt replaces a sleeping bag for hammock campers. It drapes over you instead of surrounding you, which works because the underquilt handles bottom insulation. Top quilts are lighter, more packable, and easier to adjust at night than a sleeping bag. Match your top quilt rating to your underquilt: a 40°F underquilt pairs with a 40°F top quilt.
Best starter
Kammock
KAMMOK Firebelly 30° Trail Quilt
$309.95 as of Jun 22, 2026
★★★★★Our rating· Only 18 left in stock - order soon.
The Firebelly is Kammock's top quilt designed for hammock campers: 30°F rating with a closeable footbox, down fill that packs tight, and construction quality that holds up to real backpacking. Pairs well with the Bobcat underquilt as a matched cold-weather system.
What we like
Designed to pair with Kammock underquilts as a matched system
Closeable footbox keeps toes warm without a sleeping bag
Packable enough for backpacking, not just car camping
What to know
Runs narrow; broad shoulders may experience edge gaps in cold
Premium price for a quilt you can't try before buying
ENO's dedicated top quilt for hammock use. Rated to 40°F, synthetic fill, and sized to drape over a hammock without the tuck-and-fight you get with a sleeping bag. The footbox closes with a snap. If you already own ENO gear, this rounds out the system without adding a new brand.
What we like
Designed as a hammock top quilt: footbox, drape, and shape all correct
Synthetic fill stays warm when damp; more forgiving than down
What to know
Heavier than down-fill options at the same temperature rating
40°F rating; not for shoulder-season use without a warmer underquilt
Better temperature rating for the price than most brand-name options. The footbox snaps closed, the fill lofts better than budget quilts, and for campers who want genuine shoulder-season capability without paying Kammock prices, this is the honest choice.
What we like
40°F rating at mid-range price, better value than brand-name options
Closeable footbox included at this price point
What to know
Shipping times vary; check Prime before ordering for a trip deadline
Less brand prestige; resale value lower than Kammock
Tree straps attach your hammock to trees, and they matter more than most beginners expect. You need straps at least 1 inch wide; anything narrower can damage bark and is banned at many campgrounds. Length matters too: 8–10 feet per strap covers most tree configurations. Always buy straps with your hammock. The hammock itself never ships with them.
Best starter
ENO
Eagles Nest Outfitters Atlas Hammock Straps, Suspension System
$
★★★★★Our rating
The default recommendation from every hammock camping forum. One-inch Leave No Trace-compliant webbing, 9 feet per strap for most tree configurations, rated to 400 lbs, and the loop attachment clips and adjusts fast. Buy these with your hammock. You can't hang without straps.
What we like
1-inch webbing is LNT-compliant and allowed at virtually every campground
9 feet per strap handles most tree spacings without improvising
Fast clip-and-adjust loops, under 2 minutes to hang
What to know
Fixed attachment loops limit micro-adjustment of hang angle
Under $20 and honestly close to the ENO Atlas experience for most setups. One-inch webbing, multiple loops, rated to 400 lbs, and long enough for most trees. The right answer if you're already buying the Wise Owl hammock and want to keep total spend under $55.
What we like
Under $20, keeps the complete starter kit under $55
1-inch LNT-compliant webbing at this price point
What to know
Carabiner hardware is lighter gauge than ENO; inspect before use
Loops are spaced farther apart, giving coarser hang angle adjustment
★★★★☆Our rating· Only 3 left in stock - order soon.
Ten feet of 1.5-inch tree-friendly webbing with more attachment loops than the Atlas, meaning finer control over hang angle. Kammock's hardware is bomber, the extra length solves wide-tree-gap problems, and the straps handle cold weather better than thin webbing. The upgrade hammock campers buy after two seasons.
What we like
10 ft handles wide tree gaps that ENO Atlas straps can't
More attachment loops = finer hang angle control
Bomber carabiners, noticeably more solid than ENO's
What to know
Heavier than ENO Atlas for what is functionally the same task
Overkill until you've outgrown Atlas straps after a season or two
Most beginners overthink the setup and underthink the insulation. Here's what actually matters in your first 48 hours — and what to ignore until later.
Hammock camping has a reputation for being complicated. It isn’t — but the learning curve is front-loaded in a way tent camping isn’t. Get three things right in your first weekend and everything else works. Get them wrong and you’ll write off the whole setup after one cold, crooked night.
This is what your first weekend actually looks like: what to do before you arrive, what to fix when the hang feels wrong, and what you’ll understand by Sunday morning that you couldn’t have understood on Friday.
Before you leave: the two things you must have dialed
You can improvise most camping gear in a pinch. You cannot improvise your suspension and you cannot improvise your insulation.
Your straps need to be LNT-compliant. Straps narrower than one inch cut into bark and damage the cambium layer underneath — the living tissue that keeps a tree healthy. At most campgrounds this will get you asked to leave. ENO Atlas Straps are the default recommendation: one-inch webbing, nine feet per strap, and fast to clip. This is not a place to save money.
Your insulation needs to match the conditions. If your overnight low is above 60°F, a sleeping bag or top quilt alone will work fine. Below 60°F, you need an underquilt. The hammock curve compresses your sleeping bag against your back, flattening the loft and removing the insulation. Cold air then circulates under you all night. This is the single most common hammock camping mistake — people show up with a sleeping bag rated to 20°F and still freeze because the compressed bag does nothing underneath them.
Check the forecast and have the right insulation before you leave. Adding an underquilt on the road is not a problem you can solve.
You’re looking for two hardwood trees with trunks at least eight inches in diameter, roughly 12–15 feet apart. Softwoods (pine, spruce) work in a pinch but the bark is more fragile. Avoid dead trees — they can drop branches. A slight slope is fine; being perfectly flat is not required.
The 30-degree rule. The single most important technique in gathered-end hammock camping is the hang angle. Your straps should leave the tree at roughly 30 degrees from horizontal — not dead flat, not steep. A flat hang creates a banana curve you can’t sleep comfortably in. A steep hang collapses the sides inward. Thirty degrees gives you a gentle curve that goes flat when you shift to a diagonal lie.
You don’t need a protractor. Hold your arm out parallel to the ground and drop it about a third of the way down. That’s your target angle. After a few hangs you’ll have it by eye.
The diagonal lie. This is the move that makes gathered-end hammocks work, and it takes most people two or three hangs to internalize. Don’t lie straight in the centerline — you’ll be in a deep curve like a taco. Instead, shift your body at a 30-degree angle to the centerline of the hammock: feet pointing to one end-tie, head pointing toward the opposite tree. Done correctly, the hammock flattens under you and your back is as flat as a mattress.
It feels unnatural the first time. Stick with it. By your second night it will feel obvious.
Rigging the tarp
Don’t save the tarp for when it rains. Rig it first, while the light is good and you’re not rushing. A tarp rigged in the dark in the rain is a problem; a tarp rigged before dinner and re-tensioned as the temperature drops is just camping.
The ridge line. You’ll string a cord between your two trees above the hammock — this is your tarp’s spine. Many people use a separate ridgeline cord (paracord or Dyneema) for this; some tarps have a structural ridge built in. Either works. The tarp hangs from this line and stakes out to the ground.
Pitching for weather. For a clear night, pitch the tarp high and flat — more headroom, better stargazing. If rain is possible, pitch it lower on the windward side (the side the wind is coming from) and steeper on that edge. The goal is to create an angle that sheds water past your hammock ends rather than pooling over you.
The most common beginner mistake is pitching the tarp too high and too symmetrical. When the rain comes in at an angle, the coverage fails. When in doubt, pitch lower.
You’ve checked the forecast. Your overnight low is 52°F. You brought a sleeping bag rated to 30°F. You will still be cold.
Here’s why: a sleeping bag rated to 30°F assumes you’re using it on the ground, where the insulation beneath you compresses but is still partially supported by a sleeping pad. In a hammock, the insulation beneath you compresses completely — the bag presses flat under your bodyweight with nothing to support it. The rating assumes loft that doesn’t exist in a hammock.
An underquilt hangs below the hammock on the outside, maintaining its loft against your back regardless of your weight above it. With an underquilt rated to 40°F paired with a top quilt or sleeping bag on top, you’ll be comfortable to 40°F. Without the underquilt, you’ll feel a sleeping bag’s temperature rating in a hammock as roughly 20–25°F warmer than advertised.
If you’re reading this the night before a trip and you don’t have an underquilt, here’s the workaround: bring an insulating layer — a puffy jacket or fleece — and stuff it under you in the hammock. It won’t stay in place perfectly, but it will keep you from freezing. Then buy an underquilt before your next trip.
What goes wrong (and how to fix it)
You wake up with a backache. Almost always a hang angle problem. You’re either lying straight in the centerline (fix: shift to the diagonal lie) or your hang is too flat (fix: re-rig with your straps at a steeper angle, closer to 30 degrees). Get out, re-rig, and try again. This is fixable in five minutes.
You’re sliding toward one end. Your hang is asymmetrical — one strap attachment is higher than the other. Loosen the lower side or tighten the higher side until the hammock is level end-to-end.
Your tarp is dripping inside. The tarp is pitching too flat and pooling, or the wind has shifted. Re-stake the windward edge lower. If it’s dripping at the seams, those seams need seam sealer — a ten-minute fix at home before the next trip.
You’re cold from below despite good gear on top. You need an underquilt. There is no tent-camping workaround that fully replaces one. Accept the night, stay warm with extra layers, and order the underquilt when you get home.
By your second day, two things will have happened. First, your hang will be faster — what took 20 minutes on Friday takes 8 on Sunday. Second, the diagonal lie will feel obvious rather than deliberate. You’ll just end up in it.
This is the moment most hammock campers cross a threshold. The setup no longer feels like a puzzle. The gear makes sense as a system. And the thing you were skeptical about on Friday — sleeping suspended in the air between trees — feels like the most natural way to be in the woods.
A few things will make your next trip noticeably better:
Add the underquilt if you don’t have one. This is not optional for shoulder season. It’s the single upgrade with the highest return.
Learn the structural ridgeline. A cord rigged between your suspension points at a fixed length sets your hang angle automatically every time. You stop fiddling with straps and just clip in. Most experienced hammock campers use one; most beginners don’t know they exist.
Note what your diagonal lie angle actually is. Lie in the hammock, mark where your shoulder lines up against the centerline, and recreate that angle deliberately next time rather than hunting for it.
At three or four trips in, the setup feels like second nature — and the question shifts from “how do I make this comfortable?” to “where should I camp next?”
Save your money
What you don't need yet
Beginners get pressured to buy a lot of stuff that doesn't help them play
better. Here's what we'd skip on day one.
A hammock stand — Unless you camp in treeless areas, you don't need one. Find two healthy trees 12–15 feet apart. They're everywhere in most US camping.
A separate bug net — Many hammocks include integrated nets. And shoulder-season camping often doesn't need one at all. Wait until a bug-heavy trip tells you it's necessary.
Whoopie slings — Custom adjustable suspension used by experienced hammock campers. ENO Atlas straps handle everything a beginner needs and then some.
A sleeping pad — Sleeping pads in hammocks are awkward to keep in place and shift when you move. An underquilt solves the same problem correctly.
A structural ridgeline — An optional cord that sets a consistent hang angle between your attachment points. Useful eventually. Learn to set your angle by eye first.
First week
Your first seven days
A short, real plan to get from gear-on-doorstep to actually playing.
Order a hammock and Atlas straps: these two items get you your first hangs. · Buy
Hang the hammock in your backyard or a local park before your first overnight. One practice session dials in the angle and the process. · Action
Learn the diagonal lie. In a gathered-end hammock, lying at a 30° angle to the centerline gives you a flat, comfortable position. It feels unnatural the first time and obvious by the third. · Learn
Find a campsite with good trees: 12–15 feet apart, at least 8 inches in diameter, healthy hardwoods. Check the campground's hammock policy before you go. · Action
Don't skip the tarp on your first overnight, even with a clear forecast. Weather in the woods changes fast, and an untarped hammock in a rain shower is a miserable night. · Action
If camping below 60°F, add an underquilt before the trip, not after one cold sleepless night. · Buy
Yes, for camping below 60°F. In a hammock, cold air circulates beneath you and your sleeping bag compresses flat, losing the insulation it relies on. An underquilt hangs below the hammock and fills that gap. Without one, you'll be cold regardless of what's on top of you. Above 60°F at night, a light sleeping bag or top quilt alone is fine.
How far apart do trees need to be?
Aim for 12–15 feet between trunks for a comfortable hang angle. You can make 10–18 feet work with strap adjustments. Closer than 10 feet puts you too low; farther than 20 feet starts to stress attachment points. Trees should be at least 8 inches in diameter so you're not damaging saplings.
Is hammock camping lighter than tent camping?
A hammock-only summer setup is lighter than a tent. But a full three-season hammock system with tarp, underquilt, and top quilt is comparable to or heavier than a tent and sleeping bag combo. The weight advantage is real in warm weather when you can skip the underquilt.
Can I hammock camp above treeline?
No. Hammock camping requires trees 12–15 feet apart, which rules out alpine zones, desert camping, and most ocean-front sites. If your style takes you regularly above treeline, a tent is the right tool.
Do I need a bug net?
Depends on location and season. For shoulder-season camping or bug-light areas, no. For summer camping in the Southeast, Great Lakes, or anywhere with real mosquito pressure, yes. Many higher-end hammocks include integrated nets; others sell them separately.
How do I find good hammock campsites?
Hammockforums.net has trip reports organized by region, the best source for site-specific hammock intel. Most established forest campgrounds in the eastern US have good trees. Check the campground's hammock policy before arrival; some sites near sensitive ecosystems restrict hammock use.
Hammock Forums — The definitive community for hammock camping. Trip reports, gear reviews, and build threads for DIY gear. The place to research any specific site or gear question.
The Ultimate Hang — Derek Hansen's comprehensive reference site. The clearest explanation of hang angles, insulation systems, and suspension mechanics anywhere.
Leave No Trace — Hammock-specific guidance on tree protection: strap width, trunk diameter, and campground rules. The 1-inch strap standard comes from here.
r/hammockcamping — Active subreddit. Good for gear recommendations, trip reports, and beginner questions. Search before posting; most starter questions are answered in the wiki.
As an Amazon Associate, JustBeginning earns from qualifying purchases.
We may also earn commission from other affiliate programs linked on this
page. Editorial recommendations are independent; we don't choose
products based on commission rates.
Product prices and availability are accurate as of the date and time
indicated and are subject to change. Any price and availability
information shown on Amazon at the time of purchase will apply.


 Best starter