Hand-tool woodworking means bench planes, sharp chisels, and hand saws instead of routers and table saws. The entry curve is steeper, the tools are more expensive than they look, and sharpening is a skill unto itself. The payoff is a quieter, slower craft that many woodworkers find more satisfying than anything a power tool can offer.
By Colin B. · Published June 14, 2026 · Last reviewed June 14, 2026
A real hand-tool starter kit costs $350-700. There is no substitute for quality here: cheap planes come unflat and won't hold an edge, which makes the hobby miserable. Buy less but buy better.
We earn commission on qualifying Amazon purchases — see our
affiliate disclosure.
Price tiers and budget totals shown above are editorial estimates;
actual Amazon prices vary.
At a glance
Our top pick in each category
The fastest path through this guide — each best-starter pick by category.
Scroll for the budget and upgrade alternatives.
Don't buy a cheap plane. The $20 Stanley from the big-box store feels like a plane but won't hold an edge and is almost certainly not flat on the sole. Your first experience will convince you that hand-tool woodworking is miserable, when really you just have a bad tool. Budget $100-130 for a WoodRiver or equivalent and the experience is entirely different.
Sharpening is a skill you learn before anything else. Every instruction on the internet tells you this and every beginner ignores it. A dull chisel or plane iron tears wood fibers instead of cutting them, and takes ten times more force. Spend two hours learning to sharpen before you make a single cut.
Buy your wood from a hardwood dealer, not a home center. Home centers sell construction lumber and occasional rough hardwood at retail markup. A local hardwood dealer has kiln-dried poplar and cherry for less per board-foot, and you can pick straight-grained pieces that actually behave.
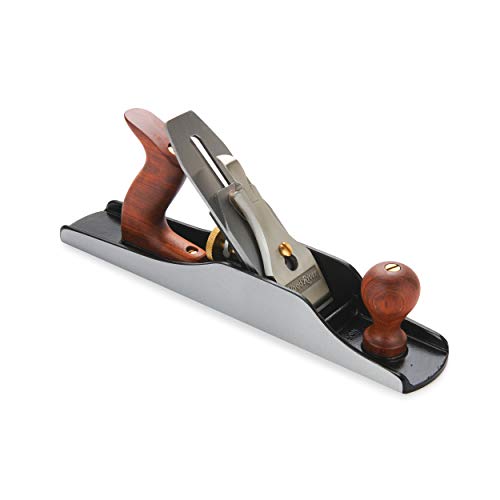
A bench plane is the single most important hand tool you will own, and also the one most likely to frustrate beginners who buy a cheap version. Modern planes from WoodRiver, Lie-Nielsen, and Veritas are genuinely good. The $20 no-name planes at big-box stores are genuinely bad: unflat soles, poorly ground blades that cannot hold an edge. You need at minimum a No. 4 smoothing plane. A No. 5 jack plane handles rough dimensioning. Buy one good plane before you buy three mediocre ones.
Bench Planes — what's the difference?
A few common shapes, each making a different trade.
No. 4 Smoothing Plane
Removes final shavings, reveals smooth surfaces. The default starter bench plane.
Blade width
2"
Length
~9"
Best for
Smoothing, finishing
Best for Beginners who want one plane that does most jobs
Tradeoff Slower to remove a lot of material than a No. 5
End grain, chamfers, and joint fitting. One-handed and versatile.
Blade width
1-3/8"
Length
~6"
Best for
End grain, trim work
Best for End-grain cleanup, chamfering edges, fitting joints
Tradeoff Too small for surfacing wide panels
Best starter
WoodRiver
#4 Bench Plane
$231.98 as of Jun 22, 2026
★★★★★Our rating· In Stock
The WoodRiver No. 4 has become the default beginner recommendation in hand-tool forums for one reason: it comes from the factory reasonably flat on the sole, with a blade that can actually be sharpened. A Lie-Nielsen takes a finer shaving, but it is three times the price. Learn the craft on this, then decide if you want to upgrade.
What we like
Comes reasonably flat from the factory, needs minimal tuning
Blade holds an edge well for an entry-level plane
Wide aftermarket blade upgrades available (Hock, Veritas)
What to know
Needs initial sharpening before first use, like all entry-level planes
The try-before-you-commit pick. The Stanley Bailey No. 4 needs flattening and sharpening before first use, but it's available everywhere and costs around $40. If you want to put a bench plane in your hands before spending $130, this does the job while you decide if the craft is for you.
What we like
Under $50 and available at every hardware store
Good for learning tuning skills before committing to a better plane
Once you have a No. 4 dialed in, the No. 5 jack plane is the right next purchase. Its longer sole bridges dips that a shorter plane follows, making it the right tool for rough stock removal and flattening wider boards. Same WoodRiver V3 quality as the best_starter, just in the workhorse size.
What we like
Longer sole bridges dips that a No. 4 follows, better for rough lumber
Same WoodRiver V3 quality as the starter No. 4, consistent performance
What to know
Too aggressive for final smoothing; always follow with the No. 4
Heavier than the No. 4, more tiring for extended stock-removal sessions
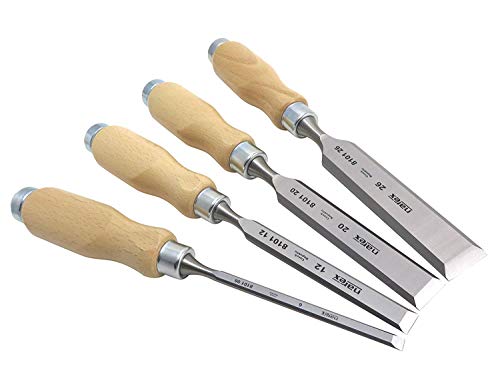
You need at minimum four bench chisels: 1/4", 1/2", 3/4", and 1". With these four widths you can chop mortises, pare joinery, and clean up corners on almost every beginner project. The quality differences are real: cheap chisels are made of soft steel that dulls within a few cuts and is hard to get truly sharp. Narex from the Czech Republic is the go-to starter set in every serious hand-tool community. You will flatten the backs and sharpen each one before the first use. That is the job.
Best starter
Narex
4-Piece Bevel Edge Bench Chisel Set
$49.00 as of Jun 22, 2026
★★★★★Our rating· In Stock
Narex chisels from the Czech Republic are the standard recommendation for hand-tool beginners, and they have earned it. The backs are reasonably flat out of the box, the steel holds an edge, and the price is low enough to justify buying a set. In every hand-tool forum, these are the first suggestion when someone asks what to buy.
What we like
Steel holds a keen edge for the price, sharpenable to a fine point
Backs are reasonably flat out of the box, minimal prep needed
Set of four covers 90% of beginner joinery needs
What to know
Beech handles will split without oiling; apply a quick linseed coat
Occasional flatness issues on the narrower 6mm chisel
★★★★☆Our rating· Only 4 left in stock - order soon.
If Narex is out of stock, the Stanley Sweetheart line is a genuine alternative. These are Stanley's premium chisels, available at hardware stores nationwide. They hold an edge better than basic Stanley and are priced comparably to Narex. A solid choice if you prefer buying locally.
What we like
Available at every hardware store, easy to replace if lost or damaged
Cheap enough to buy a full set without anxiety about learning mistakes
What to know
Soft steel requires more frequent sharpening between sessions
Handles not rated for mallet use; use a wood mallet, not metal
★★★★☆Our rating· Only 6 left in stock - order soon.
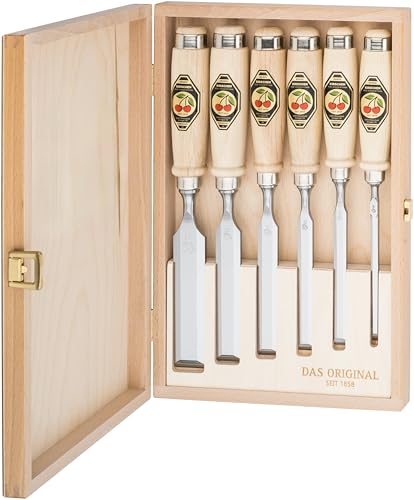
Made in Solingen, Germany, and the benchmark for European-style bench chisels at a non-Lie-Nielsen price. The blades are harder than Narex, hold an edge noticeably longer, and arrive nearly ready to use. You do not need these to start, but if you're serious about joinery, they are the step up that makes a genuine difference.
What we like
Harder steel that holds an edge noticeably longer than Narex
Blades arrive nearly ready to use, minimal back-flattening needed
What to know
At $180+ for a set, requires real commitment to the craft
Specialty retailers only; availability on Amazon can be spotty
Most beginners start with a Japanese pull saw and then, if they decide they prefer western woodworking aesthetics, add a traditional panel saw later. Pull saws cut on the pull stroke (toward you), which gives more intuitive control and requires less force than push saws. The Suizan Ryoba has both rip and crosscut teeth on one blade, which means you can start with a single saw and cover most cuts. Western saws are not worse, just different in technique.
Best starter
Suizan
Japanese Pull Saw 9.5 Inch Ryoba
$49.80 as of Jun 22, 2026
★★★★★Our rating· In Stock
Japanese pull saws are the standard recommendation for beginners because the pull stroke gives better control and requires less force than western push saws. The Suizan Ryoba has rip teeth on one side and crosscut on the other, sharp from the factory, and replaces two western saws for under $35. Start here.
What we like
Pull-stroke cutting gives beginners more intuitive control
Rip and crosscut teeth on one blade replace two western saws
Razor-sharp from the factory, no initial tuning required
What to know
Blades are replaced, not resharpened (replacements cost $12-15)
Thin blade kinks if you apply sideways pressure; requires good form
Gyokucho is what experienced hand-tool woodworkers actually use. The No. 655 is thinner-kerf and better balanced than the Suizan, with finer teeth for cleaner cuts in hardwood. Once you know you prefer Japanese saws, this is the upgrade that makes a noticeable difference in cut quality.
What we like
Thinner kerf than the Suizan, noticeably cleaner cuts in hardwood
Better balanced for longer sessions, less fatigue on the wrist
What to know
Precise blade punishes poor form more than the entry-level Suizan
Costs 2x the Suizan; only worth it once your technique is dialed in
If you prefer traditional western woodworking or come from a background in construction, a quality western push saw is a genuine alternative to Japanese saws. Crown's panel saw has well-set teeth, a thin plate, and the satisfying weight of a tool Sheffield has been making for over 100 years.
What we like
Sheffield-made with well-set teeth and a thin plate for clean cuts
Traditional push-stroke cutting for western joinery aesthetics
What to know
Push-stroke is harder to control for most beginners than pull saws
Heavier and requires more force; longer learning curve
Woodworking is really a measurement and marking problem. A square that's off by a hair compounds into a box that rocks. A marking knife severs wood fibers so your saw starts exactly in the line, not beside it. A marking gauge scores a line parallel to an edge for joinery. These tools cost $30-60 combined and have more impact on the quality of your work than any plane or chisel upgrade.
Best starter
iGaging
4R 12" Combination Square
$45.77 as of Jun 22, 2026
★★★★★Our rating· In Stock
The iGaging 4R is machined to within 0.001" accuracy and costs $35. You will use it to check for square, mark cut lines, check depth, and more. Starrett is marginally better; the iGaging is 80% there at 20% of the price, and it is accurate enough for furniture joinery. Verify squareness when it arrives.
What we like
Machined to 0.001" accuracy, far more precise than big-box squares
Sliding head locks at any depth, doubles as a depth gauge
Rule is removable for standalone use as a precision straightedge
What to know
Verify squareness on arrival; calibration can shift in shipping
Plastic head feels cheaper than Starrett, though the precision holds
A wheel marking gauge uses a tiny rotating cutter instead of a pin, which severs wood fibers cleanly rather than tearing them. The WoodRiver version delivers that clean fiber-severing action at a fraction of premium gauge prices. This is the single upgrade that most noticeably improves the cleanliness of your joinery lines.
What we like
Wheel cutter severs fibers cleanly, far better than a pin gauge
Beam locks with a single thumbscrew, holds setting all project long
What to know
Costs more than a basic pin gauge; pay the difference, it matters
Wheel needs occasional stropping to maintain clean-cut action
★★★★☆Our rating· Only 1 left in stock - order soon.
A marking knife makes thinner, more accurate lines than any pencil and severs the top wood fibers so your saw starts exactly in the line. Crown's bevel-edge marking knife is inexpensive, holds an edge, and does the job well. Any sharpened knife is better than a pencil for layout; this one won't embarrass you.
What we like
Scribes thinner, more accurate lines than any pencil for layout
Severs top fibers so your saw starts exactly in the line
What to know
Single-bevel blade requires different technique for left vs. right lines
Needs occasional sharpening; not out-of-box ready like a utility knife
Sharpening is the skill that unlocks everything else in hand-tool woodworking. A sharp chisel pares cleanly with almost no effort; a dull one bruises and tears. Every plane and chisel you buy arrives needing sharpening, and you will sharpen them dozens of times over the life of the tools. The good news: you only need one stone and a strop to start, and the skill is learnable in an afternoon. The diamond stone is the easiest entry because it needs no maintenance and no soaking.
Best starter
DMT
D6EF Dia-Sharp 6" Double-Sided Bench Stone
$55.60 as of Jun 22, 2026
★★★★★Our rating· In Stock
Diamond stones do not need flattening, do not need soaking, and work dry or with a drop of water. The DMT D6EF gives you a fine side for refining a bevel and an extra-fine side for polishing it. Strop on leather after and your chisel shaves arm hair. The easiest, lowest-maintenance entry to sharpening.
What we like
No flattening needed, ever. Works dry or with water or light oil
Fast metal removal cuts bevel-shaping time significantly
One stone replaces two or three water stones for typical edge work
What to know
Aggressive cutting; go lighter on pressure than you expect
Some woodworkers prefer the tactile feedback of water stones
★★★★☆Our rating· Only 1 left in stock - order soon.
The King 1000/6000 combination water stone is what most beginners start on, and it works. The 1000 grit removes metal fast enough to establish a bevel; the 6000 polishes to a usable edge. Under $30, and it will teach you the fundamentals of water stone sharpening before you spend more.
What we like
1000 grit establishes a bevel fast; 6000 polishes to a sharp edge
Under $30, the most affordable real sharpening stone you can buy
What to know
Needs periodic flattening with a diamond plate or lapping stone
Must soak 5-10 minutes before use; adds a step to quick touch-ups
Freehand sharpening is a skill that takes months to develop. A honing guide holds your blade at a consistent, repeatable angle so your first sharpening session produces a usable edge. The Veritas Mk.II accepts a wider range of blade widths than cheap Eclipse-style guides and holds registration reliably through a full sharpening session.
What we like
Holds blade at an exact repeatable angle, removes guesswork from honing
Accepts wider blade range than cheap Eclipse guides, handles skew chisels
What to know
Setup has a learning curve; read the angle chart before first use
Freehand sharpening is worth learning eventually; this is a training tool
Hand-tool woodworking is unusual among hobbies in that the first skill you need has nothing to do with making anything. You spend your first few hours sharpening tools you haven’t used yet. This seems backwards. It is not. A dull chisel bruises wood rather than cutting it and requires so much force that accurate work becomes impossible. A sharp chisel pares cleanly with almost no effort. The craft only feels like the craft once the tools are sharp.
Here is what the first twenty hours actually look like, including the part everyone warns you about and the part that makes you want to keep going.
Hours 1–3: Sharpening before you touch wood
Your bench plane and chisels arrived. Do not put them on the bench and start planing. Sharpen them first.
Flatten the back of each chisel on your sharpening stone until you can see a mirror reflection across the full width of the blade. This takes longer than you expect on the first chisel, about twenty minutes. The second chisel takes ten. The third takes five. By the time you finish the set, you understand what you’re doing.
Then sharpen the bevel of each chisel at 25-30 degrees. If you’re using a honing guide (and you should be for the first session), set the blade projection and work through your grits from coarse to fine. Strop on leather at the end. Test on your forearm hair. A sharp chisel shaves it off cleanly. If it doesn’t, go back to the stone.
The real test: push a sharp chisel across end grain on a piece of pine with no mallet, just hand pressure. It should cut, not scrape. If it scrapes, it’s not sharp.
Do the same for your plane iron. Sharp plane iron, flat back, sharp bevel. Set it back in the plane with a fine mouth opening and take a test shaving on a piece of soft pine. Aim for a shaving thin enough to see light through. If it tears, the iron is dull or the mouth is too wide.
Most beginners skip or rush this. They spend the next ten hours fighting dull tools, conclude hand-tool woodworking is frustrating, and either quit or buy expensive tools thinking quality will solve the problem. Quality tools still need sharpening. Spend the time now.
Hours 4–8: Planing flat, sawing square
Once the tools are sharp, pick a board. Poplar is ideal: cheap, flat, available at most hardwood dealers, and forgiving enough that mistakes don’t hurt. Buy a piece roughly 12” x 24” and 3/4” thick.
Planing to a reference face. Set your bench plane for a light cut and plane the face of the board until it’s flat. Check with a straightedge across and diagonally. If it rocks, there’s a high spot. Mark the high spots with a pencil and plane those areas specifically. This sounds simple and is surprisingly satisfying once you get it right.
Planing to a reference edge. Once the face is flat, use your combination square set to 90 degrees and plane one long edge square to the face. Check it often. The goal is 90 degrees and straight, with the square touching the full length of the edge without rocking.
Sawing to a line. Mark a line with your marking knife and combination square across the board. Set your pull saw in the line (start on the pull stroke with the knife cut right behind the blade) and saw straight down. Do not force it. The saw finds its way into the kerf. After twenty cuts, you’ll feel the rhythm: light pressure on the pull stroke, almost none on the push.
This stage is where most beginners discover they’ve been measuring inaccurately for years. The combination square reveals it. The marking knife makes the inaccuracy visible as a gap. This is productive frustration: you’re learning to see.
The fastest path to actually learning hand-tool woodworking is making a joint. Not a perfect joint. A joint.
A rabbet (an L-shaped channel along an edge or end) is the right first joint. You can cut it with your saw and clean it up with a chisel. It’s used in box bottoms, cabinet backs, and picture frames. Every project you make in the next year will probably need one.
Mark the rabbet with your marking gauge: score the width along the face and the depth along the end. Saw down to the depth line on the waste side. Chisel out the waste. Pare to the line with a sharp chisel held flat. Check with your combination square.
Your first rabbet will be imperfect. One wall will be slightly out of square. The corner will have a small ridge. This is normal and expected. The point is not the joint. The point is learning the sequence: mark, saw, chisel, pare, check. That sequence is the whole craft.
Your tenth rabbet will fit. Your twentieth will fit well. By your fiftieth you’ll cut them without thinking.
Once you can cut a rabbet, half-lap joints follow naturally. Then mortise and tenon. Then dovetails, eventually, when you are ready for something genuinely difficult and genuinely rewarding.
The fastest skill acquisition happens when you have a goal. A small box, a simple shelf bracket, a step stool: pick something you can finish in a weekend and that requires the skills you’ve been practicing.
A small box is the classic first project for a reason. It requires four identical sides, a bottom that fits, and corners that meet. You practice measuring, sawing, planing flat, cutting a simple rabbet, and gluing up. Everything compounds.
When you hit your first real problem (a joint that’s too loose, a side that’s slightly out of square, a gap in the corner), do not reach for sandpaper to hide it. Learn to fix it. An edge that’s slightly out of square is fixed with two more passes of the plane. A loose joint gets a thin shim of veneer in the gap. Fixing problems correctly is a skill, and it’s the skill that turns a hobbyist into someone who can make furniture.
By hour twenty, you will have made something real with your hands using only unplugged tools. It will have small imperfections. It will also be yours in a way that a flat-pack shelf is not.
Things that trip up almost every beginner
Sharpening too infrequently. If you feel yourself forcing a cut, stop and sharpen. Chisels and plane irons need a touch-up every 15-20 minutes of heavy use. This sounds annoying; experienced woodworkers treat it as a normal part of the rhythm.
Holding the chisel wrong. When paring, the back hand controls direction and the front hand controls depth. Most beginners grip the blade and push. This gives you no control. Use the back hand to steer.
Planing against the grain. Plane irons tear out wood fibers if you go against the grain direction. Look at the grain lines on the board edge: plane so the grain runs “downhill” in your direction of travel. Flip the board around if it’s tearing.
Using a mallet too hard. Beginners hit the chisel like a hammer driving a nail. One firm tap, check the result. You can always take more off; you cannot put it back.
Not checking for square constantly. The combination square should be in your hand as often as any tool. Experienced woodworkers check after every significant cut. Beginners check when something looks wrong, which is too late.
What to do next
At hour twenty you’ve learned the fundamentals. The next threshold is developing genuine accuracy, which comes from repetition. Make another box. Make five. Each one is faster and cleaner than the last.
When you’re ready to invest in a better tool, sharpen skills first. A Lie-Nielsen plane does not compensate for poor technique; it reveals it more clearly. The best reason to buy a premium tool is that you’ve outgrown the limitations of the entry-level version, not that you haven’t learned it yet.
The community is good. r/handtools is genuinely helpful for gear questions. Paul Sellers’ free video series covers every technique you need for the first year of the craft. Lost Art Press publishes the best books.
Save your money
What you don't need yet
Beginners get pressured to buy a lot of stuff that doesn't help them play
better. Here's what we'd skip on day one.
A $20 bench plane from the hardware store — It will convince you hand-tool woodworking is miserable. The problem is the plane, not the craft. Skip it entirely and buy a WoodRiver or better.
Japanese chisels on day one — Japanese chisels are harder steel with a different sharpening geometry. Learn to sharpen and use western chisels first. Narex teaches you everything you need before you spend $300 on Blue Spruce or Nishiki.
A router plane — Essential for dadoes and fitting inset panels, but you will not need one until your third or fourth project. Wait until you hit the problem it solves.
A proper workbench (built or bought) — A Workmate and some clamps gets you through your first ten projects. Build or buy a proper bench after you know what vise position, height, and surface area you actually want. The bench should reflect your work, not dictate it.
A brace and bit — Satisfying to use but rarely necessary. A hand drill or cordless drill handles 90% of boring needs for beginners and modern woodworkers.
Lie-Nielsen or Veritas tools before you can sharpen — The finest tools in the world do not perform until you can put an edge on them. Learn to sharpen on Narex chisels and a WoodRiver plane. Then invest in premium tools once you know what you are feeling for.
First week
Your first seven days
A short, real plan to get from gear-on-doorstep to actually playing.
Order your bench plane and chisel set so they arrive before the weekend. · Buy
Watch Paul Sellers' free beginner series on YouTube before touching wood. It is the best 90 minutes you will spend. · Learn
Paul Sellers on YouTube · Free woodworking masterclasses — start with the paring chisel and bench plane fundamentals
Lost Art Press blog · Free articles on hand-tool technique, tool selection, and the craft's history
Flatten the back of each chisel on your sharpening stone until you see a mirror across the full width. This is the most important two hours you will spend this week. · Action
Find a local hardwood dealer and buy a few board-feet of poplar. It's cheap, flat, and forgiving for practice. Skip the home center. · Action
Make a simple shooting board from scrap plywood. It's your first real project and teaches you to plane to a line, which is the fundamental hand-tool skill. · Action
FAQ
Common questions
Why can't I just use a $20 bench plane from the hardware store?
Because cheap planes come from the factory with an unflat sole and a blade made of soft steel that can't hold an edge. You will spend two hours fighting the tool and conclude hand-tool woodworking is frustrating. It isn't, but that plane is. Budget $100-130 for a WoodRiver or equivalent and the experience is completely different.
Japanese or western chisels for a beginner?
Western chisels (like Narex) for beginners. They're easier to sharpen, more forgiving, and cheaper. Japanese chisels are harder steel with a hollow-back grind and different sharpening geometry. They're excellent tools for experienced woodworkers who know what they're getting. Learn the fundamentals first.
Do I need a workbench before I can start?
No. A portable Workmate clamped to a sturdy table, or even a piece of thick plywood screwed to sawhorses, gets you through your first ten projects. Buy or build a proper bench after you know what you actually need. Most beginners don't know what bench height, vise type, or surface they want until they've used something improvised for a while.
How much does a real hand-tool starter kit cost?
Budget $350-700 for a kit that won't fight you: $130 for a WoodRiver plane, $75 for Narex chisels, $35 for a Japanese pull saw, $35 for a combination square, $50 for a DMT diamond stone. That's $325 before tax. Add a marking gauge and marking knife and you're at $400-450. There's nothing wrong with starting at $350 and adding tools as projects demand them.
What's the best first project for a hand-tool beginner?
A small wooden box with a lid, or a simple step stool. Both teach you the fundamental skills: marking, sawing to a line, planing flat, cutting a joint. Pick something you can finish in a weekend. Longer projects stall out before you learn the basics.
What's the difference between hand-tool and power-tool woodworking?
Power-tool woodworking uses table saws, routers, and planers to remove material quickly and accurately. Hand-tool woodworking uses bench planes, chisels, and hand saws. Hand tools are quieter, produce less dust, require no large machines, and connect you more directly to the material. Most serious woodworkers use a combination of both; hand-tool purists choose the manual approach for its meditative pace and the quality of surface it produces.
Paul Sellers (YouTube) — The most accessible teacher in hand-tool woodworking. Free beginner series covering every fundamental skill. Start here before you start spending.
Lost Art Press — The best hand-tool woodworking books in print, plus a free blog. Chris Schwarz's writing on tool selection and technique is the most useful in the field.
Fine Woodworking — Longstanding craft publication with deep tool reviews and technique articles. Digital subscription is worth it once you're past the beginner stage.
r/handtools — Active community with gear recommendations, sharpening help, and project photos. Genuinely useful for tool-buying questions.
The Wood Whisperer — Marc Spagnuolo's site bridges hand tools and power tools well. Good technique videos and honest tool reviews.
Wood by Wright (YouTube) — In-depth hand-tool technique videos with a focus on pre-industrial methods. Excellent once you have the basics down.
As an Amazon Associate, JustBeginning earns from qualifying purchases.
We may also earn commission from other affiliate programs linked on this
page. Editorial recommendations are independent; we don't choose
products based on commission rates.
Product prices and availability are accurate as of the date and time
indicated and are subject to change. Any price and availability
information shown on Amazon at the time of purchase will apply.


 Best starter