Once you've felt what a truly sharp knife does to a tomato, you can't go back. Whetstone sharpening is a real skill — not a quick fix — but it's learnable in a weekend and satisfying for a lifetime. Here's what you actually need to get started, and the gear myths worth ignoring.
By Colin B. · Published May 31, 2026 · Last reviewed May 31, 2026
A combo whetstone and honing steel gets you started for $60. A full kit — stone, guided system, strop, and flattening plate — runs $150-200.
We earn commission on qualifying Amazon purchases — see our
affiliate disclosure.
Price tiers and budget totals shown above are editorial estimates;
actual Amazon prices vary.
At a glance
Our top pick in each category
The fastest path through this guide — each best-starter pick by category.
Scroll for the budget and upgrade alternatives.
Don't buy a sharpening kit until you've done the paper test on your current knives. Hold a sheet of printer paper at the top and draw the blade through. A sharp knife slices clean; a dull one snags or tears. Most home cooks are living with dull knives and don't realize it — the paper test will show you where you actually stand.
Start with your most-used kitchen knife, not your best one. You'll develop technique faster on a workhorse chef's knife you're willing to practice on, and the Victorinox or Wüsthof in your drawer can handle the repetition. Save the $200 Japanese gyuto for month three.
Your angle matters more than your stone. A $25 King stone used at a consistent 20° beats a $100 Shapton used sloppily. Master the motion on a cheap stone first — every sharpening skill you build transfers directly to better stones later.
Whetstones are rated by grit — lower numbers cut faster and coarser. A 1000-grit stone does most of your sharpening work. A 6000-grit polishes the edge to razor sharpness. For nearly all kitchen knives, a 1000/6000 combo stone is everything you need. Coarser stones (under 400 grit) are only necessary for edges with chips or major damage — don't start there unless your knife looks visibly beat up.
Whetstones — what's the difference?
A few common shapes, each making a different trade.
Combo Stone (1000/6000)
One stone handles sharpening and polishing — the smart first buy.
Grits
1000 + 6000
Price
~$25–45
Soak time
5–10 min
Best for Beginners, kitchen knives, most edge maintenance
Tradeoff Can't tackle severely chipped edges without a coarser stone
Coarse/Medium (220–1000)
For damaged, chipped, or heavily neglected edges.
Grits
220–1000
Price
~$30–50
Best use
Edge repair
Best for Knives with chips, rolled tips, or years of neglect
Tradeoff Unnecessary for most knives — removes metal fast, easy to overdo
Splash-and-Go Stones
No soaking required — faster feedback, preferred by serious sharpeners.
Soak
None needed
Price
~$40–60 each
Cut speed
Fast
Best for Regular sharpeners who want less setup friction
Tradeoff Sold per grit — a full set costs $150-250+
Best starter
Sharp Pebble
Premium Whetstone 1000/6000
$39.99 as of Jun 22, 2026
★★★★★Our rating· In Stock
Sharp Pebble is the whetstone that's taught more American beginners than any other. The 1000-grit side sets your edge; the 6000-grit polishes it to a hair-splitting finish. It comes with a non-slip bamboo base and a basic angle guide, so your first sharpening session has everything it needs. Well-constructed at a price that doesn't sting.
What we like
Comes with non-slip bamboo base and angle guide for day-one setup
Dual grit 1000/6000 handles the full sharpening cycle in one stone
Best-selling beginner whetstone — broadly tested and widely trusted
What to know
Dishes faster than premium options without regular flattening
Included angle guide is very basic — no substitute for real technique
★★★★☆Our rating· Only 1 left in stock - order soon.
The King KW-65 is what Japanese culinary schools hand students. It cuts a bit slower than premium stones, which actually helps while you're learning — more time to feel the edge. Widely available, under $35, and honest. The correct answer to 'is this hobby for me' before spending more.
What we like
Under $35 and used in Japanese culinary schools for decades
Slower cut speed gives you more time to feel the edge while learning
What to know
Needs 5-10 minutes of soaking before each session — plan ahead
Dishes noticeably within 30-40 sessions; needs regular flattening
★★★★☆Our rating· Only 16 left in stock - order soon.
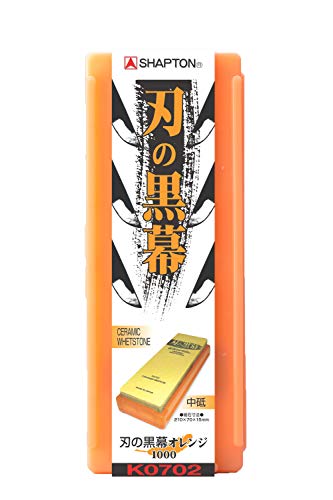
When you're ready for individual stones and faster feedback, the Shapton Kuromaku is the step up. Splash-and-go — no soaking required — and it cuts noticeably faster than soaking stones. The 1000 grit is your workhorse for regular touch-ups. Most dedicated home sharpeners end up with multiple Shapton grits over time.
What we like
Splash-and-go — no soaking, ready to use in seconds
Cuts faster than soaking stones; efficient for regular maintenance
What to know
Sold per grit — full progression set costs $150-250+ in Shapton stones
Harder feel than soaking stones; takes a session or two to adjust
If learning freehand feels like too much at first, guided systems clamp your blade at a fixed angle and move stones over it — consistent results from session one. The Lansky is the entry point; the Edge Pro Apex is where serious sharpeners land. Neither replaces learning to feel the edge, but both will get your knives sharp while you develop technique.
Best starter
Lansky
Deluxe 5-Stone Sharpening System
$52.63 as of Jun 22, 2026
★★★★★Our rating· In Stock
The Lansky takes angle consistency off the table entirely. Clamp it to the blade, choose your angle (17° to 30°), and work through the five stones coarse to ultra-fine. Sharp edges from session one, no freehand skill required. The right choice if you want sharp knives faster than learning freehand allows.
What we like
Locks blade at 17°-30° — eliminates the hardest part of sharpening
Complete kit with five stones coarse through ultra-fine included
Sharp results from session one, no freehand technique needed
What to know
Struggles on blades over 8" — extra passes needed on chef's knives
Rod stones cut slowly vs. whetstones for major edge reprofiling
★★★★☆Our rating· Only 9 left in stock - order soon.
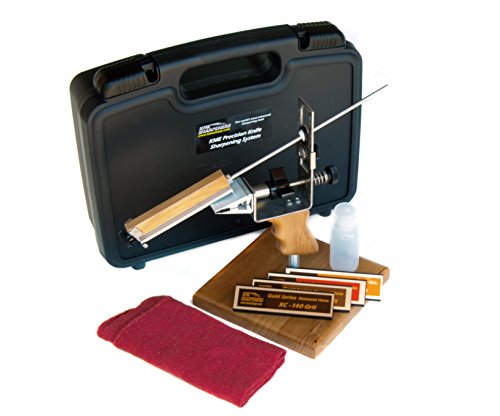
The KME sits between Lansky and Edge Pro in price and precision. Takes standard 1"×6" stones, so you can mix in diamond, ceramic, or leather hones. More control than Lansky at roughly half the Edge Pro's price — the choice when the Lansky isn't precise enough but $230 feels steep.
What we like
Takes standard 1"×6" stones — mix diamond, ceramic, or leather
Half-degree angle adjustments from 17° to 30°
What to know
More setup per knife than Lansky — overkill for a quick touch-up
$100+ requires real commitment to justify the investment
The benchmark professional guided system. The blade sits flat on the platform; you sweep the stone across it at a precise set angle. Consistent, repeatable, and precise enough for single-bevel Japanese blades. When you're sharpening other people's knives, this is what you use.
What we like
Professional standard — reproducible angles every stroke, every session
Handles single-bevel Japanese knives most other guides can't
What to know
At $230, costs as much as a quality chef's knife — commit first
Additional stones add $25+ each; the entry kit needs supplements
A strop is the last step — it removes the wire edge (a microscopic burr that forms when you sharpen) and polishes the metal to a mirror finish. With green chromium oxide compound, a leather strop takes a sharp knife to genuinely alarming sharpness. Strop after every sharpening session and you'll wonder why you waited.
Best starter
BeaverCraft
Leather Strop Set with Green Compound
$17.99 as of Jun 22, 2026
★★★★★Our rating· In Stock
The BeaverCraft strop comes with green chromium oxide compound and a hanging hook — everything needed to finish an edge after the whetstone. Two or three strokes per side on a loaded strop takes a merely sharp knife to scary sharp. If you skip the strop, you're leaving the best 20% of your edge on the table.
What we like
Includes green chromium oxide compound — the polishing step most skip
Hanging hook plus rigid option — both stropping styles in one kit
What to know
Rolling the spine off the leather rounds the edge — takes a session to feel
Compound dries out between sessions; re-apply every few uses
★★★★☆Our rating· Only 1 left in stock - order soon.
A rigid wood-backed paddle strop is easier to control than a hanging strop — no flex means consistent pressure and a more repeatable stroke. Flexcut's Gold compound is finer than the standard green, removing less material while producing a higher polish. The step up when your technique is dialed in.
What we like
Rigid paddle is easier to control than a hanging strop for beginners
Gold compound is finer than green — higher polish, less metal removed
What to know
Requires stropping away from the edge — intuition runs the wrong way
Compound loads unevenly if over-applied; thin coats work better
A honing steel doesn't sharpen — it realigns the edge between sharpening sessions. Think of the edge as very fine teeth: cooking gradually rolls them sideways. Three quick swipes on a steel straightens them back. A good steel extends the time between full sharpenings from weeks to months. Don't confuse it with a sharpener — it's maintenance, not restoration.
Best starter
Victorinox
12-Inch Fine Cut Honing Steel
$53.99 as of Jun 22, 2026
★★★★★Our rating· In stock
The Victorinox honing steel is the most-recommended cooking tool in this price range for good reason — fine-cut, durable, and 12 inches long enough to handle any home kitchen knife. Works with both European and most Asian blades at standard 15-20° angles. Hone before every cooking session and your whetstone sessions space out dramatically.
What we like
Fine-cut steel realigns without removing measurable metal
12-inch length handles every home kitchen knife comfortably
What to know
Not ideal for hard Japanese blades under 15° — use ceramic instead
A fine ceramic rod barely removes any metal — it primarily realigns and lightly polishes the edge. Preferred for harder steel over 58 HRC and Japanese knives that a regular steel would catch rather than align. The rod that edge-obsessed cooks end up using exclusively once they try it.
What we like
Safe for harder Japanese steel that metal rods can damage over time
Near-zero metal removal — pure alignment and light finishing
What to know
Won't correct a rolled or damaged edge — the whetstone still handles that
Subtle difference most beginners won't feel until they've honed for months
Whetstones develop a concave hollow with use — a dished stone can't make a flat edge. A flattening plate restores your stone to flat in under two minutes of circular scrubbing. You won't need it in the first month, but after 10-20 sharpenings your stone will dish noticeably. Get one before your edges start looking worse instead of better.
Best starter
Naniwa
IO-1142 Flattening Lapping Stone
$25.65 as of Jun 22, 2026
★★★★★Our rating· Only 3 left in stock - order soon.
The Naniwa IO-1142 is a 220-grit silicon carbide stone that restores your whetstone to flat in two minutes of wet circular scrubbing. Coarse enough to cut fast, fine enough to avoid gouging. The standard recommendation for flattening soaking stones — costs around $20, lasts for years, and the first time you use one you'll wonder how you managed without it.
What we like
Restores a dished stone to flat in under two minutes of scrubbing
Works on virtually every soaking water stone including King and Sharp Pebble
What to know
Wears faster than diamond plates — needs replacing every year or two
Less aggressive than a diamond plate on severely dished stones
★★★★☆Our rating· Only 5 left in stock - order soon.
A diamond lapping plate flattens faster and more aggressively than a silicon carbide fixer — ideal if you sharpen frequently or own multiple stones. The DMT Dia-Flat cuts quickly and stays flat itself (diamond never dishes). Also doubles as a coarse conditioning stone for edge reprofiling.
What we like
Diamond surface stays flat and cuts faster than silicon carbide
Doubles as a coarse reprofiling stone for severely damaged edges
What to know
Overkill if you own just one or two stones you sharpen monthly
At $60-80, it costs more than the stones it's meant to maintain
Whetstone sharpening has a learning curve, but it's a short one. Here's what actually happens in the first four weeks — and the single skill that makes everything else click.
Knife sharpening has a reputation for being hard to learn. It isn’t, exactly — but it does require learning to feel something rather than follow a rule. That distinction is what trips most beginners up, and it’s what this guide is about.
Here’s what the first month actually looks like.
Week 1: Learning to hold an angle
Everything in whetstone sharpening comes down to one thing: maintaining a consistent edge angle across the full length of the blade, from heel to tip. This is the skill. Once you have it, everything else is just practice and patience.
The angle most western kitchen knives want is around 20° per side. To visualize it: put your knife flat on the stone (0°), then raise the spine until it’s roughly the height of two stacked quarters off the stone. That’s close enough to 20° to start. Japanese knives typically want 15°, about 1.5 quarters’ worth.
The Sharpie trick is your best friend here. Before every practice session in week one, draw a line along the entire bevel edge with a black marker. Make one slow stroke on the stone. Look at the bevel: where is the ink removed? If it’s only in the middle, you’re holding the spine too high. If it’s only at the very edge, you’re too low. You want the ink removed right at the apex — the very edge — and that tells you your angle is correct.
Most beginners hold the angle correctly for the first inch, then unconsciously raise the spine as they push the knife forward. The Sharpie reveals this immediately. Fix it before you develop muscle memory around the wrong motion.
Your first week’s goal is a single sharpening session on one knife — your workhorse chef’s knife. Don’t rush through a set. One knife, done well, with the Sharpie as your feedback tool, teaches you more than a dozen rushed sessions.
What sharp actually feels like: After your first proper session on the 1000-grit side, run your thumb across the spine and carefully across the very edge (don’t drag along the edge). You’re feeling for a “wire edge” — a microscopic burr that rolls over when the opposite bevel is fully sharpened. If you feel a slight roughness on the opposite side from where you’ve been sharpening, you’ve raised a burr, which means you’re removing metal in the right place. Alternate sides a few times, then move to the 6000-grit for polishing.
Week 2: The stroke that unlocks it
By week two, you have some muscle memory for the angle. Now focus on the stroke itself.
The fundamental whetstone stroke starts at the heel of the blade and ends at the tip, with the edge leading — as if you’re slicing a thin layer off the stone. The tip is where beginners lose the angle most often; as you approach the tip, you need to rotate your wrist slightly to keep the edge in contact with the stone as the blade curves.
Slow down. Beginners want to sharpen fast. Fast strokes give you bad feedback and inconsistent angles. A slow, deliberate stroke where you can feel the edge against the stone is worth ten quick passes. Speed will come naturally as the motion becomes familiar — it doesn’t need to be rushed in.
The second week is also when most people do their first stropping session. After sharpening, three to five light strokes per side on a leather strop loaded with compound should noticeably change how the knife feels. If it doesn’t, your angle on the strop is too high — drag the blade spine-first, very low angle, almost flat.
Lifting the tip off the stone as you reach the front half of the blade — tip stays dull
Applying too much pressure; let the weight of the blade do the work
Over-sharpening on one side; alternate sides every three to five strokes
Week 3: Honing every day
By week three, your sharpening technique has improved, and you’re starting to notice something important: the knife doesn’t stay sharp as long as you’d hope after each session. That’s not a problem with your sharpening — it’s normal. Cooking gradually rolls the edge sideways, and a honing steel fixes that.
Three quick passes per side on a honing steel before every cooking session maintains the edge you built. This is the habit that separates people whose knives are always sharp from people who sharpen once and then complain the knife went dull. Honing takes 30 seconds. The edge lasts months instead of weeks.
The steel motion is the reverse of the whetstone: you’re working spine-first, rolling the edge back into alignment. Keep the angle consistent (same 20° you’re sharpening at) and use light, even pressure. Heavy strokes don’t help and can damage the edge.
This week is also a good time to do the paper test. Take a sheet of printer paper, hold it at the top, and draw the blade through from heel to tip. A sharp knife slices cleanly. A dull section catches or tears. If your tip catches and the heel slices, you know exactly which part of your edge needs another session.
Week 4: Your first stone flattening
After 10-15 sharpening sessions, your stone will start to develop a hollow — a concave dish in the middle. You’ll notice it when you run your finger across the stone’s face: the center is slightly below the edges. A dished stone can’t make a flat edge.
Flattening is easy: sprinkle water on both surfaces, place them face-to-face, and scrub with circular and figure-eight motions for a minute or two until you see even slurry covering the whole surface. If you have a dedicated flattening plate instead of a two-stone method, the process is identical — more abrasive, less time.
After flattening, do a few strokes on your knife. The difference is immediate and noticeable.
Where you’ll be at the end of month one:
Your knives will be genuinely, measurably sharper than they’ve ever been. You’ll have a consistent angle hold, a feel for the wire edge, and a honing habit. Your technique will still be developing — freehand sharpening keeps teaching you things for years — but you’ve crossed the threshold from “trying to learn” to “actually doing it.”
The thing that surprises most people a month in: you’ll start looking at other people’s knives and immediately knowing they’re dull. Once you’ve felt what a sharp knife is, you can’t unfeel it.
Save your money
What you don't need yet
Beginners get pressured to buy a lot of stuff that doesn't help them play
better. Here's what we'd skip on day one.
An electric sharpener — They grind fast at fixed angles that often don't match your knives, generate heat that affects the temper, and remove far more metal than necessary. Your stones will do it better.
A pull-through sharpener — Convenient, but they scratch instead of sharpen and destroy the geometry of quality knives. Use one for a $15 paring knife, not your good steel.
More than two grits for the first year — A 1000-grit and a 6000-grit cover 95% of what any home kitchen needs. Adding more grits before your technique is consistent just adds variables.
A sharpening angle jig or digital gauge — A Sharpie line on the bevel tells you everything an angle cube does — draw a line, sharpen one stroke, see where metal was removed. Free and immediate feedback.
A second set of knives to practice on — Your workhorse knives are exactly the right thing to learn on. A cheap practice blade doesn't tell you how your actual knives feel when sharp.
First week
Your first seven days
A short, real plan to get from gear-on-doorstep to actually playing.
Do the paper test on your current kitchen knives. Draw each blade through a sheet of printer paper from the top edge. A sharp blade slices clean; a dull one catches or tears. This is your baseline. · Action
Pick one knife to learn on — your most-used chef's knife. Not your cheapest, and not your best. Something in between that you use daily. · Action
Order a 1000/6000 combo whetstone. One stone is enough to start — add more only after you can hold a consistent angle. · Buy
Watch Jon Broida's beginner whetstone video on YouTube (search 'JKI knife sharpening basics'). Thirty minutes of watching saves you months of bad habits. · Learn
Use the Sharpie trick on your first session: draw a line along the entire bevel edge with a marker. Sharpen one stroke. Look where the ink is removed — that's where your edge is contacting the stone. Adjust until you're removing ink from the very edge, not just the middle of the bevel. · Action
Test with paper and a tomato when done. The knife should skin a ripe tomato with zero downward pressure — just let the weight of the blade do the work. · Action
Hone the knife before every cooking session going forward. The edge you just built will last much longer with daily maintenance. · Buy
Most western knives (German steel) want 20° per side — 17-22° is safe for the whole category. Japanese knives are typically 15° per side. If you're not sure: 20° is a safe default for any knife not explicitly sold as Japanese. Consistency matters more than precision. A wobbly 17° beats a perfect 15° held for one stroke.
How often should I sharpen versus hone?
Hone before every cooking session (30 seconds). Sharpen when the edge stops responding to the honing steel — for a home cook using a good steel, that's roughly every 2-4 months per knife. Sharp knife plus daily honing means you almost never need to sharpen.
Do Japanese water stones need to be soaked?
Traditional soaking stones (King, most budget combo stones) need 5-10 minutes submerged in water before use. Splash-and-go stones (Shapton, Naniwa Chosera) need only a few drops of water on the surface. Check your stone's instructions — soaking a splash-and-go stone won't damage it, it's just unnecessary.
How do I know when my knife is actually sharp?
Two tests. The paper test: a sharp knife slices cleanly through printer paper. The tomato test: a sharp knife skins a tomato using only the weight of the blade — no pushing. If it catches on the skin, keep sharpening. If it slips through, you're done.
Can I ruin a knife by sharpening it wrong?
You can remove more metal than necessary (especially with coarse stones) or gradually widen the bevel by holding an inconsistent angle. Both are recoverable — the knife just gets shorter over years. The genuinely ruinous move is an electric sharpener grinding at the wrong angle repeatedly, which can't be undone. A whetstone used badly is still better than that.
What is the difference between sharpening and honing?
Sharpening removes metal to create a new edge. Honing realigns the existing edge without removing material. Think of the edge as teeth that cooking rolls sideways — honing stands them back up, sharpening files them sharp again. A dull knife needs sharpening. A slightly underperforming knife that used to be sharp probably just needs honing.
Japanese Knife Imports (YouTube) — Jon Broida's channel. The best free beginner sharpening instruction on the internet — patient, specific, and teaches feel rather than just motion.
r/sharpening — Active community. The wiki covers beginner technique, stone recommendations by budget, and troubleshooting. Post your bevel angle and someone will tell you what's off.
Korin Knife Knowledge — NYC's top Japanese knife retailer publishes excellent technique guides covering angle, grit selection, and Japanese vs. German steel. No paywalls, no fluff.
An Edge in the Kitchen (book) — Chad Ward's deep-dive into knife care and sharpening. The reference book for serious home sharpeners. Read after you've done 10-15 sessions — it will answer questions you didn't know you had yet.
KnifeGrinders (YouTube) — Cliff Stamp and Murray Carter's advanced freehand technique. Watch after you've been sharpening for a month — before that the subtleties won't land.
As an Amazon Associate, JustBeginning earns from qualifying purchases.
We may also earn commission from other affiliate programs linked on this
page. Editorial recommendations are independent; we don't choose
products based on commission rates.
Product prices and availability are accurate as of the date and time
indicated and are subject to change. Any price and availability
information shown on Amazon at the time of purchase will apply.
Our top pickSharp Pebble Premium Whetstone 1000/6000


 Best starter