Herbalism starts cheaper than you think: dried chamomile, a mason jar, and 80-proof vodka is a real tincture. The expensive mistake is buying a dehydrator and press before you've made your first batch. This guide skips the Pinterest shelfie and covers gear that earns its place.
By Colin B. · Published June 18, 2026 · Last reviewed June 18, 2026
Your first tincture costs under $50 (jars, cheesecloth, and good dried herbs). The dehydrator is the one purchase that genuinely transforms the hobby long-term.
We earn commission on qualifying Amazon purchases — see our
affiliate disclosure.
Price tiers and budget totals shown above are editorial estimates;
actual Amazon prices vary.
At a glance
Our top pick in each category
The fastest path through this guide — each best-starter pick by category.
Scroll for the budget and upgrade alternatives.
You don't need a dehydrator to start. Your first tincture only needs a mason jar, 80-proof vodka, and dried herbs from a trusted bulk supplier. Buy those first, make one batch, then decide whether you want to invest in drying your own material.
The alcohol matters more than the jar. For most herbs, plain 80-proof vodka (40% ABV) extracts both water- and alcohol-soluble compounds cleanly. Save high-proof grain alcohol for resins and specific roots that need it.
Source your herbs before you buy your gear. Cheap bulk herbs from a disreputable supplier undermine every preparation you make. Mountain Rose Herbs, Frontier Co-op, and Starwest Botanicals are the names you'll see in every serious herbalism community.
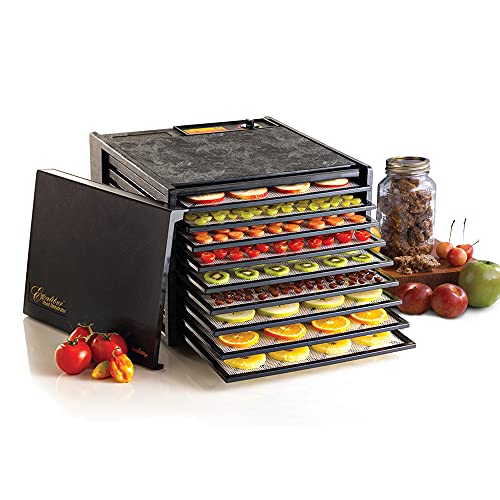
A dehydrator is the single best investment in a herbalism setup. Air-drying works for many herbs, but a dehydrator preserves more volatile oils, cuts drying time from weeks to hours, and handles dense roots and thick plant material that air-drying struggles with. You don't need a big one to start. Six trays handles a medium harvest comfortably. Stackable models cost less and take up less space; shelf-style horizontal-airflow models dry more evenly. See the variant comparison below.
Dehydrators — what's the difference?
A few common shapes, each making a different trade.
Six trays, digital timer, and a max temp of 165°F handles everything from delicate chamomile blossoms to dense marshmallow root without scorching. Rear-mounted fan delivers even horizontal airflow so you don't have to rotate trays. Quiet, well-built, and well-reviewed across years of real use.
What we like
Horizontal airflow dries all six trays evenly without rotation
Digital timer and temp dial prevent scorching delicate flowers
Quiet enough to run overnight without disturbing a household
What to know
Bulkier than stackable models; needs dedicated counter or cabinet space
Mesh inserts pass very fine material; use parchment liner for powders
Stackable design starts at four trays and expands as your harvests grow. Under $65 and durable. The top-mounted fan creates slightly uneven drying, so you'll rotate trays every few hours, but at this price it's the right way in when you're not yet sure the hobby will stick.
What we like
Expandable stackable trays grow with your harvest volume
Under $65, right price before you know if the hobby sticks
What to know
Top-mounted fan causes slight uneven drying; rotate trays midway
Plastic construction absorbs herb scents over time
The dehydrator serious herbalists eventually end up with. Nine trays handle a full summer harvest in one run. Thermostat is precise, airflow is perfectly even, and individual trays pull out for easy loading. Expensive, but built to last decades and resell well.
What we like
Nine trays handle an entire summer harvest in one run
Precise thermostat preserves volatile oils in delicate herbs
Even horizontal airflow, no tray rotation ever needed
What to know
Over $300, hard to justify before you've committed to the hobby
You will use a mortar and pestle more than almost any other tool in herbalism. Grinding dried herbs releases volatile oils and breaks cell walls, making teas and tinctures noticeably stronger. Stone (granite or marble) is better than ceramic: heavy enough to grip and grind without skidding, and it doesn't absorb color or scent the way ceramic can. Get at least a 2-cup capacity; smaller ones are frustrating when you're processing a real batch.
Best starter
ChefSofi
Unpolished Heavy Granite Mortar and Pestle
$29.99 as of Jun 22, 2026
★★★★★Our rating· In Stock
Three-pound granite set with an unpolished interior that actually grips and grinds instead of sliding. The rough surface does real work on dried flowers and roots. Stable, well-sized at 2 cups, and the standard recommendation in herbal communities for a reason.
What we like
Unpolished granite interior grips herbs instead of pushing them around
Heavy base stays put during hard root-grinding sessions
2-cup capacity handles a solid working batch without multiple refills
What to know
Needs seasoning before first use (grind dry rice twice)
Heavy enough to be annoying if storage space is tight
HIC Kitchen Marble Mortar and Pestle, Solid Carrara Marble
$20.99 as of Jun 22, 2026
★★★★☆Our rating· In Stock
Under $20 and completely functional for dried flowers, leaves, and petals. Marble is easier to clean than granite and doesn't require seasoning. Won't handle heavy root-grinding sessions, but handles the herbs most beginners actually start with.
What we like
Under $20, no seasoning needed, clean after any preparation
Marble surface works well for flowers, leaves, and soft dried herbs
What to know
Lighter weight means more skidding when grinding dense roots
Polished interior loses grip over time with heavy use
Four-cup capacity means fewer refills during large batches. The heavier pestle delivers more grinding force with less effort, which matters when you're processing dense roots like valerian or ashwagandha. The right move once you're producing real volume.
What we like
Four-cup capacity handles large batches without constant refilling
Heavier pestle delivers more grinding force on dense roots
What to know
Requires 3-4 seasoning rounds before first use
Large footprint; more counter real estate than most kitchens give it
Making a tincture is simple: pack a jar with dried herbs, cover completely with 80-proof vodka or apple cider vinegar, wait four to six weeks, strain. You need two kinds of glass: wide-mouth mason jars for the infusion stage and small amber bottles for storing the finished product. Wide-mouth jars are easier to pack and strain than narrow-neck options. Amber glass protects finished tinctures from UV degradation, extending shelf life meaningfully.
Best starter
Ball
Wide Mouth Pint Mason Jars 12-Pack
$39.88 as of Jun 22, 2026
★★★★★Our rating
The industry standard for herbalism macerations. Wide mouth makes packing dried herbs and straining finished tinctures easier than narrow-neck jars. Glass seals properly, doesn't leach or absorb flavors, and you can watch your preparation develop through the glass. Twelve pints handles a serious season of tincture-making.
What we like
Wide mouth lets you pack herbs tightly and strain cleanly
Glass seals without absorbing scent or leaching into preparations
Reusable indefinitely; a one-time purchase for the hobby
What to know
Standard lids rust in damp storage; replace with plastic caps
12-pack takes real cabinet space; buy half a case to start
1 oz Amber Glass Dropper Bottles with Droppers (30-Pack)
$27.99 as of Jun 22, 2026
★★★★☆Our rating· Only 8 left in stock - order soon.
Your finished tinctures go into these. Amber glass blocks UV light, the main cause of potency loss in finished preparations. Built-in dropper caps let you dose precisely without measuring spoons. A 30-pack gets you through a full year of making before you need to reorder.
What we like
Amber glass blocks UV that degrades tincture potency over months
Dropper caps allow precise dosing of potent preparations
What to know
1 oz size means frequent decanting for daily-use tinctures
Droppers can gum up if resin-rich preparations dry in the cap
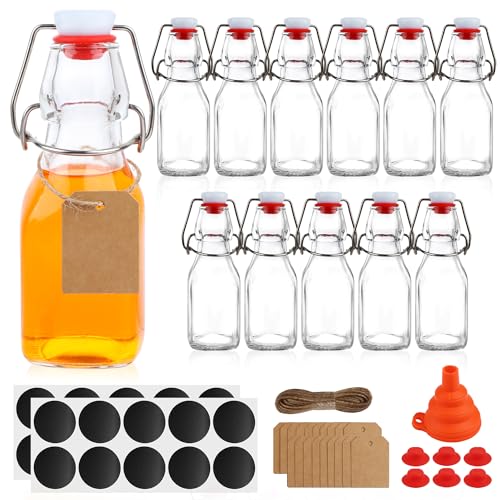
Larger than dropper bottles, these clear swing-top bottles are well-suited for herbal syrups, oxymels, and fire ciders you plan to use within a few weeks. Swing-top lids reseal easily, and clear glass lets you monitor the color and clarity of your preparation.
What we like
4 oz size ideal for syrups and oxymels you plan to use within weeks
Swing-top lids reseal without separate caps to lose or misplace
What to know
Clear glass offers no UV protection; store in a dark pantry or cabinet
Not ideal for long-term tincture storage; use amber bottles for that
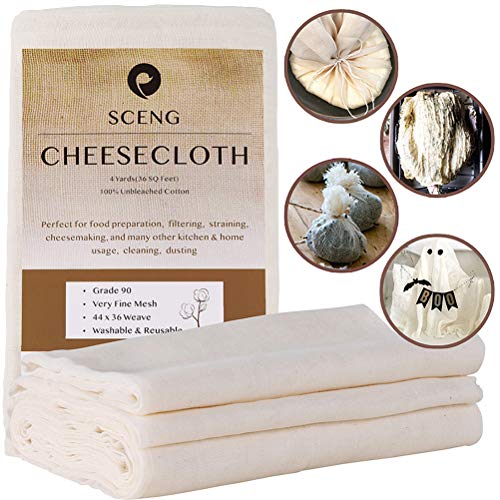
Straining is the step beginners underestimate. A solid squeeze of the spent herbs (the marc) at the end of a maceration increases your yield by 20-30%. Cheesecloth works and is cheap, but grade 90 (tighter weave) won't shed fibers into your finished preparations the way grocery-store cheesecloth does. For pressing, a stainless steel potato ricer extracts the last bit of menstruum cleanly and costs a fraction of dedicated herb presses.
Best starter
Unbleached Cheesecloth
Grade 90 Unbleached Cheesecloth (36 sq ft)
$9.95 as of Jun 22, 2026
★★★★★Our rating· In Stock
More tightly woven than the grocery store stuff. Grade 90 doesn't shed fibers into your finished tinctures and is reusable after boiling. The right starting strainer: inexpensive, clean, and it works for everything from delicate flower infusions to chunky root preparations.
What we like
Grade 90 tight weave traps fine herb particles, no fiber shedding
Reusable after boiling; one pack lasts through dozens of batches
What to know
Requires double-layering for very fine powdered material
Hand-squeezing is tedious; you'll want a press once volume increases
Herbalists have used potato ricers as marc presses for years because they work and cost a fraction of dedicated tincture presses. Fill it with your cheesecloth-wrapped herbs, squeeze, and extract the remaining menstruum cleanly. Under $20 and available at any kitchen store.
What we like
Extracts the last 20-30% of menstruum from spent herbs cleanly
Under $20, far cheaper than dedicated tincture presses
What to know
Small cup means multiple pressings for large batches
Very fibrous roots can push through holes; wrap tightly in cheesecloth
The herbs you use matter more than the equipment you use them with. Potency varies dramatically with sourcing: fresh-dried organic herbs from a reputable bulk supplier outperform grocery-store herbs by a significant margin. For your first year, buy high-quality dried bulk herbs while you build your growing knowledge. Chamomile and lemon balm are the most forgiving starting herbs: gentle, well-studied, and useful enough that you'll actually go through what you buy.
Best starter
Starwest Botanicals
Organic Chamomile Flowers Whole (1 lb)
$31.99 as of Jun 22, 2026
★★★★★Our rating· In Stock
One pound of organic chamomile gets you through several tinctures, multiple tea blends, and a salve test batch. Starwest's quality controls are serious: third-party tested, consistently potent, and the brand you'll see recommended in every herbalism community. Chamomile is the best first herb to work with.
What we like
Third-party tested organic; reliably more potent than grocery herbs
1 lb handles several tinctures, teas, and salve experiments
What to know
Potency drops after 12-18 months; don't overbuy on the first order
Buying pre-dried limits your knowledge of fresh plant work
If you want to grow your own, this seed collection gets you started with chamomile, lavender, lemon balm, echinacea, and other workhorses of a home herb garden. Growing from seed teaches identification and harvest timing that buying dried herbs never does.
What we like
Growing from seed teaches identification and harvest timing
Inexpensive way to start a self-replenishing herb supply
What to know
60-90 days before harvestable material; not an immediate solution
Germination rates vary by herb; not all seeds in a pack come up
Most beginners make their first real tincture before they buy any equipment. Here's what the first month actually looks like, from folk infusion to a shelf of labeled amber bottles.
Herbalism has a reputation for being complicated: field guides and Latin names and a hundred different preparations. The reputation is earned, eventually. But in the beginning, it’s just a jar.
Your first real preparation is a folk tincture: dried herb, 80-proof vodka, sealed jar, dark cupboard for four weeks. No special equipment. No measurement ratios. No certification. Just patience and observation. That’s where the practice starts.
Week one: the folk tincture
Before you buy anything, you can make something. Here’s the only equipment you need to start:
A wide-mouth pint mason jar with a lid
80-proof vodka (the standard menstruum for most herbs)
Dried chamomile flowers from a reputable bulk supplier
Fill the jar loosely halfway with dried chamomile. Pour vodka over it until the herbs are completely submerged with an inch of liquid above them. Seal the jar, label it with the herb name and today’s date, and put it in a dark cabinet.
That’s it. Check it in four weeks.
The “folk method” is one part herb to two parts menstruum, approximate rather than weighed. It works for the vast majority of beginner herbs and removes the friction that stops people from starting. You’ll move to weight-to-volume ratios (1:5, 1:3) once you’re making multiple preparations and want consistency between batches. For now, approximate is fine.
What you’re actually doing: The alcohol draws out the plant’s active constituents over time (alkaloids, flavonoids, tannins, essential oils, depending on the herb). The longer the maceration, the more complete the extraction, up to a point. Four to six weeks is the standard window. Some herbalists go eight; rarely longer.
While your chamomile macerates, spend a week with that herb specifically. This is the simpler’s method, and it’s the most practical framework for beginners: one herb, observed on its own, before blending.
Read what chamomile actually does: it’s a gentle nervine (calming to the nervous system), a carminative (settles the digestive system), and a mild anti-inflammatory with a strong safety record. Make it as a tea. Note how you feel an hour later. Make it again the next evening. Give it a week before you add anything else to your rotation.
This isn’t precious. It’s practical. If you start with five-herb formulas, you won’t know which plant is doing what. The whole point of the first month is building a working knowledge of individual herbs, not impressive blends.
Three herbs worth knowing first:
Chamomile: sleep, digestion, mild anxiety. Most forgiving starter herb.
Lemon balm: nervine and antiviral. One of the most pleasant teas in any herb garden.
All three are well-documented, gentle, and effective enough that regular use teaches you something real.
Week three: drying your first herbs
If you have access to a garden, a farmers market, or even a window box, week three is a good time to start drying your own material.
Air-drying works for flowers and thin-leaved herbs: hang small bundles upside down in a warm, ventilated space away from direct light. Chamomile, lavender, lemon balm, and peppermint all air-dry well in one to two weeks. You’ll know they’re done when the material crumbles between your fingers rather than bending.
Dense roots, thick-stalked plants, and anything with high water content (elderberries, rose hips, most berries) need a dehydrator. Set it to 95-115°F for flowers and leaves, 125-135°F for roots. Low and slow preserves the volatile oils that make the preparation worth making.
Two things beginners get wrong at this stage:
Under-drying. Moisture left in the material invites mold during storage. Err toward more drying time rather than less.
Storing before cooling. Hot dried herbs trap condensation in airtight containers. Let everything cool completely on the tray before jarring.
Week four: straining and bottling
At the four-week mark, your chamomile tincture is ready to strain.
Line a large measuring cup with two layers of grade 90 cheesecloth. Pour the contents of the jar through it. Gather the corners of the cheesecloth around the spent herbs (the marc) and squeeze as much liquid out as you can. This last squeeze can recover 20-30% of the total yield. Use a potato ricer if your hands aren’t strong enough to get it all.
What you have in that measuring cup is a finished chamomile tincture. It will be amber-gold, smell strongly of flowers and vodka, and taste bitter and aromatic. Transfer it to small amber dropper bottles, label each with the herb, menstruum, date, and batch number, and store them away from heat and light.
Shake your chamomile tincture into a small glass of water (10-15 drops) and drink it 30 minutes before bed. Do this for two weeks and notice what, if anything, changes about how you fall asleep. This is the practice: not just making preparations but observing their effects with some rigor.
What’s next: Once you’ve made a tincture, the preparations that follow are riffs on the same method. A glycerite uses vegetable glycerin instead of alcohol (gentler, sweeter, good for children). An oxymel uses apple cider vinegar and honey (strong flavor, shorter shelf life). A salve is an oil infusion solidified with beeswax. All of these have the same fundamental logic: get the plant’s compounds into a carrier that preserves and delivers them.
You don’t need to rush toward all of them. One preparation, done well and observed carefully, teaches you more than five rushed experiments.
Save your money
What you don't need yet
Beginners get pressured to buy a lot of stuff that doesn't help them play
better. Here's what we'd skip on day one.
Dedicated herb press / tincture press — A potato ricer does the same job for $15. Get the dedicated press after you've confirmed the hobby is yours.
Capsule filling machine — You're now in supplement manufacturing territory, with all the potency inconsistency and regulatory complexity that brings. Stay with tinctures and teas.
Essential oil distillation kit — Distilling hydrosols and essential oils needs specialized glass equipment and large volumes of fresh plant material. Interesting eventually; not for year one.
Grow lights and propagation setup — Start with pots on a south-facing windowsill or buy dried bulk herbs. Grow lights come after you know which plants you actually use enough to justify them.
First week
Your first seven days
A short, real plan to get from gear-on-doorstep to actually playing.
Order dried organic chamomile or lemon balm from a reputable bulk supplier. These are the most forgiving starting herbs. · Buy
Make your first folk tincture: fill a jar halfway with dried chamomile, cover completely with vodka, seal, label with the date and herb name, set in a dark cupboard. Check it in four weeks. · Action
Start a preparation journal. Date, herb, preparation method, observations. This habit becomes invaluable after six months. · Action
Read about the simpler's method: one herb per preparation, observed independently. No complex formulas in your first month. This is how you learn what individual plants actually do. · Learn
Mountain Rose Herbs Blog · Practical how-to guides on tincture-making, salve ratios, and drying techniques
FAQ
Common questions
What alcohol should I use for tinctures?
80-proof vodka (40% ABV) is the standard starting point. It extracts both water- and alcohol-soluble compounds from most herbs. Use higher-proof grain alcohol (95% ABV) only for resins, bark, and specific roots that need it. Apple cider vinegar is an alcohol-free alternative with a shorter shelf life of one to two years.
What are the best herbs to start with?
Chamomile and lemon balm. Both are gentle, widely studied, hard to misuse, and produce tinctures and teas people actually use daily. Chamomile supports sleep and settles the digestive system. Lemon balm is a reliable nervine for anxiety. Start here before moving to stronger or less-familiar plants.
Is it safe to make your own herbal preparations?
For common culinary herbs (chamomile, lavender, lemon balm, calendula), yes. These are gentle plants with a long history of food-safe use. Strong medicinal herbs (black cohosh, pennyroyal, anything in the nightshade family) require real botanical knowledge first. Don't work with plants you can't identify with certainty.
How long do homemade tinctures last?
Alcohol-based tinctures (40%+ ABV) stored in amber glass away from heat and light last 5-10 years. Vinegar-based tinctures last 1-2 years. Teas and water infusions last a few days refrigerated. Label every bottle with the herb, menstruum, and date.
Do I need organic herbs?
Organic matters most for roots and bark, where pesticide residues concentrate. For aerial parts (flowers and leaves) it matters less. For your first year, buy organic from a reputable supplier. The quality assurance is worth the small price premium, and you'll taste and smell the difference.
American Herbalists Guild — Professional organization for clinical herbalists. Their educational standards and practitioner directory are the field's benchmark.
United Plant Savers — Tracks native medicinal plants at risk of overharvesting. Essential reading before you start wild-harvesting anything.
Mountain Rose Herbs Blog — Practical how-to guides from one of the most trusted bulk herb suppliers. Covers tincture ratios, salve making, and dehydrating techniques.
Herb Pharm — Professional extract maker. Their individual plant monographs are among the most practical and evidence-informed free resources in the field.
r/herbalism — Active community. Skip the cure-all threads; the preparation technique and plant ID threads are genuinely useful.
As an Amazon Associate, JustBeginning earns from qualifying purchases.
We may also earn commission from other affiliate programs linked on this
page. Editorial recommendations are independent; we don't choose
products based on commission rates.
Product prices and availability are accurate as of the date and time
indicated and are subject to change. Any price and availability
information shown on Amazon at the time of purchase will apply.
Our top pickCosori Food Dehydrator 6 Stainless Steel Trays


 Best starter