Sourdough has a cult around it. The good news for you: that cult exaggerates the difficulty and the gear required. Here's what you actually need: a scale, the right baking vessel, a few small tools, and the things people will tell you are essential but really aren't.
By Colin B. · Published May 8, 2026 · Last reviewed June 6, 2026
Sourdough is one of the cheapest hobbies to start. The whole kit fits under $150, and the gear lasts decades.
We earn commission on qualifying Amazon purchases — see our
affiliate disclosure.
Price tiers and budget totals shown above are editorial estimates;
actual Amazon prices vary.
At a glance
Our top pick in each category
The fastest path through this guide — each best-starter pick by category.
Scroll for the budget and upgrade alternatives.
Don't buy a stand mixer or a fancy bread proofing box. Real sourdough is mixed by hand. The dough handling is part of the practice, and the equipment-heavy version of this hobby is mostly marketing.
A kitchen scale matters more than any other piece of gear. Sourdough is a percentages-and-ratios hobby; volume measurements (cups, tablespoons) introduce enough error to ruin loaves. If you only buy one thing first, buy a scale.
You don't need to buy a starter. You can make one from just flour and water in 5-7 days. Most people who buy a starter could have made one for free in the time it took the package to ship. We list a dehydrated starter as a specialty pick for people who genuinely can't wait, but it's not the recommended path.
The single most important tool. Sourdough is built on percentages: water is some percentage of flour weight, salt is some percentage of flour weight. You cannot do this with measuring cups. A digital kitchen scale that weighs in grams with at least a 5kg capacity is essentially mandatory and costs less than $25.
Best starter
Etekcity
Digital Kitchen Scale
$9.99 as of Jun 22, 2026
★★★★★Our rating· In Stock
Reliable, weighs in grams to 1g resolution, holds up to 11 lb / 5 kg, has a tare button that you'll use constantly. Under $20. We've seen these last for years of daily use.
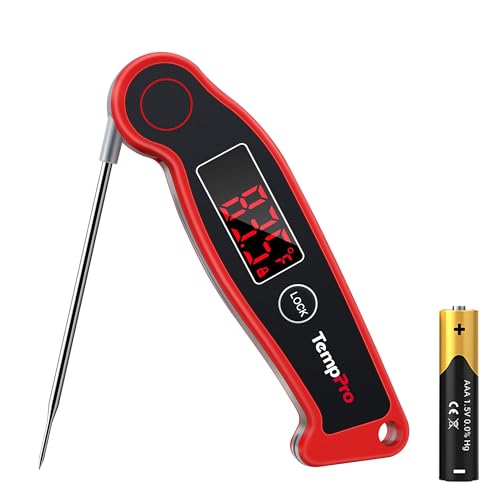
Useful for two specific moments: getting your water to the right temperature for mixing (around 80°F / 27°C) and checking that a finished loaf has hit 205-210°F internal. You can bake good bread without one. Once you have one, you'll use it.
What we like
2-3 second readings, fast enough for tracking dough temps
Reads bread internal temp without slowing the workflow
Foldable probe is gentle on drawer space
What to know
Auto-off can trigger mid-read on slow stir-and-check
Sourdough wants steam to develop its crust, and the easiest way to get steam at home is to bake the loaf inside a covered cast-iron vessel. The dough makes its own steam from its internal moisture; the lid traps it. The shape and material of the vessel matters more than the brand.
Bread vessel — what's the difference?
A few common shapes, each making a different trade.
Combo cooker
A two-part cast-iron pan: shallow lid + deeper base. Easiest to load.
Capacity
~3 qt
Material
Cast iron
Shape
Round, flat lid
Best for First-time bakers; the flat lid makes loading dough easy without burning your hands
Tradeoff Bare cast iron requires seasoning maintenance; less useful for non-bread cooking
The community favorite specifically for sourdough. Two-piece cast-iron design: the shallower side becomes the lid, the deeper becomes the base. Loading dough is dramatically easier than dropping it into a deep Dutch oven. Around $40, lasts forever.
What we like
Cast iron retains heat like nothing else; better oven spring
Shallow lid + deep base = two pans for the price of one
If you can't find the Combo Cooker, a plain 5-qt Lodge cast iron Dutch oven works fine. You'll have a slightly harder time loading dough, but the bread comes out the same.
What we like
Same Lodge quality at a lower price than the combo
The artisan-bread specialist. Wide oval opening, heavy lid that traps steam beautifully, designed by a sourdough baker. Worth it once you've baked 50+ loaves and know you're staying with this hobby.
What we like
Designed by a baker for sourdough; wide low pan = great spring
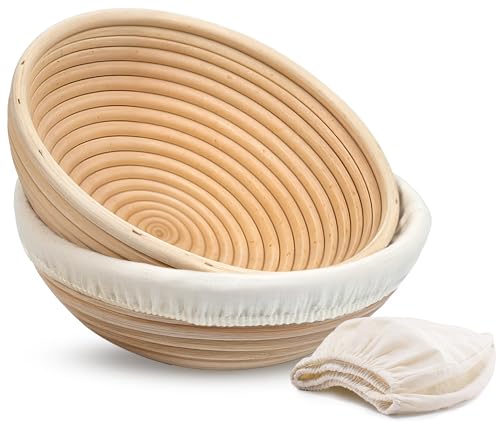
After shaping your dough, it needs to hold its form during its final rest (the 'proof'). A banneton (a coiled rattan basket usually lined with cotton or linen) gives the dough surface to grip and produces the spiral pattern you see on the top of artisan loaves. You can fake it with a flour-dusted kitchen towel in a bowl, but bannetons are cheap and they last.
Best starter
Kook
9-Inch Round Banneton (2-pack with liners)
$24.95 as of Jun 22, 2026
★★★★★Our rating· In Stock
9-inch round is the right size for a 1kg-flour loaf, which is the size most beginner recipes target. Comes with a cotton liner that prevents sticking. Around $20.
What we like
Two baskets means you can stagger bakes
Includes linen liners for clean release every time
Rattan produces the classic spiral mark
What to know
Rattan can splinter if not seasoned with flour first
If you want to skip the banneton, a heavy linen cloth dusted with flour and laid in a bowl works. Won't give you the spiral pattern but it's a third the price and you'll bake fine bread.
What we like
Traditional French linen for shaping multiple loaves at once
Three small tools that change how dough handling feels. None of them are strictly necessary; you can shape dough with your hands and score with a sharp paring knife. But the bench scraper is genuinely so cheap and useful that it should be considered mandatory.
Best starter
OXO
Good Grips Stainless Steel Bench Scraper
$
★★★★★Our rating
Get one of these immediately. Pre-shaping wet sourdough is impossible without it; cleaning the bench afterward is also impossible without it. Around $12.
What we like
Sharp enough to divide dough cleanly
Stainless steel survives daily use
Comfortable grip you can press through
What to know
Heavier than plastic scrapers, wrist fatigue on big sessions
Used to slash the top of the dough right before baking, allowing controlled expansion (the 'ear' on artisan loaves). A sharp paring knife or razor blade taped to a stick works for free.
What we like
Razor blade swap takes 10 seconds
Curved edge produces the prettiest "ear" on a loaf
A stiff wire whisk shaped like a flat coil. Used for the initial flour-and-water mix. Does the job better than a spoon, faster than your hands, with less mess. Optional but loved by people who own one.
Your starter (the wild yeast culture that leavens the bread) lives in a jar on your counter. You feed it flour and water on a schedule. The jar matters more than people think; a wide-mouth jar with straight sides lets you see how much your starter has risen and is much easier to clean than a mason jar.
Best starter
Weck
745 Tulip Jar (1L)
$
★★★★★Our rating
Straight sides, wide mouth, glass body. You'll be able to see the rise clearly, and a wooden spoon or spatula fits inside without scraping the walls. A loose-fitting lid (or just a cloth + rubber band) lets gases escape. Around $15.
What we like
Wide mouth lets you stir and feed without spillage
Glass is non-reactive and won't affect starter flavor
Lid clip lets pressure escape during active fermentation
What to know
Tall enough that a doubling can sneak over the rim
Clips can pop off if you forget to leave them loose
If you really can't wait the 5-7 days to grow your own starter, a dehydrated culture rehydrates in about 24 hours and you'll be baking by the weekend. We list this as specialty because making your own is free and equally good, but if you bought a banneton last week and you want to bake this Saturday, this is the move.
What we like
Skips the 7-day starter creation, active by day 3
Backed by King Arthur's quality and consistency
Stable enough to keep extras on hand as insurance
What to know
Less rewarding than building a starter from scratch
Homegrown starters develop more complex flavor over time
Sourdough is a cycle, not a recipe. Here's what actually happens from the day you buy a scale to the day you slice your first real loaf, about a week, with a few hours of actual work spread across it.
The single biggest thing to know about sourdough before you start is that it’s an arc, not a recipe. You can’t speed it up. The starter has to grow on its own schedule, the dough has to ferment on its own schedule, and a thousand “no-knead in 4 hours” tutorials online are not actually sourdough; they use commercial yeast and shortcut the part that gives sourdough its character.
That sounds intimidating but it isn’t. The total active work across your first loaf is maybe two hours, spread over seven to eight days. Most of the time, the dough is just sitting there.
Here’s the day-by-day reality.
Day 0: The setup
Before you do anything, you need three things on your counter: a kitchen scale, a wide-mouth glass jar, and a 5-lb bag of King Arthur all-purpose flour. That’s it. Don’t buy a Dutch oven yet, don’t order a banneton, don’t think about a stand mixer.
Pick a spot for the jar. Room temperature, out of direct sunlight, somewhere you’ll walk past every day. The starter likes 70-78°F. Top of the fridge is usually too warm in summer; a windowsill is too cold in winter. A back corner of the counter is fine.
Days 1–3: The starter is just confused
Day 1. Put 50 grams of flour and 50 grams of water in your jar. Stir with the back of a spoon until smooth. Cover loosely (a coffee filter and a rubber band, or just the jar lid resting on top, never sealed). Walk away for 24 hours.
Day 2. Look at it. Maybe a few bubbles. Probably not many. The smell is faintly fermented, kind of like very mild beer. Take a clean spoon, scoop out most of what’s in the jar (you’ll throw this away; it’s called “discard”), and then feed the rest with another 50g flour + 50g water. Stir. Cover. Wait.
Day 3. This is the disappointing day. The starter smells weird, not necessarily bad, but vinegary, kind of like nail polish remover, sometimes a bit cheesy. The bubbling has slowed or stopped. New beginners panic here. Don’t.
What’s actually happening is that the wrong microbes (the ones that live on grain and tolerate clean conditions) got there first. They’re now dying off, and the wild yeasts and Lactobacillus bacteria that make real sourdough are arriving in their place. The smell is the changeover. Feed it again. Wait again.
Days 4–6: Recognizable life
By day four or five, the rhythm shifts. After each feeding, the starter rises predictably: half an hour to an hour to start, four to eight hours to peak, then a slow fall. The smell changes from weird-and-vinegary to bright-and-yogurty. Some people describe it as smelling like a sourdough bread you’d actually want to eat, which is the right idea.
This is also the boring middle. You feed daily, you discard, you feed again. Don’t rush it. Don’t bake yet. The starter needs a few cycles of feeding before it has the strength to leaven a loaf.
A quick way to tell when it’s ready: drop a small spoonful of starter into a glass of water. If it floats, the starter is mature enough to bake with. If it sinks, give it another day or two of feedings.
Day 7: First mix
Your starter floats. It doubles within 4-6 hours of being fed. You’re ready.
The first dough is the moment most people overthink. Don’t. Pick one recipe (we’d suggest the King Arthur “Naturally Leavened Sourdough” or the no-knead version of the Tartine country loaf) and follow it exactly. Don’t substitute flours, don’t change ratios, don’t add herbs or seeds. Bake the recipe, see what happens, then adjust on loaf two.
A typical day-7 schedule looks like this:
Morning (7-9am): Feed the starter. It needs to peak before you mix.
Late morning (10-11am): Starter doubles. Mix the dough: flour, water, salt, mature starter. Let it rest 30 minutes.
Afternoon (12-5pm): “Bulk ferment”: leave the dough alone for 4-6 hours, with two or three “stretch and folds” along the way (a one-minute task each).
Evening (5-7pm): Shape the dough into a round, drop it into a flour-dusted banneton (or a kitchen towel-lined bowl), cover, refrigerate overnight.
That’s the whole day. Maybe forty-five minutes of actual hands-on time, scattered.
Day 8: First bake
This is the easy part. Take the dough out of the fridge. While it sits, preheat your oven to 500°F with the Dutch oven inside for at least 45 minutes; this is non-negotiable, the bread relies on the cast iron being screaming hot.
Score the top of the dough with a sharp knife or razor. One curved slash an inch deep, off-center, is plenty. Lower the dough into the hot Dutch oven (parchment paper helps), put the lid on, slide it back in.
Twenty minutes covered. Twenty more minutes uncovered. Pull it out; the loaf should be deeply browned, almost too dark by your instincts. That’s correct. Underbaked sourdough is the most common beginner mistake.
Cool the bread on a rack for at least an hour before you slice it. Especially the first one. The interior is still cooking from residual heat, and slicing too early gives you gummy crumb that makes you think the bake failed when it didn’t.
The first-loaf reality check
Your first loaf will almost certainly not look like Instagram. It might be denser than you expected. The crumb might be tighter, the rise smaller, the ear nonexistent.
That’s normal. What you’re looking at, in priority order:
Did it rise at all? If yes, your starter and bulk ferment worked. Everything else is fine-tuning.
Is the crumb open or closed? Big holes come with experience. Tight crumb on loaf one is fine.
Does it taste like sourdough? A faint tang is success. If it tastes like flat bread, your starter wasn’t quite ready.
Is the crust deep brown? It should be borderline burnt-looking on top. Pale crust = underbaked.
The one thing not to do is open Instagram and compare your loaf to someone’s seventh year of practice. You’re at hour zero of an arc that compounds for years.
What to do at loaf two
The temptation after a decent loaf one is to immediately tweak everything. Don’t. Bake the same recipe with the same flour for at least three more loaves before changing variables. Sourdough is sensitive; change two things at once and you can’t tell which one mattered.
A reasonable progression:
Loaves 1-4: Exact same recipe, learn what “ready dough” feels like in your hands.
Loaves 5-10: Vary one thing: slightly more water (higher hydration), a longer cold proof, a different flour.
The whole curve takes a few months of weekly baking, which is a small price for a skill that gives you good bread on demand for the rest of your life.
Save your money
What you don't need yet
Beginners get pressured to buy a lot of stuff that doesn't help them play
better. Here's what we'd skip on day one.
A stand mixer — Sourdough is mixed by hand. Stand mixers actually develop gluten differently than the long-rest method beginner recipes call for.
A bread proofing box — A turned-off oven with the light on holds the perfect proofing temperature for free.
Specialty bread flour (yet) — King Arthur all-purpose flour bakes great sourdough. Try specialty flours after your first 10 loaves, when you can taste the difference.
A laminating mat or silicone work surface — A flour-dusted countertop works for everything you'll do in your first six months.
Multiple bannetons in different sizes — One round banneton is enough until you've baked 20+ loaves.
First week
Your first seven days
A short, real plan to get from gear-on-doorstep to actually playing.
Start your starter: 50g all-purpose flour + 50g water in your jar. Cover loosely. Leave on the counter at room temperature. · Action
Order a kitchen scale if you don't already have one; you'll need it before your starter is ready to bake with anyway. · Buy
Feed your starter daily for 5-7 days: discard most of it, then add 50g flour + 50g water. It will look weird for the first few days. That's normal. · Action
While your starter develops, read one beginner recipe end-to-end. Don't read five. Pick one and follow it exactly the first time. · Learn
Once your starter doubles within 4-6 hours of feeding, it's ready to bake with. Mix your first dough that evening; bake the next morning. · Action
Bake your first loaf. It will not look like Instagram. That's also normal. · Action
Take a picture of the crumb (the inside texture). You'll be glad to look back at it in three months. · Action
FAQ
Common questions
How much should I spend total to start baking sourdough?
You can be fully equipped for around $70 with our budget picks (scale + cast iron + jar + cloth + bench scraper), or around $130 with the recommended starter set. The gear lasts decades; a Lodge cast iron pan can be passed down.
Do I really need a kitchen scale?
Yes, more than any other tool. Sourdough is built on baker's percentages: water is X% of flour weight, salt is Y%. Volume measurements (cups, spoons) introduce enough error to ruin loaves. A $20 scale fixes this permanently.
Can I bake sourdough without a Dutch oven?
You can, but it's harder. Sourdough's signature crust comes from steam during baking, and the easiest way to trap steam at home is inside a covered cast-iron vessel. The workaround (a baking stone with a tray of water) produces a softer crust and is finicky.
How long does it take to make a starter from scratch?
Five to seven days for most people. You combine equal weights of flour and water in a jar and feed it daily. By day 4-5 it should start showing bubbles and rising; by day 6-7 it should be doubling within 4-6 hours of feeding, which means it's ready to bake with.
What flour should I buy as a beginner?
King Arthur all-purpose flour is excellent for sourdough and easy to find. Bread flour will give you slightly more chew but isn't necessary for your first 20 loaves. Specialty flours (whole wheat, rye, einkorn) are fun to experiment with later, not now.
My starter looks weird. Is it ruined?
Almost certainly not. Healthy starter goes through ugly phases (gray hooch, weird smells, layers separating). The only signs of actual death are pink or orange mold (different from harmless darkening) or a smell that's genuinely repulsive. When in doubt, feed it twice a day for two days; it almost always recovers.
King Arthur Baking — The most reliable beginner resource. Recipes work as written. Their hotline (yes, a real phone hotline) is staffed by bakers.
The Perfect Loaf (Maurizio Leo) — Detailed essays and recipes from a home baker turned professional. Best blog in the space; everything is rigorously tested.
Bake With Jack (YouTube) — Patient, beginner-friendly UK baker. Start here for video learning. His 'Five Things a Beginner Needs' video is gold.
The Bread Code (YouTube) — Hendrik Kleinwächter, more technical, science-leaning channel. Watch after Bake With Jack for the why behind the what.
r/Sourdough — Most active sourdough community online. Lots of 'is my starter okay?' photos with thoughtful replies. Search before posting.
Tartine Bread (Chad Robertson) — The book that started the modern home-sourdough wave. The country loaf recipe is the canonical reference. Read after your first 5 loaves.
As an Amazon Associate, JustBeginning earns from qualifying purchases.
We may also earn commission from other affiliate programs linked on this
page. Editorial recommendations are independent; we don't choose
products based on commission rates.
Product prices and availability are accurate as of the date and time
indicated and are subject to change. Any price and availability
information shown on Amazon at the time of purchase will apply.


 Best starter