Pizza from a properly hot oven isn't a restaurant secret anymore — the equipment has caught up, and a beginner can pull a blistered, leopard-spotted Neapolitan pie their first weekend. Here's what to buy, what to skip, and the one decision that shapes everything else: where will you cook?
By Colin B. · Published May 15, 2026 · Last reviewed June 2, 2026
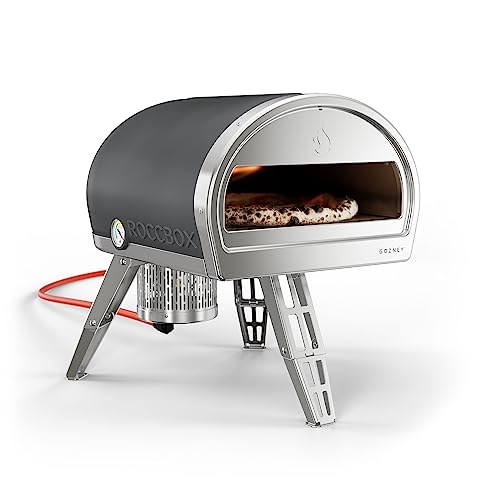
Ooni Koda 12 Gas Pizza Oven
— The Ooni Koda 12 is the easiest way into outdoor pizza — gas-powered, 950°F, and Neapolitan pies in 60 seconds.
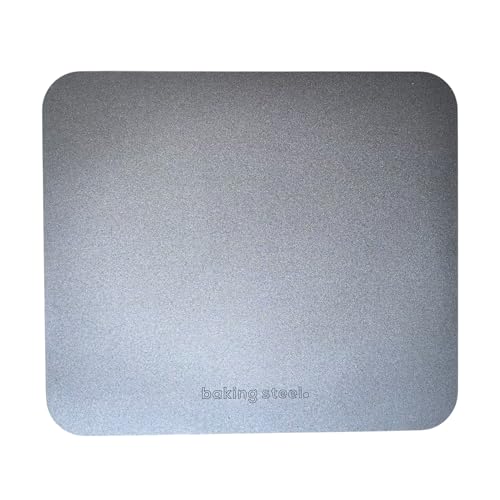
Baking Steel Original (14" x 16")
— The Baking Steel Original transforms your home oven — more thermal mass than any stone, and practically indestructible.
The budget swings on one decision: outdoor pizza oven or home oven. A home-oven setup (baking steel + peel + scale) runs $100–180. An outdoor Ooni setup puts you at $450–550 out the gate. Both make excellent pizza — the ceiling is just higher with the outdoor oven.
We earn commission on qualifying Amazon purchases — see our
affiliate disclosure.
Price tiers and budget totals shown above are editorial estimates;
actual Amazon prices vary.
At a glance
Our top pick in each category
The fastest path through this guide — each best-starter pick by category.
Scroll for the budget and upgrade alternatives.
Decide where you'll cook before you buy anything else. Outdoor space and a propane line or portable tank? Get an Ooni Koda or similar. Apartment, no outdoor access, or not ready to spend $400 on an oven? Do the home oven + baking steel route. Both approaches make genuinely excellent pizza, but the gear lists are almost completely different.
Make your first few pies with store-bought dough. Seriously. You'll be learning the launch technique, the bake, and the toppings simultaneously — making your own dough adds a fourth variable you don't need yet. Once you can get a pizza off the peel without folding it, start the dough.
Pizza is about heat more than it's about recipe. The reason restaurant pizza is better than most homemade pizza isn't a secret ingredient — it's that commercial ovens run at 800–1000°F. An outdoor pizza oven closes this gap completely. A baking steel on broil closes most of it. Understanding this is worth more than any recipe.
The gear
What you actually need
Pizza Ovens
This is the choice that changes everything. Outdoor pizza ovens run at 900–950°F and cook a Neapolitan pie in about 60 seconds — that's how you get the charred, puffy, leopard-spotted crust that restaurants charge $24 for. They run on gas, wood pellets, or both. If you have outdoor space, get one. The Ooni Koda 12 on gas is the right entry point: no fire management, no wood sourcing, just consistent heat and great pizza within 15 minutes of turning it on. If you're apartment-bound, skip to the Baking Steel section — you can still make excellent pizza in your home oven.
Pizza Ovens — what's the difference?
A few common shapes, each making a different trade.
Outdoor Gas
Consistent heat, no fire management. The easiest way into outdoor pizza.
Max temp
~950°F
Cook time
60–90 sec/pie
Fuel
Propane or natural gas
Best for Beginners, anyone who wants consistent results without babysitting a fire
Tradeoff Slightly less wood-smoke character than a fire-based oven
No dedicated oven — use your existing oven at max heat with a steel insert.
Max temp
~550°F (typical home oven)
Cook time
5–8 min/pie
Fuel
Your existing oven
Best for Apartment dwellers, anyone without outdoor space, or anyone not ready to spend $400+ on a dedicated oven
Tradeoff Can't match the char and airy texture of a 950°F oven, but makes excellent NY-style and thin-crust pizza
Best starter
Ooni
Koda 12 Gas Pizza Oven
$298.95 as of Jun 22, 2026
★★★★★Our rating
Gas-powered, 950°F maximum temperature, ready to cook in 15 minutes. The Koda 12 removes every friction point from outdoor pizza: no fire to tend, no pellets to source, no temperature guesswork. Turn the knob, wait 15 minutes, launch your pizza, pull it in 60 seconds. It makes 12" pies, which is the right size for learning. Compact enough to store in a cabinet between uses, and it genuinely works.
What we like
No fire management — turn the knob and it's ready in 15 minutes
Reaches 950°F for authentic leopard-spotted Neapolitan crust
Compact enough to store in a cabinet between sessions
What to know
12" size limits you to smaller pies — tight for feeding 4+
A hundred dollars cheaper than the Koda 12 and runs on wood pellets instead of gas — which means more authentic smoke character and the ritual of tending a fire. A genuine tradeoff: you'll feed pellets every few pies and manage temperature fluctuations in wind or cold. A better fit if the fire aspect genuinely excites you more than convenience.
What we like
About $100 cheaper than the Koda 12
Wood pellet fuel adds authentic smoke character
What to know
Temperature management takes practice and varies with conditions
Requires ongoing wood pellet purchases and more active tending
The Roccbox is more refined than the Koda — better insulation for cold-weather cooking, a stone floor that retains heat between pies, and compatibility with a wood burner attachment (sold separately). It reaches temperature faster and holds it more steadily. If budget isn't the constraint, the Roccbox is worth the premium — but cook 20+ pies on something simpler first.
What we like
Better insulation holds heat more steadily, especially in cold weather
Compatible with wood burner attachment for multi-fuel flexibility
Heats up faster than the Koda with more even floor temperature
What to know
Stone floor more fragile than steel — handle carefully
Significantly more expensive than Ooni entry points
If you're cooking in a home oven, a baking steel is your single highest-leverage purchase. A steel has far more thermal mass than a pizza stone — it heats hotter, stays hotter, and drives heat into the crust faster. Preheat it for 45–60 minutes at your oven's max temperature, slide the pizza on, and switch to broil for the last 2 minutes. The difference between a bare oven rack and a properly preheated steel is not subtle. Even if you eventually get an outdoor oven, the steel makes excellent pan pizza and focaccia.
Best starter
Baking Steel
Original (14" x 16")
$129.00 as of Jun 22, 2026
★★★★★Our rating
The original and still the benchmark. A quarter-inch thick steel plate — pre-seasoned, nearly indestructible, and it genuinely transforms what a home oven produces. Gets searingly hot and stays that way. Season it like cast iron when needed, and it will outlast everything else in your kitchen.
What we like
Far more thermal mass than any pizza stone — genuinely transforms home oven results
Virtually indestructible — will outlast every other tool in your kitchen
Works for focaccia, pan pizza, and bread too
What to know
Heavy at 16 lbs — best treated as a permanent rack fixture
More expensive than pizza stones, though it's a lifetime purchase
If you're not ready to spend $90 on a steel, a proper pizza stone still dramatically outperforms a bare oven rack. The Old Stone is thicker and sturdier than most competitors. Just preheat it slowly and gently — thermal shock from cold water or a rapid heat change is the main failure mode for any stone.
What we like
Significant improvement over a bare rack at a fraction of the steel price
Thicker and sturdier than most competing pizza stones
What to know
Conducts less heat than steel — results are good but not as dramatic
Vulnerable to thermal shock — never expose to cold water while hot
A peel is the paddle you use to build, launch, and retrieve pizzas from a screaming-hot oven. There are two types worth knowing: a wooden or composite prep peel (wide, for building the pizza on) and a thin perforated metal launch peel (so excess flour shakes off and the pizza slides cleanly). Ideally you use both — build on the wood, transfer to the metal for the launch. At minimum, get a good perforated metal peel. This is the most skill-dependent tool in pizza: a sticky launch folds your pie in half and ruins a 24-hour dough.
Best starter
Ooni
Perforated Pizza Peel (14")
$$
★★★★★Our rating
Thin leading edge, perforated surface that shakes off excess flour cleanly, and the right size for a 12" Neapolitan pie. Works equally well for launching into a home oven or an outdoor pizza oven. Light, well-balanced, and made specifically for the high-heat context. This is what we'd hand a beginner on day one.
What we like
Perforations shake off excess flour for a clean, stick-free launch
Thin leading edge slides under dough without disturbing the pizza
Works for both outdoor pizza ovens and home oven setups
What to know
Can't double as a cutting board — need a separate surface for slicing
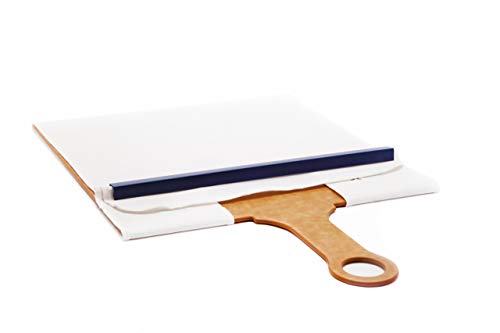
EXO's Super Peel uses a built-in conveyor belt mechanism — you build your pizza on the fabric belt, then tilt the peel and the belt rolls the pizza off cleanly onto the stone. No flour, no sticking, no failed launches. Made from Richlite composite (same NSF-approved material as Epicurean boards), it's the most forgiving launch system for beginners dealing with wet, high-hydration doughs.
What we like
Built-in conveyor belt eliminates the risk of a stuck launch entirely
Best for high-hydration sticky doughs that are hard to slide normally
What to know
Belt mechanism adds complexity — more parts to clean and maintain
A wide composite prep-and-cutting peel for building your pizza before transferring to the metal launch peel. Safe to wash, gentle on knives, and big enough to hold a 14" pizza with room to dress the edges. The two-peel system — composite for prep, perforated metal for launch — is how the best home pizza cooks work.
What we like
Composite surface is dishwasher safe and gentle on knives
Wide surface fits a 14" pizza with room to dress all the way to the edge
What to know
Not a launch peel — you still need perforated metal for the actual throw
Pizza dough is flour, water, salt, and yeast — but the ratios matter more than in almost any other cooking, which means a kitchen scale is not optional. That's the single most important purchase in this category. Beyond the scale: 00 flour is the finely milled Italian variety that produces a properly chewy, blistery Neapolitan crust (all-purpose flour makes acceptable pizza, but the texture is noticeably different). A bench scraper handles everything from dividing dough balls to cleaning flour off the counter. If you already own a scale, the scraper and a bag of flour are all you need.
Best starter
OXO
Good Grips 11 lb Food Scale
$54.92 as of Jun 22, 2026
★★★★★Our rating· In Stock
The right kitchen scale for pizza (and every other baking project): accurate to 1g, large enough platform for a big bowl, and a pull-out display so you can read the number under the bowl. No single tool improves dough consistency more than switching from volume measurements to weight. This is the one to get.
What we like
Accurate to 1g — turns volume guesswork into repeatable dough chemistry
Pull-out display reads clearly under a large mixing bowl
Useful for all baking, not just pizza
What to know
11 lb limit is fine for home use — not for batch baking at scale
The flour Neapolitan pizza was invented with. Finely milled (the "00" refers to grind fineness), lower in ash, and specifically designed for high-heat baking — which gives you the open, chewy crumb and charred exterior that all-purpose flour can't quite produce. Not strictly mandatory, but noticeably better. Order a couple bags at once since you'll use it.
What we like
Purpose-designed for high-heat baking — produces classic Neapolitan crumb
The standard flour for authentic Italian-style pizza worldwide
What to know
Lower gluten than bread flour — wrong choice for NY-style pizza
Comes in large bags — needs airtight storage to stay fresh
★★★★☆Our rating· Only 13 left in stock - order soon.
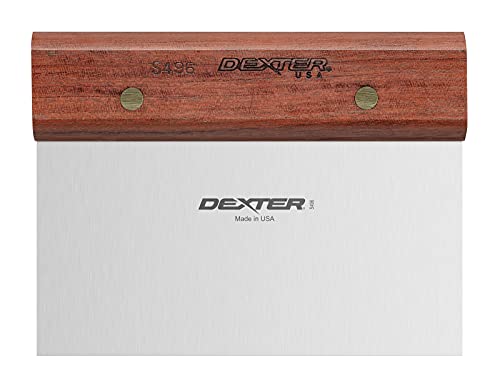
A stiff metal bench scraper is how you divide dough balls, fold dough during mixing, move sticky dough without tearing it, and scrape the counter clean without ruining your cutting board. Under $10, used constantly, and the Dexter-Russell is the pro-kitchen standard. The kind of tool that ends up living on your counter permanently once you start baking anything with flour.
What we like
Handles dough dividing, folding, and counter cleanup with one tool
Under $10 — the best dollar-for-dollar buy in this entire guide
What to know
No non-stick surface — dust with flour when handling sticky doughs
A few cheap tools that meaningfully change the experience: an infrared thermometer tells you the actual surface temperature of your steel or stone (which is often 100–200°F lower than what your oven claims, which explains a lot). A proper pizza wheel cuts cleanly instead of dragging cheese across the pie. And a lidded dough container is how you do cold fermentation properly — 24–72 hours in the fridge develops flavor that same-day dough simply cannot match.
Best starter
Etekcity
Infrared Thermometer (Lasergrip 800)
$28.99 as of Jun 22, 2026
★★★★★Our rating· In Stock
Point this at your baking steel or oven stone and know the actual surface temperature — not what the thermostat claims. This single tool explains most beginner pizza failures: launching onto a surface that's 400°F instead of 550°F is why your crust is soft and pale. Also useful for BBQ, candy-making, and any other application where surface temperature matters. Under $20 and genuinely enlightening.
What we like
Shows the actual surface temp of your steel — explains most failed pies
Under $20 and useful far beyond pizza: BBQ, candy, HVAC checks
What to know
Only reads surface temperature, not internal or air temp in the oven
A large-diameter wheel cuts through crust without compressing it. Cheap pizza wheels have small, wobbly wheels that drag rather than cut. The OXO has a 4" stainless steel wheel, a comfortable grip, and actually separates cleanly. Dishwasher safe. Not glamorous, completely necessary.
What we like
Large 4" diameter wheel cuts without compressing or dragging the crust
Dishwasher safe — easy to clean after cheesy, saucy sessions
What to know
A sharp chef's knife works too — this is convenience, not necessity
The container pro pizza shops use for cold fermenting dough. Round shape encourages even rise; graduation marks on the side show exactly how much the dough has grown; the lid seals tightly without pressing on the dough. A 6-quart fits 2–3 dough balls comfortably. Get two — one for fridge proofing, one to prep in.
What we like
Round shape promotes even rise; graduation marks show exactly how much it's grown
The same container pro pizza shops use for cold fermentation
What to know
Bulky — takes real fridge shelf space during the 24–72 hour cold ferment
Your first month of pizza-making is really one long experiment: finding the combination of dough, heat, and technique that makes your oven produce a consistently great pie. Here's what that month actually looks like — and the mistakes you'll stop making by week four.
Pizza is one of those hobbies where your first pie is both disappointing and encouraging. Disappointing because it almost certainly won’t look like the pictures — the launch will be nervous, the crust will be uneven, the cheese will pool somewhere you didn’t intend. Encouraging because you can see, very clearly, exactly what needs to change. That feedback loop is what makes pizza-making so absorbing.
Most of the improvement in your first month happens not from reading more recipes but from cooking more pies. The dough is a skill. The launch is a skill. Reading the oven is a skill. None of them transfer from a video — they come from doing it badly, noticing why, and adjusting.
This is what your first month actually looks like.
Pies 1–3: Get the heat right first
The most common beginner mistake is underestimating how important temperature is. Home ovens that claim 500°F often have surfaces — rack, stone, steel — that are actually 350–400°F because they haven’t preheated long enough. Restaurant pizza is cooked at 800–1000°F. The gap explains everything.
Before you make your first dough, understand your setup:
Home oven + baking steel: Preheat the steel for at least 45–60 minutes at your oven’s absolute maximum temperature. Use an infrared thermometer to check the actual surface temperature. It should be 500°F minimum; 550°F is better. Switch to broil for the last 2 minutes of the bake.
Outdoor pizza oven (Ooni, Gozney, etc.): Preheat for at least 15–20 minutes. Check the stone surface with an infrared thermometer — you want 800°F+. The first pie often cooks unevenly because the stone loses heat fast; rotate it at 30 seconds.
For your first few pies, use store-bought dough. Supermarkets sell it fresh in the deli section; pizzerias will often sell you a raw ball for a few dollars. This removes one variable while you learn the launch and the bake.
Keep your first toppings simple: crushed San Marzano tomatoes, shredded low-moisture mozzarella, olive oil, salt. No ingredients on top of each other. The reason restaurant pizza doesn’t get soggy isn’t a secret technique — it’s that they apply less of everything than you think looks right.
By pie three or four, you’ve got a feel for your oven and your launch. Now make your own dough.
The non-negotiable rules for pizza dough:
Weigh everything in grams. Volume measurements (cups, tablespoons) introduce enough error to ruin dough. A kitchen scale turns dough-making from guesswork into reproducible chemistry.
Cold-ferment for at least 24 hours. Make the dough on Friday, put the balls in covered containers in the refrigerator, pull them out Sunday 2 hours before you cook. The extended ferment develops flavor that same-day dough cannot produce. A 48-hour cold-fermented dough at 65% hydration outperforms a 2-hour room-temperature dough at any hydration.
Start at 60–65% hydration. Hydration is the ratio of water weight to flour weight. 60% is easier to handle and launch; 65% is more flavorful and produces a more open crumb. High-hydration doughs (70%+) are harder to shape and much stickier to launch — save them for after you’ve got the basics.
Use 00 flour for Neapolitan style. For a home-oven NY-style crust, bread flour is actually better. Pick one style, stick with it for 5–6 pies, then experiment.
The shaping step trips up most beginners. You’re trying to stretch the dough into a circle without tearing it or making it uneven. The instinct is to use a rolling pin — resist this. A rolling pin presses out the air bubbles that make the crust light. Use your hands: start with your fingertips pressing outward from the center, leaving a 1″ border, then lift the round and let gravity stretch it while you rotate it. It takes 10–15 pies before this feels natural. That’s normal.
The launch is the most anxiety-producing moment in pizza-making, and it’s where most beginner pies go wrong. The failure mode is always the same: the pizza sticks to the peel mid-launch, folds over, and ruins the dough.
Prevention:
Work fast once the dough is on the peel. 60–90 seconds maximum. Every second the dough sits on the peel, it’s wicking moisture from the toppings and bonding to the surface. Shape quickly, add toppings quickly, launch immediately.
Use semolina or fine-grind flour under the pizza, not just on the peel. Dust the peel generously before the dough goes on, then dust again underneath the dough once it’s shaped. Shake the peel before every launch to confirm the pizza is still sliding freely. If it’s not sliding, you’re not launching it yet — lift the edge with a bench scraper and add more flour.
A perforated aluminum peel is dramatically better than a flat wooden one for launching. The holes let excess flour shake off and allow airflow that breaks the suction. If your pizza is sticking consistently, the peel is probably part of the problem.
Around pie ten, something shifts. The launch becomes automatic. You stop thinking about it as a liability and start thinking about what you want to put on top.
This is when pizza-making actually becomes fun.
What you’ll fail at — and that’s expected
Every beginner makes the same handful of mistakes. You will too:
Launching too slowly. A tentative launch sticks. A confident, single-motion forward push is what gets a pizza cleanly onto the stone. Watch Ooni’s launch videos. The motion looks cavalier. It should.
Too many toppings. The instinct is to cover the pizza. Professional pizzas are sparse — you can see the cheese through the sauce in places. More ingredients = more moisture = wet, dense crust.
Not rotating in the outdoor oven. The back of an outdoor pizza oven is hotter than the front. Rotate at 20–30 seconds or one side burns while the other is still pale.
Pulling the pie too early. A properly cooked home-oven pizza takes 6–8 minutes at full heat. It looks done at 5 minutes and isn’t. Wait for the bottom to brown — use a spatula to check before pulling.
Dough that’s too cold. Pulling dough straight from the refrigerator makes it contract when you try to stretch it. Always let it rest at room temperature for 1.5–2 hours first.
A few things that sharpen your improvement curve quickly:
Pick one style and master it before branching out. Neapolitan (thin, blistered, 60-second outdoor oven), New York (chewy, foldable, home oven at max heat), and Detroit (thick pan pizza, completely different technique) are three separate crafts. The fundamentals transfer, but the technique differences are real. Pick one.
Cook with someone else. Pizza has natural roles — one person shapes, one person launches, one person manages the oven. Cooking with a friend speeds up skill transfer in a way that solo cooking doesn’t.
Read Serious Eats’ pizza section. Kenji Lopez-Alt’s food-science approach to home pizza is the best written guide available, especially for understanding why each step matters. The recipes are reliable; the explanations behind them make you a better cook across everything you make.
By month two, you’ll have developed opinions about hydration, flour, and oven temperature that you couldn’t have formed before you started. The experiment has become a practice.
Save your money
What you don't need yet
Beginners get pressured to buy a lot of stuff that doesn't help them play
better. Here's what we'd skip on day one.
A standalone dough mixer or KitchenAid dough hook — Hand-mixing pizza dough works completely fine. The quantities are small enough that a 5-minute mix by hand is easier than cleaning a stand mixer.
A proofing box — Your refrigerator is a better proofing environment for pizza dough than a controlled warm box. Cold fermentation (24–72 hours in the fridge) develops far more flavor than a 2-hour warm proof.
A wood-burning insert for your home fireplace — These run $2,000+ and require serious installation. An Ooni Koda costs $399 and lives in a cabinet. Not a serious comparison for beginners.
A 16" peel for beginner pies — A 12–14" peel is plenty for the pizza sizes a beginner makes. A 16" peel is harder to maneuver inside a home oven and adds awkwardness you don't need.
Imported specialty tomatoes from an Italian grocery — Canned San Marzanos on Amazon are excellent. Don't special-order imported tomatoes until you've dialed in your dough and heat — those variables dwarf any tomato difference.
First week
Your first seven days
A short, real plan to get from gear-on-doorstep to actually playing.
Make the oven decision: outdoor pizza oven or home oven + baking steel. Everything else follows from this. · Action
Order the Ooni Koda 12 if you have outdoor space. · Buy
Pick up store-bought pizza dough from a grocery store or local pizzeria for your first 2-3 pies. Save the homemade dough for when you've nailed the launch and the bake. · Action
Cook your first pizza at the absolute maximum temperature your oven or outdoor oven allows. Use the infrared thermometer to confirm the surface is actually hot before launching. · Action
After your first pie, start a 24-hour cold-ferment dough for weekend pizza. This single habit separates okay home pizza from great home pizza. · Action
FAQ
Common questions
Can I make good pizza in a regular home oven?
Yes, with two conditions: a baking steel (not a stone — the steel conducts heat better) and maximum heat. Preheat the steel for 45–60 minutes at your oven's highest temperature, then switch to broil for the last 2 minutes of the bake. The result is genuinely excellent thin-crust and NY-style pizza. It can't match the leopard-spotted char of a 950°F outdoor oven, but it's the right approach for apartment dwellers.
Do I need a wood-fired oven for authentic pizza?
No. Gas is easier and produces 90% of the result with 10% of the fire management. The key variable is temperature, not fuel type — an Ooni Koda on gas reaches 950°F, which is what makes a Neapolitan pie cook in 60 seconds with proper char. You can add a wood-burning multi-fuel option later once you've mastered the basics.
What is 00 flour and do I actually need it?
00 refers to the grind fineness — it's milled much finer than American bread or all-purpose flour, with a lower ash content. It's designed for high-heat baking and produces the open, chewy crumb characteristic of Neapolitan pizza. You can make acceptable pizza with all-purpose flour, but 00 flour gives you noticeably better texture at high temperatures. For NY-style pizza (lower heat, longer bake), bread flour actually performs better.
How long does pizza dough actually take?
Same-day dough works, but cold-fermented dough is dramatically better. Make it 24–72 hours ahead, store it in the fridge, and pull it out 2 hours before baking to come to room temperature. The extended fermentation develops complexity that same-day dough simply can't produce. Friday dough + Sunday pizza is the move.
Why does my pizza stick to the peel?
Usually one of three things: the dough is too wet and picked up moisture from the peel surface, there isn't enough flour or semolina under the pizza, or you waited too long between building the pizza and launching it. Work quickly once the dough is on the peel — 60–90 seconds max — and shake the peel periodically to confirm the pizza is still sliding freely before you commit to the launch.
How hot does the oven or stone need to be?
For Neapolitan-style: 850–950°F. For NY-style in a home oven: 500–550°F surface temp on the steel (use an infrared thermometer to verify — home ovens often read 100–200°F higher than actual surface temperature). The difference between launching at 400°F and 550°F is the difference between pale, soft crust and a properly browned bottom.
Serious Eats — Pizza — Kenji Lopez-Alt's food-science approach to home pizza. The New York-style, cast-iron, and no-knead pizza recipes are the best beginner-accessible guides online. Start here.
Adam Ragusea (YouTube) — Practical, skeptical home-cook approach to pizza. His baking steel and home-oven pizza videos are excellent — he explains the why behind every step.
Pizza Making Forum — The most complete online community for home pizza obsessives. Deep archives on dough formulas, oven mods, and flour comparisons. Overwhelming for a beginner — use search for specific questions.
r/Pizza — Active subreddit with a weekly beginner thread. The wiki has reliable beginner recipes. Good for troubleshooting ('why is my crust pale') with photos.
Ooni Recipes & Guides — Ooni's official recipe library is actually solid — well-tested dough formulas calibrated for their ovens. The Classic Neapolitan and New York-style recipes are good starting points.
Flour Water Salt Yeast — Ken Forkish — The definitive home-baker's guide to pizza and bread dough. Forkish is meticulous and the results are reproducible. Skip to Part 4 (Pizza) if you're not interested in bread right now — the pizza dough recipes stand alone.
Elements of Pizza — Ken Forkish — Forkish's pizza-specific follow-up. More recipes, more styles, more detailed oven-temp guidance. Worth it once you've worked through 10+ pies and want to go deeper.
As an Amazon Associate, JustBeginning earns from qualifying purchases.
We may also earn commission from other affiliate programs linked on this
page. Editorial recommendations are independent; we don't choose
products based on commission rates.
Product prices and availability are accurate as of the date and time
indicated and are subject to change. Any price and availability
information shown on Amazon at the time of purchase will apply.

 Best starter