Sublimation printing turns plain polyester shirts and polymer-coated mugs into custom goods you actually made. The startup cost is real (expect $500–700 for a complete beginner setup), but once it's running, each item costs $2–5 to make and takes about ten minutes. Here's exactly what you need, and what you can skip.
By Colin B. · Published June 15, 2026 · Last reviewed June 15, 2026
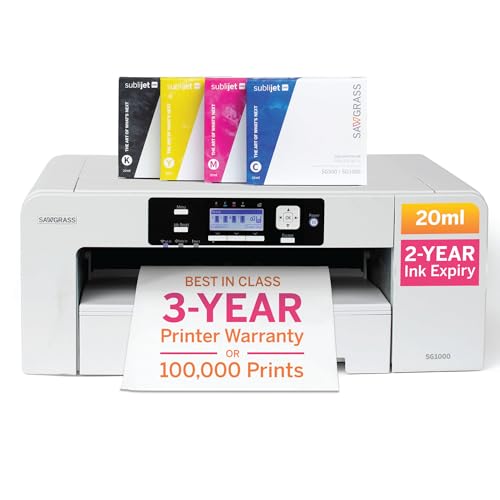
Sawgrass SG500 Sublimation Printer
— The Sawgrass SG500 just works out of the box: no ink-swapping, no warranty risk, bundled color profiles and software.
A converted Epson EcoTank plus a budget heat press gets you started around $450. A dedicated Sawgrass printer plus a quality swing-away press runs closer to $700. Both assume you already own a computer for design work.
We earn commission on qualifying Amazon purchases — see our
affiliate disclosure.
Price tiers and budget totals shown above are editorial estimates;
actual Amazon prices vary.
At a glance
Our top pick in each category
The fastest path through this guide — each best-starter pick by category.
Scroll for the budget and upgrade alternatives.
You need 100% polyester for apparel. Sublimation dye bonds to polymer fibers, not cotton. Even a 50/50 blend gives you a washed-out, faded result. Buy sublimation-specific blanks; they're labeled polyester for a reason.
Your first 10 prints will likely have color issues. That's expected, not a defect. Start with mugs rather than shirts. Mugs are cheaper per blank, forgiving of temperature variation, and immediately satisfying as a beginner project.
The Sawgrass SG500 costs more than a converted Epson, but it's worth it if you're serious. Converted printers save $100–150 upfront but use third-party ink that can clog, have a narrower color gamut, and void your warranty. If you plan to use this more than twice a month, go dedicated.
The gear
What you actually need
Sublimation Printers
The printer is the heart of your setup, and this is where your biggest decision lives. You have two paths: convert a compatible Epson EcoTank by swapping in sublimation ink, or buy a printer purpose-built for sublimation like the Sawgrass SG500. Converting is cheaper upfront ($150–200 all-in) but carries real tradeoffs: the color gamut is narrower, third-party ink can clog the heads, and you've voided your Epson warranty. The Sawgrass ($300–400) costs more but comes with tuned color profiles, bundled CreativeStudio software, and Sawgrass's direct support. For casual experimenting, the Epson conversion works. For anyone planning to sell their work or print consistently, start with the Sawgrass.
Sublimation Printers — what's the difference?
A few common shapes, each making a different trade.
Converted Epson EcoTank
Budget entry under $200 all-in. Voids warranty; narrower color gamut.
Entry cost
$150–200
Max print size
8.5x11"
Ink system
Third-party sublimation ink
Best for Casual experimenters, very budget-conscious starters
13x19" prints for jerseys, banners, and large transfers.
Entry cost
$600–800
Max print size
13x19"
Ink system
Sawgrass proprietary cartridges
Best for Small-business production, all-over print garments, large panels
Tradeoff Large footprint and high cost; only buy once you need the width
Best starter
Sawgrass
SG500 Sublimation Printer
$$$
★★★★★Our rating
Purpose-built for sublimation and ready to print day one. Ships with Sawgrass's CreativeStudio software and pre-tuned color profiles, prints up to 8.5x14 inches, and handles all substrates cleanly. You spend zero time troubleshooting ink compatibility and more time printing. The ink costs more per cartridge than Epson conversions, but the consistency justifies it for anyone printing regularly.
What we like
Purpose-built for sublimation, ships ready to print day one
Bundled CreativeStudio software with pre-tuned color profiles
Direct Sawgrass support if anything goes wrong
What to know
Proprietary ink cartridges cost more per mL than Epson conversions
Prints up to 8.5x14 only; need the SG1000 for wider transfers
The most popular Epson EcoTank for sublimation conversion. With a full swap to sublimation ink it produces solid results for under $200 all-in. Large ink tanks keep per-print costs low, and the printer is widely supported by the sublimation community. Know the tradeoffs: you're voiding the warranty, the color gamut is narrower than a Sawgrass, and you'll dial in ICC profiles yourself.
What we like
Under $200 all-in with sublimation ink, the cheapest real entry point
Low per-print cost from the EcoTank's large refillable reservoirs
Large sublimation community for troubleshooting ICC profiles
What to know
Voids Epson warranty from the moment you add sublimation ink
Narrower color gamut than dedicated sublimation printers
When you outgrow 8.5x11 (team jerseys, 12x16 photo panels, wide transfers for all-over print garments), the SG1000 is the next step. Handles up to 13x19 sheets with the same Sawgrass color accuracy and ecosystem as the SG500, just bigger. Don't buy this first; buy it when a specific project demands the width.
What we like
Handles up to 13x19 sheets for wide-format and all-over prints
Same Sawgrass ecosystem and color quality as the SG500
What to know
Significant desk footprint; measure before ordering
A heat press applies precise temperature and pressure to transfer sublimation ink from paper to your blank. Both matter: too little pressure and the transfer is incomplete; too much heat and you scorch the blank. A 15x15 clamshell or swing-away press is the standard for shirt and flat goods transfers, running $180–300 for a quality unit. Mug and tumbler transfers require a cylindrical mug press (a completely different tool). Buy a flat press first, then add a mug press when you want to do drinkware.
Best starter
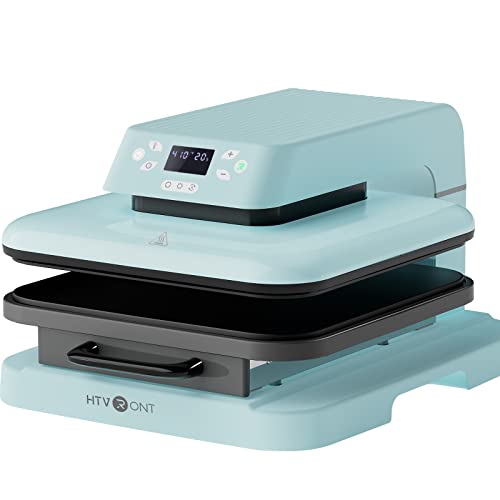
HTVRONT
15x15 Auto Heat Press Machine
$236.00 as of Jun 22, 2026
★★★★★Our rating· In Stock
One of the most reliable presses at a reasonable price. The 15x15 swing-away design delivers even pressure across the whole platen (critical for sublimation's full-contact requirement), the digital temperature display is accurate within a few degrees, and the swing-away arm keeps condensation off your blank. Handles shirts, totes, mouse pads, and flat sublimation tiles.
What we like
Swing-away arm prevents condensation dripping onto your blank
Accurate digital temperature display within a few degrees
15x15 platen handles full shirt fronts and back panels
What to know
Timer counts up instead of down; use your phone as a secondary timer
Heavy (30+ lbs); designate a permanent spot before buying
The PowerPress 15x15 is the entry-level workhorse the sublimation community has used for years. Accurate enough for sublimation, durable enough for daily use, and regularly available for under $200. The build quality is a small step below the HTVRONT but the results are identical on properly set time and temperature. A solid first press for a maker who isn't ready to spend $300.
What we like
Well-tested by the sublimation community over many years
Under $200 while still accurate enough for consistent sublimation results
What to know
Manual pressure knob is imprecise; test and dial in before full prints
Clamshell design can trap steam; open immediately after pressing
Flat heat presses can't wrap a mug or tumbler. You need a dedicated cylindrical press for drinkware. PYD Life is a trusted name in sublimation tumbler presses, handling 20oz and 30oz tumblers, skinny tumblers, and most mug sizes. A second purchase, not a first. But tumblers are the most popular small-business sublimation product at craft fairs and Etsy, so you'll want this eventually.
What we like
Required tool for mugs and tumblers; a flat press can't do this
Handles most standard tumbler and mug sizes including 20oz and 30oz
What to know
A second-purchase tool; buy after you're committed to drinkware
Sizing matters: match the press to your specific tumbler diameter
Sublimation paper is the transfer medium: your printer lays dye onto the paper and the heat press vaporizes it into the blank. Quality matters, cheap paper bleeds and washes out. A-SUB has become the community standard for third-party paper, compatible with both Epson-converted and Sawgrass printers. Beyond paper, you'll need heat-resistant tape to anchor the paper to your blank (prevents ghosting) and Teflon sheets to protect your press platen from ink bleed-through. Budget $50–100 for a solid paper-and-supplies starter kit.
Best starter
A-SUB
Sublimation Paper 8.5x11 (110 Sheets)
$19.99 as of Jun 22, 2026
★★★★★Our rating· In Stock
A-SUB paper is the default choice across the sublimation community: consistent, vibrant transfers with both Epson-converted and Sawgrass printers, feeds cleanly without jamming, and the 110-sheet pack gives you room to experiment and make mistakes before you scale up. Stock up; you'll go through paper faster than you expect.
What we like
Community standard, compatible with both Epson and Sawgrass printers
Consistent vibrant color transfer with minimal ghosting
110-sheet pack gives you room to experiment and make mistakes
What to know
Both sides look similar; the wrong side gives a washed-out transfer
Not rated for wide-format; buy the 13x19 pack separately if needed
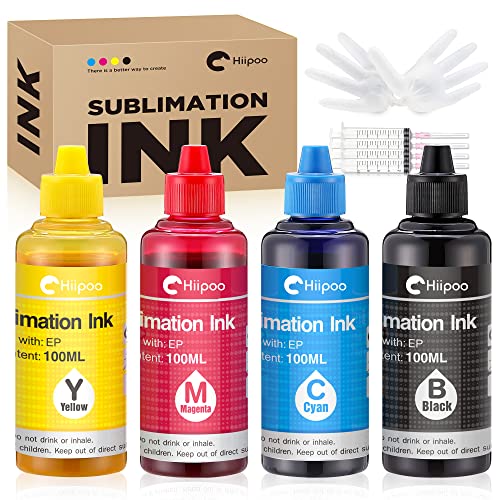
If you go the Epson EcoTank conversion route, you need sublimation ink, and Hiipoo is consistently the top-rated third-party option. The 400mL bottles fill the EcoTank reservoirs with enough ink to print hundreds of transfers. Colors are accurate for the price, and it doesn't clog heads as badly as cheaper alternatives if you print at least once a week.
What we like
Top-rated third-party sublimation ink for Epson EcoTank conversions
400mL bottles provide hundreds of prints at low per-print cost
What to know
Narrower color gamut than Sawgrass inks; reds and blues may look muted
Head clogging risk if the printer sits idle more than two weeks
Two supplies you'll use on every single print. Heat-resistant tape holds your sublimation paper in place during the press; any movement causes ghosting (a blurry double-image). Teflon sheets protect your press platen from color bleed as ink vaporizes. Get these before your first print session.
What we like
Heat tape eliminates ghosting, the most common beginner mistake
Teflon sheets protect your press platen and are reusable for months
What to know
Tape tears if you rush removing it while the blank is still hot
Teflon sheets degrade over time; replace every few months of heavy use
Blanks are what you print on. They need to be either 100% polyester (for soft goods) or polymer-coated (for hard goods like mugs and coasters). Sublimation dye bonds into the polymer; on cotton or uncoated metal it just sits on the surface and washes off. For beginners: start with sublimation mugs. They're cheap per blank, the process is fast, the results are immediately impressive, and they make great gifts. Once you're comfortable with color and pressure, add shirts to your rotation.
Best starter
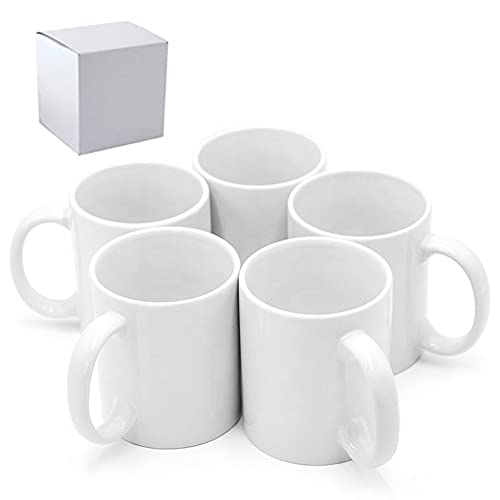
MYSUB
Sublimation Mugs 11oz White (36-Pack)
$68.98 as of Jun 22, 2026
★★★★★Our rating· In Stock
Your first project should be a mug. They're inexpensive, forgiving, and immediately satisfying. The 36-pack lets you practice, make mistakes, and still have 30 good mugs to gift or sell. MYSUB's polymer-coated 11oz white mugs are AAA-grade and individually boxed, meaning the color bonds cleanly and consistently. They just work.
What we like
36-pack gives you room to experiment and still have plenty to gift or sell
Polymer coating transfers color vibrantly and consistently
11oz size works with most cylindrical mug presses
What to know
Fingerprint oils cause light spots; wipe with isopropyl before every press
Only the coated outer surface accepts sublimation; the inside stays white
Once you've nailed mugs, shirts are the next step. These 100% polyester blanks sublimate cleanly with no cotton-fade issues. The 6-pack gives you room to practice positioning and pressure before buying in bulk. Stick to white blanks: sublimation replaces the fiber's base color, so white shirts produce full-color prints while dark shirts get muted results.
What we like
100% polyester produces full-color vibrant transfers without fading
6-pack is the right amount for a practice run before buying in bulk
What to know
Polyester-only wearability; less soft than cotton blends
Pre-wash before printing to prevent steam ghosting
Polymer-coated 20oz skinny tumblers are the best-selling sublimation item on Etsy and at craft fairs. Hogg is a dedicated sublimation brand; their blanks are built specifically for the process with coatings that bond dye permanently. This 9-pack is the right quantity for testing and small-batch production. Save this for month two, after you've dialed in your mugs, then add a cylindrical press.
What we like
Premium coating produces vibrant, long-lasting drinkware people pay for
The most popular small-business sublimation product at craft fairs and Etsy
What to know
Requires a cylindrical mug press; a flat press won't give even contact
Higher cost per blank than mugs; dial in your process on mugs first
Once you're comfortable with mugs and shirts, a hard goods variety kit lets you explore product categories without committing to a bulk order. Modacraft's set includes coasters, keychains, and other sublimatable items. Working through the variety builds intuition for how each surface behaves and reveals which items your customers actually want.
What we like
Explore multiple product types without over-committing to one
Coasters and ornaments are easy-to-press holiday and gift staples
What to know
Each material has slightly different time and temperature settings
Keychains require careful tape positioning to avoid edge ghosting
Sublimation printing clicks surprisingly fast. Your first mug transfer happens in ten minutes. But the first month is where you sort out color profiles, pressure settings, and which blanks actually work. Here's what to expect, and how to shortcut the frustrating parts.
Sublimation printing is one of the more satisfying craft hobbies to pick up because the feedback loop is so fast. You design something, print it, press it, and thirty seconds after you open the press you know exactly how it went. Compare that to, say, woodworking, where a mistake reveals itself three days later during finishing.
The first month is mostly about calibration, not creativity. Your printer, your heat press, and your blanks each have their own quirks, and the first twenty prints are really you learning those quirks rather than making things. That’s fine. Here’s what to expect.
Week one: your first ten mugs
Start with mugs. Not shirts, not tumblers, not phone cases. Mugs.
Here’s why: an 11oz white sublimation mug is forgiving in all the ways that matter for a first project. The flat-ish surface area is easy to tape and wrap. The press time is short (180 seconds). The blanks cost about $1.50–2.00 each in bulk, so a mistake doesn’t sting. And the result, a mug with your own design on it, is immediately, objectively satisfying.
Before you press your first mug, learn these three things:
Mirror your design. You print the image reversed, face-down on the blank. When the ink sublimates, it transfers correctly oriented. Forgetting to mirror is the most common first-week mistake. Every design software has a flip-horizontal option. Use it before every print.
Use heat tape. Tape all four edges of your sublimation paper to the mug before pressing. Any movement during or after the press causes ghosting, a blurry double-image that ruins the transfer. It’s not recoverable. Tape first, every time.
Temperature and time for 11oz white ceramic mugs: 400°F (204°C) for 180 seconds, firm pressure. This is the community-standard starting point and it works on most polymer-coated mugs. You’ll fine-tune from there, but start here.
Your first mug probably won’t be perfect. The color might be slightly off, or the edges might be a little washed out. That’s normal. Note the temperature, time, and pressure you used, then adjust slightly on the next one. After five or six mugs you’ll have your settings dialed in.
Color in sublimation is the hardest part to get right, and it’s the reason a lot of beginners get frustrated.
What you see on screen is not what you’ll get on the blank. Sublimation transfers print with different color behavior than your monitor, and the gap between “vibrant on screen” and “a bit muted on the blank” is real. There are two ways to close it.
ICC profiles. These are color-translation files that tell your printer how to shift its ink output so the final transfer looks like what you designed. If you’re using a Sawgrass printer, Sawgrass CreativeStudio has profiles pre-loaded and handles this automatically. If you’re using a converted Epson, you’ll download the ICC profile for your specific printer and install it in your print driver. The r/SublimationPrinting wiki has profiles for every common Epson EcoTank model.
Print test swatches. Before you commit a full design to a blank, print a 2-inch color swatch grid on sublimation paper and press it onto a blank piece of fabric or a test tile. This gives you a reality-check on how your printer’s output looks after sublimation without wasting a full blank.
Colors that tend to shift the most in sublimation: oranges and reds often go slightly pink, blues can go slightly green, and dark gray can print more purple than expected. Once you’ve done a few test swatches on your specific printer, you’ll know which colors to nudge in your design software before printing.
Once your mug settings are reliable, shirts are the natural next project.
The polyester rule is non-negotiable: you need 100% polyester blanks. Sublimation dye bonds to polymer, not cotton. A 65/35 polyester-cotton blend gives you a transfer that looks fine when dry but loses 40-50% of its vibrancy in the first wash. A 100% cotton shirt won’t take the dye at all; the color sits on the surface and washes off completely.
Wash and pre-press your shirts before printing. New polyester fabric releases moisture when heated. If you press without pre-washing, that moisture becomes steam under the platen and causes ghosting. A quick run through the wash and a 30-second pre-press at your heat press temperature drives the moisture out before your actual transfer.
Pressure is more critical on shirts than on mugs. A mug press is a fixed cylinder; contact is even by design. A flat heat press requires you to set the pressure knob so the platen makes full, even contact with the shirt surface. If you’re getting light spots or uneven color across a shirt, pressure (not temperature) is usually the culprit. Adjust the knob a half-turn tighter and test again.
The standard settings for 100% polyester shirts: 385–400°F, 45–60 seconds, firm even pressure. Some thin fabrics do better at 60 seconds than 45; thicker performance polyester can handle the full 60 easily.
Week four: when things go wrong
By the end of the first month you’ve pressed enough blanks that you’ve probably run into at least a few problems. Here’s the quick diagnostic:
Ghosting (blurry double image): Paper moved during or after pressing. Fix: use more tape, peel the paper immediately after opening the press (don’t let it cool on the blank), and hold the blank still while opening.
Washed-out color: Usually temperature or time too low, wrong-side-up paper, or missing ICC profile. Run the checklist in order before adjusting.
Light spots or uneven coverage: Pressure problem on flat goods, or fingerprint oils on hard goods. Wipe mugs and tiles with isopropyl alcohol before every press.
Bleed outside the design edges: Too much time or too much heat. The ink is re-sublimating slightly past the design boundaries. Reduce time by 10–15 seconds.
Colors look great when dry but fade in the wash: Your blanks aren’t 100% polyester. Check the tag.
What comes next
After your first month you’ll have dialed-in settings for mugs and shirts, a feel for color behavior on your specific printer, and probably a growing collection of prototypes. That’s the foundation.
The most common next steps:
Tumblers. 20oz skinny tumblers are the most popular small-business sublimation item. You’ll need a cylindrical heat press attachment or a dedicated tumbler press. The process is similar to mugs but requires shrink-wrap sleeves (which hold the transfer against the curved surface) and slightly higher temperatures. Once you have a tumbler press, the per-item production time drops to under ten minutes.
Hard goods variety. Coasters, keychains, and ornaments are fast to press, cheap per blank, and popular as seasonal gifts. Each surface has its own time and temperature, so start with one material and master it before adding another.
Bulk ordering blanks. At month one you’re still testing, so small packs make sense. Once your settings are stable, buying mugs in 50–100 packs and shirts by the dozen drops your cost per item significantly and makes selling at craft fairs or online actually profitable.
The learning curve in sublimation is front-loaded. The hard part is weeks one through three. After that, each session builds on what you already know, and the process becomes genuinely fast.
Save your money
What you don't need yet
Beginners get pressured to buy a lot of stuff that doesn't help them play
better. Here's what we'd skip on day one.
A wide-format printer — The Sawgrass SG500 handles 8.5x14, which covers shirts, mugs, and most beginner projects. Add wide-format when a specific project demands 13x19, not before.
An automated mug press — Manual mug presses work fine for dozens of mugs per day. Automated versions run $400–600 and only pay off at production scale.
Professional color-calibration hardware — A colorimeter for display calibration is for print studios. Learn your printer's color behavior through practice first; the ICC profiles bundled with your printer solve most issues.
A full Adobe Creative Suite subscription — Canva Pro or Sawgrass CreativeStudio handles 90% of what beginners need. Upgrade to Illustrator or CorelDraw only if you hit vector-complexity limits.
Dark-colored blanks — Sublimation dye replaces polymer color rather than sitting on top of it. A dark blank won't turn light-colored ink bright. Stick to white and light pastel blanks for sublimation.
A vinyl cutter — HTV (heat-transfer vinyl) and sublimation are different processes that don't combine on the same project. Master one before adding the other.
First week
Your first seven days
A short, real plan to get from gear-on-doorstep to actually playing.
Order your printer and heat press at the same time so they arrive together. You can't test one without the other. · Buy
Do five mug presses in your first week, adjusting temperature and pressure slightly each time to find your sweet spot. · Action
FAQ
Common questions
What's the minimum budget to start sublimation printing?
A converted Epson EcoTank with sublimation ink runs about $200, a budget heat press adds $150–180, and paper plus a pack of mug blanks adds $50–80. You're at $400–460 for a functional setup. Starting with the Sawgrass SG500 instead of a converted Epson adds another $150 or so.
Can I sublimate on cotton shirts?
No. Sublimation dye bonds to polyester fibers and polymer coatings. On cotton, the dye sits on the surface and washes off in the first laundry cycle. You need 100% polyester blanks for apparel sublimation; even a 50/50 blend gives noticeably faded results.
Why does my sublimation print look faded or washed out?
Four culprits in order of likelihood: (1) wrong-side-up paper — confirm you're printing on the coated side; (2) too-low temperature — most blanks need 385–400°F; (3) too-little pressure — the paper must be in full contact with the blank; (4) wrong ICC profile if you're using a converted Epson printer.
What is ghosting, and how do I prevent it?
Ghosting is a blurry double-image caused by the transfer paper shifting during or after the press, before the ink fully sublimates. Fix: use heat-resistant tape to anchor the paper on all four edges, and remove it in one clean pull immediately after opening the press.
Do I need to mirror my design before printing?
Yes, always. You print the mirror image, then press it face-down on the blank. When it sublimates, the image transfers correctly oriented. Forgetting to mirror is the single most common beginner mistake.
Can I make money with sublimation printing?
Yes, and this is one of the more viable craft-business models at small scale. A sublimated tumbler costs $4–8 in materials and sells for $25–40. Mugs cost $2–4 to produce and sell for $12–20. Most small sublimation businesses start on Etsy or at local craft fairs.
Is a Sawgrass printer worth the extra cost over a converted Epson?
If you plan to print more than twice a month or want to sell your work: yes. The Sawgrass produces more accurate color, ships with tuned profiles, and doesn't have the head-clogging risk of third-party inks. The Epson conversion is a reasonable way in if you want to experiment cheaply before committing.
r/SublimationPrinting — The most active beginner community. Search here before troubleshooting anything; it's almost certainly been answered.
Sawgrass Learning Center — Sawgrass's own tutorials, color-profile guides, and blank-compatibility database. Useful even if you're not using a Sawgrass printer.
The Country Chic Cottage (Angie Holden) — One of the most thorough sublimation beginner resources online. Her troubleshooting guides are better than most paid courses.
Cre8iveSkill (YouTube) — Clear, beginner-focused sublimation walkthroughs covering Epson conversions, Sawgrass setup, and common problems.
Etsy Sublimation Marketplace — Research what sells and at what price points before you commit to a product category. What's popular in your market shapes which blanks to stock.
As an Amazon Associate, JustBeginning earns from qualifying purchases.
We may also earn commission from other affiliate programs linked on this
page. Editorial recommendations are independent; we don't choose
products based on commission rates.
Product prices and availability are accurate as of the date and time
indicated and are subject to change. Any price and availability
information shown on Amazon at the time of purchase will apply.

 Best starter