Pyrography rewards patience from day one. Trace a design, burn it in, and you've made real art. The catch: the $15 starter kit at craft stores is a trap. Wire-nib burners aren't just better; they're the difference between a fun hobby and a frustrating one. Here's what to actually buy.
By Colin B. · Published May 24, 2026 · Last reviewed June 8, 2026
Saral Wax-Free Transfer Paper
— Graphite transfer paper that sticks to wood cleanly; trace any printed design onto wood in a minute.
Budget total
$50
Typical total
$100
A wire-nib starter burner ($50) plus a basswood blank pack ($18) and transfer paper ($12) gets you burning on day one. Add a nib set ($20) as soon as you're hooked.
We earn commission on qualifying Amazon purchases — see our
affiliate disclosure.
Price tiers and budget totals shown above are editorial estimates;
actual Amazon prices vary.
At a glance
Our top pick in each category
The fastest path through this guide — each best-starter pick by category.
Scroll for the budget and upgrade alternatives.
Don't buy the $15 pen from the craft store. Every pyrography forum gives the same advice: cheap fixed-tip burners have no temperature control, which is the most important feature. You can't shade, you can't do fine detail, and you'll scorch your wood constantly. A $50 wire-nib unit is a completely different experience.
Basswood is the wood for beginners. Other woods burn unevenly, have surprise resin pockets, or smoke more than you want. Every tutorial and starter kit defaults to basswood for a reason. Use it until you know exactly what you're doing, then experiment.
Ventilation matters more than beginners expect. Wood smoke smells pleasant but accumulates over long sessions. Open a window, put a small fan behind you blowing smoke away from your face, and you're fine. This is not optional.
The gear
What you actually need
Burners
The single most important decision in pyrography is fixed-tip vs. wire-nib burner, and craft stores won't explain the difference. Fixed-tip pens ($15–30) are simple and cheap but offer no temperature control and no way to swap tips. Wire-nib units ($50–150) have an adjustable heat dial and interchangeable nibs. That dial is everything. It's what lets you do light shading at a low setting and bold dark lines at a high setting without switching tools. Start with a wire-nib unit if your budget allows at all.
Burners — what's the difference?
A few common shapes, each making a different trade.
Fixed-tip burner
The craft-store classic. One heat level, built-in tips, plug-and-play simple.
Heat control
Fixed (no dial)
Tip options
Built-in, non-swappable
Entry price
$15–35
Best for Total beginners who want to try the hobby before committing any real money
Tradeoff No temperature control makes shading nearly impossible; tips cannot be upgraded
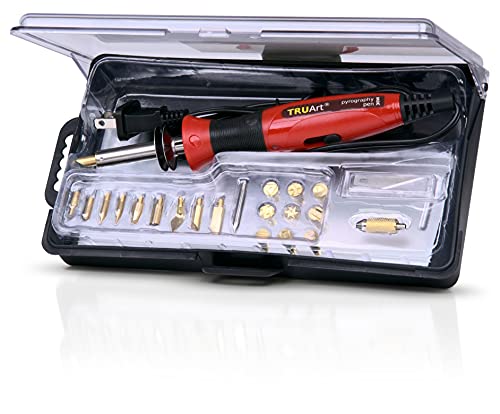
TRUArt's Stage 1 is the wire-nib burner most hobbyist forums point beginners toward, and for good reason. The temperature dial gives you real control over burn depth, heat recovery between strokes is solid, and you can swap nibs as your skills expand. This is the tool that lets you actually learn to shade, not just scorch.
What we like
Wire-nib with a temperature dial; fixed-tip units can't offer either
Interchangeable nibs mean one unit handles lines, shading, and textures
Heats a nib in seconds; swapping mid-session is painless
What to know
Temperature dial takes a session or two to calibrate to your wood
Short power cord; plan on an extension cord at a proper desk
The burner you'll see at Michaels or Hobby Lobby, and there's a reason: it's everywhere, affordable, and the easiest way to find out if wood burning clicks before spending real money. Fixed temperature means no shading control, but simple text burns and basic stencil work fine. Buy it to try the hobby; upgrade when you're hooked.
What we like
Sold at Michaels and Hobby Lobby, easy to grab locally or return
11 included attachments cover basic writing, shading, and stenciling
What to know
No temperature dial; one fixed heat that is often too hot for fine detail
Tips are not interchangeable with wire-nib systems; a dead-end upgrade path
★★★★☆Our rating· Only 17 left in stock - order soon.
Razertip builds the burners professional pyrographers and serious hobbyists actually use. The SS-D10 holds temperature steadier than budget units, recovers heat faster between strokes, and is compatible with Razertip's extensive nib library. If you are burning several times a week and want tighter control on fine-detail work, this is where you end up.
What we like
Precision temperature stability; burn depth stays consistent start to finish
Compatible with 100+ Razertip wire nibs covering every technique
Built in Canada with strong manufacturer support and warranty
What to know
At $150+, it is a real commitment; earn it after 30+ hours with a starter
Control station adds desk footprint; tight for small workspaces
Wire-nib tips are what make a variable-temperature burner powerful, and they are sold separately from most units. Most starter kits include one or two generic nibs. The three you will reach for most are: a writing tip for lines and outlines, a shader for filling areas smoothly, and a ball tip for dots, textures, and cross-hatching. A set of five covers nearly everything you will do in your first year without redundancy.
Best starter
Razertip
SE Pyrography Starter Kit
$195.50 as of Jun 22, 2026
★★★★★Our rating· In Stock
If you want to go the Razertip route from the start (or upgrade from TRUArt), the SE kit is the entry point: a BPH pen and 6 interchangeable wire nibs covering the key tip shapes. True loop-style wire nibs give finer temperature response than collet-style tips.
What we like
Includes BPH pen plus 6 wire nibs, a complete Razertip starter in one kit
Loop-style wire nibs heat and cool in seconds for finer stroke control
What to know
Needs a Razertip control unit to run (not a standalone burner kit)
Three heavy-duty shading pens built for filling large background areas. The wide tip geometry covers more wood per stroke than any small writer nib, and the Razertip build quality means consistent heat distribution across the whole nib face.
What we like
Broad tip covers large shading areas in smooth, even passes
Heavy-duty construction holds temperature better than standard tips
What to know
Kit of three; more than a beginner needs, but the price is reasonable
Basswood is the universal beginner surface: soft grain, minimal resin, predictable burn. It forgives inconsistent pressure and temperature wobbles better than any other wood. Birch plywood is the step up: a harder grain holds finer lines and larger panels support bigger compositions. Avoid pine (resin pockets cause unpredictable scorching), MDF (toxic smoke), and treated lumber of any kind.
Best starter
Walnut Hollow
Basswood Country Planks (6-Pack)
$
★★★★★Our rating
Six boards cut to practice-friendly sizes, consistent grain, and ready to burn straight from the box. Walnut Hollow is the dominant brand in beginner pyrography supplies and these boards are exactly what their own tutorials use. No prep needed. Trace, burn, and sand.
What we like
Six boards in one pack, enough to experiment and make mistakes freely
Consistent basswood grain with no surprise resin pockets or hard spots
What to know
Thin boards can warp if you seal only one side; always seal both faces
Thin basswood sheets at a lower cost per square inch than pre-cut craft board packs. Cut to any size you need with a craft knife and straightedge. Good when you want to experiment with different dimensions without the markup of pre-sized boards.
What we like
More surface area per dollar than pre-cut craft boards
Cut to any size you need, flexible for custom project shapes
What to know
Flat sheets need a saw or craft knife to cut, which adds a prep step
Slight grain variability across sheets compared to dedicated craft boards
Once you have outgrown practice boards and want to do larger, more detailed pieces, birch plywood is the move. Tighter grain than basswood holds finer lines, the flat laminated face is smooth right out of the box, and a 12x12 panel gives you real composition room.
What we like
Tighter grain than basswood, giving finer lines and sharper edge definition
Flat laminated face burns evenly across large areas without prep
What to know
Harder surface requires more heat; recalibrate your dial from basswood
Pricier per panel; save for pieces you actually intend to keep
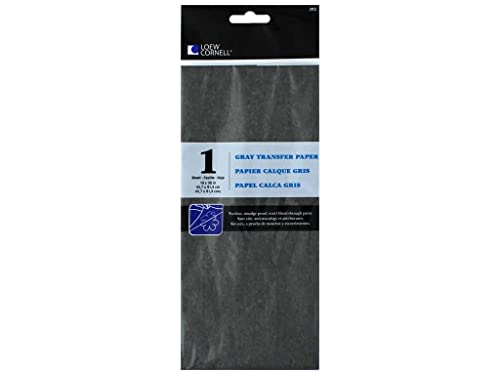
Getting a design onto wood before you burn is half the workflow. Freehand burning is possible, but most beginners save themselves hours of frustration with a simple transfer. Graphite transfer paper works like carbon paper: lay it between your printed design and the wood, trace the lines with a stylus or pen, and your drawing is on the wood in 60 seconds. Clean, no app required.
Best starter
Saral
Wax-Free Transfer Paper
$20.67 as of Jun 22, 2026
★★★★★Our rating· Only 1 left in stock - order soon.
Saral comes up in nearly every pyrography tutorial, and for good reason: it does not smear, does not bleed into the grain, and shows up clearly enough on basswood that you can burn right over the lines without losing them. One roll covers dozens of projects and stores flat.
What we like
Wax-free formula does not contaminate wood grain the way carbon paper does
Available in graphite or white; check which shows up on your wood color
What to know
Lines fade over days; burn within 48 hours of tracing or re-trace the design
A flat pack of graphite tracing paper that works the same way as Saral for less per sheet. Slightly messier and the graphite smears a bit more, but perfectly functional for your first several projects before you decide if pyrography is worth stocking up on supplies.
What we like
Cheaper per sheet than a roll of Saral, a lower commitment to try
Works the same basic way: trace, lift, burn
What to know
Smears more than Saral; wash hands before touching the marked wood
Graphite lines are heavier and can show through very light burns
Sealing your finished burn protects the wood from moisture and fingerprints and gives you control over sheen. Satin poly is the standard: protective, durable, and not so shiny it kills the handcrafted feel. Apply in thin coats after burning is complete; heavier coats raise the grain and require light sanding between coats.
Best starter
Minwax
Wipe-On Poly (Clear, Satin)
$19.99 as of Jun 22, 2026
★★★★★Our rating· In Stock
Wipe-on poly is the easiest sealer a beginner can use; apply it with a cloth, no brush streaks, no bubbles, no cleanup drama. Minwax's satin finish is exactly right for pyrography: protective enough to handle daily handling, low enough sheen to look handmade rather than plastic.
What we like
Wipe-on application: no brush, no streaks, no skill required
Satin sheen protects the piece without looking plasticky or fake
What to know
Slower build than brush-on poly; plan on three thin coats for full protection
When you want to seal a three-dimensional piece or skip the cloth-and-wipe process entirely, a clear matte spray works fine. Rust-Oleum's version is widely available at hardware stores, dries in 20 minutes, and does not add a visible sheen over your burns.
What we like
Spray reaches curves and carved recesses that wiping always misses
Dries in 20 minutes; recoat the same afternoon
What to know
Aerosol requires good ventilation; use outdoors or in a ventilated space
Matte sprays look chalky if applied too thick; multiple light coats only
Week one you'll make your first burn. By the end of month one you'll have temperature control, shading, and design transfer — the three skills that make every piece after that noticeably better.
Pyrography has an unusually shallow learning curve at the start. Your first piece will look intentional. Your tenth will surprise you. The skills that matter most — controlling temperature, reading how different woods respond, coaxing a gradient from nothing — are learnable in a month of focused sessions.
This is what that month actually looks like.
Week 1: Your first burn
Before you burn anything meaningful, do one thing: make a temperature test strip.
Take a scrap piece of basswood. Set your burner to its lowest setting and drag a short stroke across the wood. Step up one dial position. Burn another stroke. Repeat across the full range of your burner. Label each mark with the dial setting. Take a photo.
That strip is your reference for this wood. Every burner and every batch of basswood is slightly different — a setting that whispers on one board might scorch another. The test strip takes five minutes and saves you from ruining your first real project.
Now pick a simple design. Not something ambitious — a leaf, a geometric shape, a single animal silhouette with clean outlines. Print it at the size of your board. Transfer it using graphite transfer paper: lay the paper face-down between your printout and the wood, trace every line with a ballpoint pen or stylus, then lift both layers. Your design will be on the wood in light graphite lines, ready to burn.
Burn the outlines first at a medium setting. Keep your strokes consistent and don’t dwell — the longer you hold the nib in one place, the darker and wider that mark gets. For outlines, you want thin, even lines. Move the pen like you’re drawing, not painting.
Your first piece will be fine. Not great — fine. That’s exactly where you should be. The goal for week one is a finished piece, not a perfect one.
Week 2: Learning to shade
Shading is what separates pyrography that looks like a burn from pyrography that looks like art. It’s also the skill that the $15 craft-store pen makes nearly impossible — which is why a temperature dial matters so much.
The core technique is gradient shading: creating a smooth transition from dark to light by varying either your temperature, your pressure, or the density of your strokes. Start with temperature variation.
Set your burner to about 60–70% of its maximum. Burn a small area with slow, overlapping circular strokes — like you’re coloring in a tiny circle over and over. That’s your darkest value. Without lifting your hand, dial back the temperature slightly and continue the same strokes outward, slightly lighter. Continue reducing temperature as you move toward the light area.
You will not get a smooth gradient on your first try. That’s fine. What you’re training is the feel of how much heat equals how much darkness on your specific wood. It clicks faster than you’d expect.
The second shading technique is hatching: parallel strokes, close together for dark areas and farther apart for light ones. Hatching is more controllable than circular strokes for beginners because it doesn’t require steady circular motion. Many pyrographers use both: hatching for medium values, circular strokes for deep shadows.
Spend most of week two on shading exercises on scrap basswood. Don’t try to incorporate shading into a full project yet — get comfortable with the technique in isolation first.
Week 3: Composition and reference
By week three, most beginners are tempted to attempt something complex: a portrait, a detailed landscape, a realistic animal. That’s fine — but approach it with the right process.
Use a reference photo, not memory. Print your reference at the same size as your board. Analyze it in terms of value (light vs. dark) rather than detail. Where are the darkest darks? Where does the light hit? Pyrography is fundamentally a value medium — you’re burning shadows into light wood. Seeing your reference as a map of light and shadow, rather than a collection of details, is the mental shift that makes everything easier.
Work dark to light across large areas first. Establish your big shadows before you add detail. Small details on top of established values look intentional; small details on flat, unshaded wood look scratchy and amateurish. Fill the shadow areas first, midtones second, and then add detail lines on top.
You cannot remove a burn, but you can go darker. When in doubt, err lighter. You can always add another pass. Scorched wood is the most common beginner mistake and it’s one-way.
Week 4: A complete piece
Pick something slightly ambitious. One size up from week one — maybe a simple animal portrait, a botanical illustration, or an abstract pattern with varied value. The point isn’t the subject; it’s executing a complete piece from transfer to finishing without abandoning it halfway through.
Follow this sequence:
Prepare your wood: sand to 220-grit, wipe clean, let dry.
Transfer your design with graphite paper.
Burn outlines at medium heat.
Fill shadow areas with shading.
Add midtones.
Add detail lines and fine texture last.
Let it cool completely. Erase any visible graphite lines with a kneaded eraser.
Seal with two thin coats of satin wipe-on poly, sanding lightly between coats with 400-grit.
The piece you make in week four will be your best yet. It will also show you exactly where you need to spend month two: probably shading consistency, probably line weight control, probably your transfer process. That’s the feedback you’re looking for.
The mistakes everyone makes
A few things are universal in the first month:
Burning too fast. Speed kills smooth shading. Slow your strokes down by 30% and you’ll get 50% better results.
One heat setting for everything. The dial exists for a reason. Outlines, midtones, dark shadows, and fine texture all want different temperatures. If you’re not adjusting the dial throughout a session, you’re leaving a lot on the table.
Burning in the grain direction only. Going across or against the grain reads differently than going with it. Experiment both ways on scrap wood; the “wrong” direction often gives you the value you need.
Skipping the test strip. Every new batch of wood, every new nib, every new humidity level changes how your burner behaves. A two-minute test strip saves you a ruined project.
What comes after month one
A month of focused practice puts you well past the beginner stage. The skills you develop in month two are refinements: finer line control, more consistent shading gradients, more ambitious compositions.
The pyrography community skews deeply helpful — the r/Pyrography subreddit has active critique threads where experienced artists give detailed, constructive feedback on beginner work. Post your pieces. The feedback will accelerate your progress faster than any tutorial.
Save your money
What you don't need yet
Beginners get pressured to buy a lot of stuff that doesn't help them play
better. Here's what we'd skip on day one.
A dual-pen professional station — Two-pen units ($200+) let you keep two nibs hot simultaneously. Useful eventually, but a complete beginner has no reason to switch nibs mid-session anyway.
Exotic hardwoods — Walnut burl, manzanita, and olive wood are beautiful to burn but burn unpredictably, cost too much to practice on, and teach you nothing that basswood doesn't. Wait until you have 20+ hours of technique under your belt.
Specialty calligraphy or brass nibs — There are gorgeous specialty nibs for script lettering and decorative strokes. They assume technique you don't have yet. Get the basics down with a standard nib set first.
A light box or light pad — Useful for tracing designs through thick paper, but graphite transfer paper accomplishes the same goal for $10. Buy a light box when you have a specific project that actually needs it.
First week
Your first seven days
A short, real plan to get from gear-on-doorstep to actually playing.
Order a wire-nib starter burner and a basswood blank pack together so they arrive at the same time. · Buy
Do a temperature test strip on a scrap piece: burn a mark at each dial setting from low to high and label each one. This becomes your personal reference for that wood. · Action
Find a simple line-art image online (a leaf, a geometric shape, a single animal silhouette) and print it at the size of your board. · Action
Free SVG designs · Thousands of clean line-art designs, free to download
Transfer your design using graphite paper, then burn it. Don't aim for perfect. Aim for finished. Your second piece will be noticeably better than your first. · Action
Watch one shading tutorial on YouTube before your second session. Even 10 minutes of focused technique instruction will change what you see. · Learn
Do I really need a wire-nib burner, or will the fixed-tip pen from the craft store work?
The fixed-tip pen will work for extremely simple projects (burning names, basic outlines, stencil patterns). But it has no temperature dial, which means no shading, no fine control, and a high chance of scorching. A wire-nib unit in the $50 range is a completely different experience. Most beginners who start with the fixed-tip pen regret it and upgrade within a month.
What wood should I use as a total beginner?
Basswood, full stop. Soft, tight grain, minimal resin, and the most forgiving surface for inconsistent technique. Birch plywood is the step up once you want to do larger or more detailed work. Avoid pine (resin pockets), MDF (toxic smoke when burned), and any treated lumber.
Is the smoke from wood burning dangerous?
Wood smoke in small amounts from short sessions isn't acutely dangerous, but it's worth treating it seriously. Open a window, set a small fan behind you blowing smoke away from your face, and take breaks. If you're burning for hours regularly, an air purifier with an activated carbon filter is worth the investment.
How do I get a design onto wood without drawing it freehand?
Graphite transfer paper. Print your design, lay a sheet of graphite transfer paper face-down between the printout and the wood, and trace over the lines with a stylus or ballpoint pen. Lift both layers and your design is on the wood, ready to burn. Takes 60 seconds once you have the materials.
How long before I can produce something I'm actually proud of?
Most beginners make their first piece they want to keep within two to four sessions. The entry curve is gentle; you can make something that looks intentional very quickly. What takes longer (months) is developing smooth shading, fine line control, and the ability to salvage a mistake without it showing.
Do I need to seal my finished pieces?
Sealing is optional but recommended for anything that will be handled or displayed long-term. An unsealed burn oxidizes slowly over years and picks up fingerprint oils over time. A coat or two of satin wipe-on poly takes 20 minutes and protects the piece indefinitely.
r/Pyrography — Active community with weekly critique threads and a wiki covering the fixed-tip vs. wire-nib question in exhaustive detail. Search before posting; most beginner questions have been answered well.
Sue Walters Pyrography (YouTube) — One of the most respected pyrography instructors online. Her technique videos on shading and value are foundational. Watch these in your first month.
Lora S. Irish: Pyrography Workbook — The most widely recommended beginner book in the hobby. Covers tools, wood preparation, shading technique, and a dozen projects. Buy the physical copy; you'll reference it at your workbench.
Walnut Hollow Resources — The brand that makes the most common beginner pyrography supplies also publishes step-by-step project tutorials on their site. Good starting point for structured first projects.
Pyrography World — UK-based site with detailed technique articles, wood comparisons, and tool reviews. Less flashy than YouTube but more thorough on the why behind each technique.
As an Amazon Associate, JustBeginning earns from qualifying purchases.
We may also earn commission from other affiliate programs linked on this
page. Editorial recommendations are independent; we don't choose
products based on commission rates.
Product prices and availability are accurate as of the date and time
indicated and are subject to change. Any price and availability
information shown on Amazon at the time of purchase will apply.

 Best starter